Category: Hybrid Crafting

Hybrid How-To | Halloween Decor


I love decorating for different seasons and holidays and my absolute favourite is to decorate for halloween. I love everything about Halloween …and today I am going to show you how to make a few fun decor items — Halloween candles and 3D stars.

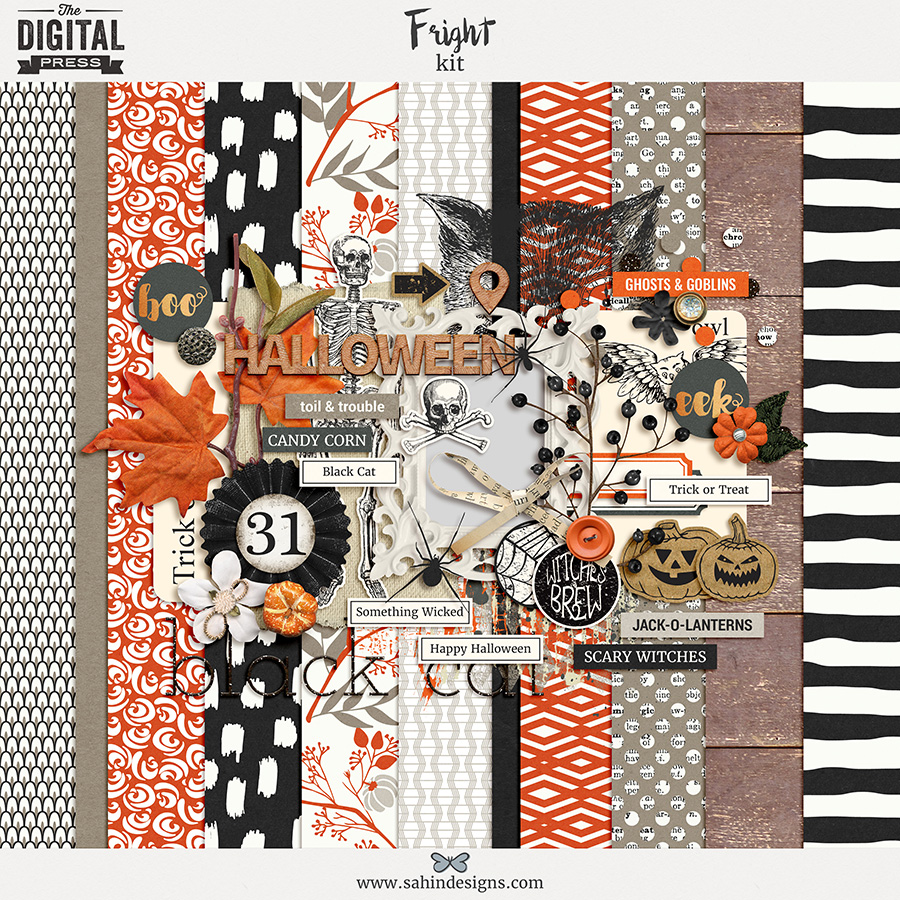
All digital items I used for these projects can be found in the Fright | Kit by Sahin Designs here at The Digital Press.


First, we’ll do the stars.

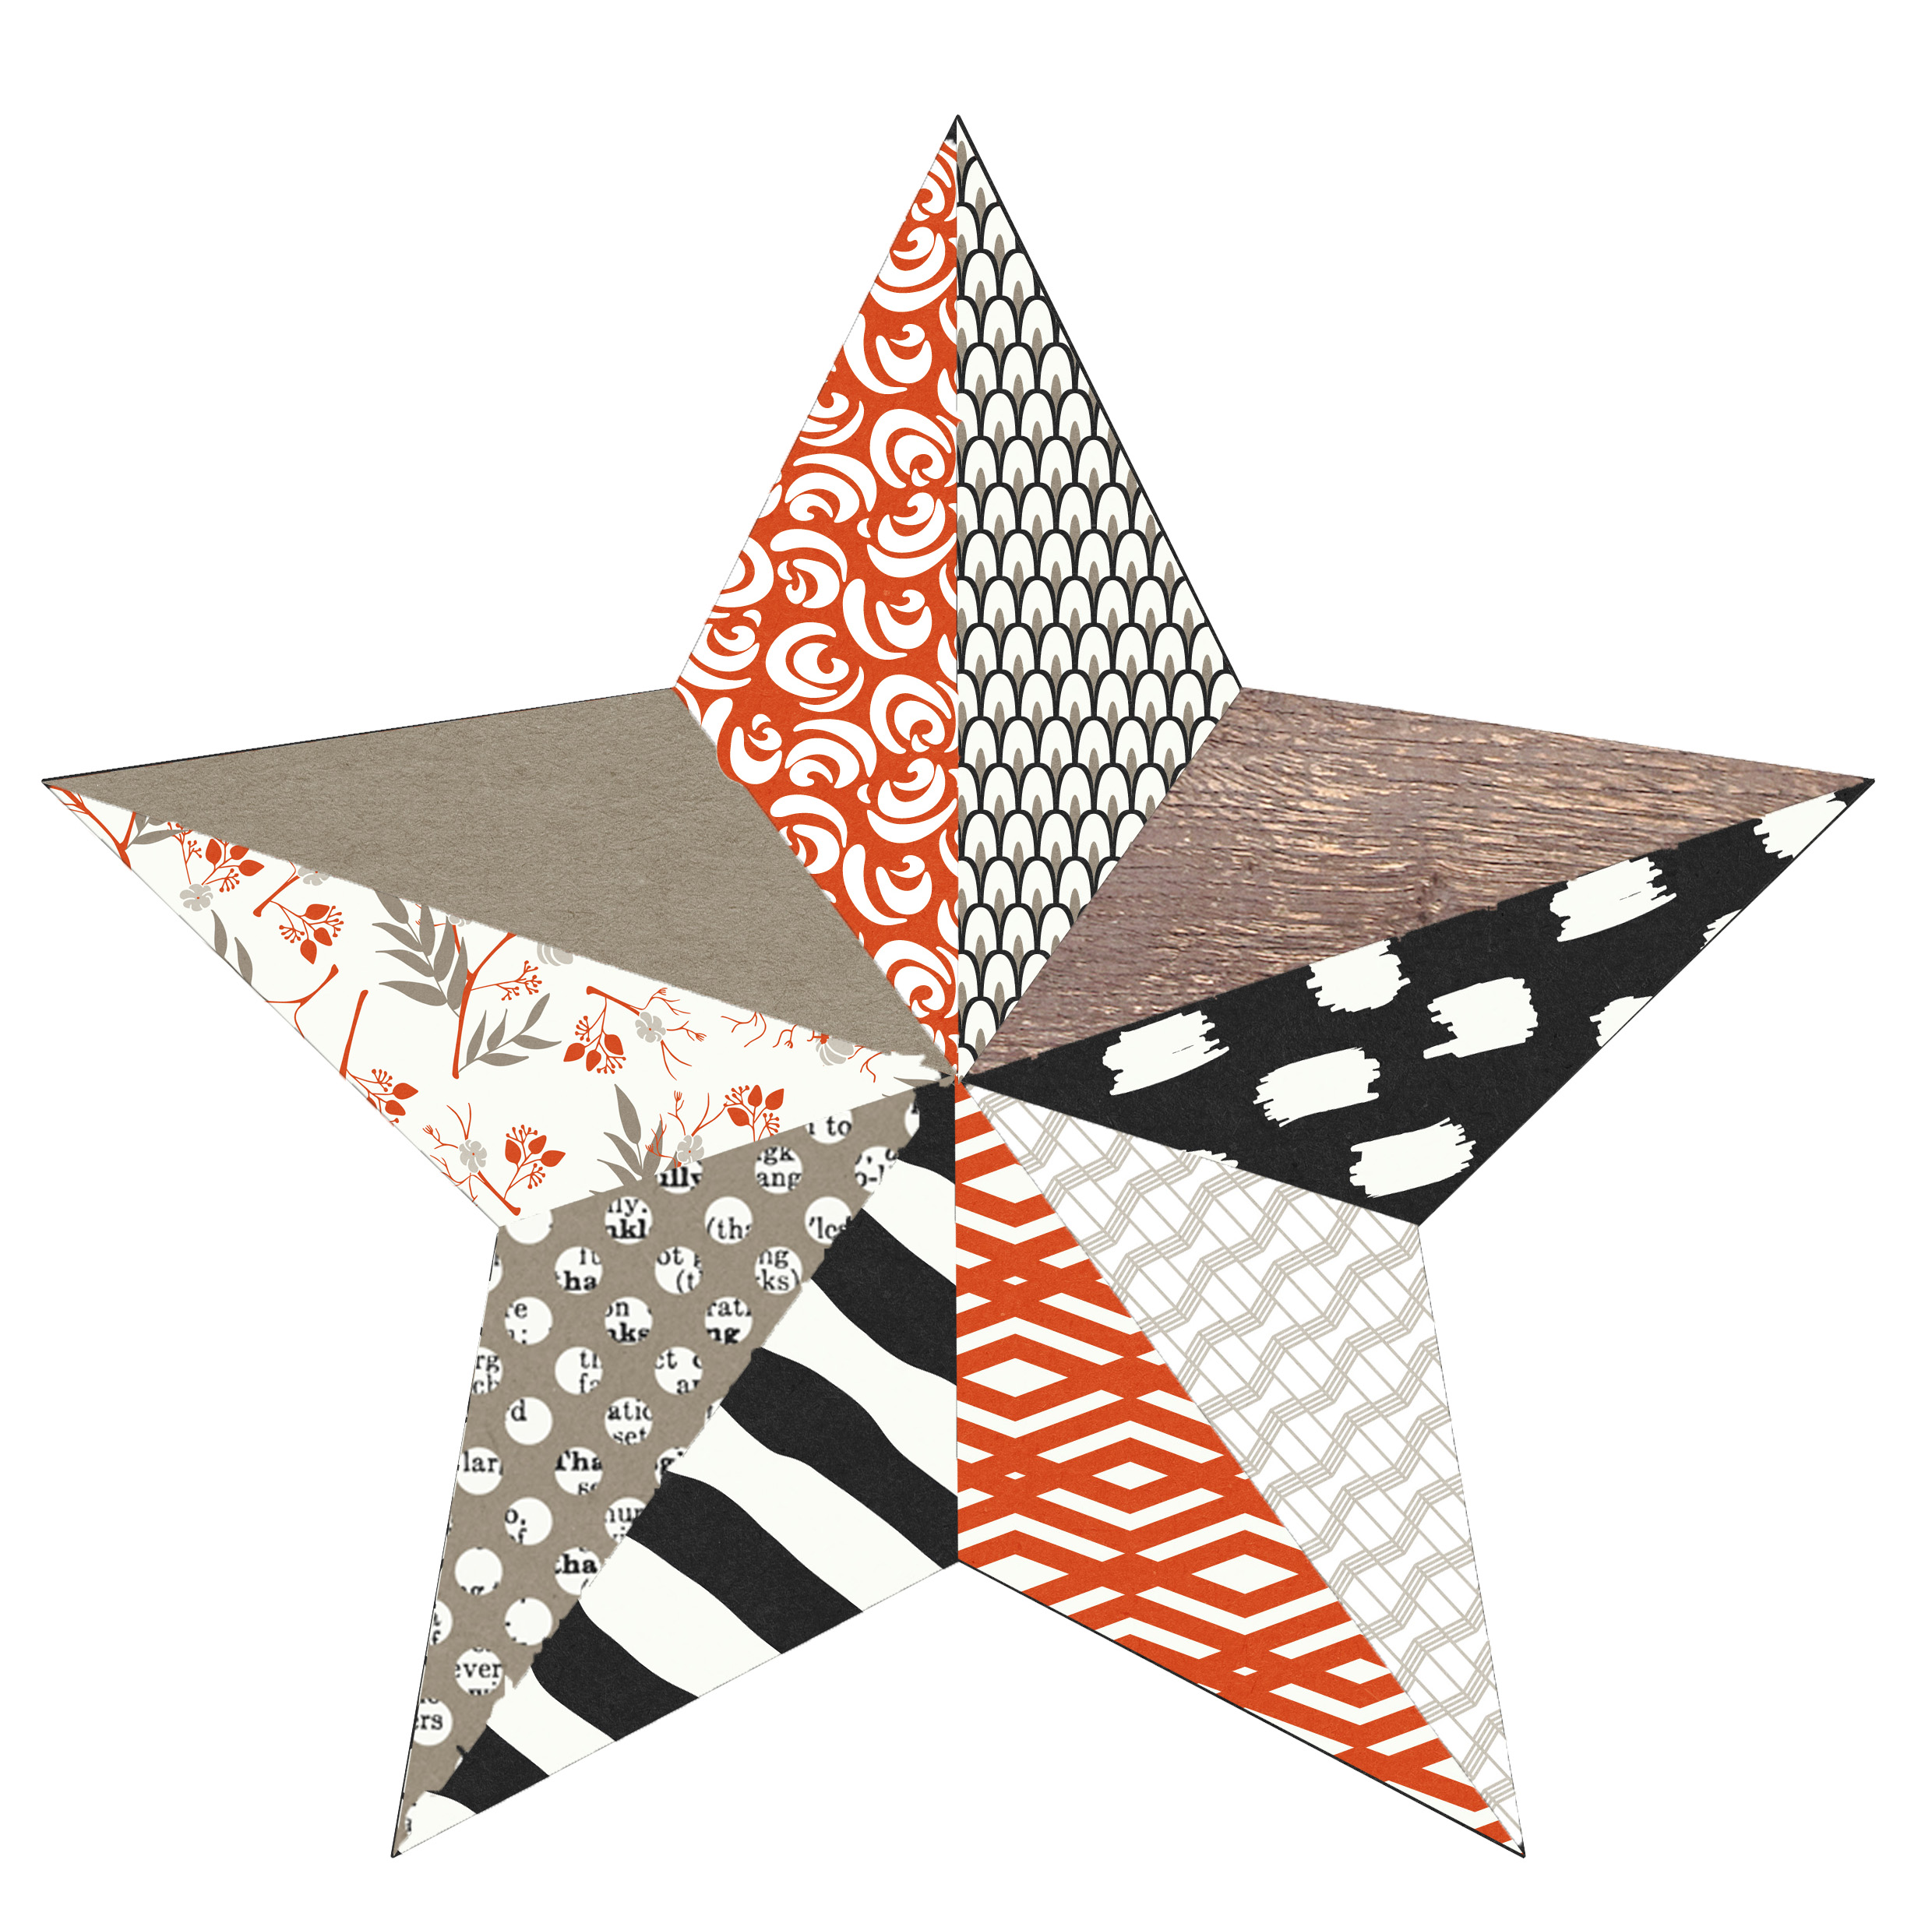
I found a PDF template online for the star shape, but the lines were dotted, so I used it to make a PSD template that I could clip each of the papers to. I printed out different sizes using different combinations of papers. You can cut out your stars by hand, or using a digital cutter. Here’s an example of one of my stars before printing…

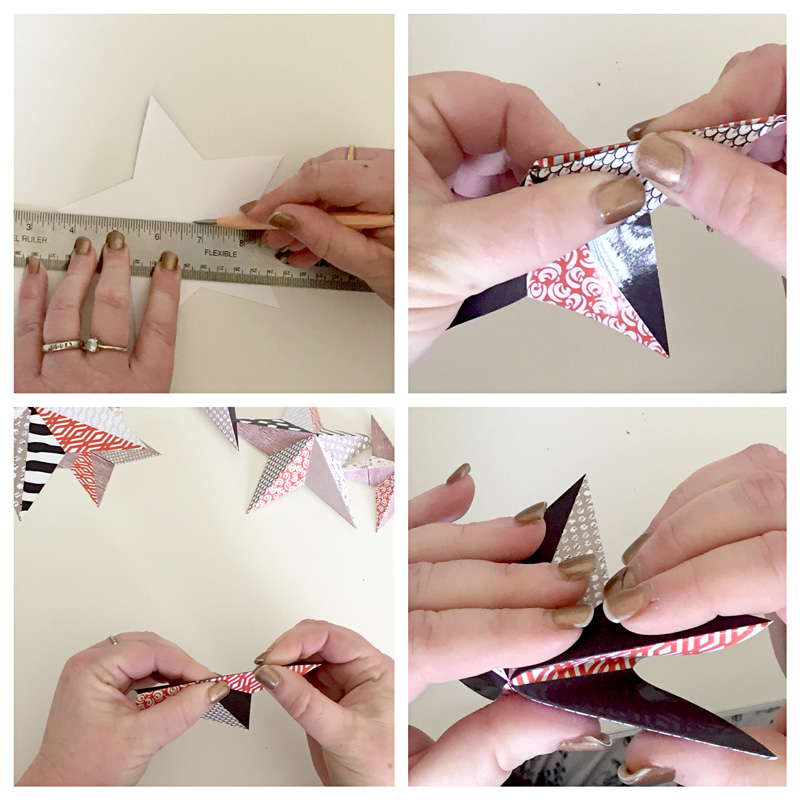
Once all my stars were cut out, I scored the fold lines. This is done on the back of the star from each tip, through the center to the other side.

Turn your stars over and fold each tip, aligning the other tips with other to get a precise fold. You only crease from the center to the tip, not the other side. Then fold in between the tips with valley folds, as shown here…
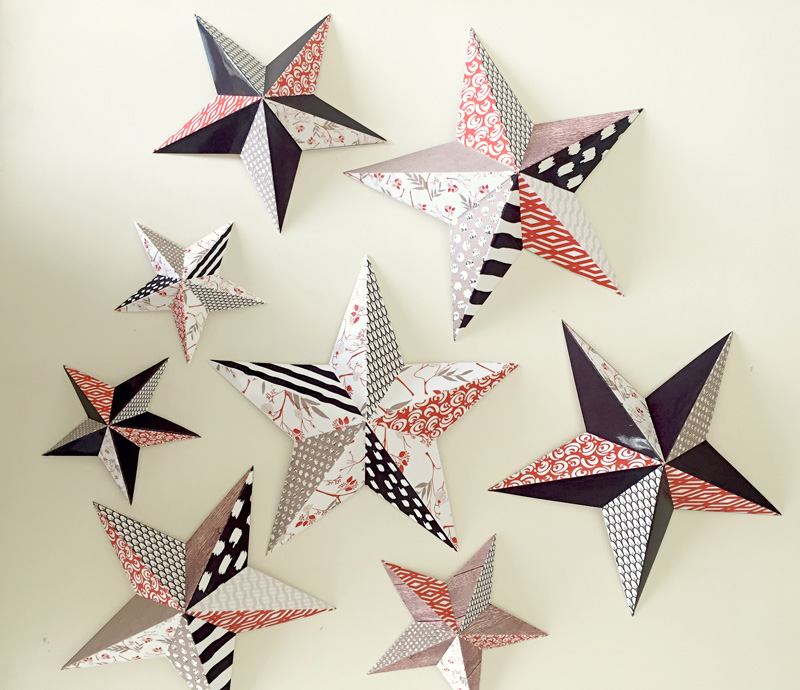
Here’s a look at the finished products… stars of all sizes!
Now for the candles.

Print your desired images onto tissue paper [for more detailed instructions on printing on tissue paper, you can refer to one of my previous posts here or Arielle’s post here].

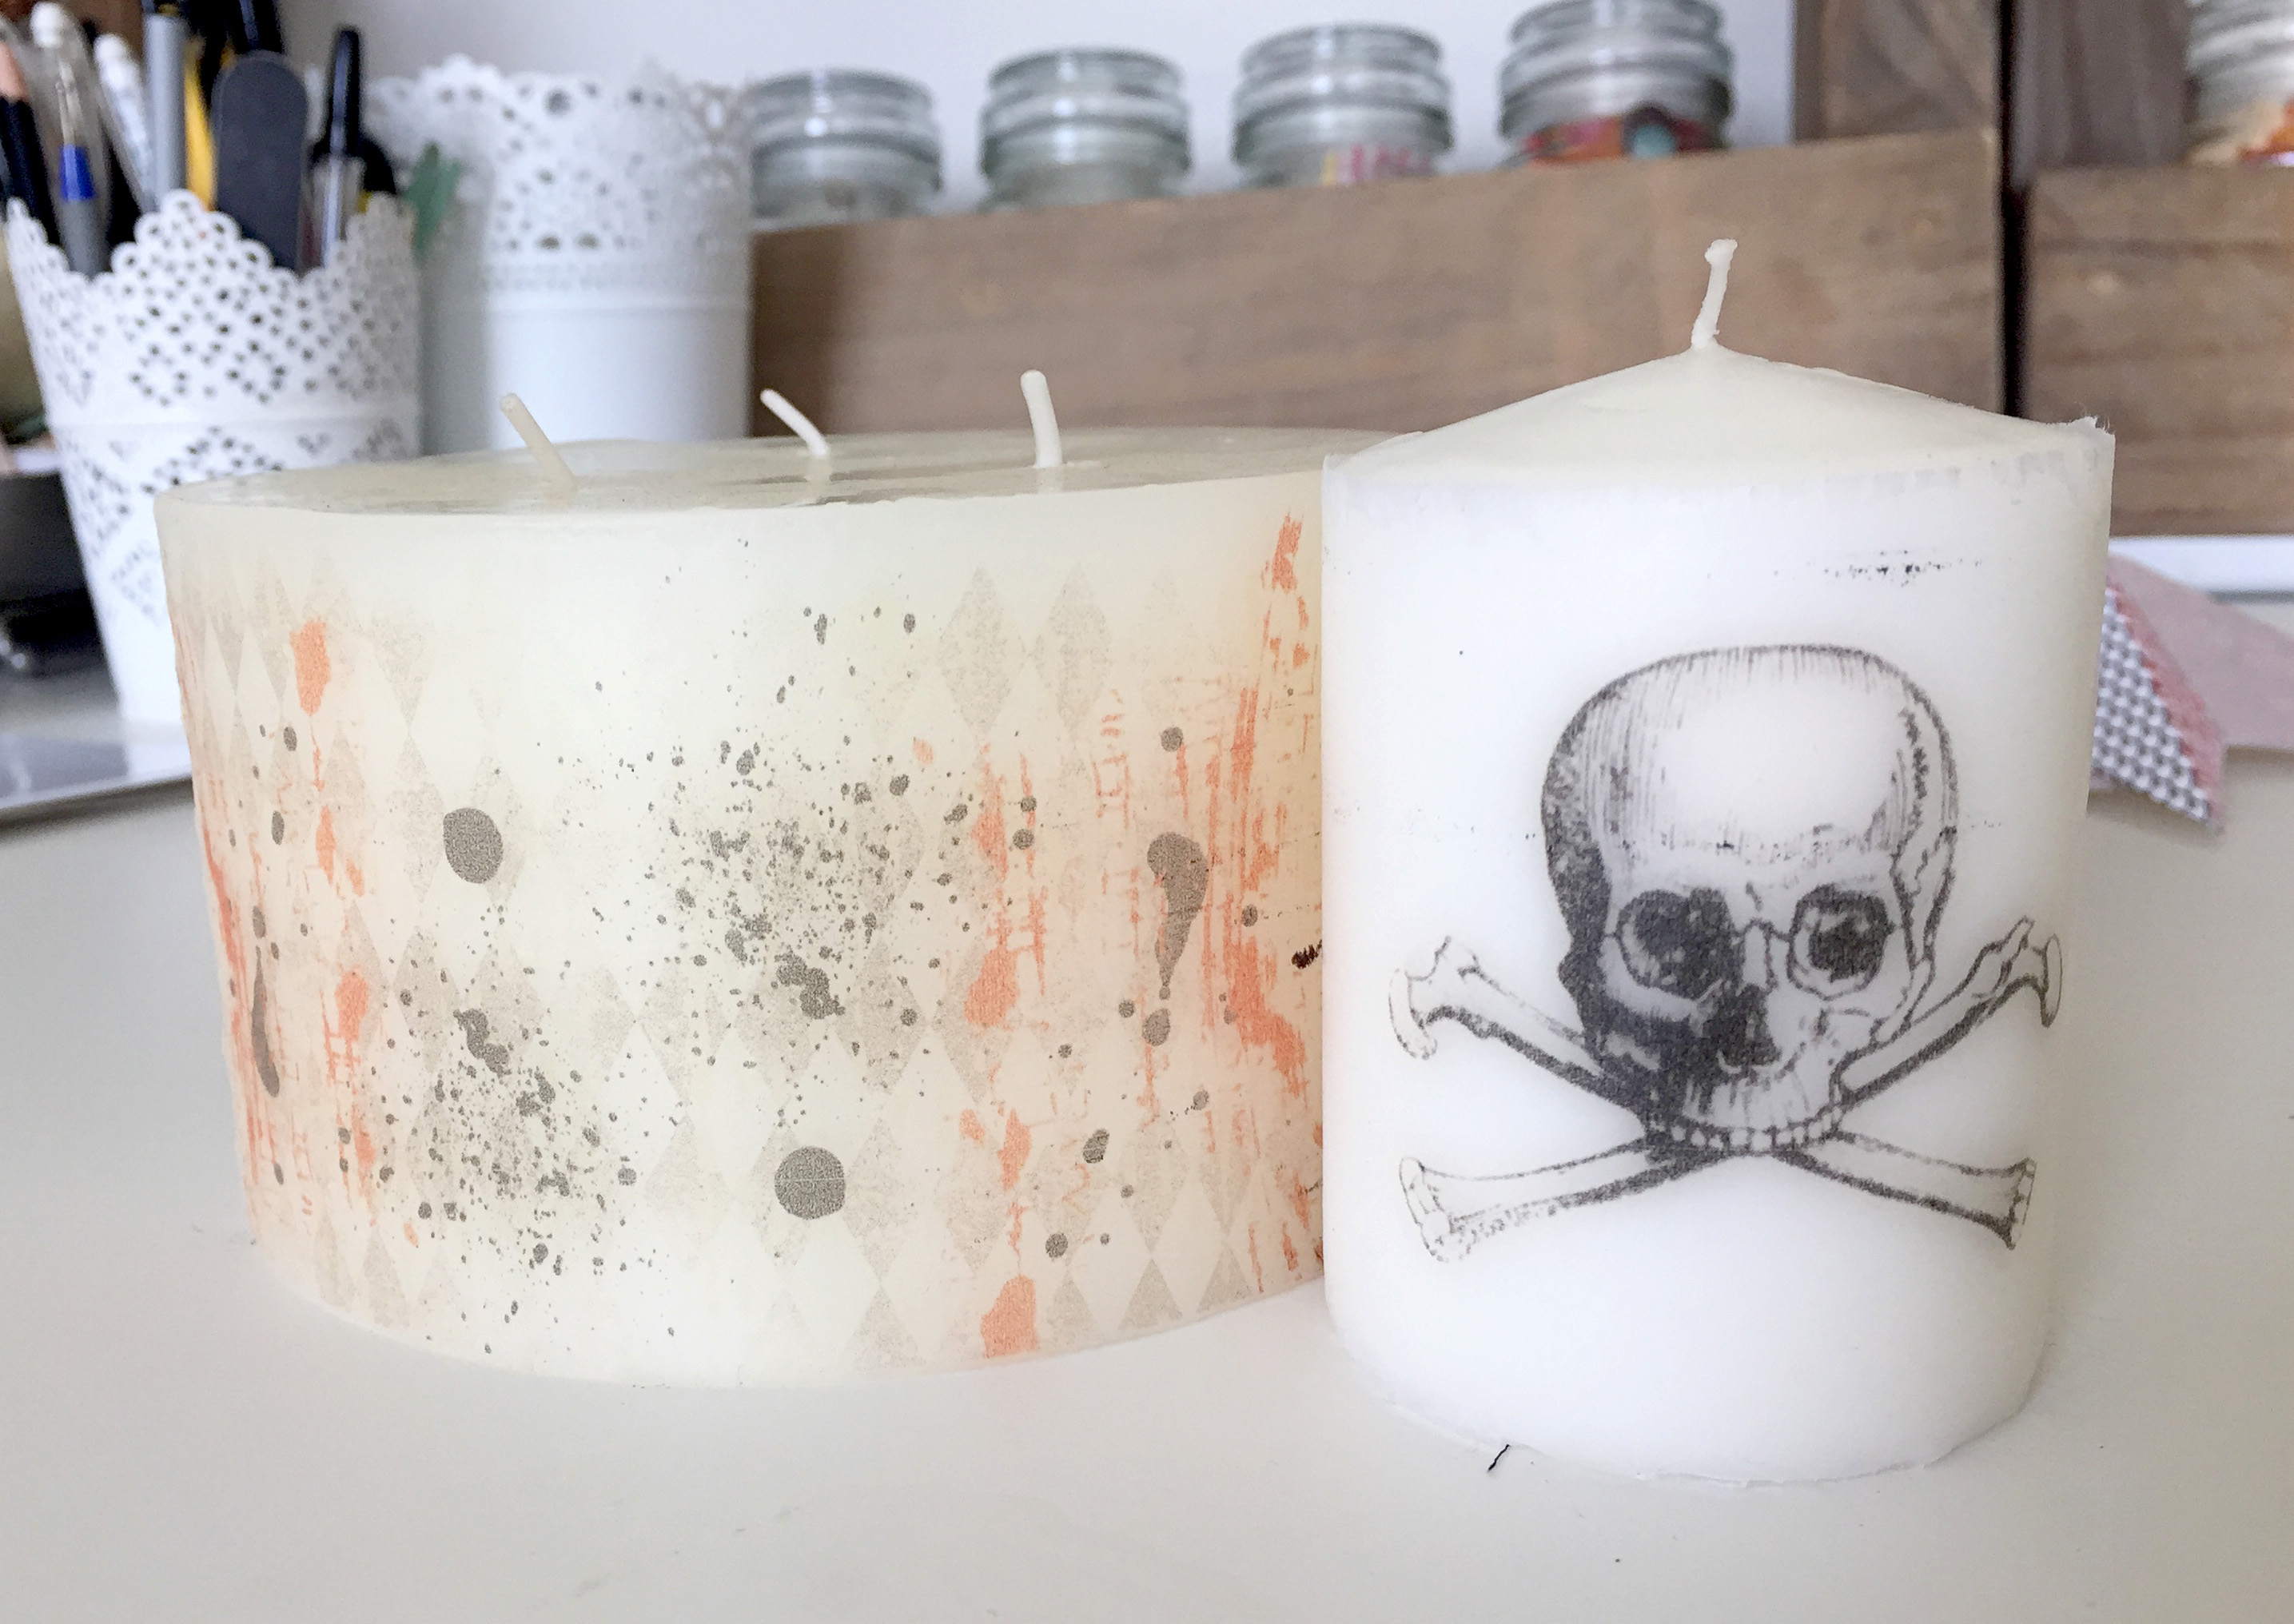
Cut your tissue to size, and use a hairdryer to heat the candle. You will see the tissue “disappear” into the wax. Be careful, your hands may get get hot… just give them a break every now and then and work your way around the candle…
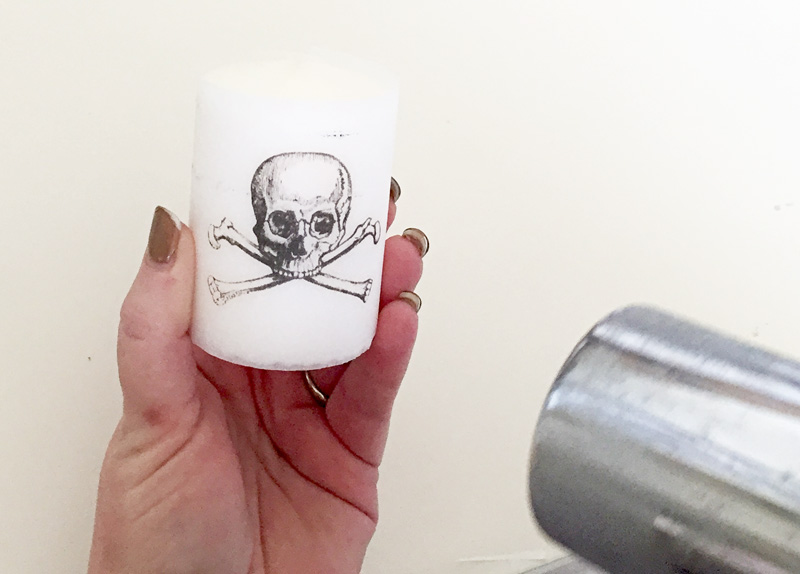
Here’s a look at the candles once the tissue paper image has adhered on/into the wax of the candles…
I also printed the frame from the kit in a few different sizes… and cut them out with my paper cutter (I use a Silhouette) to add on my wall, along with the stars…
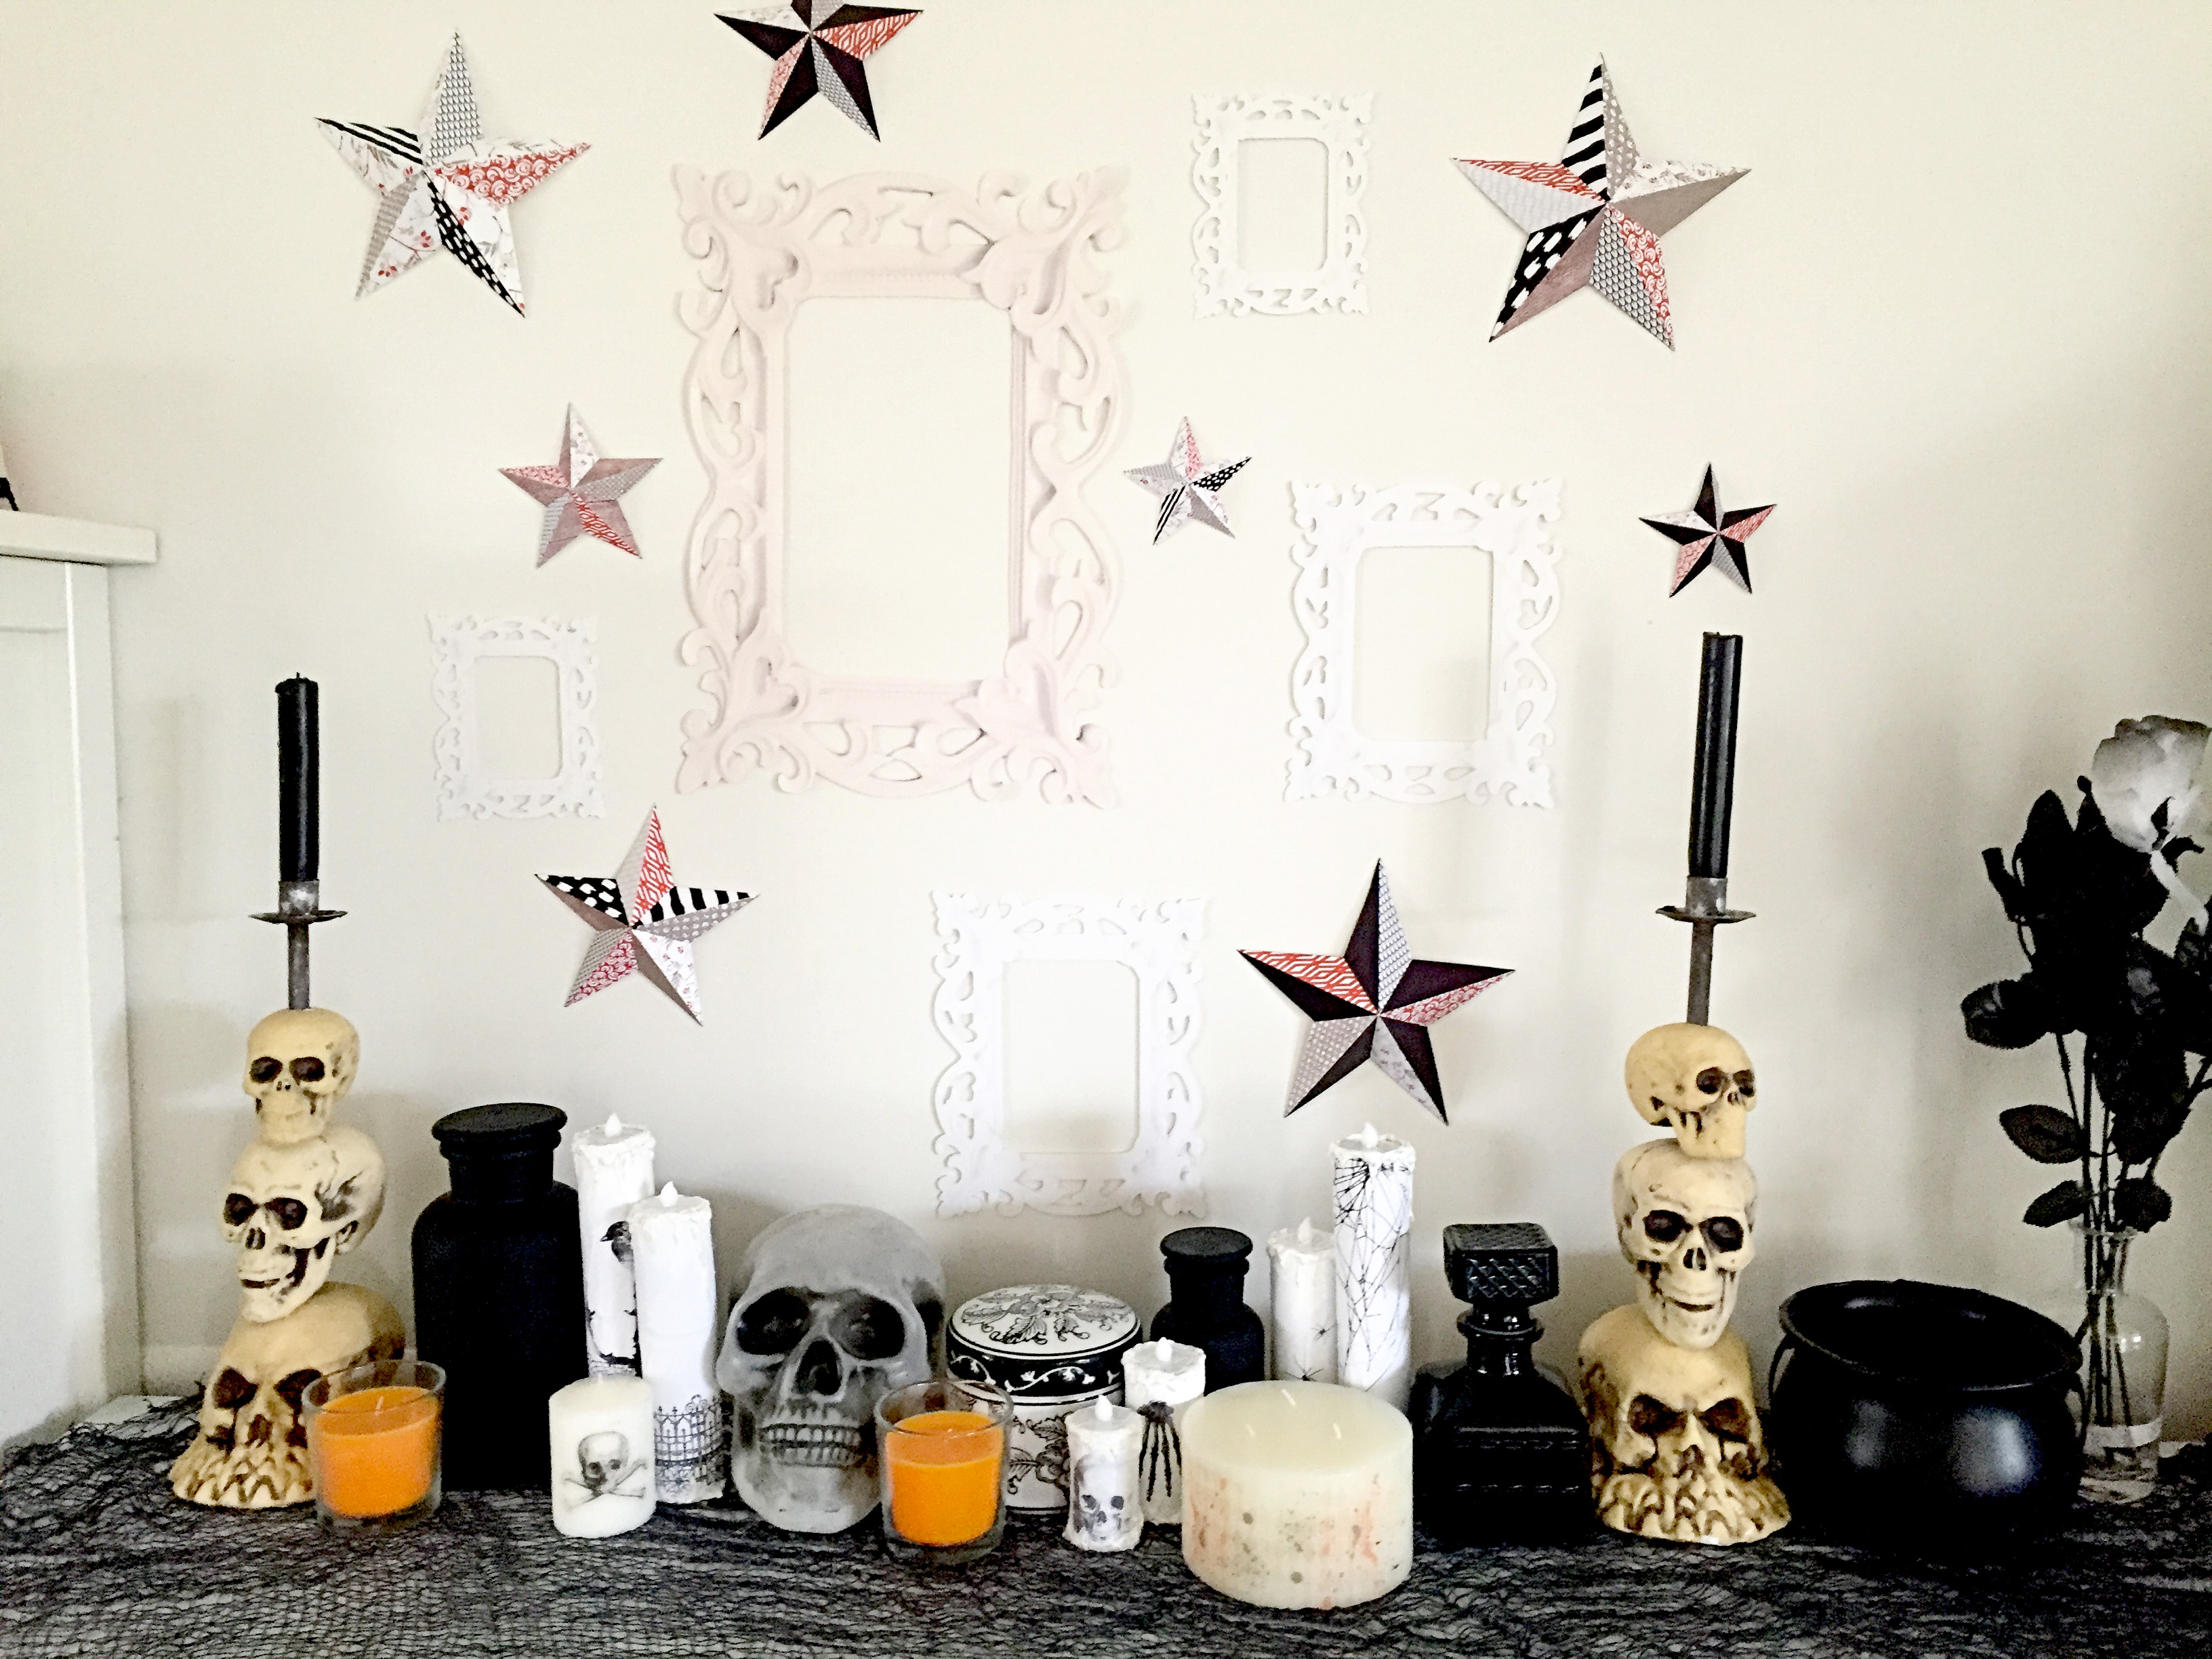
And that’s it! So simple! If you give it a try, definitely come post your final product in the gallery (and even join the monthly Hybrid Challenge and earn points toward discounts and free stuff at TDP!).

Happy Halloween!


About the Author  Amanda found digital scrapbooking in 2006, as a paper scrapper who was frustrated with the limitations of paper scrapping products. She now loves to combine paper and digital products and techniques for her pages and projects. She is the wife of a Naval Officer and has two teenage children. She lives in Australia, and has also lived in the U.S and Malaysia and loves that she has had the opportunity to travel the world with her family.

Hybrid How-To | Halloween Countdown Decor

ahgordon_octhybrid_tdphead

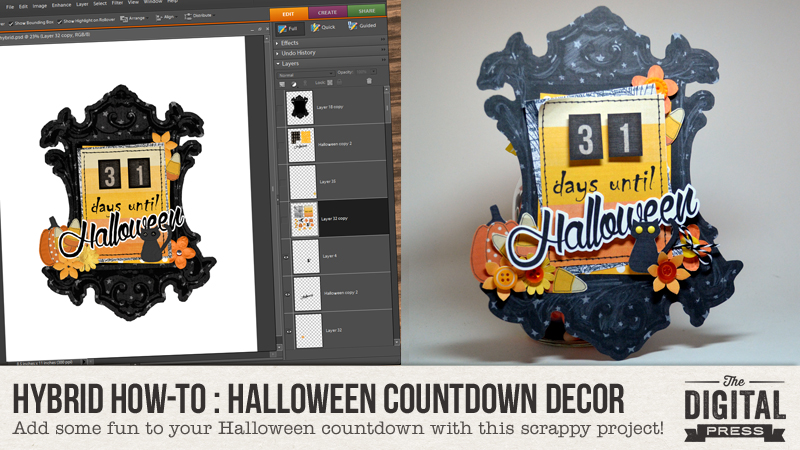
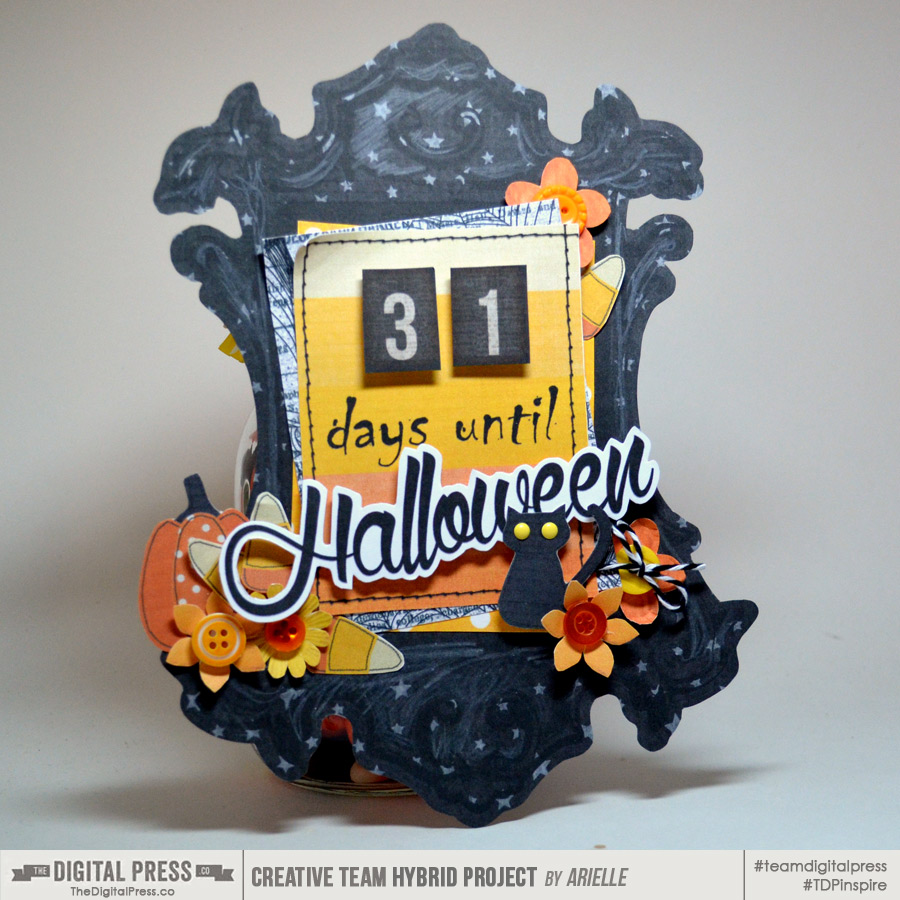
Hello and HaPpY OcToBeR!!! And Happy Digital Scrapbook Day! Arielle here and I’m so glad you stopped by today! I have a great project that will get you all scrappy this weekend – snipping and gluing and layering – oh my! I’m going to show you how I designed this little Halloween Countdown decor, and give you some tips on creating your own Halloween decor!

Here are the supplies I used:

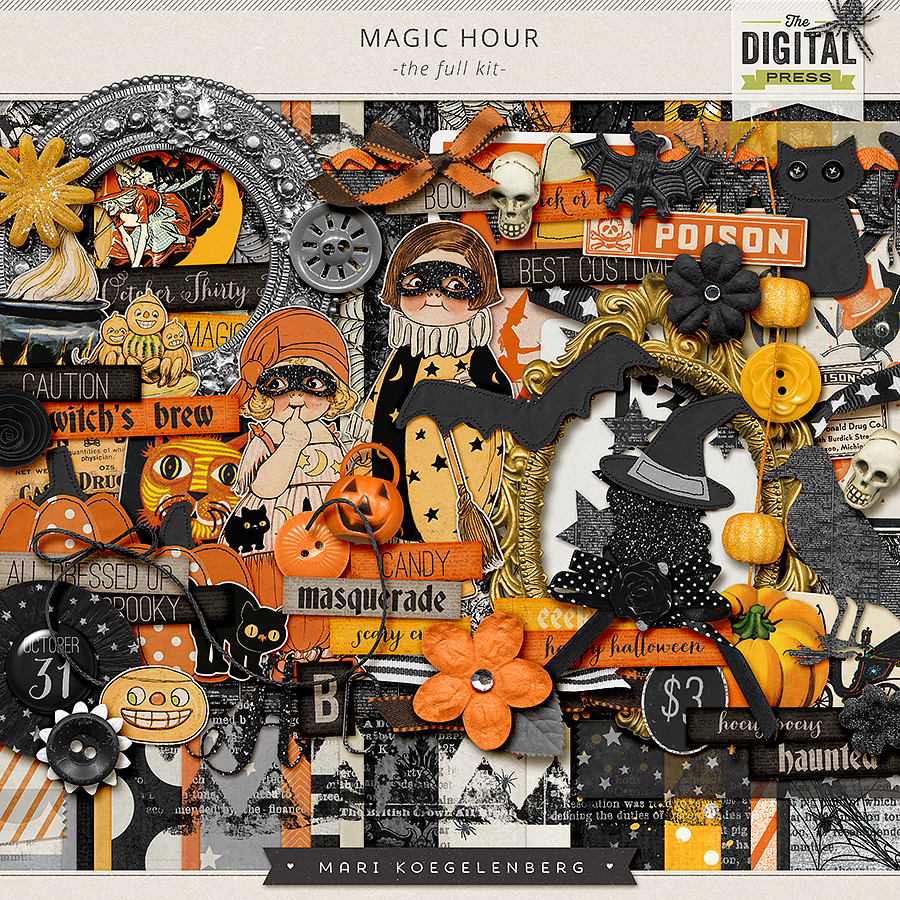
  • Digital Kit – Magic Hour by Mari Koegelenberg
  • Thin cardstock
  • Adhesives (I used an ATG gun & dimensionals)
  • Scissors and paper trimmer
  • Other embellishments such as buttons and twine.
  • Base material – you can adhere your decor to an adhesive magnet sheet to use on your fridge or a filing cabinet or you could mount it to black foam core.

mkc-magichour-kit

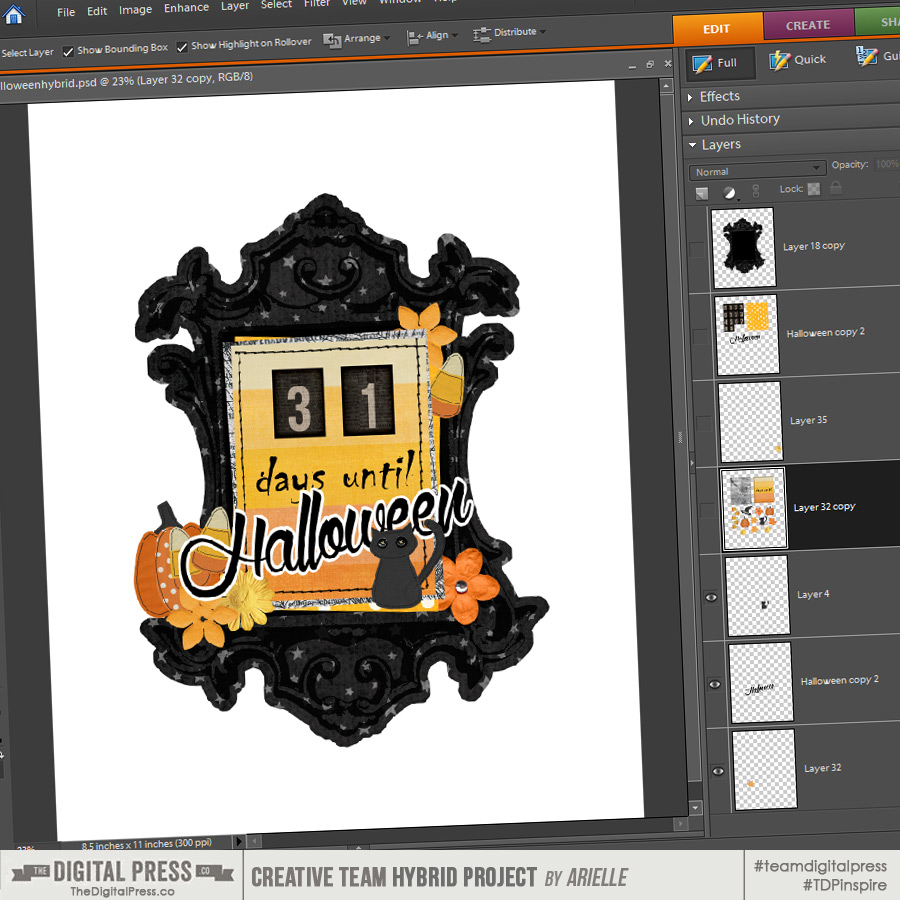
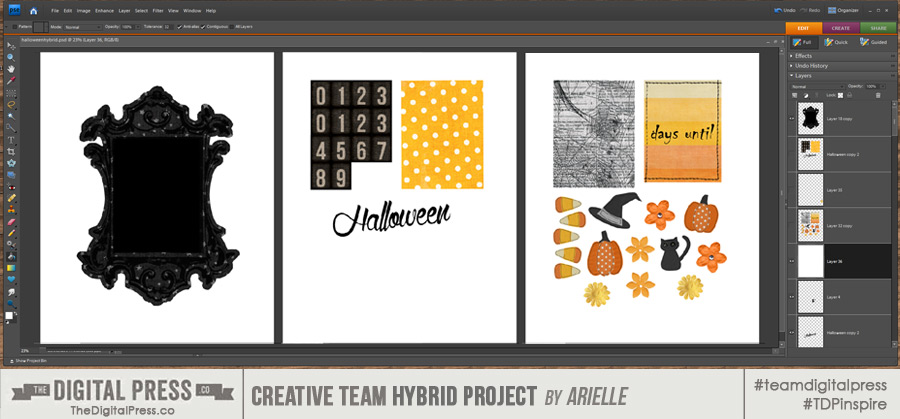
Step One – Design your project! I like to pick my kit and completely design my project In Photoshop before I print out the elements. That way I know everything will work together and I will only print what I need for the project.

I found this antique~y frame in another kit and blew it up, adjusted the threshhold settings and superimposed it over the star paper. I used some free spooky fonts, as well.

ahgordon_octhybrid_tdp

(Once my design is complete, I divide all the elements onto separate sheets for printing. I usually throw in some extra elements in case I mis-cut something or I decide it needs a little something extra!)

ahgordon_octhybrid_tdp-5

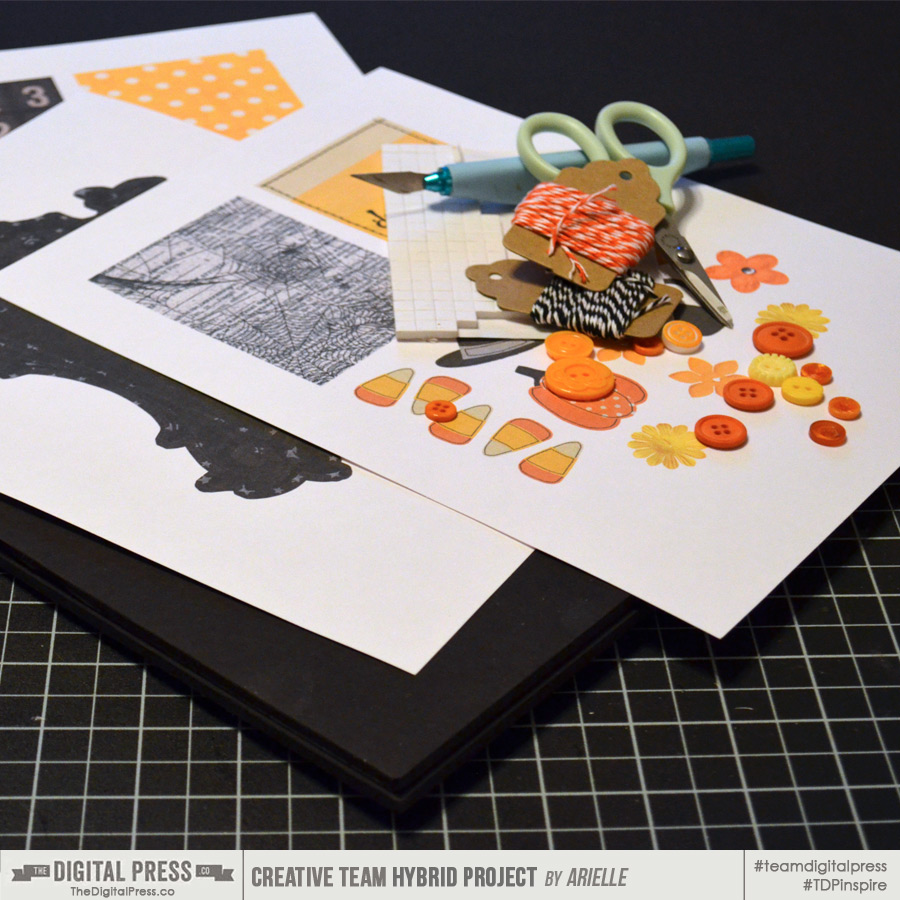
Step Two – Print your elements and gather your supplies! It’s always a great idea to add some buttons, gems, ribbon, twine… you get the idea – mix in some real stuff. It will be fun & you can’t get it wrong. I promise.

ahgordon_octhybrid_tdp1

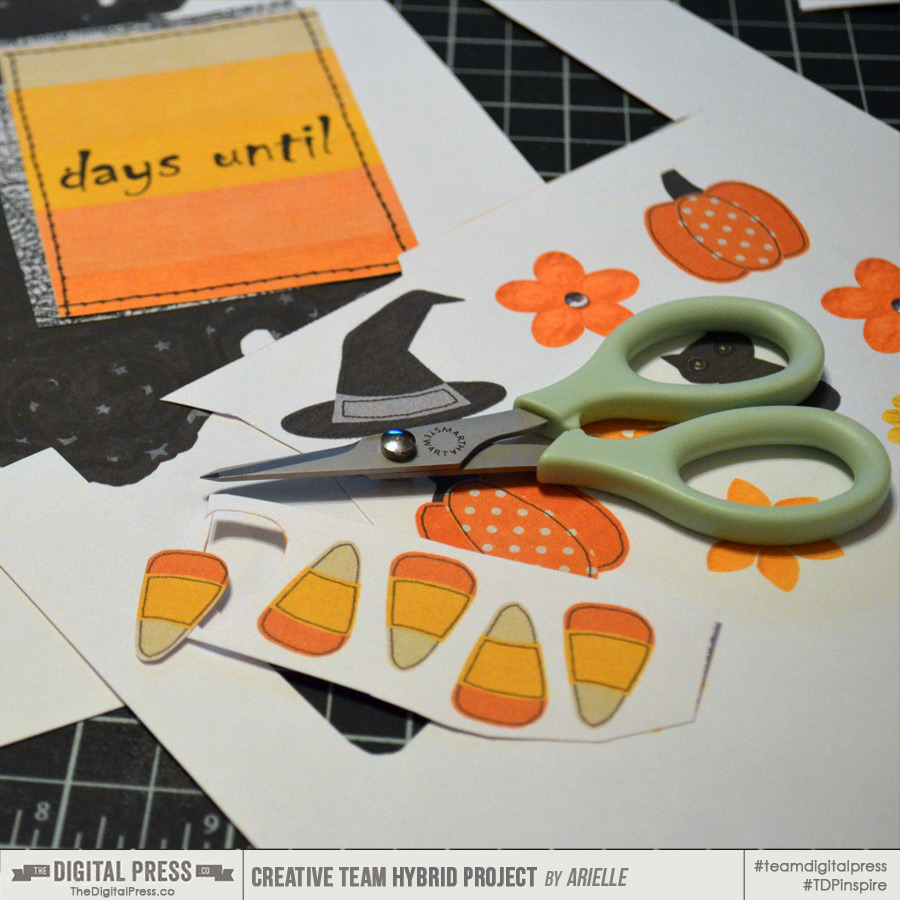
Step Three – Trim out your elements. Yes, you could think of this as tedious… or you can realize it’s really therapeutic! I just love cutting out cute little things!

ahgordon_octhybrid_tdp2

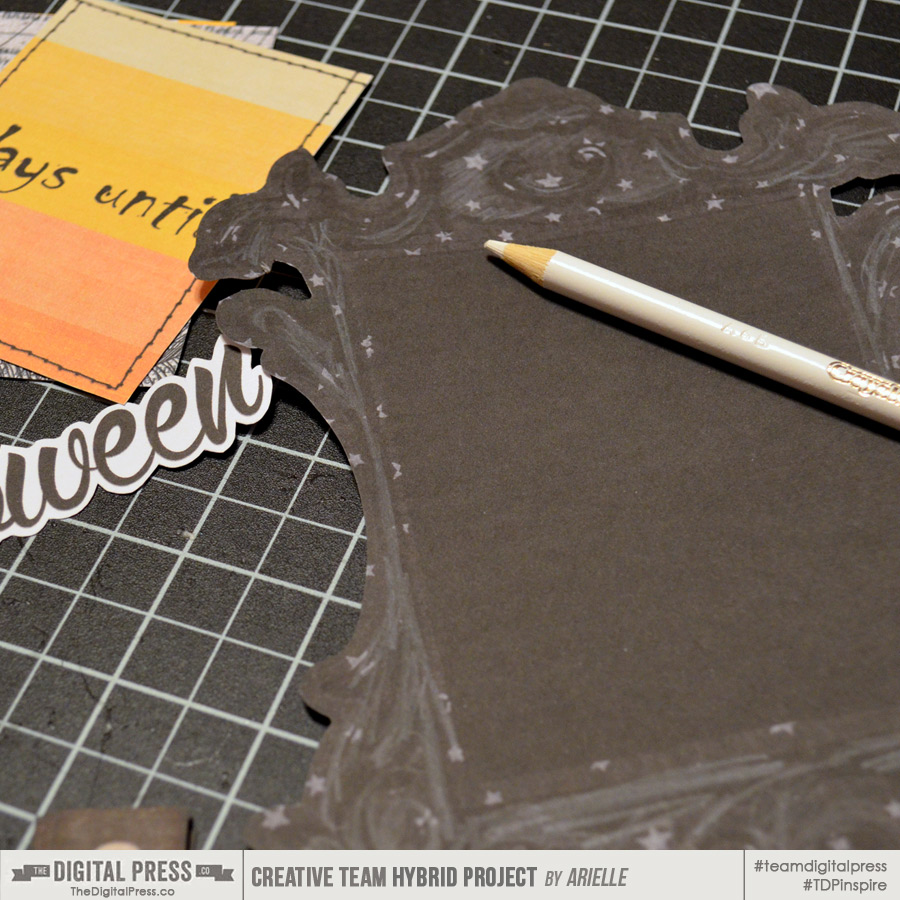
Step Four – My frame paper printed really dark, so I went back in with a white pencil to add a little definition. Don’t be afraid to grab paint, glitter or other media to layer onto your project! It adds another dimension to your hybrid work!

ahgordon_octhybrid_tdp3

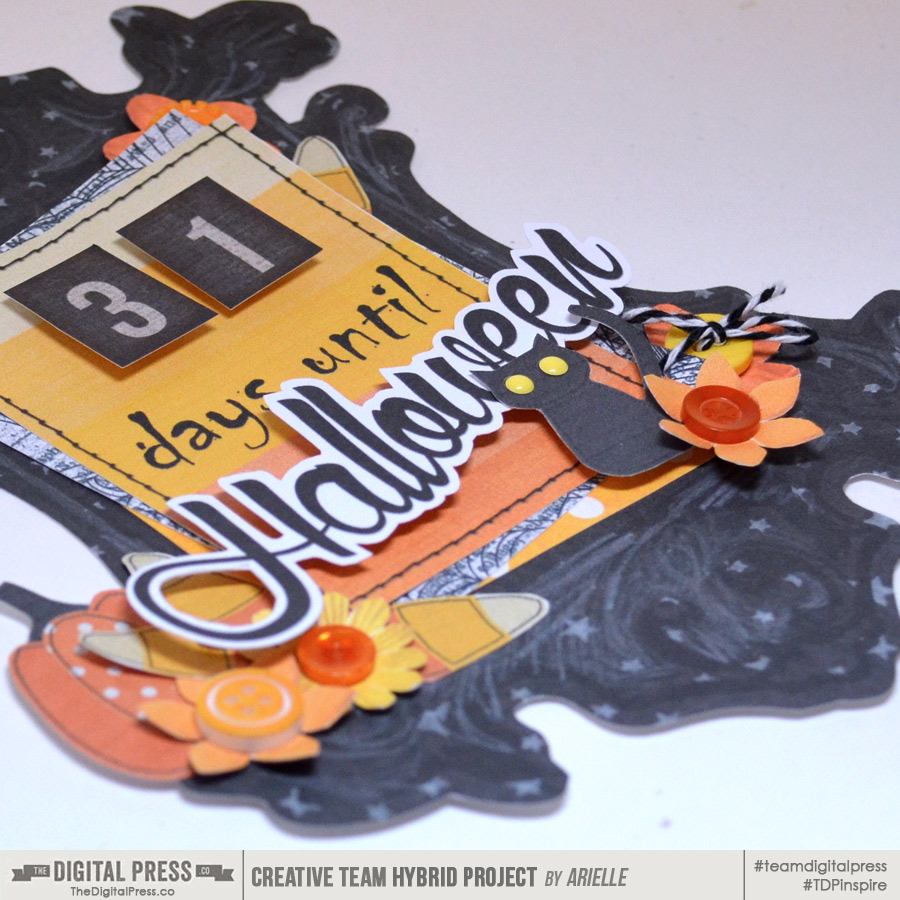
Step Five – Start layering! Pop up different layers with dimensional adhesives. It’s great when you can find them at different heights. Add some different textures, I used buttons and twine. (I added a couple enamel dots to the cat’s eyes, too!)

ahgordon_octhybrid_tdp4

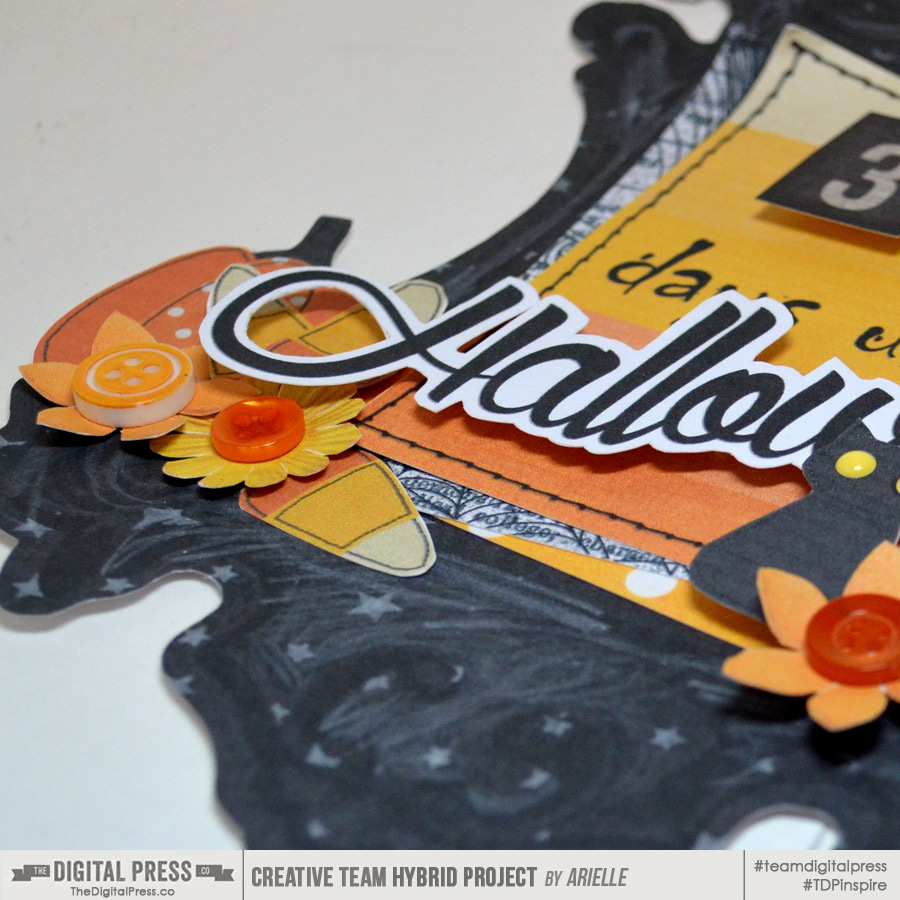
(I made my own Halloween “sticker” by just leaving a white border as I trimmed around the word. I used a craft knife to cut out the space in the “H”. I added some depth to my paper flowers by pressing them into my palm to push the petals up!)

ahgordon_octhybrid_tdp5

Here’s the finished project! I still can’t decide if I want mine on my fridge or my wall, but I have both magnetic sheets and black foam core when I do! I’ll just trace around my frame, and trim the backing to size.

ahgordon_octhybrid_tdp6

Craft stores also sell all kinds of blank signs you could use as a base – canvas, chalkboard, wood, burlap. You could also make a hybrid Halloween banner or bunting, on paper or fabric. hey, you could even print out a bunch of these and let your kids decorate a tin can pencil holder or a cute garland!

Now it’s your turn! Want to try your hand at some hybrid Halloween decor? It can be as easy and as simple as you want it to be! Please come join us in The Digital Press’s forum for a fun challenge related to this tutorial! You can create an amazing item for yourself or someone you love AND earn points doing it! Points can later be cashed-in for discount coupons to the shop at the end of the month if you participate in the challenge system at The Digital Press!

Hybrid How-To | Halloween Stickers

Hello everyone, It’s Tanya here to show you step-by-step how to create your own (really cute) Halloween stickers!

I thought that stickers like these would make the perfect Halloween treat for school parties. You just never know when one of your child’s classmates might have a food allergy… and with all of the sugar they will be getting already, these will surely be a big hit! My boys are way to old for this, but I am excited to create a bunch and give them out on Halloween night!

Supplies Needed:

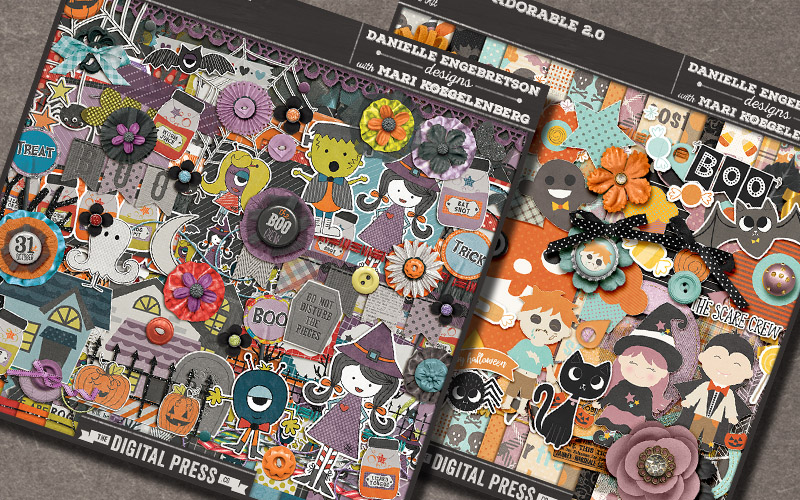
  • Your favorite Halloween-themed digital kit (I used FREAKIN ADORABLE 1.0 and FREAKIN ADORABLE 2.0 by Mari Koegelenberg and Danielle Engebretson, shown below)
  • Cutting machine (I use a Silhouette Cameo)
  • Printer
  • White shipping labels
  • 3 x 4 treat bags
  • Stapler (I use a mini stapler that came with colored staples)

The reason I chose these kits — there are just soooooo many fun elements to choose from! I chose 4 different elements from each kit and believe me, that was really hard to do because I wanted to use them all!

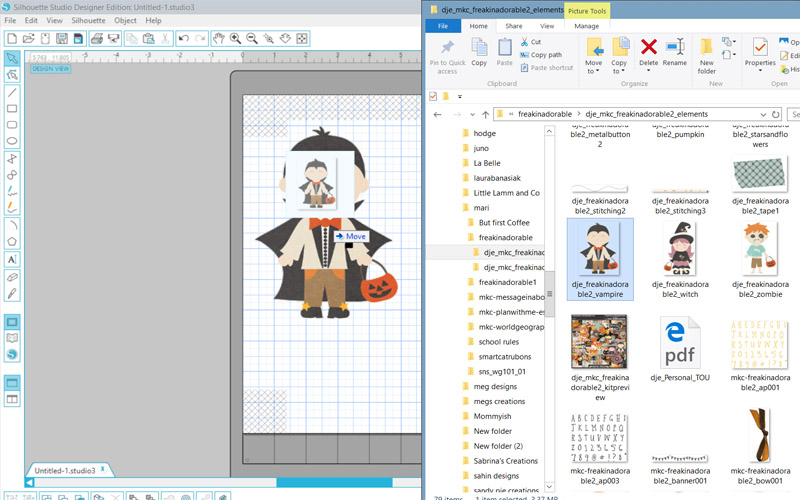
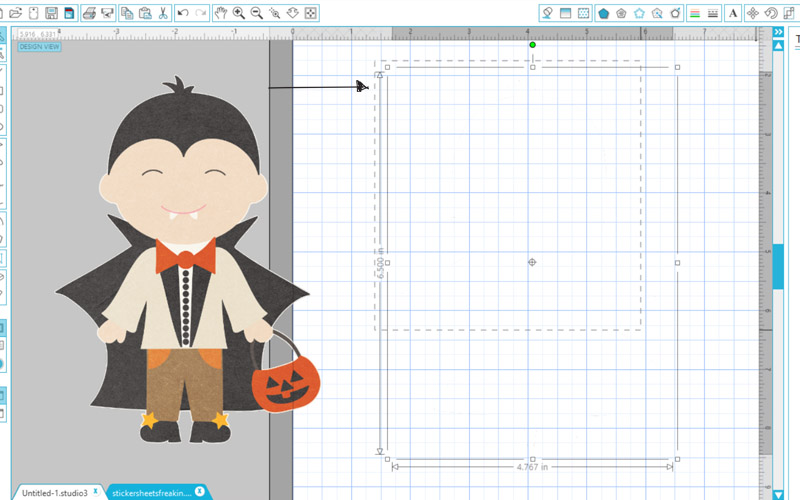
The first thing you need to do is to open the images/elements you are going to use in your cutting machine software (I’m using Silhouette Studio Designer Edition). Open your elements and simply drag them over to a new drawing area, as shown here…

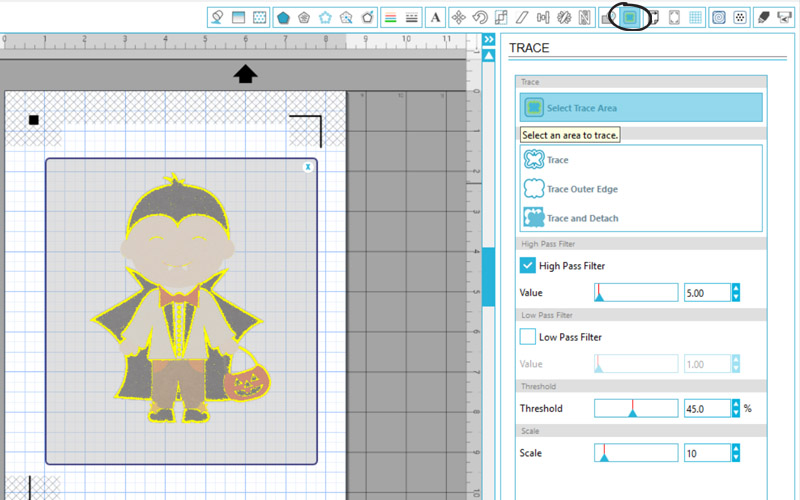
Once you have decided on the images you will use, you will have to do a “trace” on each one in your software. This will tell the machine where to cut. This is also referred to as a Print and Cut.   Open the Trace menu and select the trace area (see the small black circle I drew near the upper right)…

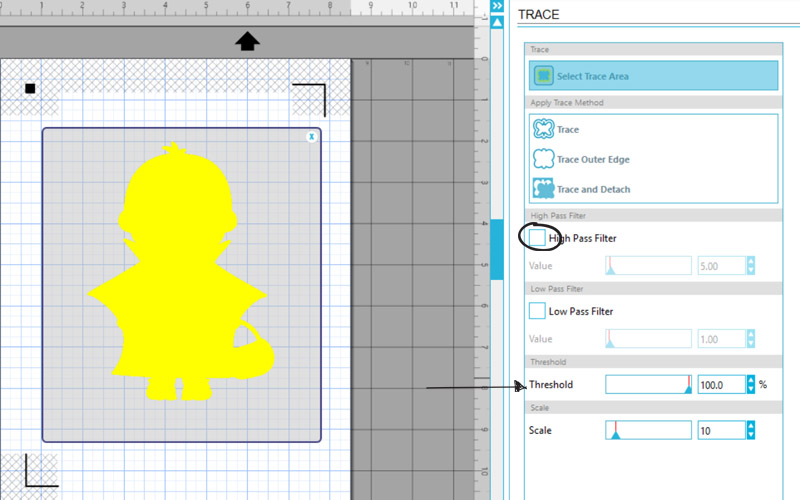
Now uncheck the “High Pass Filter” and move the “Threshold” all the way to the right. You can see that the image is perfectly highlighted (see the circle and the arrow I drew to show the boxes you will click/change)…

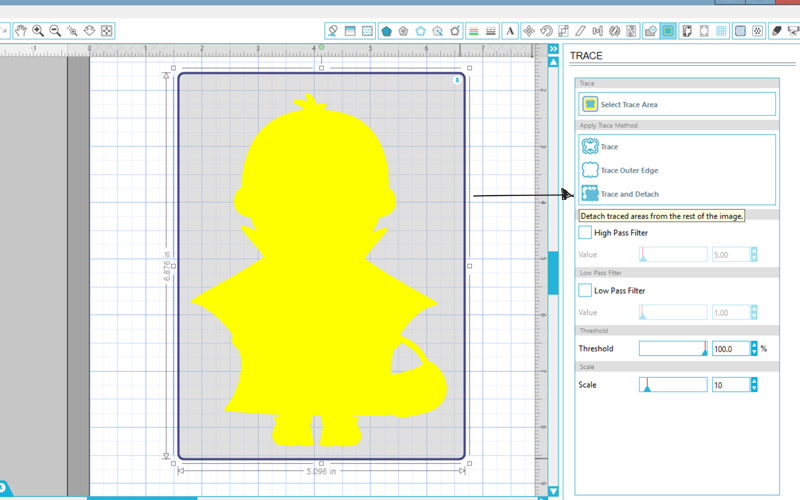
At this stage, there are a few ways to let the machine know the cut area. The one I will be showing you is the Trace and Detach. To do this, simple click on “Trace and Detach” as shown here (see the small black arrow I drew near the right)…

Now you will click on the image and drag it off to the side. It is hard to see, but there will part of the image left behind (you can see this below; when I click and drag over where the image was, the dashed lines show up. This is the part to get rid of). After dragging a box over the leftover part, hit “delete.”

Continue to do this for all elements used…

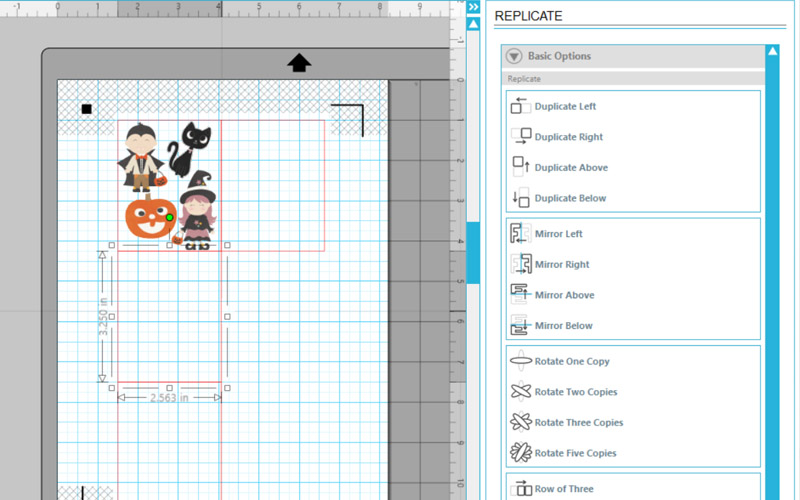
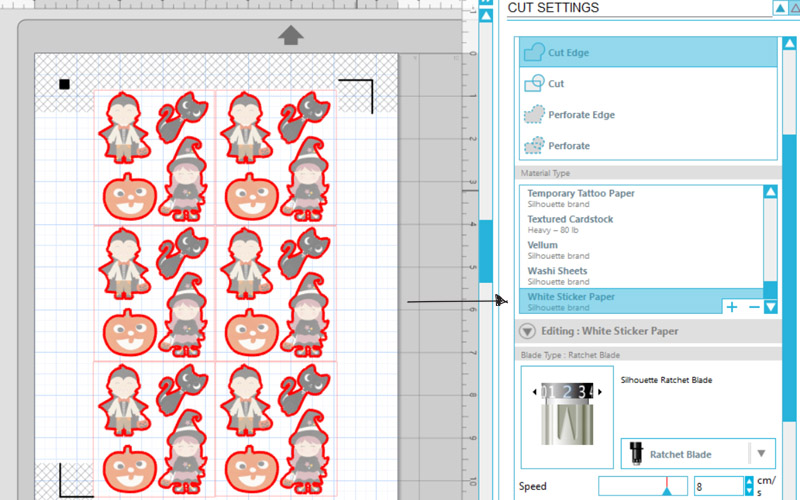
Next, draw out a box. The dimensions of my box were 3.250 x 2.563. I was able to get six to a page. Resize the elements to fit inside your area. The size of your box and images will depend on the size of your treat bags.

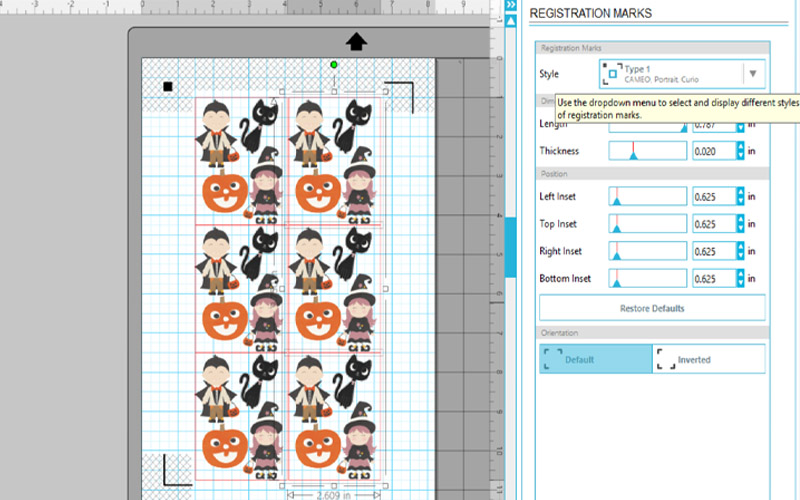
Now, you will copy and paste into all spaces, as shown here…

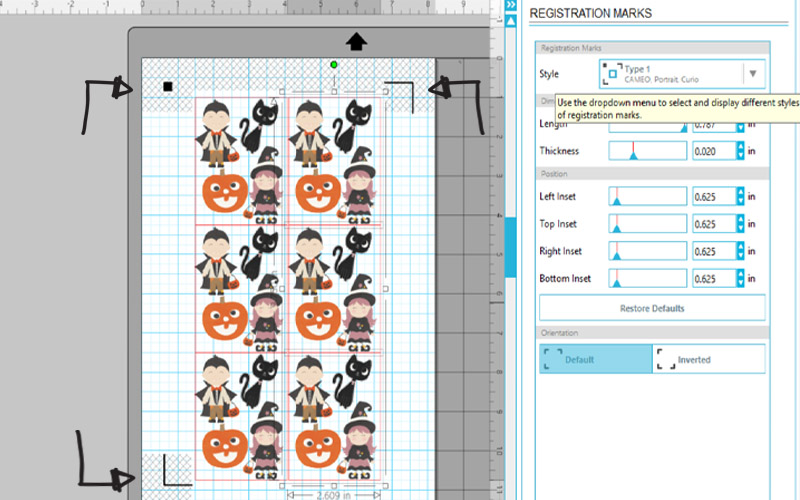
Now it cutting time. First, you have to print the stickers onto the label sheet. To do this, make sure that your “registration marks” are on… and then send through your printer. It is important to have the registration marks on before you print. These marks tell the machine where to cut.

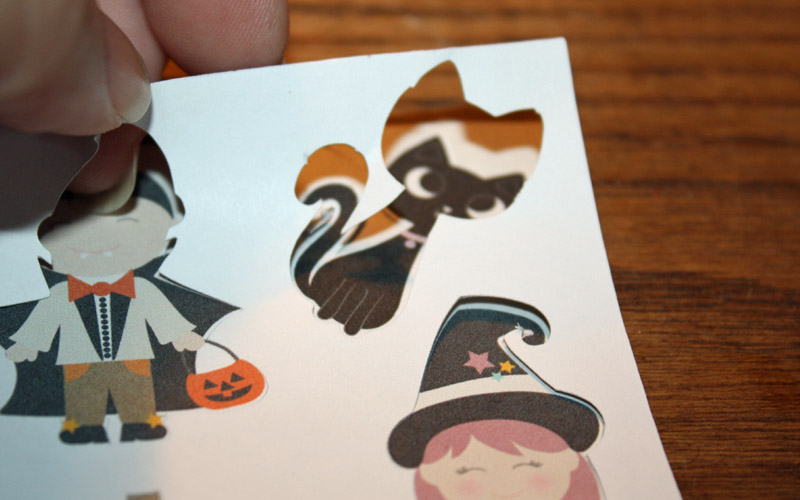
Next step is to go to the “Cut Settings.” Here, you will tell the machine where to cut and what type of materials you will be using. For this project we will need to send the sticker sheet through twice. The first time will be just a kiss cut; this will not cut the paper all the way through.

First cut: Only turn on the cut settings on the images. To do this, go through and click on each image and chose “Cut Edge.” You can double check to see if the box around the images is off — simply click on one and it should show “No Cut.”

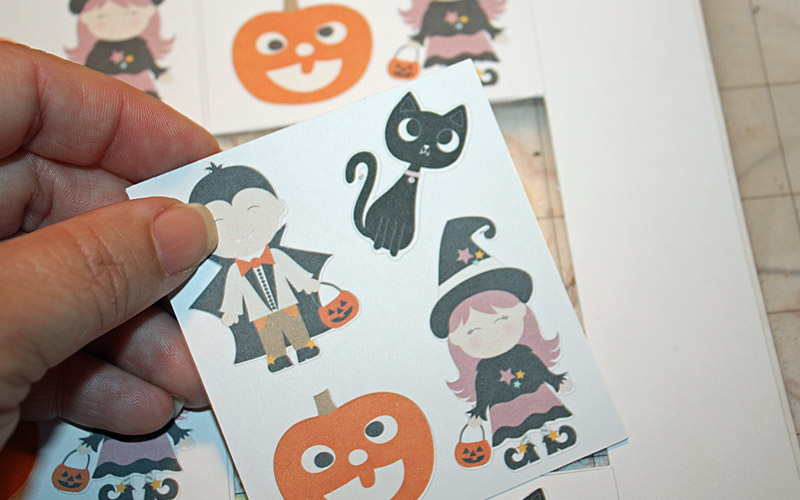
Second cut: Now do the opposite. Go through and turn the cut marks OFF on the images and turn the box cutting lines ON. You will also choose “cardstock” for your material. This will cut all the way through, giving you little individual sticker sheets…

Now you can either peel the white area around your sticker off… or leave it on. I left it on because these particular labels have a “cut” through the back and doesn’t look quite right.

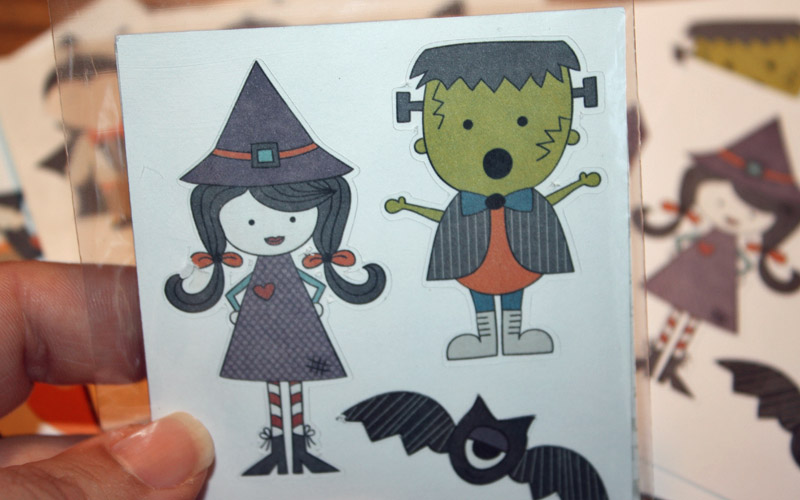
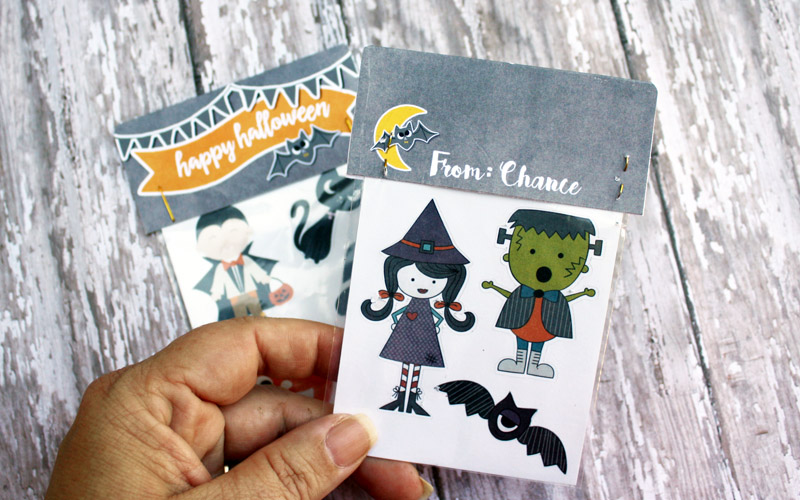
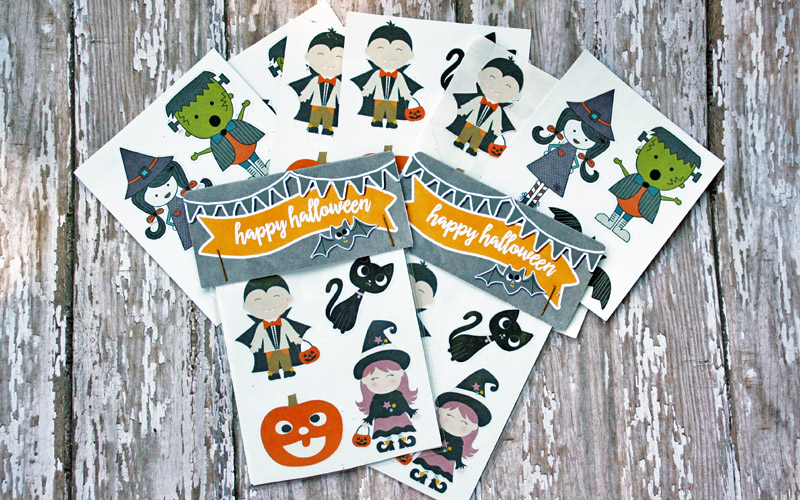
Now add your sticker sheets to the treat bags…

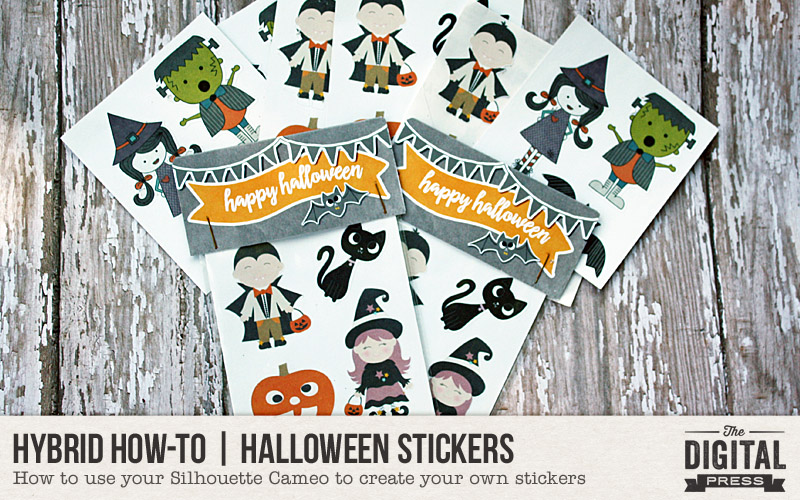
I created a cute topper (in Silhouette Studio Designer Edition) and stapled it to the top of each treat bag. You can even add your child’s name to the back of the treat for a nice finished touch…

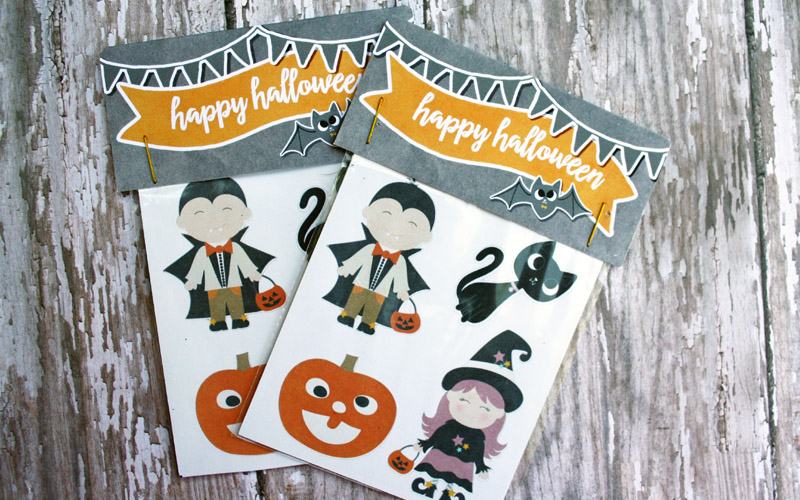
Here’s a look at the finished product from the front of the sticker packages…

I hope that you have enjoyed this tutorial! Get your creative juices flowing and create some stickers for Halloween (or even for some other fun occasion… you could use any theme/kit you like!). If you give it a try, come share your creation in the September Hybrid Challenge thread in the forum. 🙂


TanyaAbout the Author  Tanya is a part of the hybrid team here at The Digital Press. She has been hybrid crafting for at least 14 years now, and loves creating and sharing those creations with others. Her all-time favorite tool is her Silhouette Cameo. She has been married for 28 years to her high school sweetheart, Richard and has two sons: Chris, 25 and Chance, 20. She also enjoys crocheting, photography and woodworking.

Hybrid How-To | Chipboard Elements

Supplies

  • Digital kit of your choice. I used the Jaunt Collection (papers, elements) by Sahin Designs.
  • Photo editing software (I’m using PSE)
  • Printable sticker paper
  • Chipboard (old cereal boxes work!)
  • Cutting machine (optional, but you’ll need to choose simple designs that can be cut by hand)
  • For the key ring charms: jump rings and split rings (in the jewelry-making aisle of the craft store)

Directions

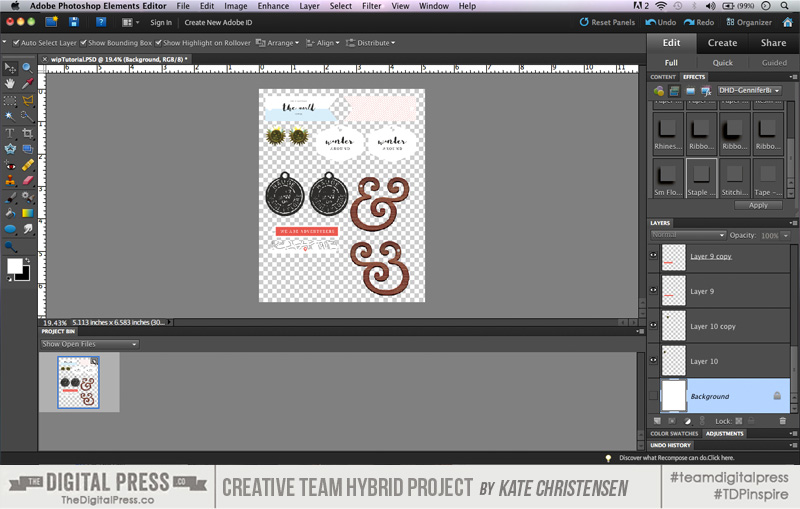
Open the designs of your choice in photo editing software and resize to whatever you need.

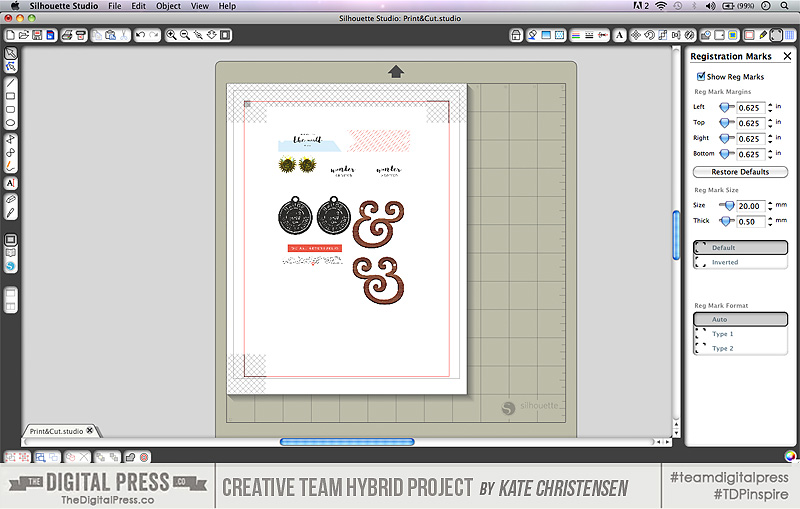
If you’re doing the key ring charms and using a cutting machine, go ahead and make the holes for the rings now. Might as well let the machine do the work for you! If you’re not using a cutting machine, you’ll need to punch the holes after assembling the final product.

Now make a mirror copy of each non symmetrical design. In my case, I also changed the back of two designs to be coordinating paper. Just for fun. 🙂

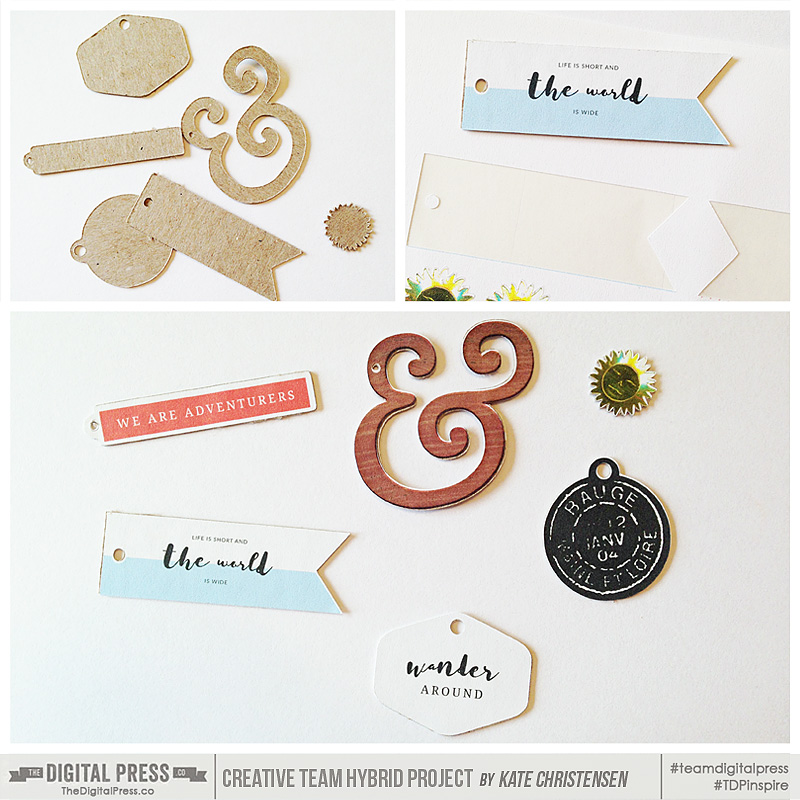
The next step is to print a set of images on sticker paper and cut them out.  You’ll also need to cut the image shapes out of chipboard. I used my Silhouette for this part. The chipboard provides support for the element, and if you’re planning on using it on a layout or other project, it’ll pop off the page a bit for some added dimension.

After everything is printed and cut, all you need to do is peel the images off the sticker paper and place them on the front and back of the chipboard shape. If you’re making the charms and doing it by hand, now is the time to punch holes in them. I used a hook tool to do this on the sun element.

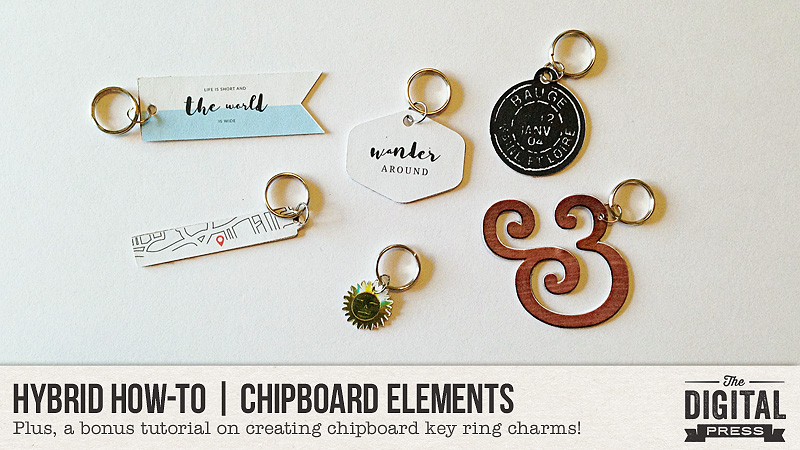
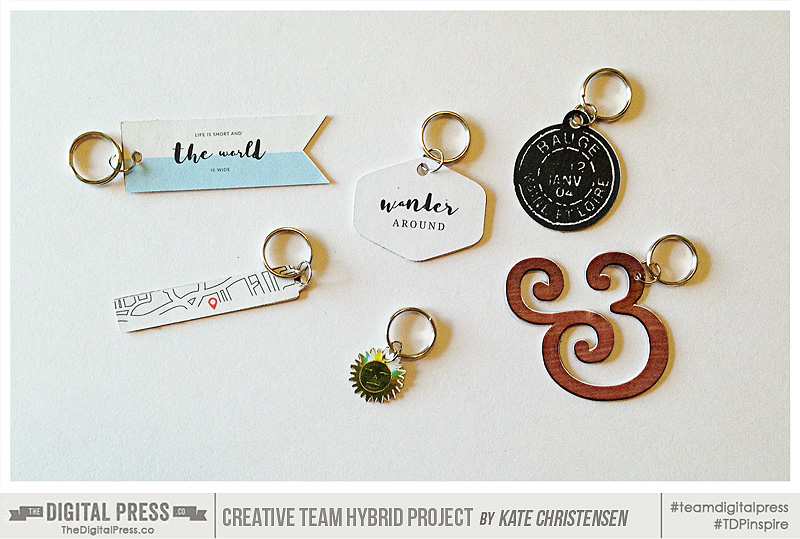
Next, open a jump ring. Attach a split ring and the chipboard element then close the jump ring.

Now you can add the charms to your key ring!


About the Author  Kate is on the hybrid team here at The Digital Press. She lives on the Utah/Colorado border with her husband, 5 kids, 10 chickens, and a dog named Gracie. She’s a city-born girl who found she’s really a country girl at heart. She can be found outside, barefoot, and probably in her garden.
Tutorial Tuesday | Rotating Homework Supply Station


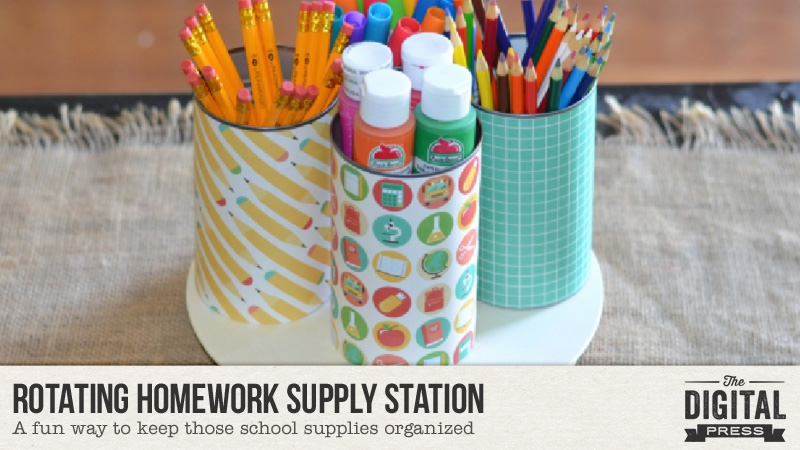
Today I’m here to help teach you how to make a super easy project — a rotating homework station. This is a great way to keep all those school supplies in one place! It’s a really easy project, too… as we’ll basically just turn a lazy susan into a turntable homework station, using our favorite school-themed digital scrapbook kit.

Supplies Needed:

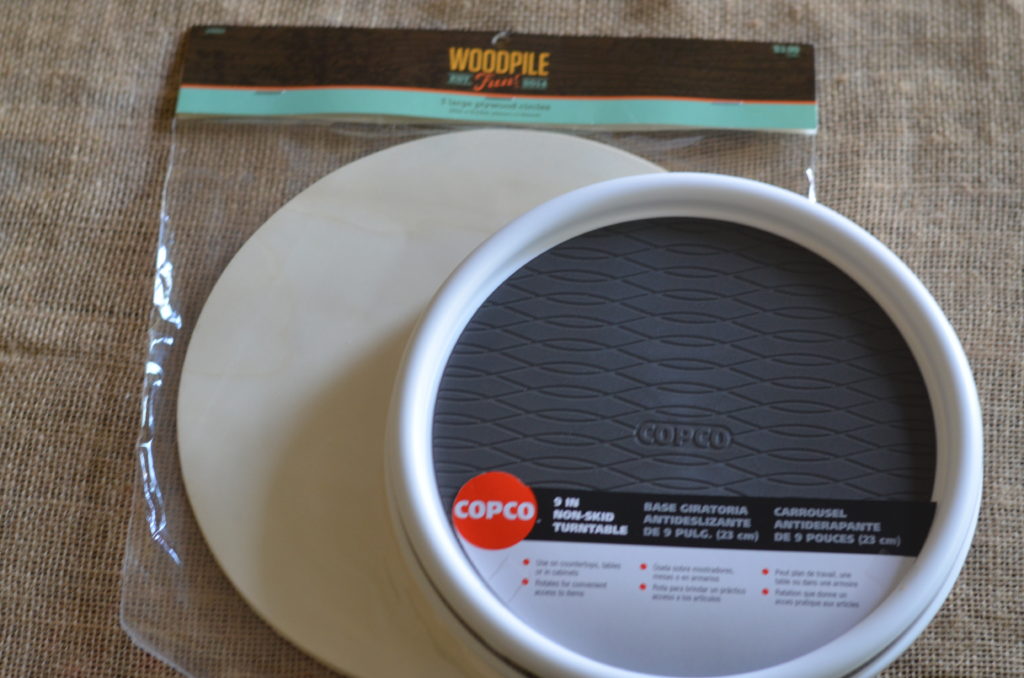
  • turntable & wood top
  • 4 soup cans (or similar; I used 26oz soup cans)
  • ribbon (optional)
  • magnets
  • scissors
  • school supplies
  • printer
  • card stock
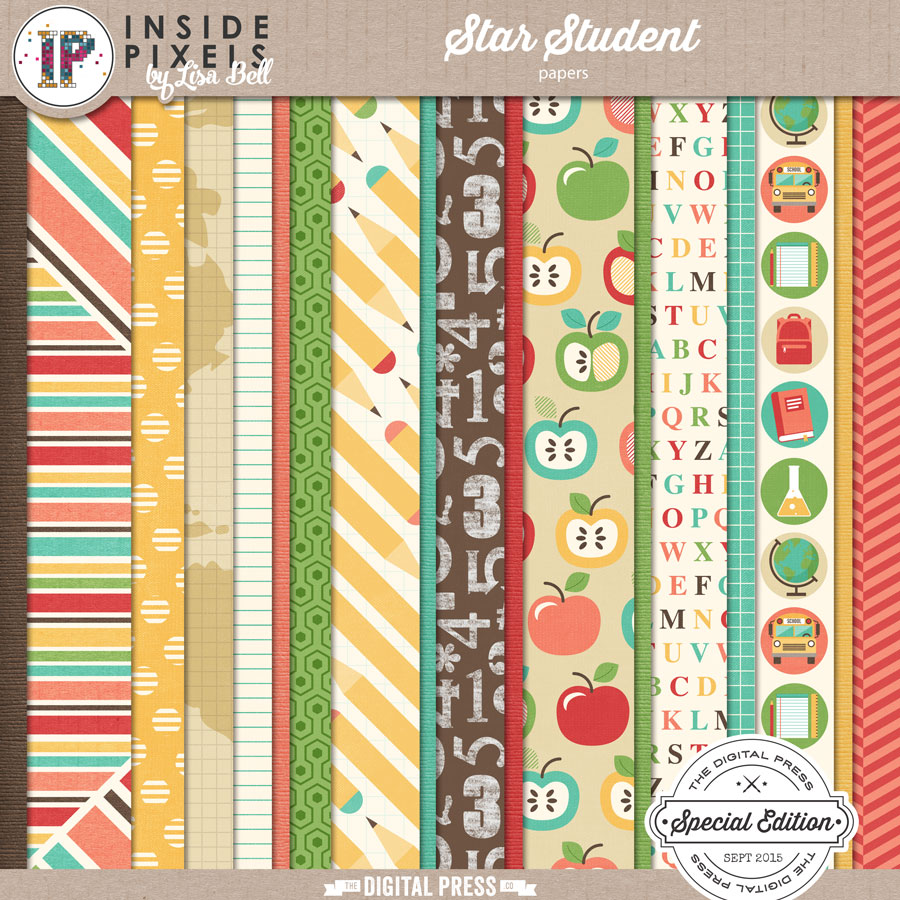
  • digital papers (I used the following school-themed papers —  Star Student papers by Inside Pixels by Lisa Bell)…


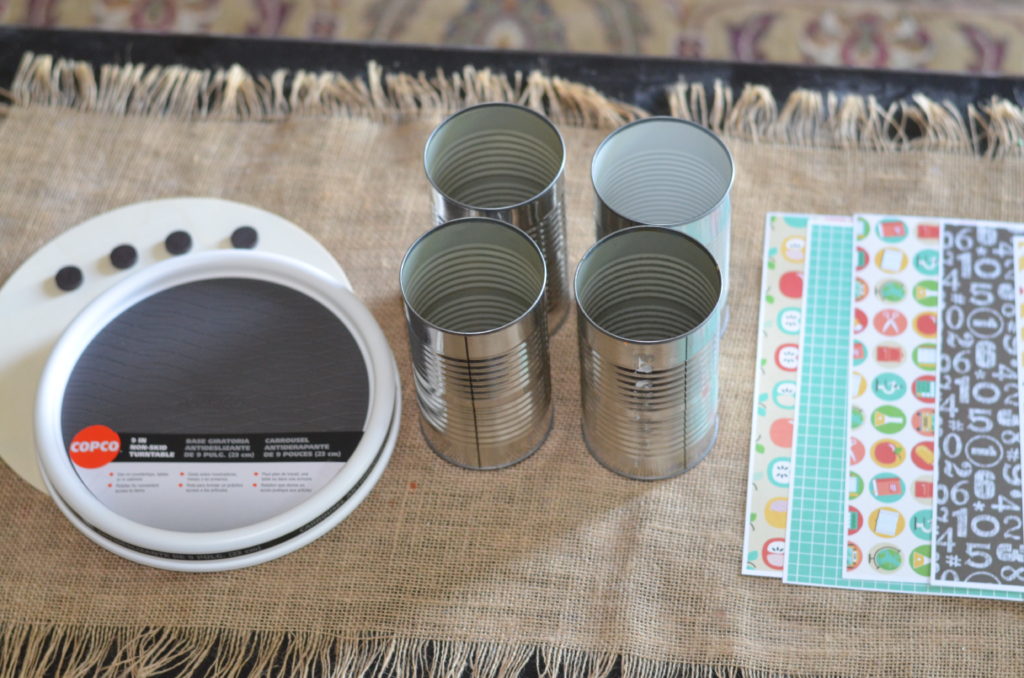
Here’s a look at my supplies for this project. I chose to use 4 – 26oz soup containers; you could choose smaller cans and use one or two more, or you could even choose 3 larger cans… it’s up to you!)…


I purchased my 9″ turntable from Amazon. You can also find them at most kitchen supply stores. I wanted my platform to be a bit larger than the turntable, itself, so I added a 10″ round wooden top to my turntable.


Once the platform was secured to the turntable, I glued magnets on the top in the places where my cans would be placed.

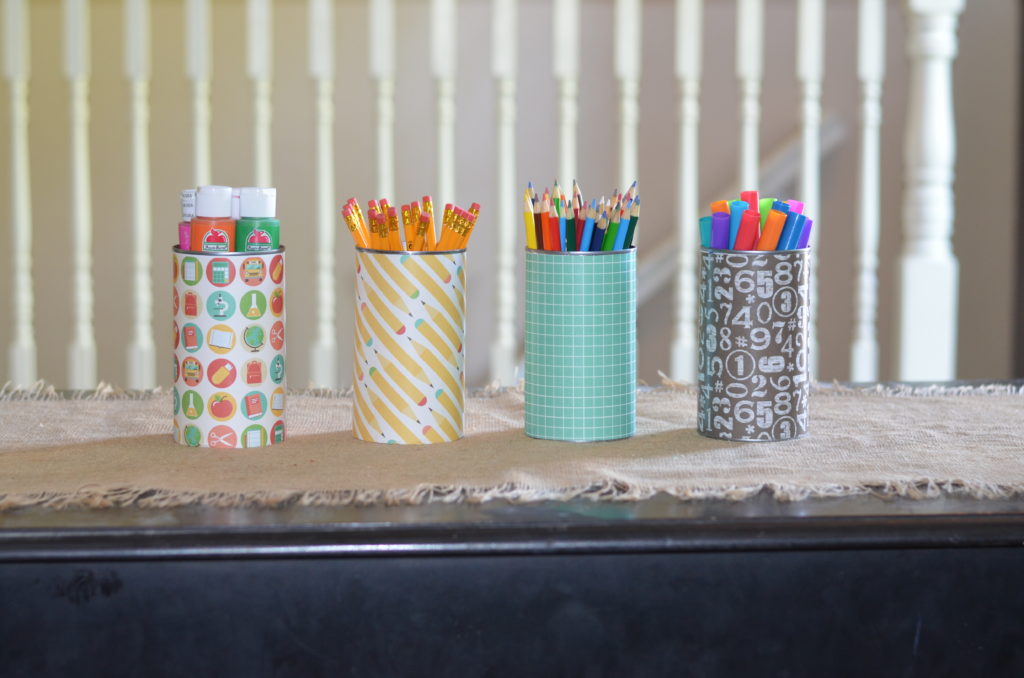
Next, I printed some of the fun Star Student papers onto my card stock, and then trimmed them to fit my cans.

*TIP* When attaching the papers to your cans, you can hot glue the seams… or even just use glue dots to adhere the papers straight to the cans. You can even add a ribbon around the top of the cans, if you wish, as decoration (I didn’t).


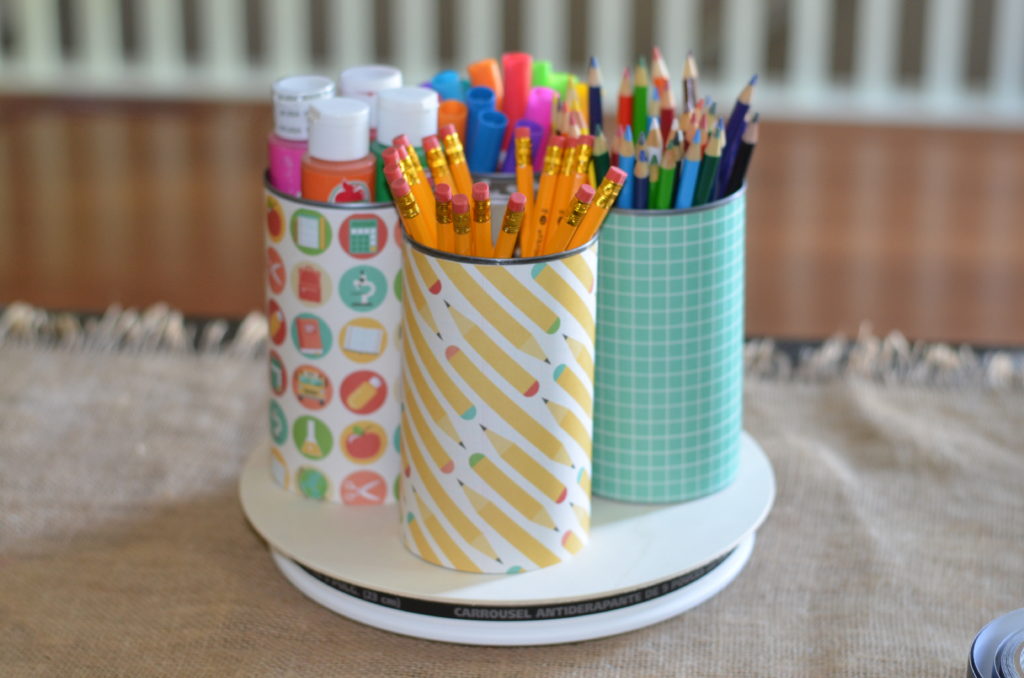
Once the paper was attached to my cans, I placed the cans on the top of the magnets to hold them in place — to keep them from tipping over when rotating the turntable.

After that, we’re finally ready to fill the cans with our school supplies…


You can fill this with supplies for a teacher gift, use for a homeschool organization, college desk, craft area or anything else you can imagine!

If you have a central location where supplies are kept neat and tidy, it will be much more simple to finish your homework efficiently. Let me know if you give this a try… I’d love to see your results!


Terresa

About the Author  Terresa is a mother to 5 beautiful children. She loves capturing memories with her digital camera and creating a visual family memory book to be enjoyed and treasured. She enjoys designing and creating personalized items for her home and children. Other interests are crafting and gardening, and you will often find her enjoying the outdoors and soaking in the beauty of nature.

Hybrid How-To | Make Your Own Washi Tape

Washi tape has been a trend in scrapbooking for quite a while now, and I’ll admit to having quite a stash. I have about 3 favorites that I tend to use on every project, however… so I decided to make my own shorter versions using digital papers. I’m here today to teach you how to do the same!

STEP 1 — First, gather your supplies:

  • Tissue paper
  • Double-sided tape
  • Scissors
  • Digital papers (I used papers from Family Time by Meg Designs, and also from Count On Me by Anita Designs)…

STEP 2 — Next, in Photoshop you will open up a page as big as your printer will print. Pull a few of your favorite papers into Photoshop, and make strips down the page, as shown here…

*TIP* make the strips a little wider than the width of your tape, in order to leave some room in case you don’t lay the tape exactly straight in STEP 5

You may need to resize the papers, making them smaller and overlapping them, in order to create the right size pattern for the thin strip. If you look at the blue damask paper, above, you will see that the pattern really needed to be smaller to get the damask effect on the thin tape strip… so I shrunk the paper down, duplicated it, and overlapped it to get the repeating pattern correct.

Here’s a look at my final document in Photoshop, before I printed…

STEP 3 — Your next step will be to cut the tissue paper to the size of the paper that will go through your printer, and secure it to the end that feeds into your printer with double sided tape (I use thinner tape for this). This is because the tissue paper won’t usually feed through your printer on its own, without getting all jammed up (it’s just not thick enough). Adhering it to a thicker piece of plain copy paper ensures that it will make it through the printer without jamming up.

*TIP* I also iron my tissue paper slightly on a low setting (no steam), to ensure that it’s really flat — but this isn’t mandatory.

STEP 4 — Now you will print as many copies as you like, depending on how long you want your tape rolls to be.

STEP 5 — Attach your double-sided tape to the back of the printed tissue paper strips, joining the papers if you printed more than one sheet of the same pattern…

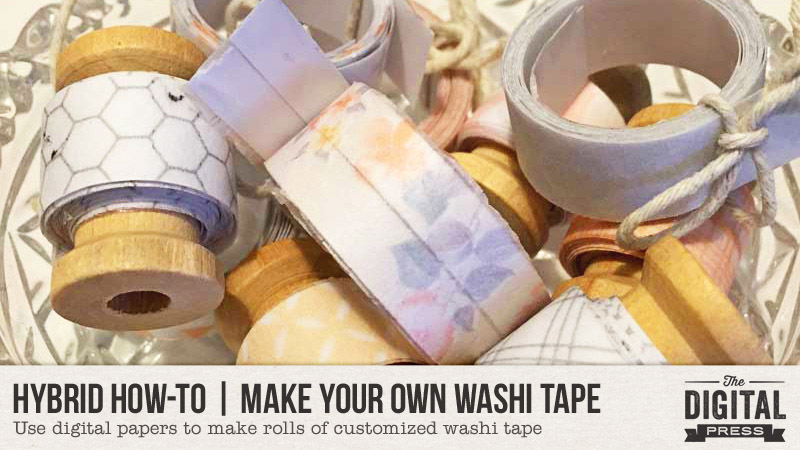
STEP 6 — After that, you will trim each of your new tape strips, cutting off the excess tissue that is wider than the double-sided tape. After that, you just need to roll up the strips…

STEP 7 — Have fun playing with your new tape! You can use your “limited edition” washi tape strips on everything from scrapbooking layouts… to hybrid cards… to planner pages… or anything else you can think of!  🙂


amandajane About the Author  Amanda found digital scrapbooking in 2006, as a paper scrapper who was frustrated with the limitations of paper scrapping products. She now loves to combine paper and digital products and techniques for her pages and projects. She is the wife of a Naval Officer and has two teenage children. She lives in Australia, and has also lived in the U.S and Malaysia and loves that she has had the opportunity to travel the world with her family.