Category: Hybrid Crafting

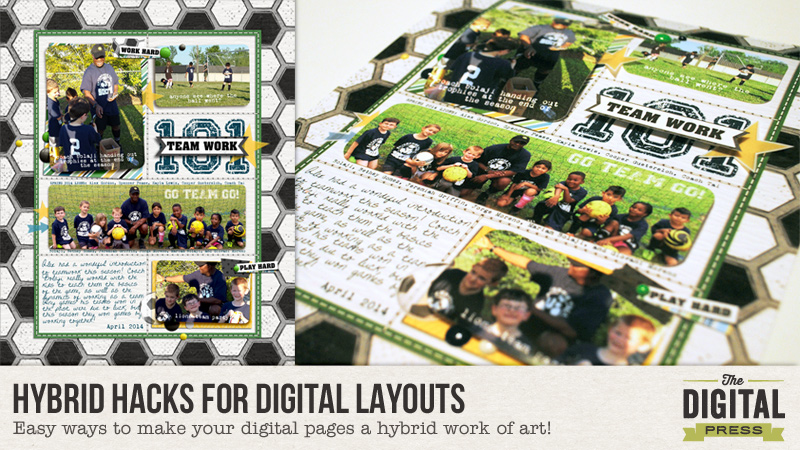
Hybrid Saturday | Easy Hybrid Hacks For Digital Layouts

Hello and happy Saturday! Arielle here, getting all “hybrid~y” today, as I show some techniques for turning digital layouts into hybrid. Sometimes I think certain layouts are far too awesome to be stuck in an album – they should be featured on my walls or given as gifts. But I like to jazz them up a little before I stick them in a frame!

Today I will show you two hybrid layouts based on this all digital layout, and show you some of my fail-proof tips for adding just the perfect amount of pop!
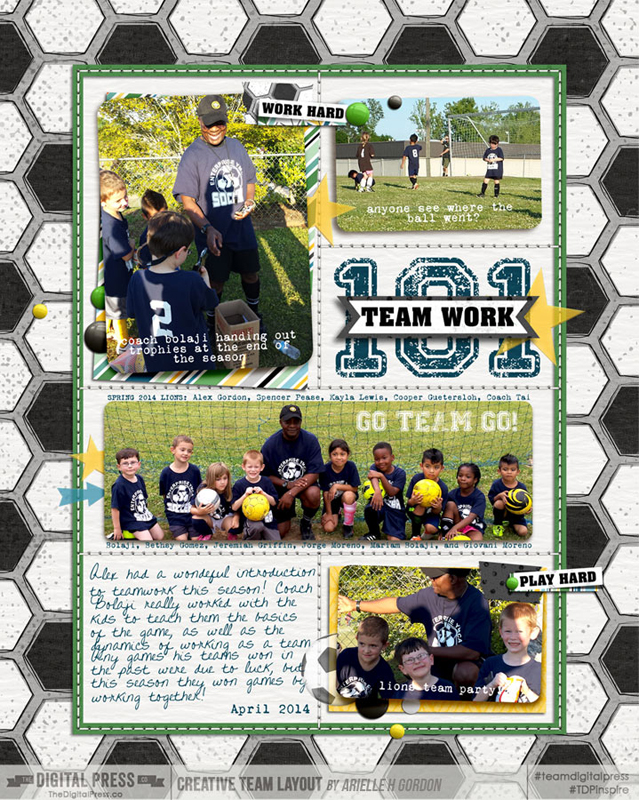
It’s great if you already have a layout you’d like to use, but if not, you can certainly start from scratch! Alex loved this layout so much, that I decided to “hybrid~ize” it for his room. I used the kit Game On by Inside Pixels by Lisa BellWhat a great soccer kit for boys! (She needs to do one for gals, doesn’t she? wink, wink!)

When you know what you’re using, gather your crafty supplies! I used:

  • Thin cardstock
  • Tissue , vellum, and other assorted papers
  • Adhesives (I used a Xyron machine, ATG gun & dimensionals)
  • Scissors and paper trimmer
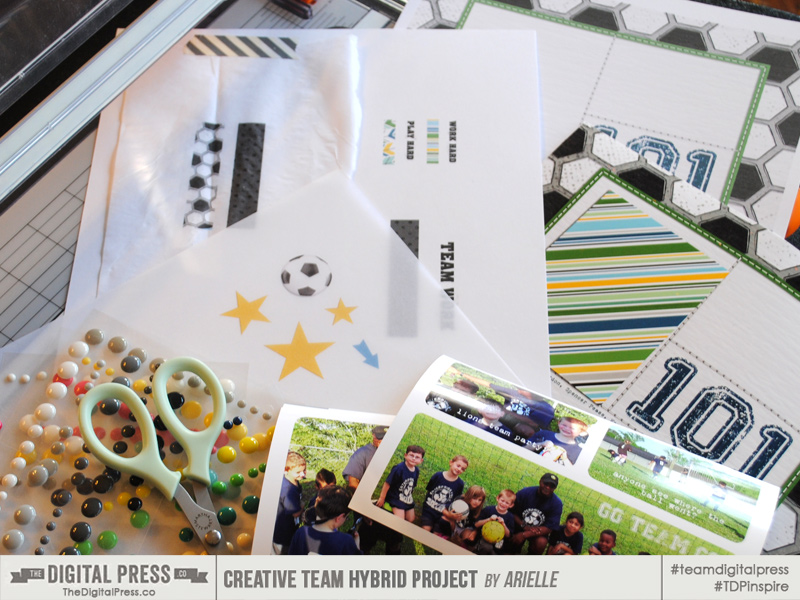
  • Other embellishments such as enamel dots or buttons.
  • photos
  • layout base

When I do a hybrid layout, I always start with creating the digital layout. That one’s for the albums. Then I decide what the base of my layout will be. Either printed on 8.5×11″ at home or on photo paper. I did one of each for this layout.

The pros for paper are:

  • You can write, stamp, paint without destroying it
  • You can print it at home
  • Much cheaper

The pros for photo are:

  • Colors are more vivid
  • Is nice and glossy
  • Lasts longer, perhaps?

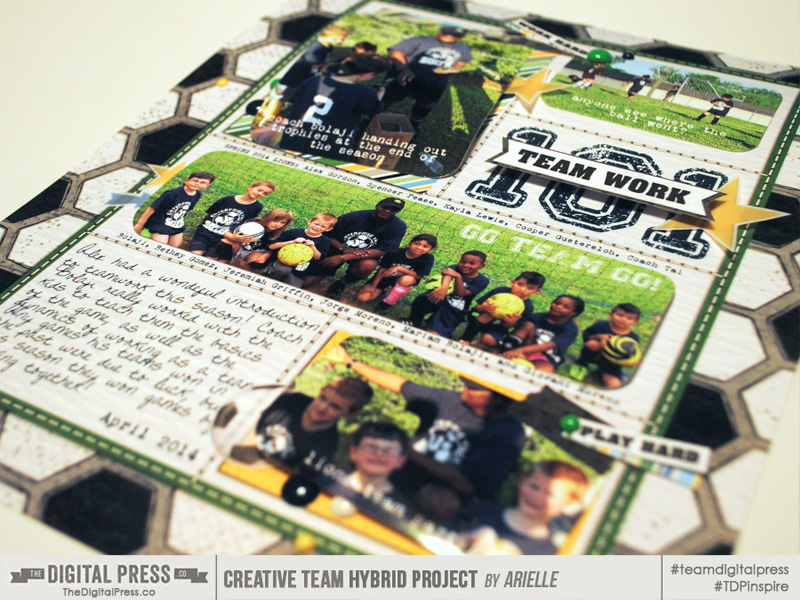
First up is the paper based layout. I decide before I print, what layers/elements I will leave, and what I will print separately and add on. For this, all the elements, photos and the two paper layers under the photos were removed (the text remained, along with the stitching and the frame and background soccer paper) from the digital layout before printing. Then everything was printed and adhered back on.
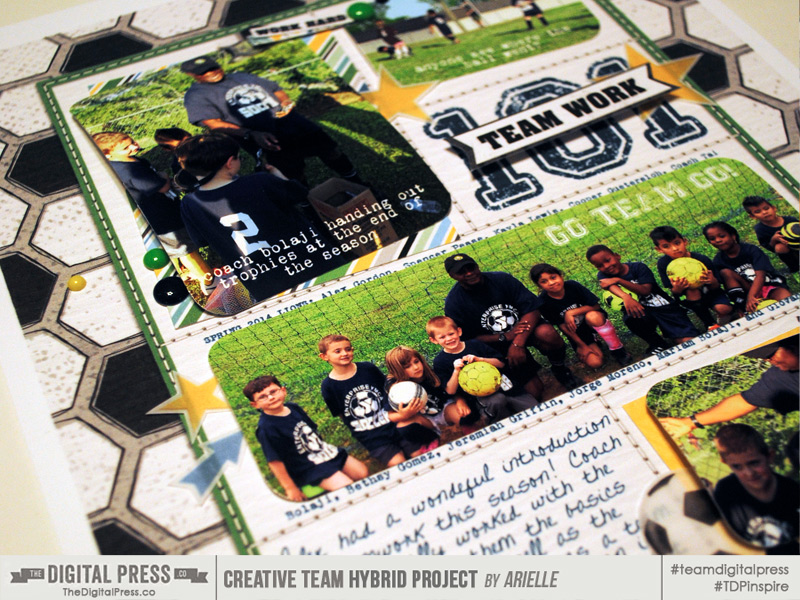
This one is an 8×10″ photo base. I printed this exactly the same, except I also left the two papers that are layered under the photos. (That way, I know those paper will match up, and save me a little time.) They are all shadowed, too. You can’t tell too much of a difference between the two layouts in these photos, but I love the look of the one with the photo base, the shadows really pop!
Now onto the fun stuff!

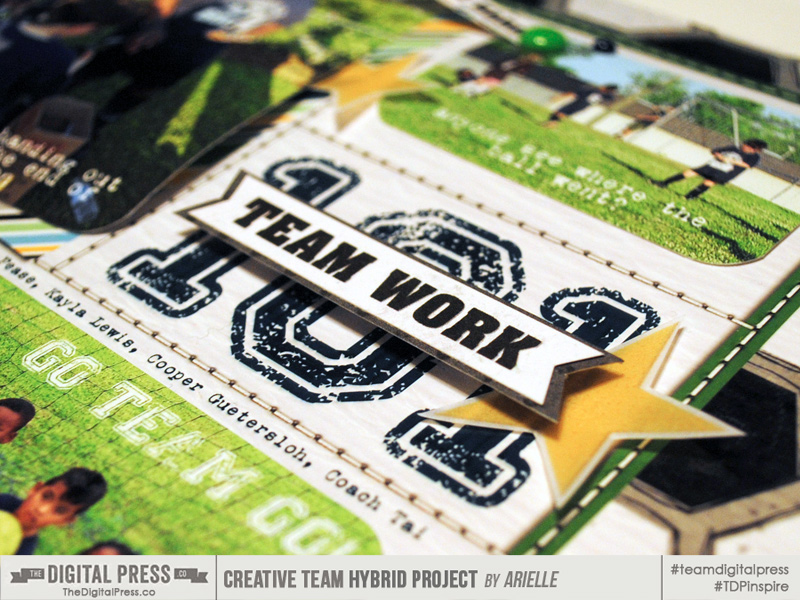
HACK ONE – POP IT UP!

Adding a little bit of height is a great way to jazz up your hybrid layout… it will also create more interesting shadows! You can use a thin dimensional – say 1/8″ or so, and it will still fit in a regular frame. But not much more than two additional layers above the base, otherwise it will get a squashed look. (Of course, if you’re putting it in a shadow box – go crazy with the layers!)
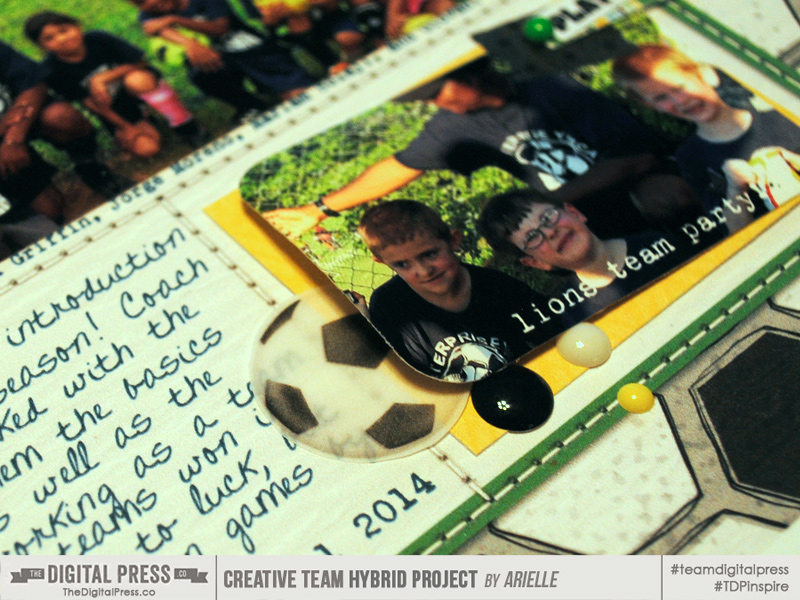
HACK TWO – PRINT ON VELLUM

You can easily add some pop by printing on vellum! It’s so fun to get a little peek of what’s underneath the vellum, it’s a classy little hack! (After I printed the vellum stars, arrow and soccer ball, I put a few of them in my palm, one at a time with the image up, and pressed into the middle of it a little, so it wouldn’t sit so flat on my layout.)
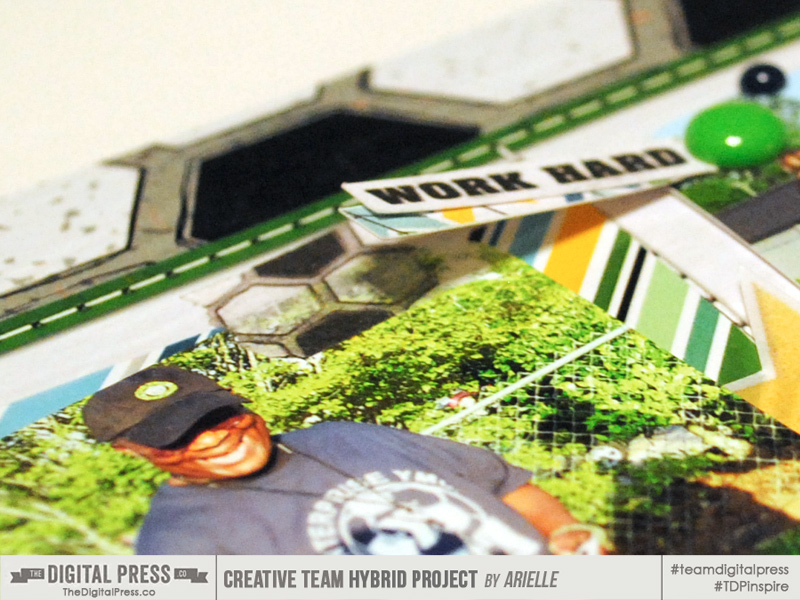
HACK THREE: PRINT ON TISSUE PAPER

Last month on the blog, I showed off a technique for making your own washi. (In this post) I made a couple small pieces and you can see one below. Yes, it may sound like a lot of trouble, but they do match the kit – LOL! I loved this soccer ball pattern! But you could always use any washi you have!
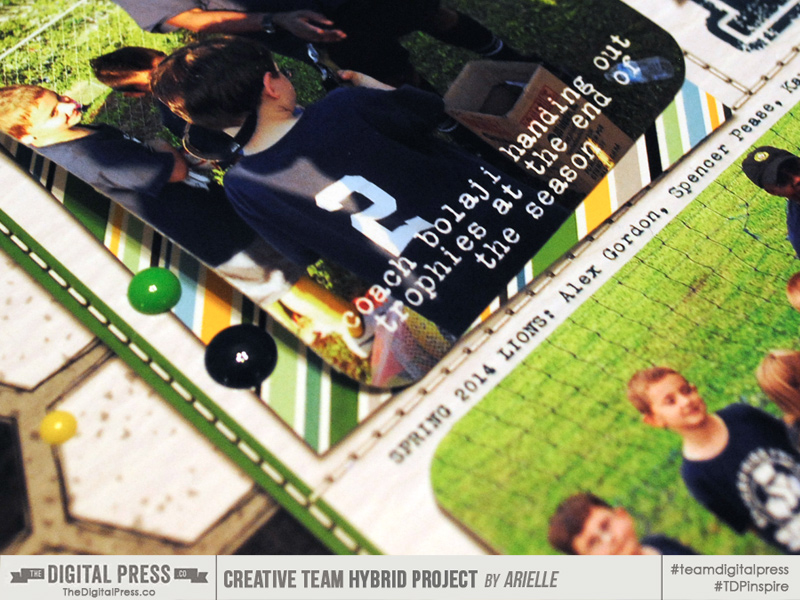
HACK FOUR: ADD EASY LITTLE DETAILS

I love adding buttons or enamel dots to hybrid layouts. Or paint, glitter and stiching. It’s fun to shake up the whole paper thing with some actual hardware ~ to me it creates a Trompe-l’œil effect. It’s interesting to see people trying to figure out what is real and what’s printed. (Text or overlays on photos is another great detail, too.)
Now it’s your turn! Want to try your hand at a hybrid layout? It can be as easy and as simple as you want it to be! Please come join us in The Digital Press’s forum for a fun challenge related to this tutorial! You can create an amazing item for yourself or someone you love AND earn points doing it! Points can later be cashed-in for discount coupons to the shop at the end of the month if you participate in the challenge system at The Digital Press!


Arielle H GordonAbout the author  Arielle H Gordon is a wife and mom of two crazy kiddos, ages 6 & 7. She moved around (a lot!) before returning to settle down in her hometown of Enterprise, Alabama, to marry her sweetheart and start her family. She is an avid crafter — digital, hybrid and otherwise! She LOVES Jesus, family time, camping, gardening, reading cozy mysteries, hot tea, popcorn, and anything on the BBC! This time of year, you’ll find her gardening, gearing up for summer and reading like it’s going out of style (while sipping sweet tea!)…

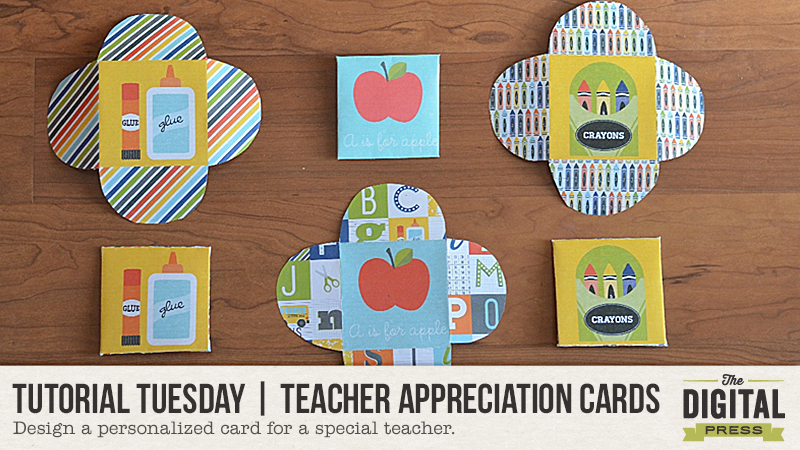
Tutorial Tuesday | Teacher Appreciation Cards

Tutorial Tuesday | Teacher Appreciation Cards

Did you know May 2-6 is National Teacher Appreciation Week? This is always a great time to show appreciation and love to a favorite teacher.  Today, I am here to show you two simple ways to dress up a card for a teacher gift.  For this project, choose a favorite school themed scrapbook kit.

Supplies Needed:

  • ribbon
  • glue dots
  • scissors
  • template
  • pencils
  • printer
  • digital elements (School-themed, etc.)
  • card stock

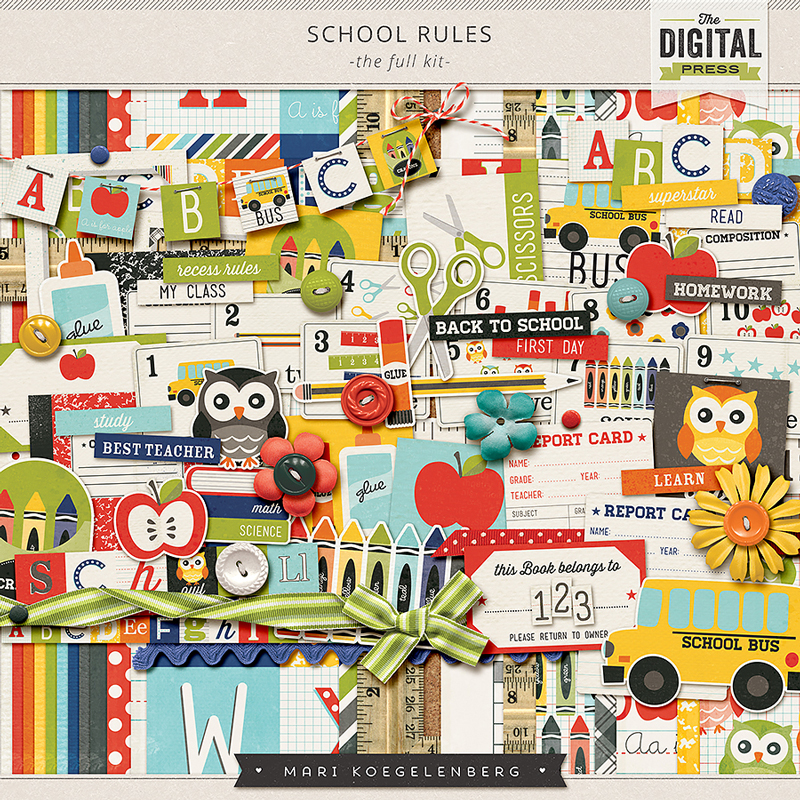
I chose School Rules by Mari Koegelenberg for the petal gift cards.

Tutorial Tuesday | Teacher Appreciation Cards

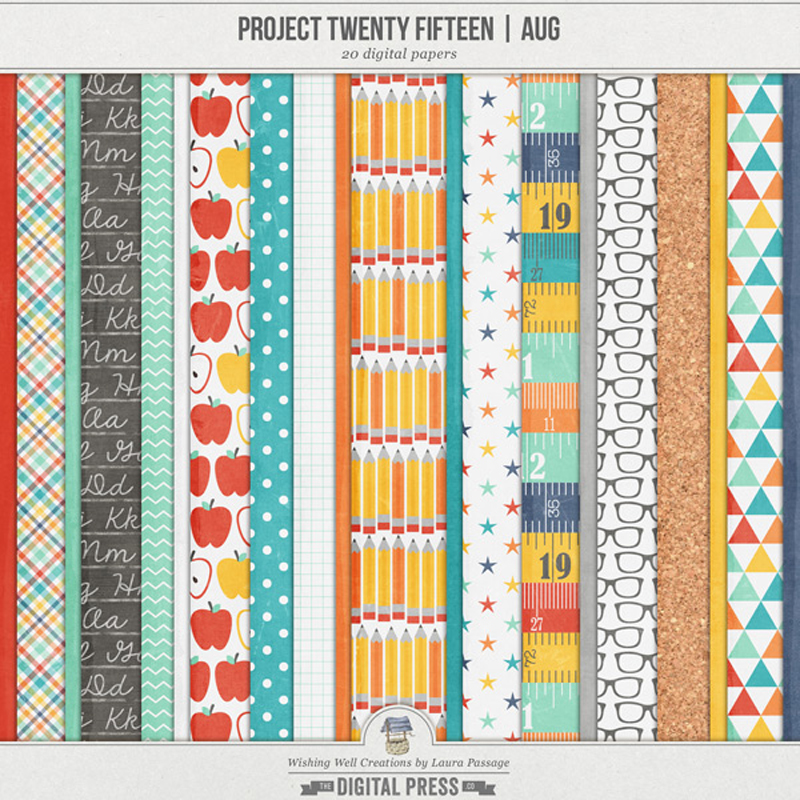
For the pencil card I chose  Project 2015 August Papers  and journal cards by Wishing Well Creations (Laura Passage).

Tutorial Tuesday | Teacher Appreciation Cards


Tutorial Tuesday | Teacher Appreciation Cards

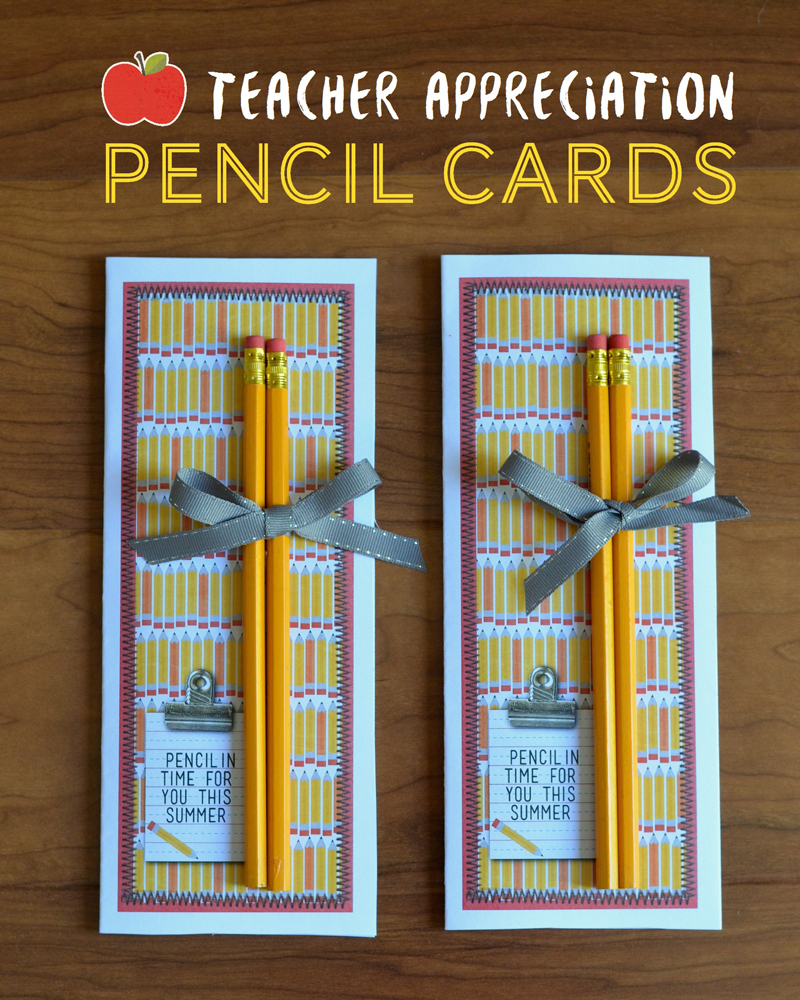
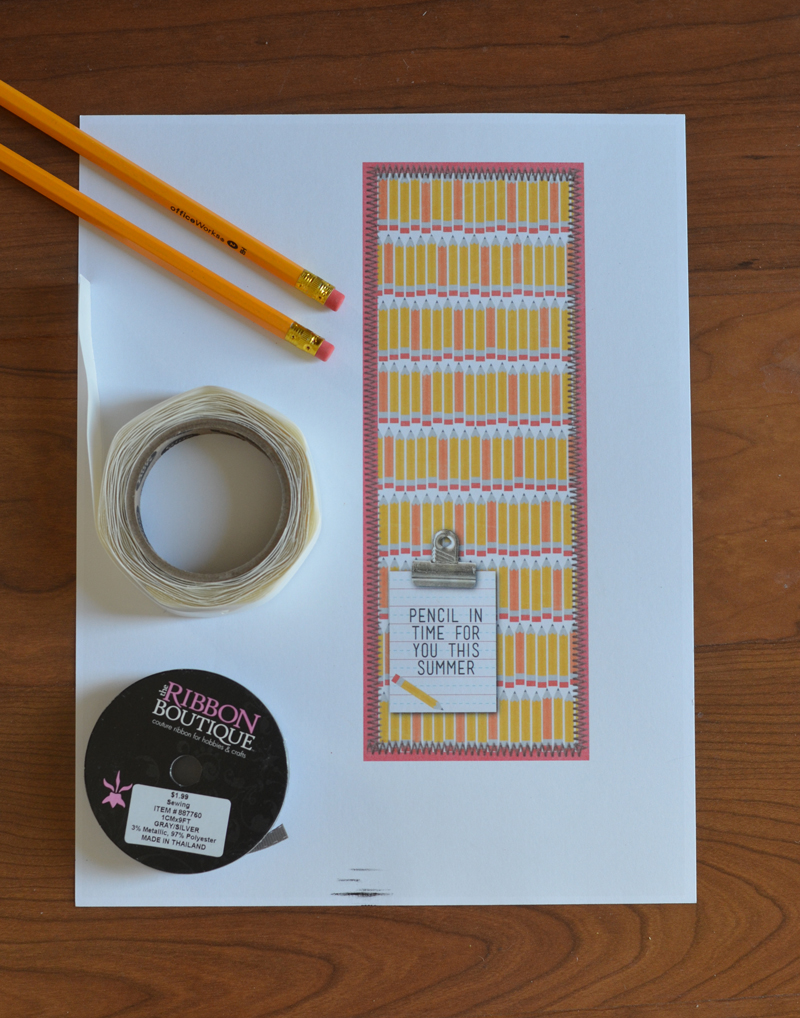
Pencil cards are a fun way to show appreciation for your child’s teacher.  They are so simple to create! To make one, gather your supplies.

I created my card from Laura Passage’s 2015 August collection papers and journal cards.  Don’t you just love that little clip element from LJS Design?

To create one I sized my graphic design 8″ x 3″ using the darling pencil papers.  I incorporated some digital stitching elements from my stash around the image and sized down the journal card to 2.5″ x 2″ and then added my text.  I placed all of the elements on the right side of an 8 1/2″ x 11″ paper as  you can see below.   Once you have the graphic designed, you can print on card stock, then fold and trim.  Or just cut around the graphic as a single page. I added some glue dots to the back of the pencils and tied them with a bow. You can write a fun little note on the back or folded on the inside of the card!

Tutorial Tuesday | Teacher Appreciation Cards

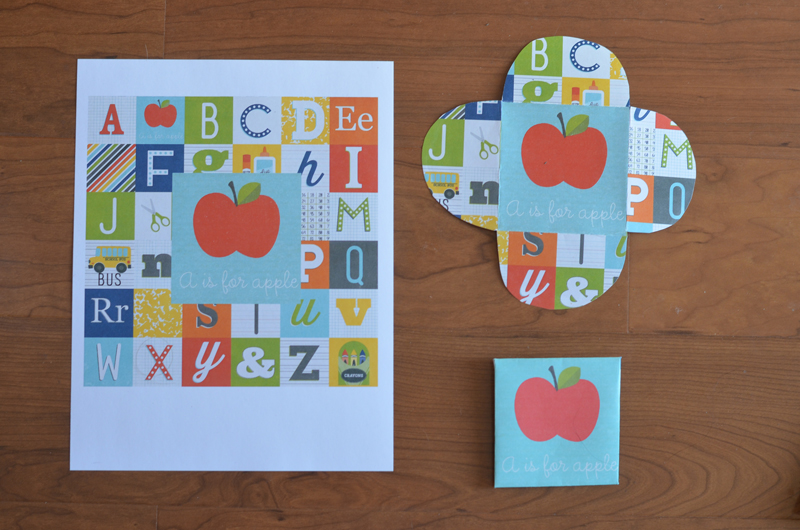
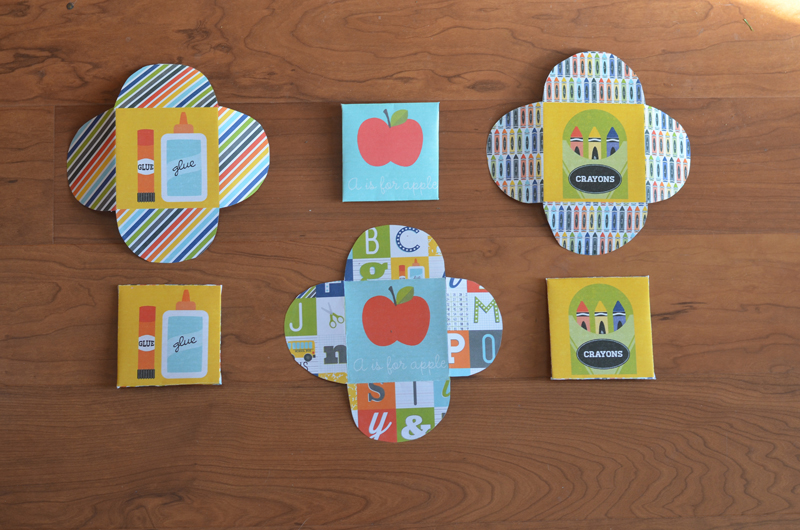
For the second card I created a petal gift card.  I chose elements and paper from the School Rules kit by Mari Koegelenberg.

Tutorial Tuesday | Teacher Appreciation Cards

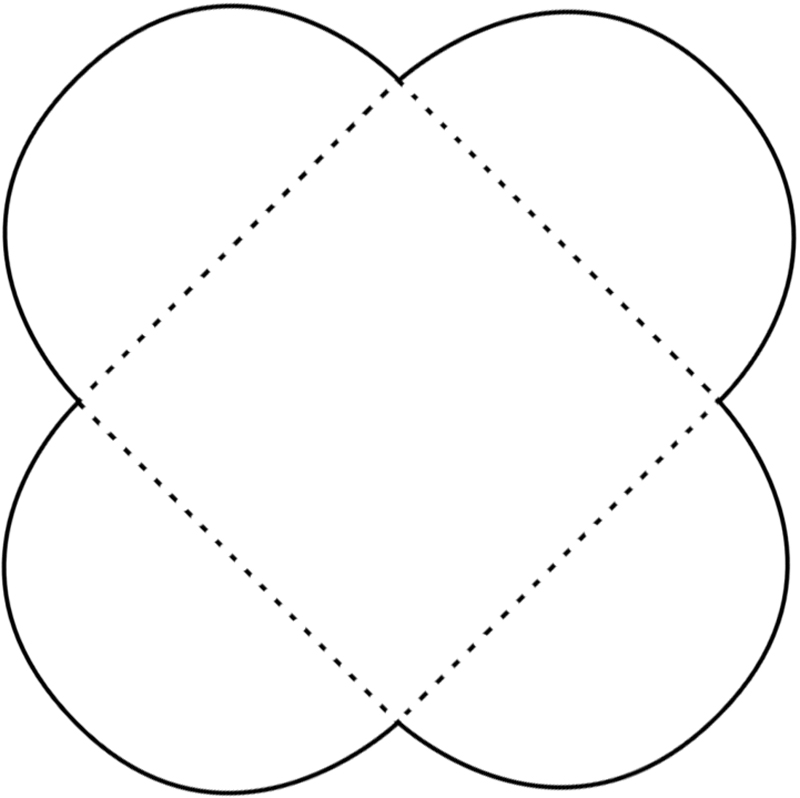
Click on the image to save and print.

Tutorial Tuesday | Teacher Appreciation Cards


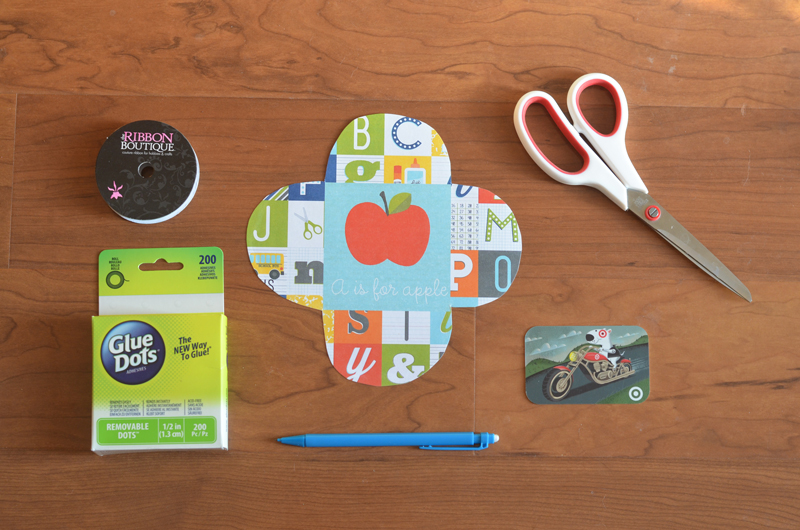
First, you want to choose your paper and card element to print.  I centered my 3.75″ x 3.75″  apple graphic on the center of my page. With my chosen printed paper behind the image, I used an 8 1/2″ x 11″ size for the paper.  Next, I printed out the image.  Now I am ready to trace the template and score the edges.  Once you have folded your card, you can add a fun gift card inside.  I closed my card with a glue dot – you could also punch two holes across from each other on the petals and close with twine.

Tutorial Tuesday | Teacher Appreciation Cards


Tutorial Tuesday | Teacher Appreciation Cards

I hope you have fun creating a pencil card or petal gift card for your child’s favorite teacher. Happy Teacher Appreciation week!


Terresa

About the Author  Terresa is a mother to 5 beautiful children. She loves capturing memories with her digital camera and creating a visual family memory book to be enjoyed and treasured. She enjoys designing and creating personalized items for her home and children. Other interests are crafting and gardening, and you will often find her enjoying the outdoors and soaking in the beauty of nature.

How to Create Cards Using Pocket Cards

How to Create Cards Using Pocket Cards

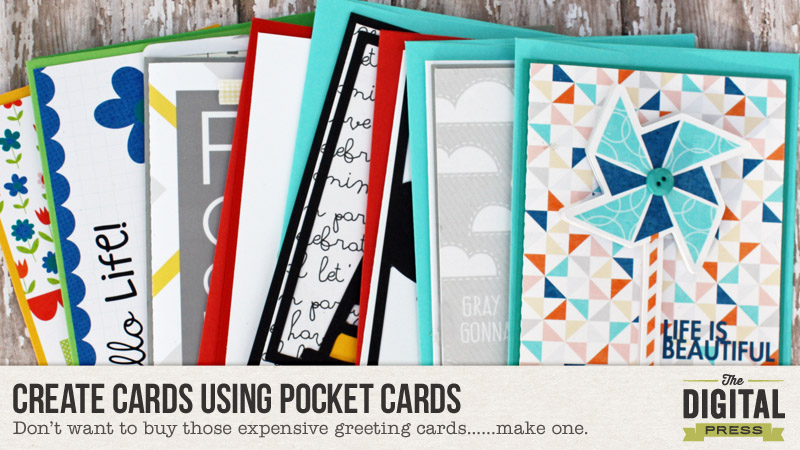
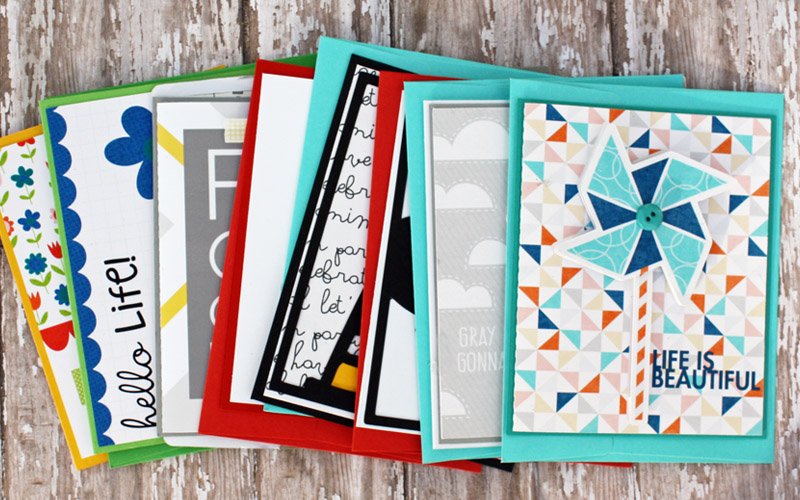
Are you ever in that situation where you are running out the door and suddenly remember you forgot to get a birthday card for the party your child is going to?  Or a “Thank You” card for a gift someone gave you, maybe even just a “cheering up” card?   I don’t know about you, but cards are VERY expensive and I hate buying them.  So, I want to show you how to make greeting cards to build up your stash so that you will always have one on hand.  No more excuses for not giving someone a card.

If you are crafter you probably already have most of the items on hand.  Even if you are mostly a scrapper, you still probably have the basics.  Most digital kits these days will either come with a few pocket cards or have a pocket card edition to the kit.  I love pocket cards because they are so versatile.  Since I’m an hybrid gal, I immediately see them as cards.  I love giving people homemade cards even if it’s just to brighten their day.

Here is what you will need:

  • Digital pocket cards
  • White cardstock
  • Colored cardstock
  • double sided tape
  • glue pen
  • embellishments
  • Pop dots

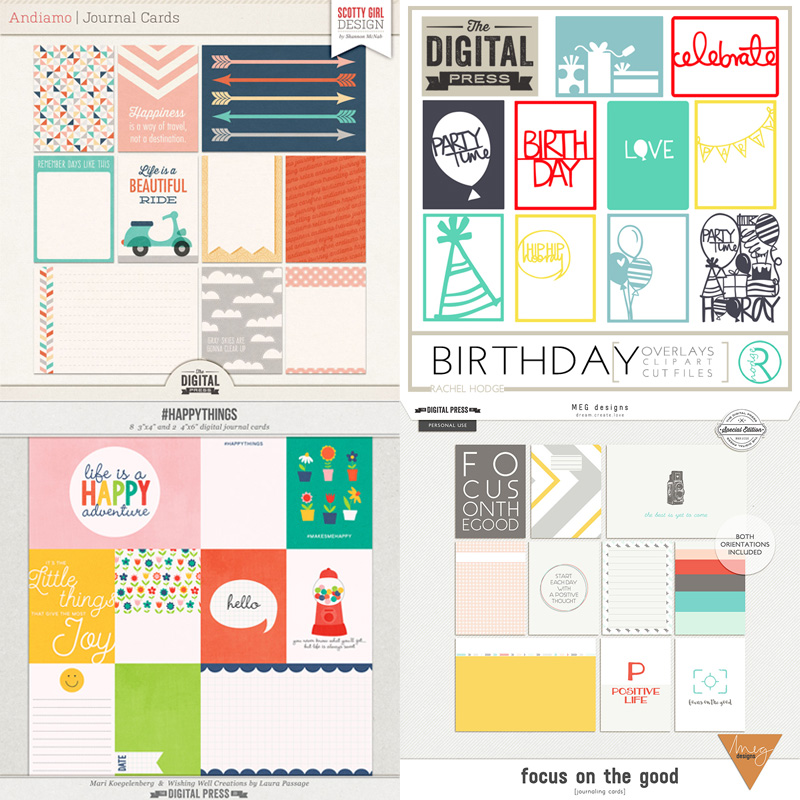
Here are the pocket cards I used for this project, but any of them will work.  You probably already own several.  There is definitely one out there for EVERY occasion.

How to Create Cards Using Pocket Cards

Andiamo Journal Cards, Birthday Card Set, #Happythings Journal Cards,
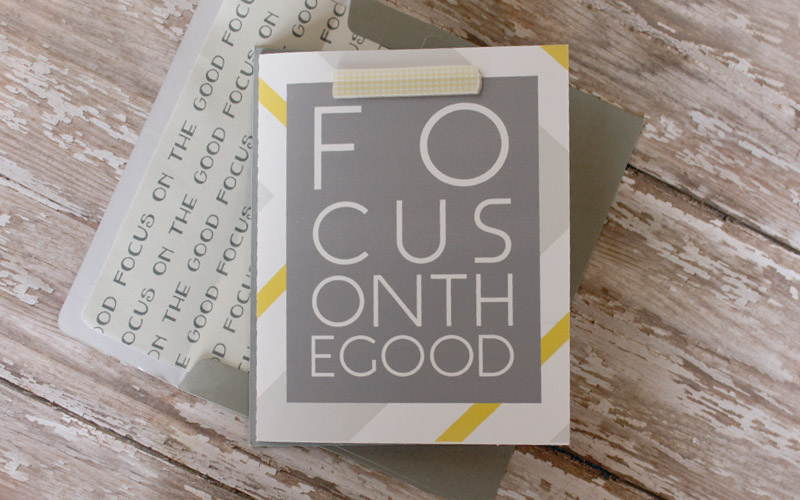
Focus On the Good Journaling Cards

You can use any photo editing program you have to create these cards.  You do not have to have a cutting machine, however, I did use mine because I’m a little obsessed with it.   You can be as simple or as fancy as you would like.  I did a little of both.

How to Create Cards Using Pocket Cards

Some pocket cards are fine without adding anything to them.  Some just need a saying or an additional element. I like dimension so I usually cut out extra elements.

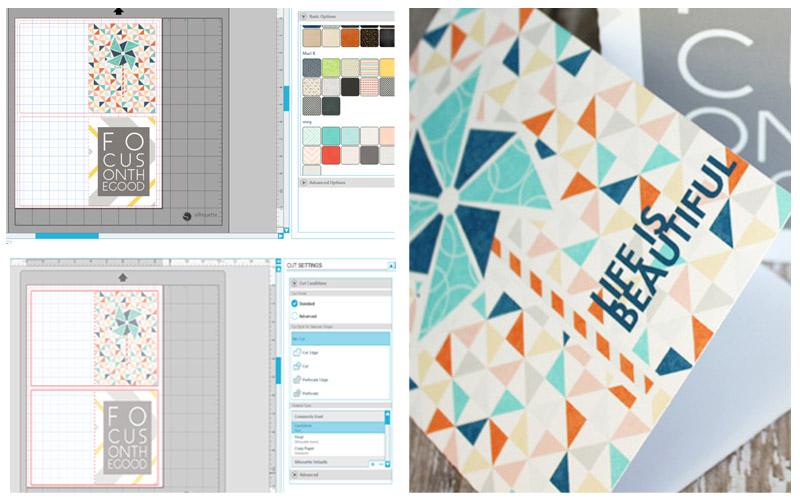
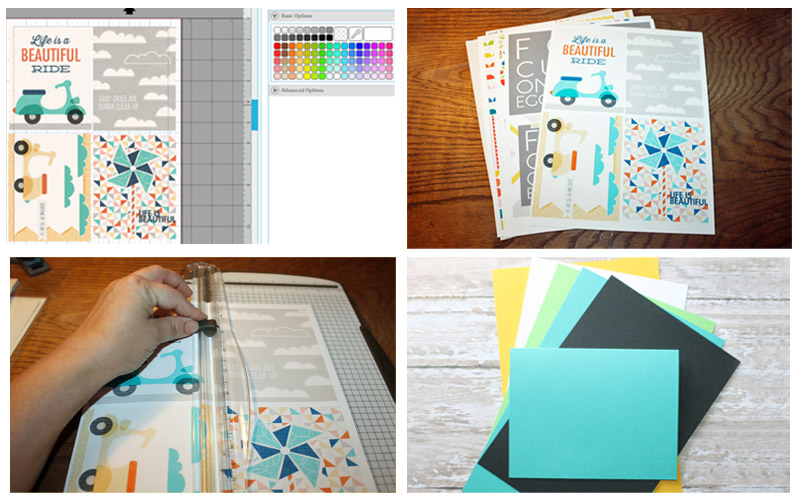
For some of my cards, I started out by drawing out a 5″ x 8″ triangle.  At the 4″ mark, I drew a dashed line – this is if you are going to use a cutting machine, if not, just use the ruler in your editing program and open and place your pocket card at the 4″ mark.   Two cards fit to a page.  That is it… print the card, cut with your paper trimmer and fold.  It really is that simple.   If you want it to be a little fancier, add some cute elements from the coordinating kit……go one step farther and add a piece of coordinating cardstock to the back.

How to Create Cards Using Pocket Cards

For that extra little touch, I added several elements to a page to do quite a few cards.   I did a print and cut with my Silhouette, but a pair of scissors will work just as good….I’m just not that great with them.   I also love to add matching inserts for the envelopes.


How to Create Cards Using Pocket Cards

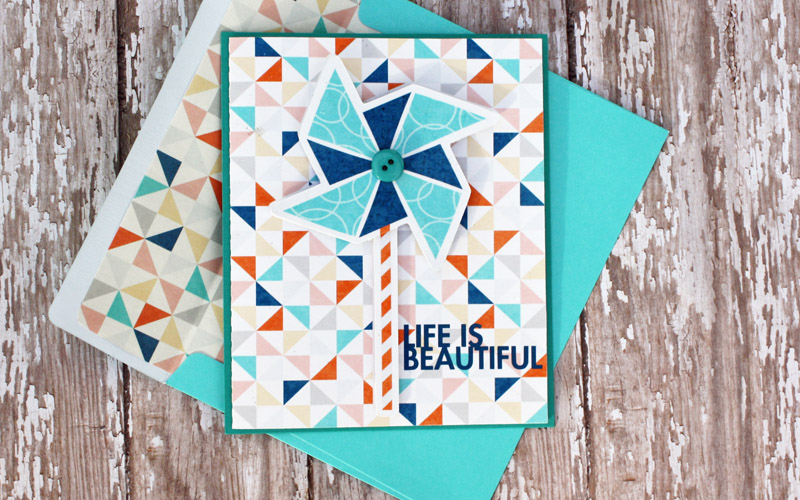
I took the same card above and added the extra elements I cut out with pop dots.  I also added a piece of cardstock to the back and a button to finish off. Cute, isn’t it?!

How to Create Cards Using Pocket Cards

Another way is to just cut several pocket cards for the fronts of the cards.  You can get four pocket cards to a page.  After cutting with your paper trimmer add to a piece folded cardstock with double sided tape or your adhesive of choice.  Again, keep it simple or fancy it up a little.

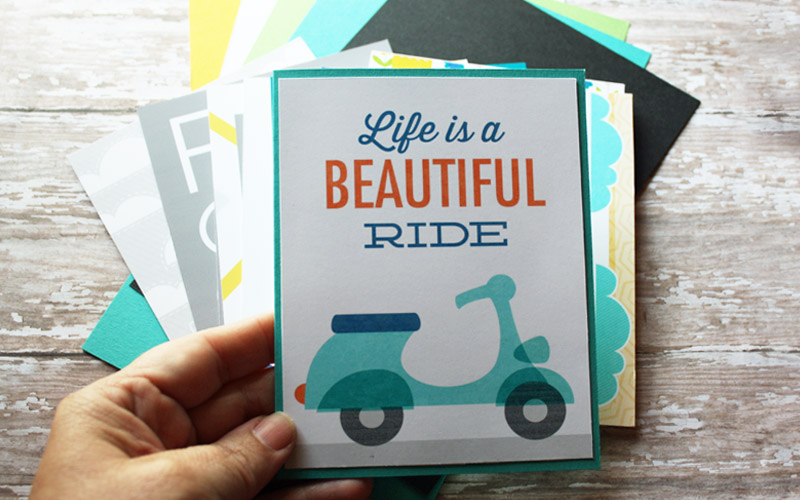
Here is a front added to a piece of folded cardstock.  It is fine just the way it is, but of course I had to take up a notch.

How to Create Cards Using Pocket Cards

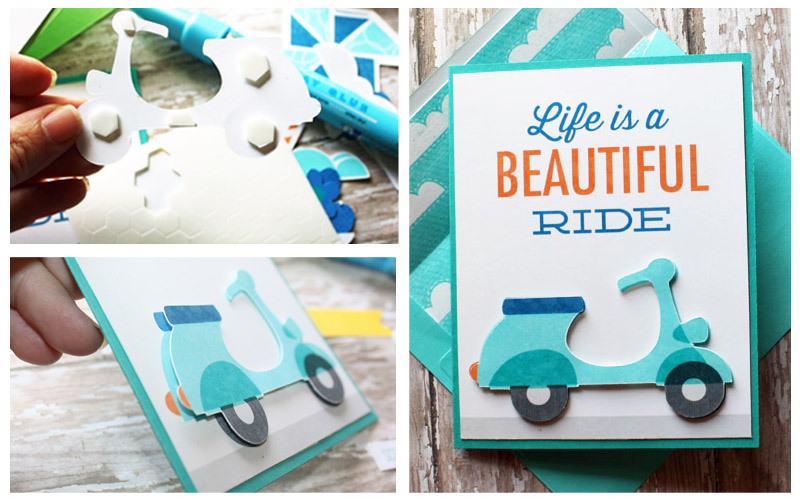
Here is the same card with another scooter cut out and added to the top with pop dots.  It adds an extra little touch.

How to Create Cards Using Pocket CardsHere I cut the card and added a piece of grey cardstock, cut out the washi tape and added with pop dots.
How to Create Cards Using Pocket Cards

This card is done a little different than the others.  You do have to have a cutting machine to get the same affect.  I’m sure that you could do something similar in your photo editing program.

CREATE CARDS USING POCKET CARDS

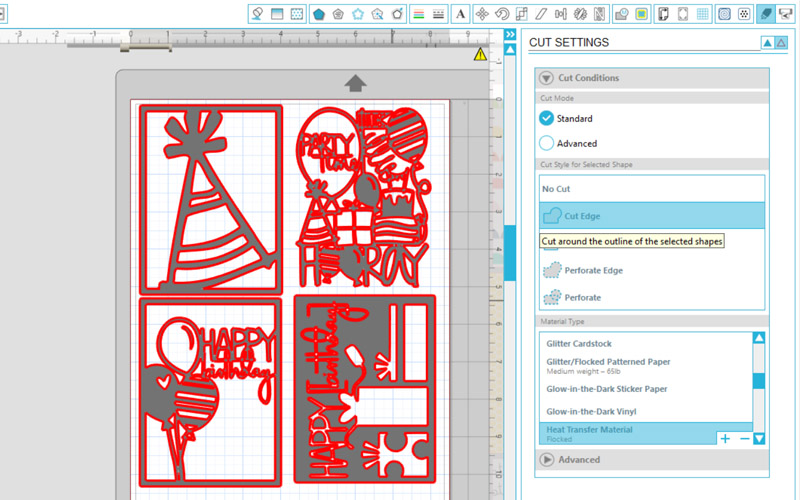
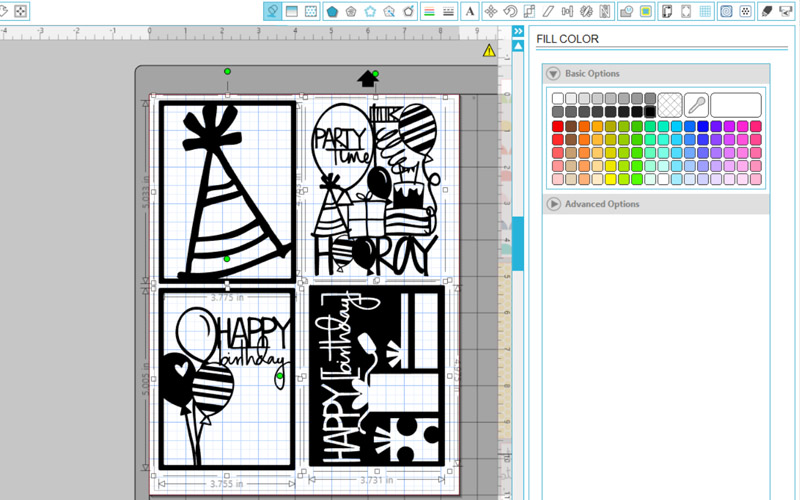
First, open the cutting files in the program that your cutting machine uses.  I have a Silhouette Cameo, the program I am using is Silhouette Studio Designer Edition.

How to Create Cards Using Pocket Cards

Next, make sure that your cutting lines are turned on and choose cardstock material type.  Now add cardstock to your mat and send through your machine.  It did take me a couple of times to get a clean cut.  I had to change my mat and slow down my cutting speed.

How to Create Cards Using Pocket Cards

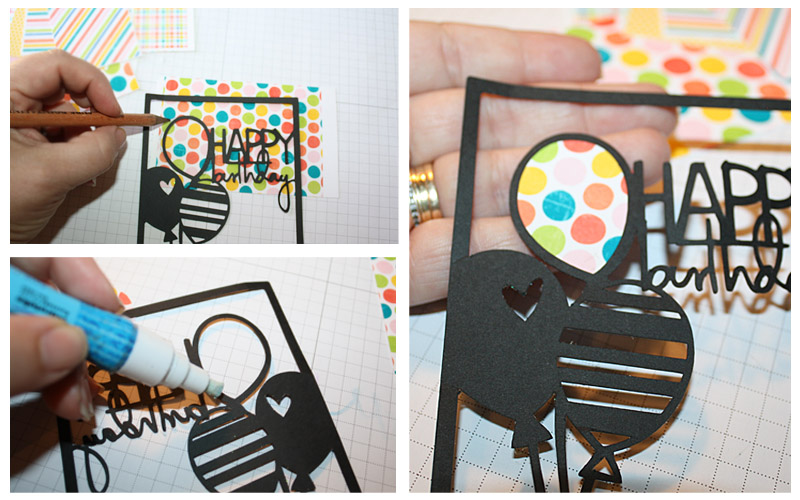
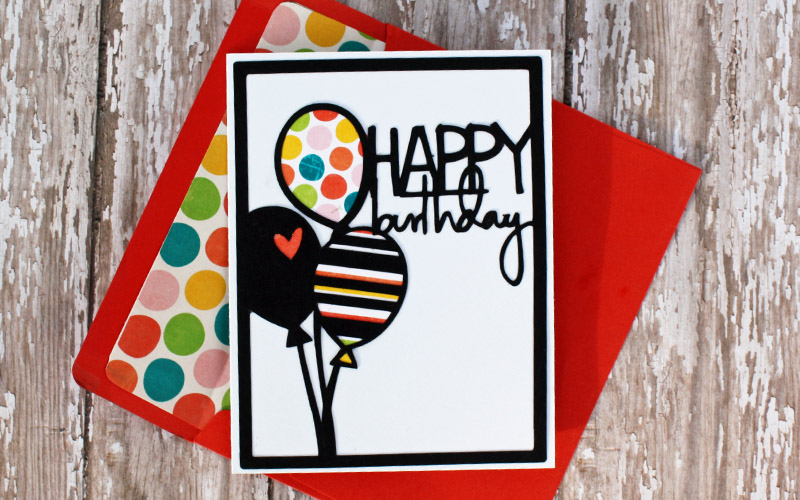
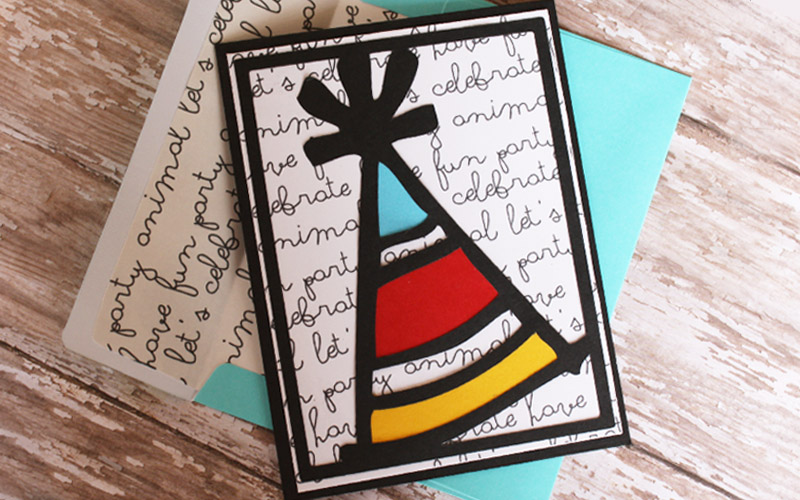
This is a good card to use up some of those scraps that you have on hand.   I just took a piece and traced the balloon with a pencil.  Cut to the inside of your trace marks and glue down with a glue pen.  Add to the top of your card base and your done.

How to Create Cards Using Pocket CardsI really like how this one turned out.  I used cardstock scraps that I had on hand.
How to Create Cards Using Pocket Cards


How to Create Cards Using Pocket Cards

I hope this tutorial has inspired you! If you’d like to give it a try, please join me in the forum and have fun creating some cards.  You can earn points toward this month’s challenges!  I can’t wait to see your creations.


TanyaAbout the Author  Tanya is a part of the hybrid team here at The Digital Press. She has been hybrid crafting for at least 12 years now, and loves creating and sharing those creations with others. Her all-time favorite tool is her Silhouette Cameo. She has been married for 26 years and has two sons: Chris, 24 and Chance, 20. She also enjoys crocheting, photography and woodworking.

Tutorial Tuesday | Hybrid Pocket Letter

pocketletters
Hi everyone! Indah here today with a tutorial for creating a trendy pocket letter that I have seen all over the internet.

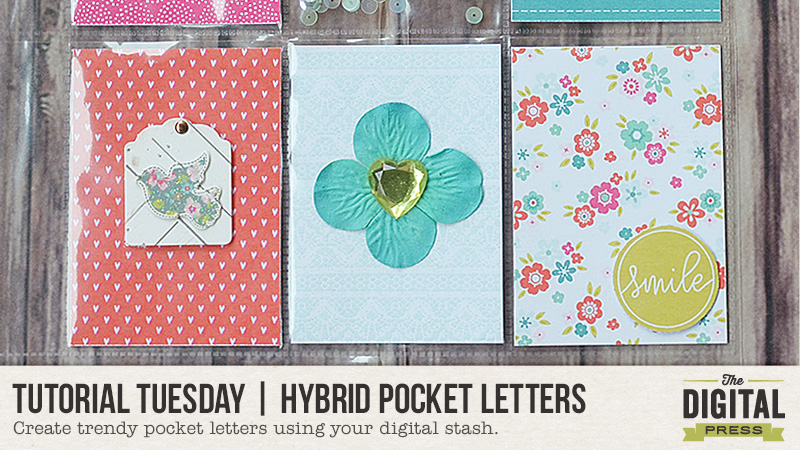
What is a pocket letter? Pocket letters are penpal letters in pocket format… using pocket scrapping supplies. Basically, you fill all of the pockets of a page protector (most commonly used for this is likely the 9-pocket size), and send it to your penpal! Too fun. 🙂

I have made one as an example using my digital scrapbooking supply stash — it’s so easy and fun! All you need, apart from your digi supplies, is a pocket sleeve. I couldn’t find a standalone pocket sleeve, so I tore one up from a pocket sleeve album. My samples shown here were all made using the digital collection As You Wish designed by Scotty Girl Design.

The first step is to print out your digital papers. This can be done with your digital imaging software by resizing or creating a document sized to fit your pockets (mine were printed/cut at 2.5″ x 3.5″ for my 9-pocket page).

Tutorial Tuesday | Hybrid Pocket Letters

Tutorial Tuesday | Hybrid Pocket Letters

You can also use your digital pocket cards — just re-size accordingly. Often, this means cutting off part of the card slightly… but it’s still doable.

Tutorial Tuesday | Hybrid Pocket Letters

Next, print out your digital embellishments and start putting together your pocket letter inserts…

Tutorial Tuesday | Hybrid Pocket Letters

I used a combination of sequins and seed beads in the center space of my pocket letter. To secure this, I first sealed it with clear tape… followed by a strip of adhesive… before putting on a strip of washi tape to cover up the other adhesive steps and also act as decoration.

Tutorial Tuesday | Hybrid Pocket Letters

Tutorial Tuesday | Hybrid Pocket Letters

Here is my completed project.

Tutorial Tuesday | Hybrid Pocket Letter

Easy right? Now it’s your turn to do one, too! Give it a try… and don’t forget to upload your creations to our gallery!


IndahAbout the Author  Indah is on the creative team here at The Digital Press.  She has been a hybrid crafter for over 8 years, and loves making cards and paper crafts. She also loves collecting stamps and stickers.

Hybrid How-To | Butterfly Wreath

Hybrid: Butterfly Wreath

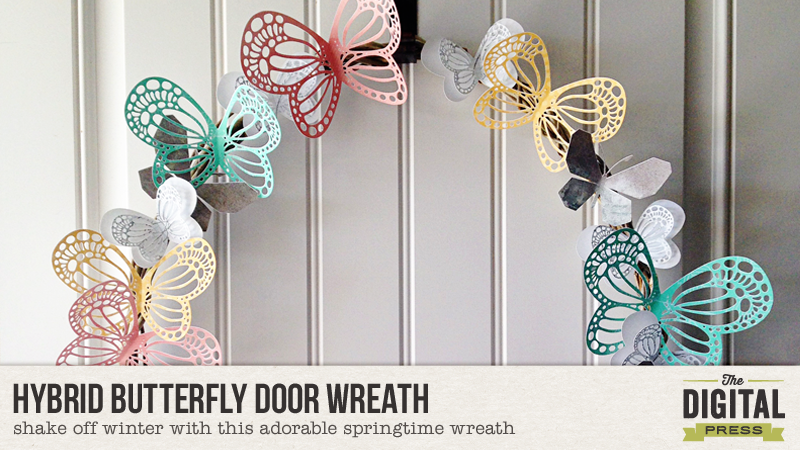
Did everyone pick up the March 2016 Collaboration kit, Fly Away? It comes with a beautiful butterfly cut file that I knew I wanted to use as soon as I saw it. I thought it would make a great wreath for my front door. It’s a super easy project, too… so let’s dive in!

Supplies Needed

  • Digital Kit of your choice (I used the new TDP collab Fly Away)
  • Cutting Machine
  • Cardstock
  • Wreath of your choice
  • Hot Glue Gun & Gluesticks

Instructions

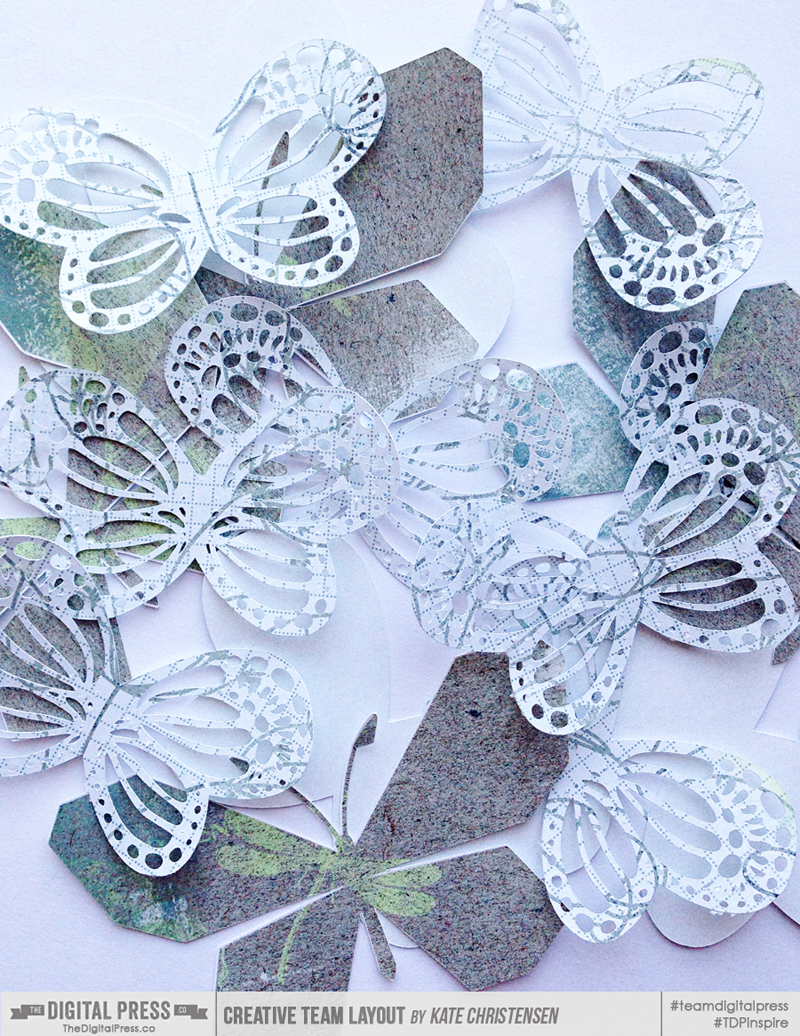
The first thing I did was cut the butterflies. I wanted them in a variety of colors and sizes. I primarily used the cut file for my butterflies… but I also pulled in a butterfly element from the main kit and clipped paper to it.

Hybrid: Butterfly Wreath


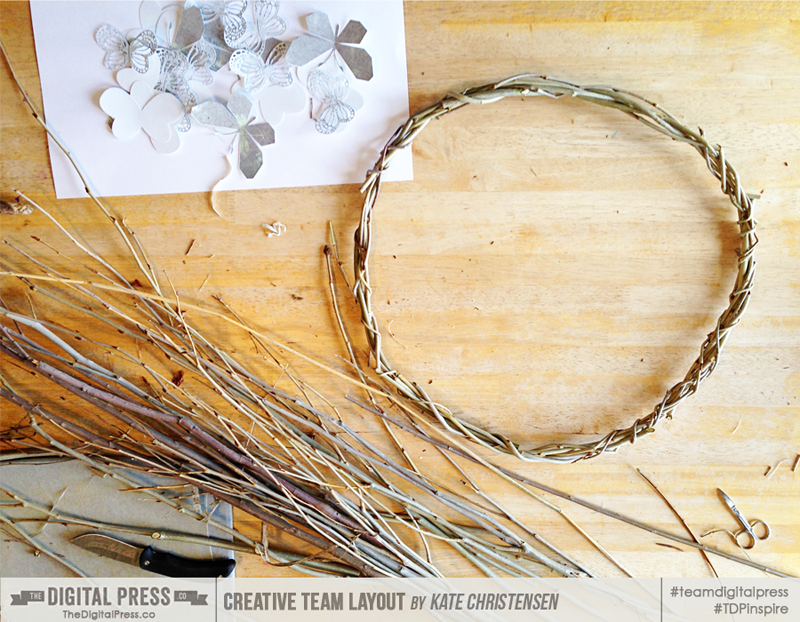
This is how I do wreaths at my house. I use young Willow or River Birch branches and twist them around each other (tucking in the ends) until I have a sturdy, circular wreath. I find that twist ties really help to secure the first layer. It’s super easy (but you can also buy ready-made wreaths at your local craft store).


Hybrid: Butterfly Wreath


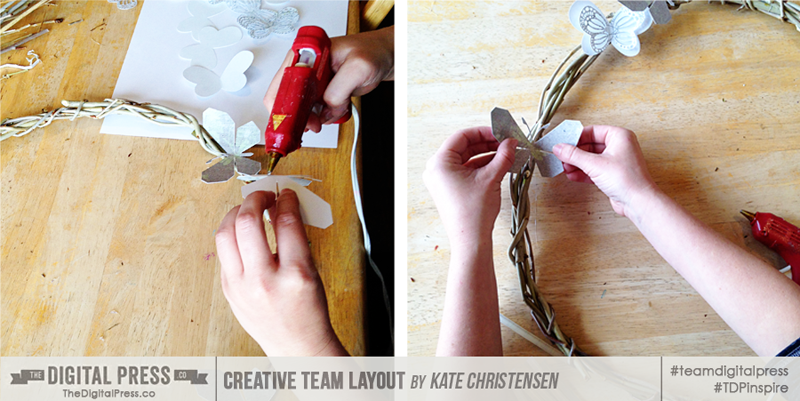
After that was done, I started attaching the butterflies with hot glue. I didn’t think too hard about placement; I basically just spread out the larger butterflies first, and then went from there.


Hybrid: Butterfly Wreath


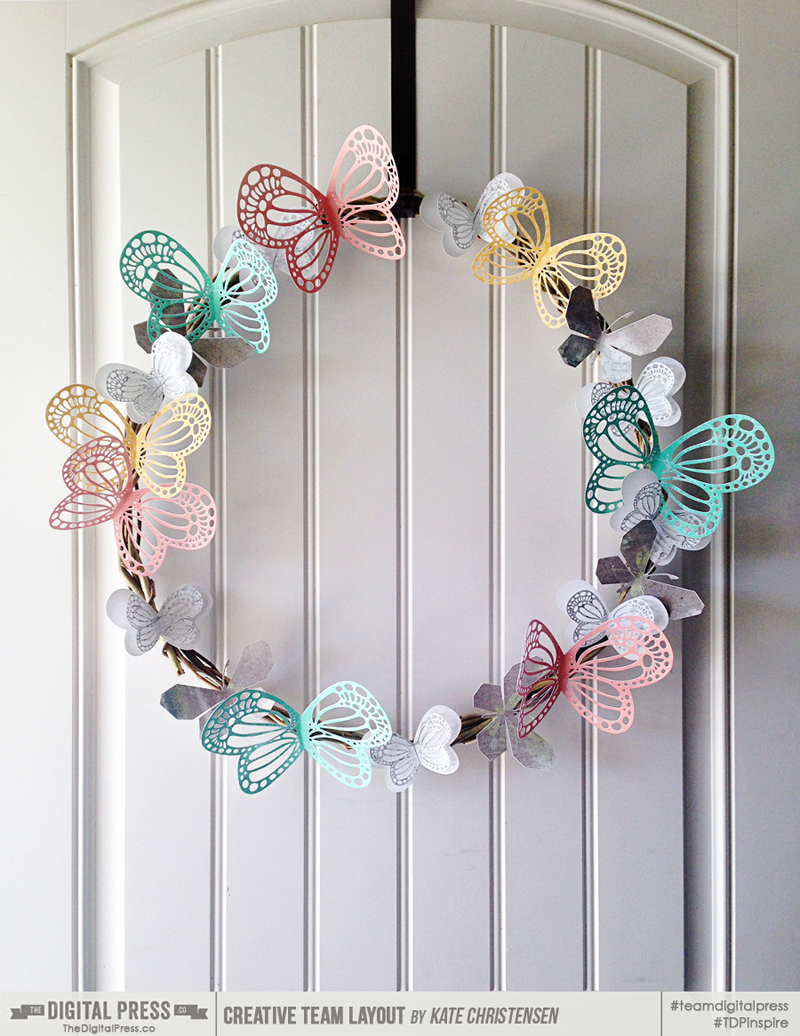
The whole project took an afternoon and I just love how it looks on my front door!


Hybrid: Butterfly Wreath

Ready to try out your own wreath?  Join us in the forum for a fun challenge to make your own Spring wreath!
(*NOTE* this post was originally published in 2016 and the challenge is no longer active)


KateAbout the Author: Kate is on the hybrid team here at The Digital Press. She lives on the Utah/Colorado border with her husband, 5 kids, 10 chickens, and a dog named Gracie. She’s a city-born girl who found she’s really a country girl at heart. She can be found outside, barefoot, and probably in her garden.

Tutorial Tuesday | Mini Easter Baskets

EASTER BASKETS: A HYBRID RECYCLE PROJECT

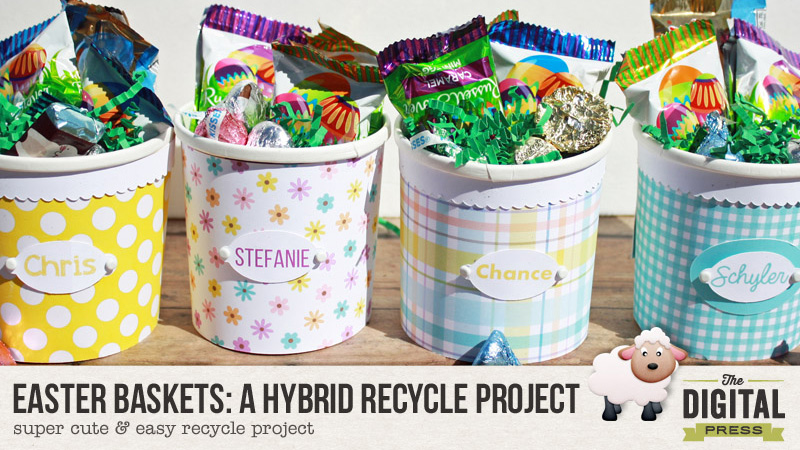
Since we just celebrated the first day of Spring, I thought it fun to start it off with bright Spring colors!   One of my favorite things to do is take recycled containers and turn them into treasures.  One of my co-workers has McDonald’s oatmeal every morning.  Every time she threw the container away, I couldn’t help to think what cute little Easter baskets they would make, so I started collecting them.  I used them to make mini Easter baskets for my kiddos.

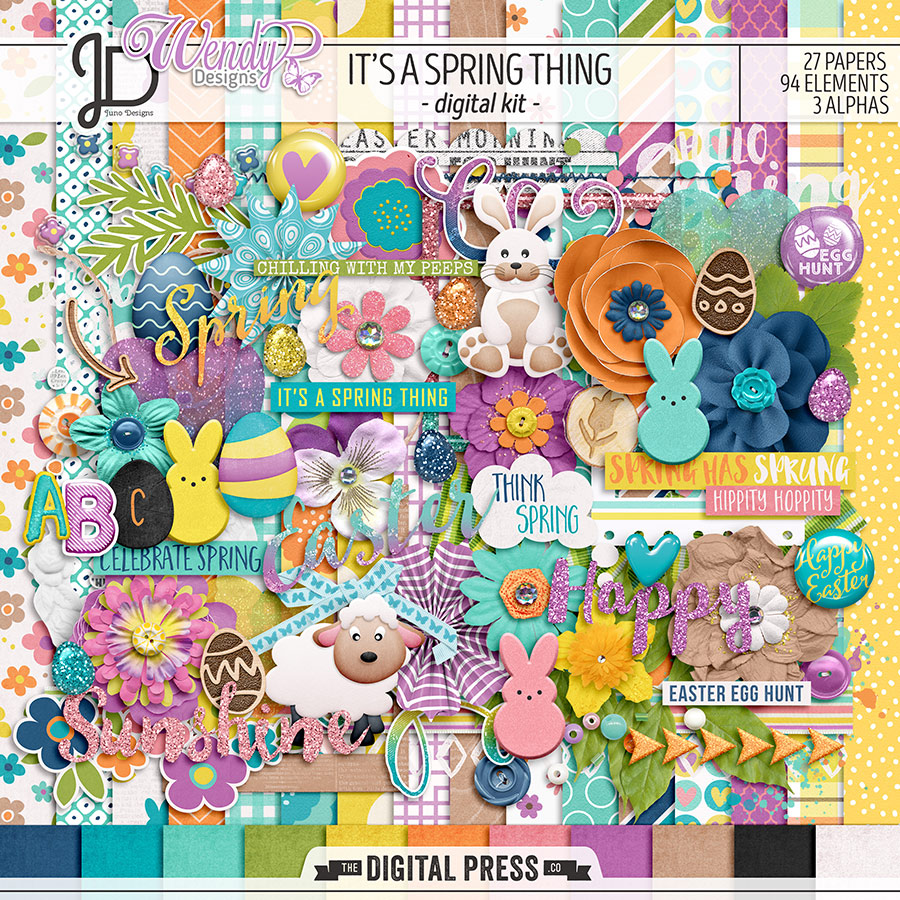
Since it’s an Easter project, I wanted to used an Easter themed kit.  When I saw this new kit, It’s a Spring Thing by Juno Designs and Wendy P Designs, I knew it would be perfect to use.

EASTER BASKETS: A HYBRID RECYCLE PROJECT

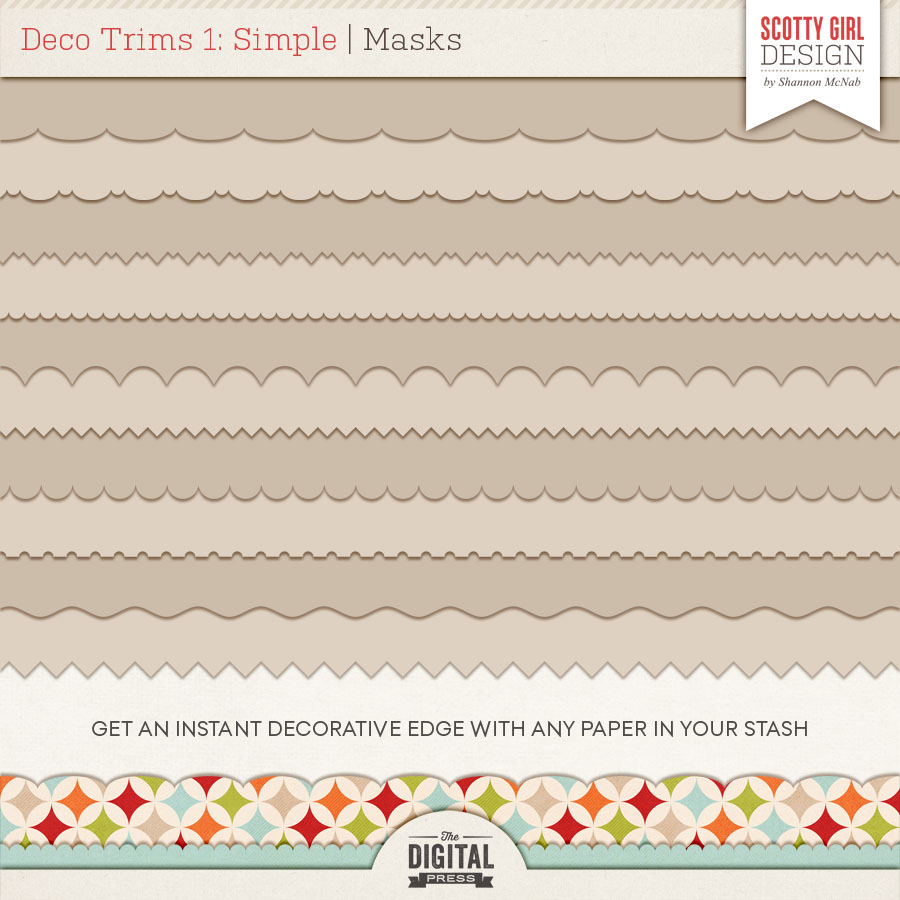
I also used the Deco Trims: Simple by Scotty Girl Designs.    I loved using the scallop for a fun edge around the top of my baskets.

EASTER BASKETS | A HYBRID RECYCLE PROJECT

I used my Silhouette Cameo to do this project, but you can easily use your favorite photo editing program and a pair of scissors.

Let’s get started!!

SUPPLY LIST

  • Recycled oatmeal containers from McDonald’s
  • White cardstock
  • Ribbon
  • Scissors
  • Glitter – optional
  • Double sided tape
  • Glue pen
  • Pop dots
  • Green Easter Grass
  • Assortment of candy

EASTER BASKETS: A HYBRID RECYCLE PROJECT

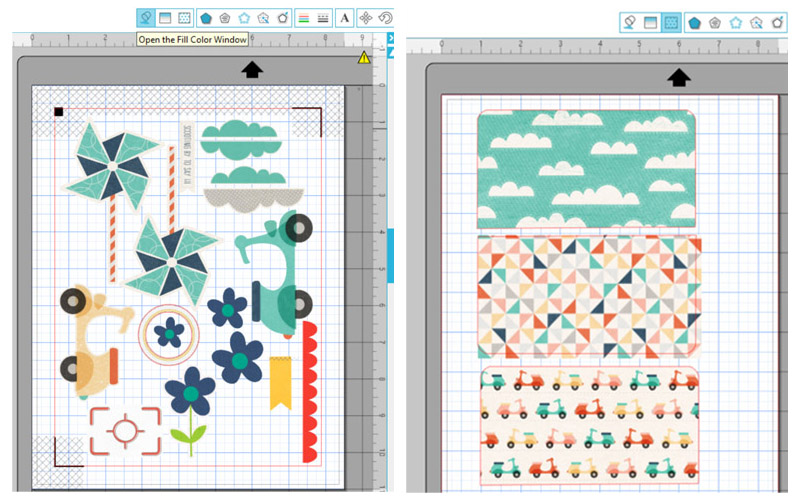
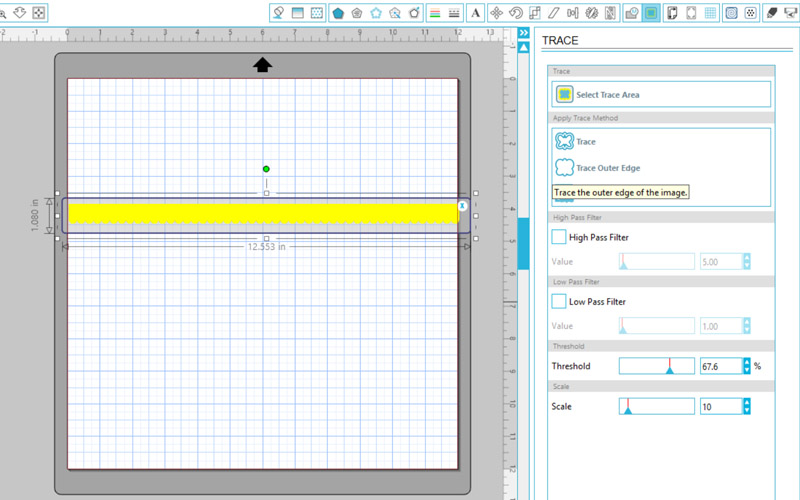
Step 1:  If using a Silhouette, open the scallop from deco trims and do a trace.  I had to trace so that I could fill the image with the papers from the kit. To do this,  open Select Trace Area, uncheck High Pass Filter and move the Threshold bar to the right until the image is completely yellow.  Next select the Trace Outer Edge option.

EASTER BASKETS: A HYBRID RECYCLE PROJECT

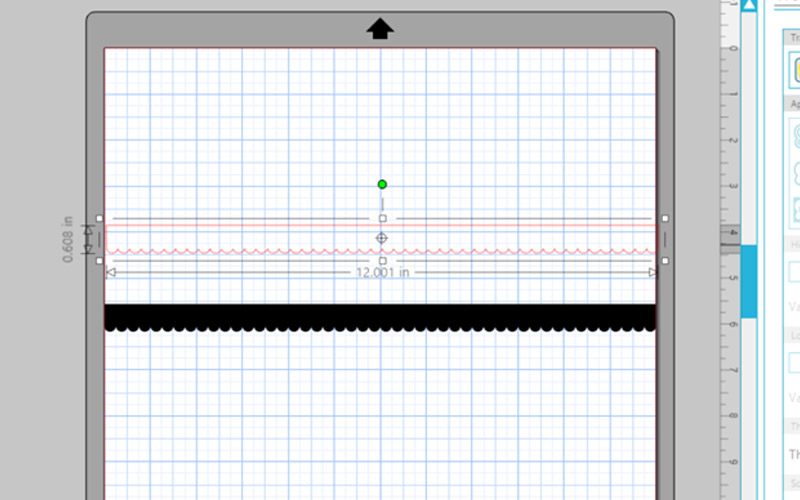
After the image is traced, move  it off to the side.

EASTER BASKETS: A HYBRID TUTORIAL

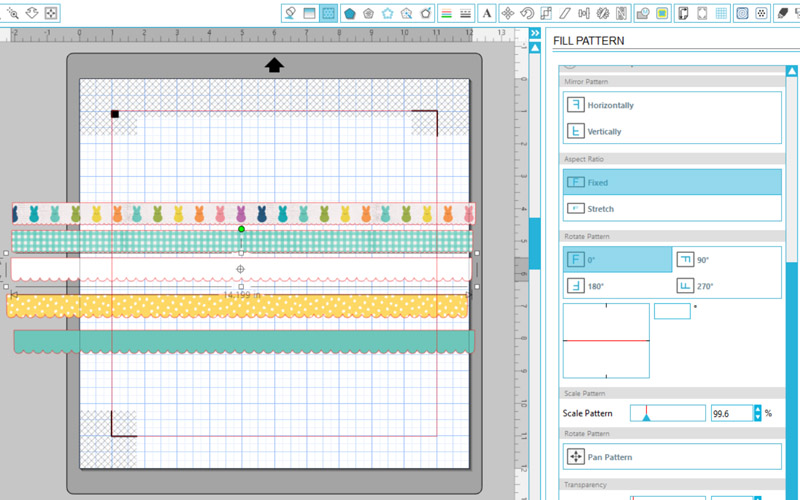
Now pick the paper that you want to use from the kit and fill the image.  The Fill Pattern section is where you would enlarge the print and move it around as well.

EASTER BASKETS: A HYBRID RECYCLE PROJECT

To make the band around the container, you will draw out a rectangle at least 10.5 in long x 3 in wide.  Fill that shape with the paper of your choice.  After printing, I simply used my paper trimmer to cut the band.

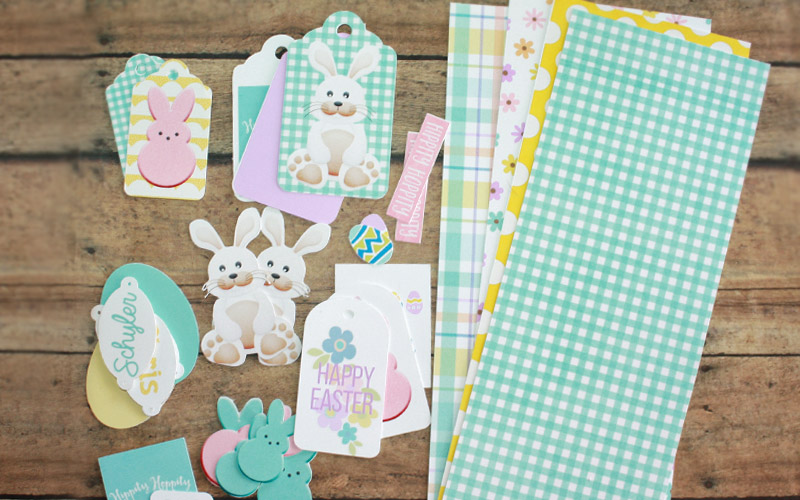
EASTER BASKETS: A HYBRID RECYLE PROJECTNow choose the elements that you want to embellish  your basket with. I made a name tag to put in the middle of the basket and tied off with a cute tag.  Make sure that you have the registration marks on and double check to make sure that cut lines are on in the right places.  Send through printer and then through your Silhouette machine to cut.

EASTER BASKETS: A HYBRID RECYCLE PROJECT

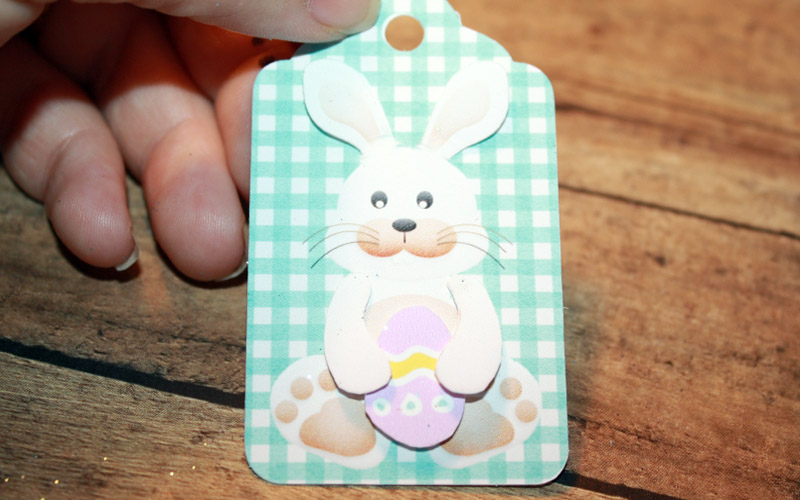
Step 2:  Gather pieces and start assembling.  I first wrapped the band and the scalloped trim around the container with double sided tape.  I gave dimension to my tags by cutting additional pieces with a pair of scissors and assembled with pop dots.

EASTER BASKETS: A HYBRID TUTORIAL

EASTER BASKETS: A HYBRID RECYCLE PROJECT

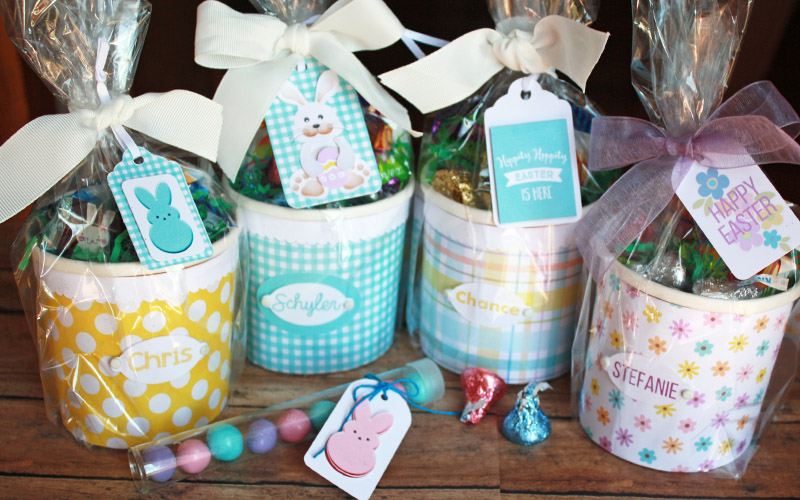
Final Step:  Fill with Easter grass and fill with candy…..you can eat the ones that fall out…hehehe!  (I later added a gift card to the baskets)  After filling, I wrapped with a cellophane bag and tied it off with ribbon and added the tags.

EASTER BASKETS: A HYBRID RECYCLE PROJECT

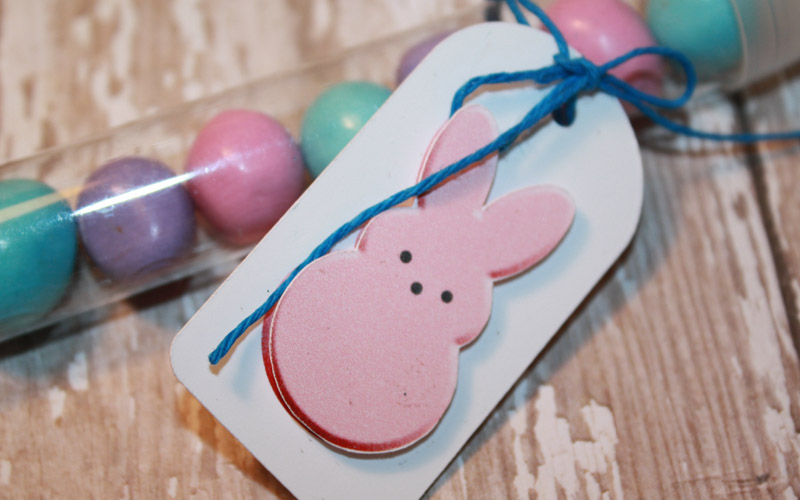
I also made some treats for my co-workers.  I made this simple tag and tied it to the little tubes that I filled with M&M’s.

EASTER BASKETS: A HYBRID RECYCLE PROJECT

I hope that everyone has enjoyed this tutorial and has a Happy Easter!!

Hugs, Tanya


About the Author  TanyaTanya is a part of the hybrid team here at The Digital Press. She has been hybrid crafting for at least 10 years now, and loves creating and sharing those creations with others. Her all-time favorite tool is her Silhouette Cameo. She has been married for 26 years and has two sons: Chris, 23 and Chance, 19. She also enjoys crocheting, photography and woodworking.