Category: Hybrid Crafting

Hybrid Saturday | Jar of Hearts

header blog2


I love the month of February. Valentine’s Day is always a great time to show appreciation and love to family and friends.  Today, I am here to show you a few simple ways to dress up a jar as a Valentine’s Day gift. They make fun teacher gifts, also! I love to collect jars of all sizes and use them for gift-giving. For this project, any small to medium-sized jars will work perfectly.

Supplies Needed:

  • jars
  • twine/string/etc.
  • felt
  • needle and thread
  • cotton balls
  • toilet paper roll (optional, to be used as filler)
  • candy
  • digital elements (Valentine-themed, etc.)
  • card stock

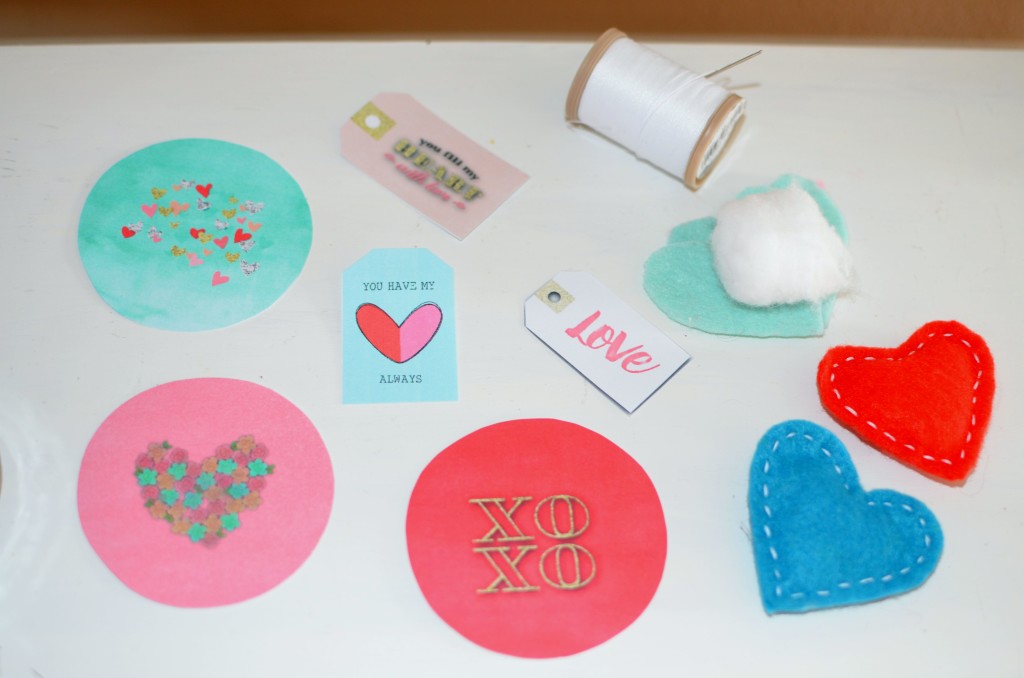
To begin, choose your favorite digital scrapbook kit. For my jar labels and tags, I chose Be My Valentine Kit and Love is in the Air Journal Cards from the shop at The Digital Press.


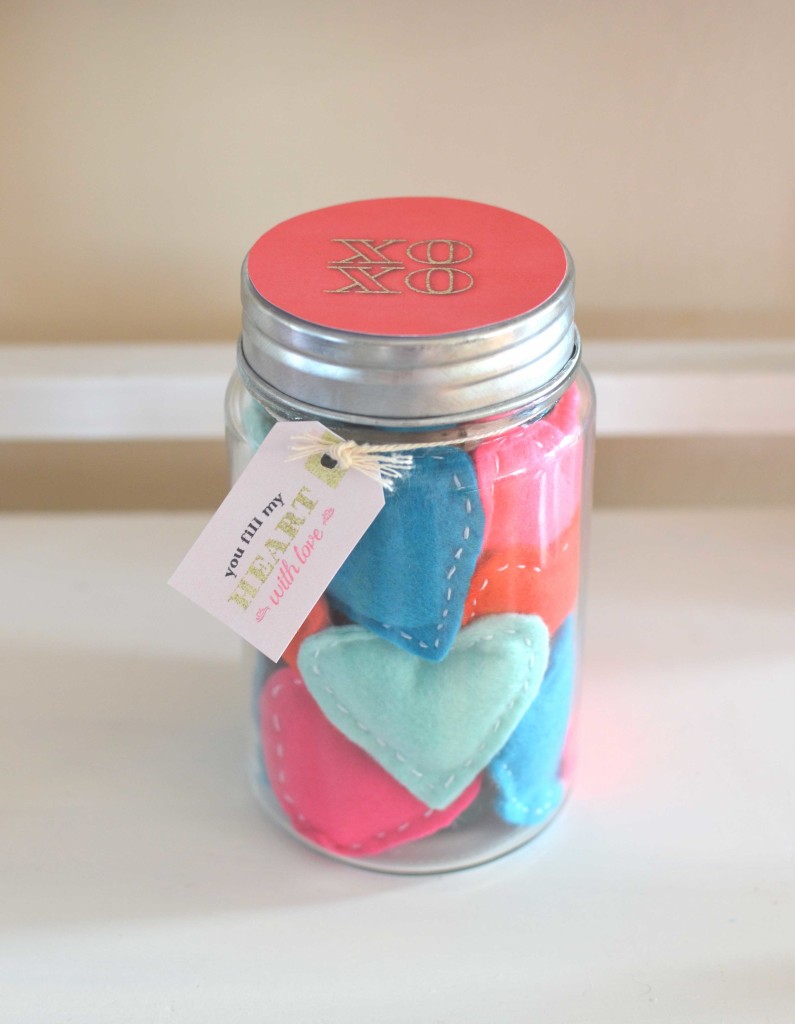
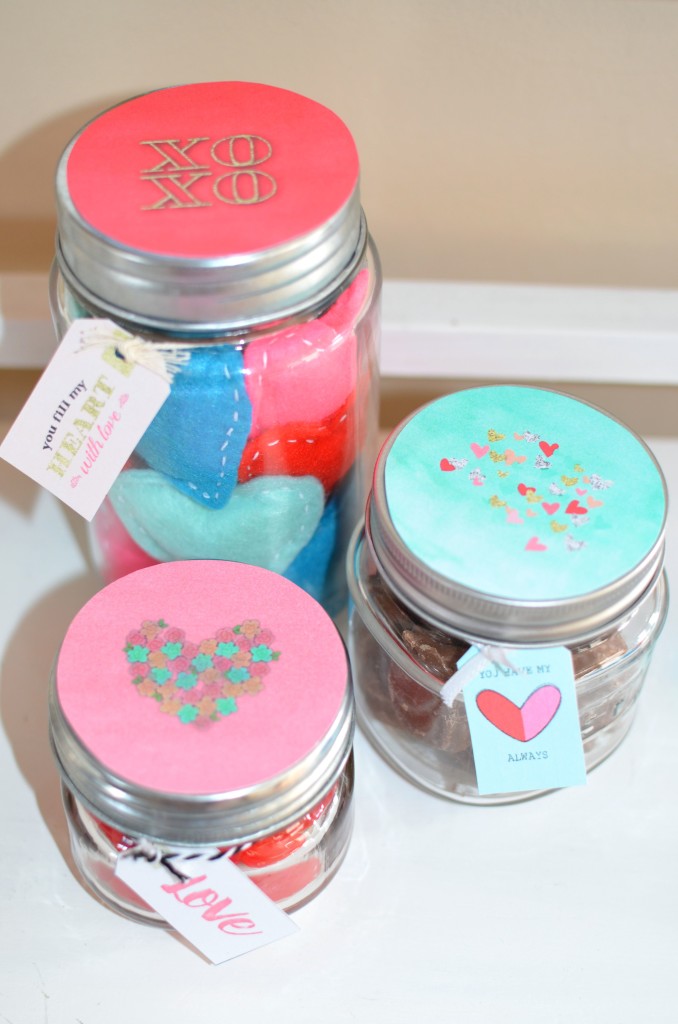
Next, let’s work on the jar of felt hearts. I used various colors of felt: red, pink, blue, and green. I hand-drew a heart pattern that was about 2.5 inches wide, and after cutting out the hear shapes I hand-stitched half of two hearts together with white floss. Then, before completing the stitching all the way around the heart shape, I slipped a cotton ball inside and stitched up the other side. I sewed about 15 of these hearts to fill the largest jar (TIP: when you are filling a larger jar, it’s helpful to add in a filler; I slipped a toilet paper roll inside the jar and placed the hearts around it).

layout

To create a topper for the jar, I chose some elements and papers from the Be My Valentine Kit. In my photo-editing program, I sized the elements and paper to the size of the lid of the jar (my lid was roughly 3 inches in diameter). Then, I printed my image on card stock and used the jar as a template to cut it out by hand.

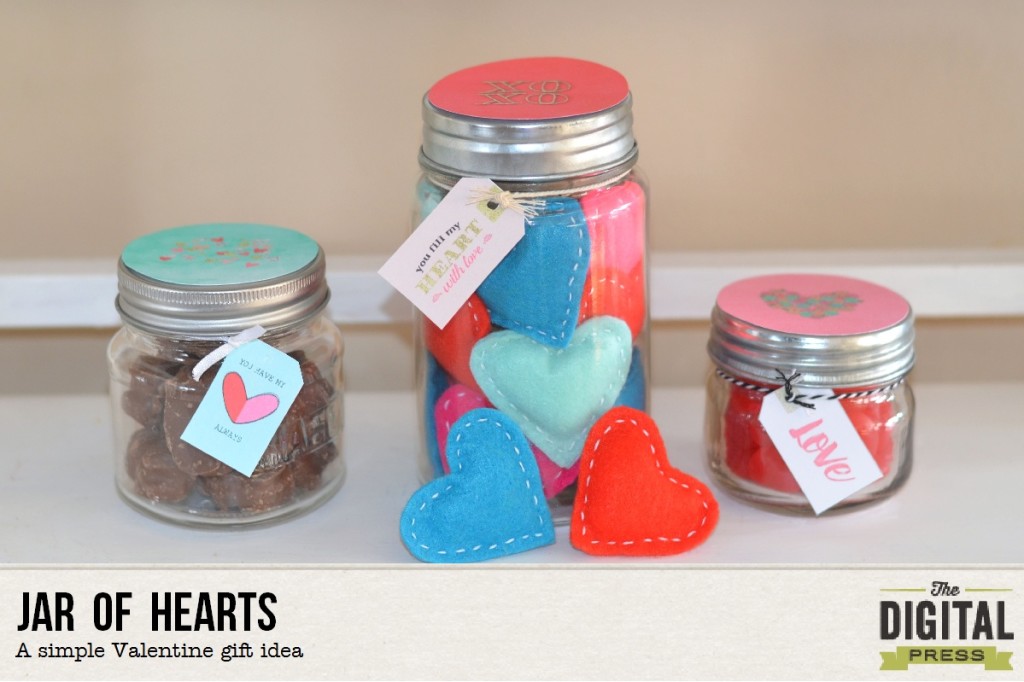
Here is a look at the finished jar with the topper, tag, and stitched felt hearts inside it. Isn’t the word art sweet? I love that bit of gold print on the tag. It matches perfectly with the XOXO topper.

Enhance-jarPS

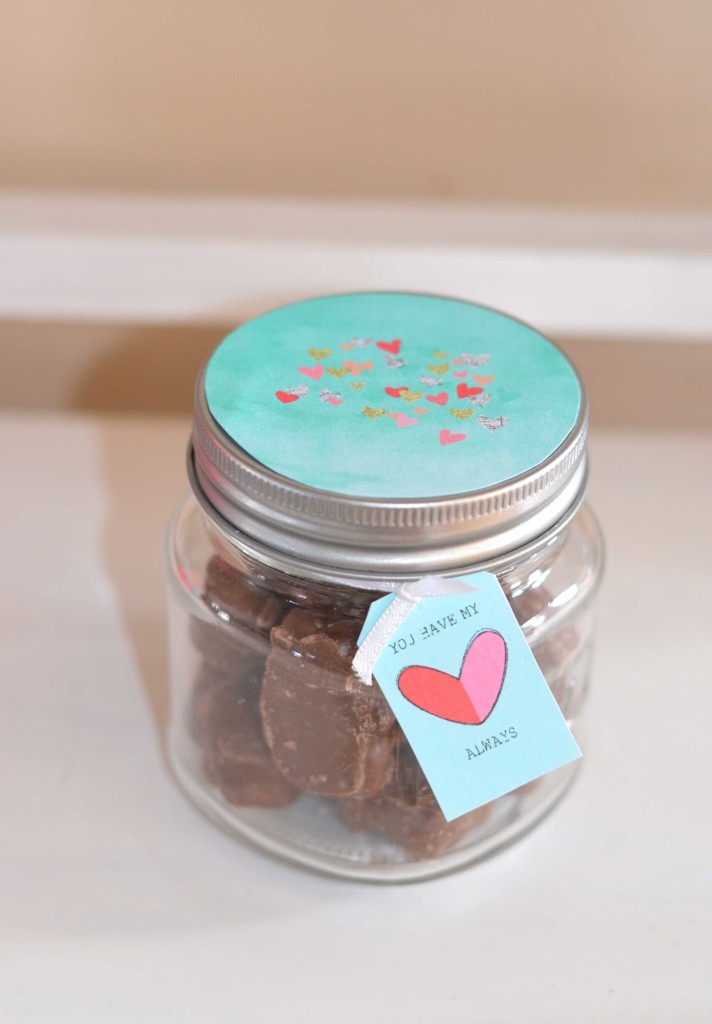
Next, check this out… I love how easy it was to create a tag using a journal card from the Love is in the Air Journal Cards set. I chose this darling “You Have My Heart Always” card (shown below), and then sized it to fit my jar, printed it, and cut it out. I punched a small hole at the top and slipped some ribbon through so I could tie it around the jar.

enhanced-photo3PS

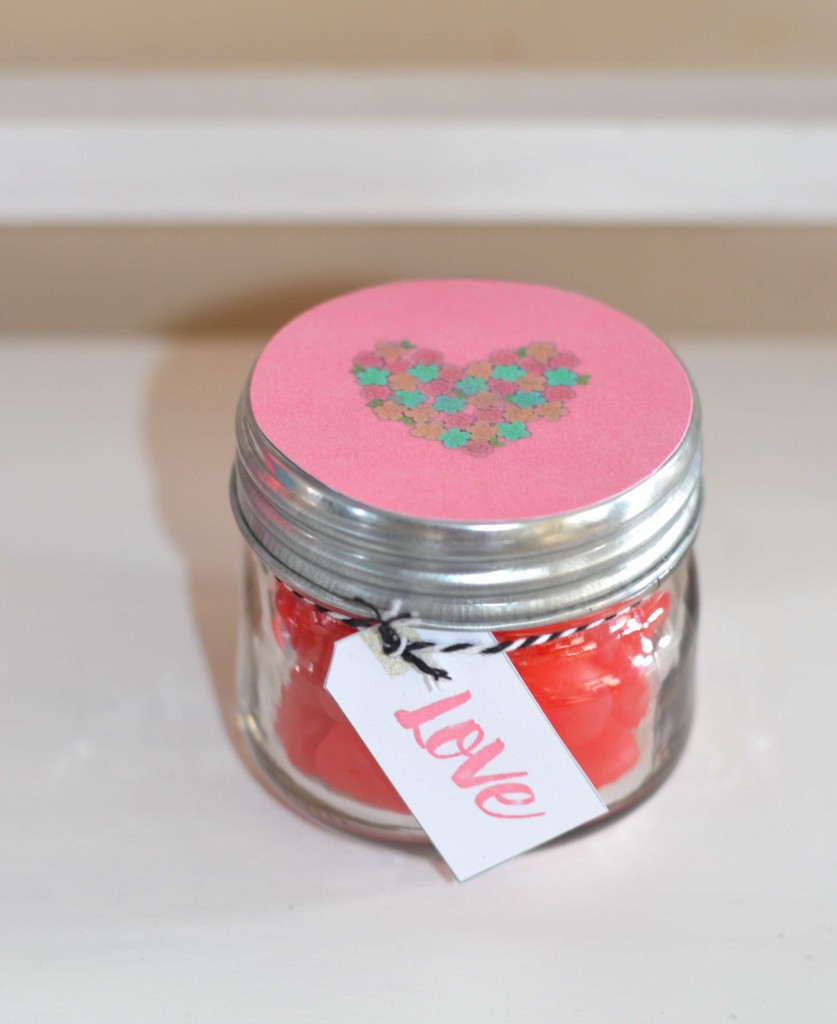
Here’s another example of a fun jar topper and tag combo… I just loved the heart shape made out of flowers (found as a digital element in the Be My Valentine Kit, and used as the topper on the candy hearts jar shown below). Before printing it out, I simply noted the specifications of the lid size — making it easy to know what size to print that heart element onto the background paper for the topper.

enhanced-photoPS

Once created and filled with goodies, each jar is unique and ready to give to that special teacher, friend, or family member on Valentine’s Day!

enhanced


Want to give this a try? Please come join us in The Digital Press’s forum for a fun challenge related to this tutorial! Not only will you end up with some adorable hand-made gifts… but you can earn challenge points while doing so, which can later be cashed-in for discount coupons to the shop at the end of the month if you participate in the challenge system at The Digital Press!


TerresaAbout the Author  Terresa is a mother to 5 beautiful children. She loves capturing memories with her digital camera and then creating a visual family memory book to be enjoyed and treasured. She also loves to design and create personalized items for her home and children. Other interests are crafting and gardening, and you will often find her enjoying the outdoors and soaking in the beauty of nature.



Chore Chart Hybrid Project


I am sure you have heard the saying, “desperate times call for desperate measures.” Well, things in my house are getting pretty desperate!

One thing that I have wanted to do for a while now is to get my children a little bit more on board with helping out around the home. They do have ONE job to do around the house each day… but as they are getting older and more capable, I think it is time for them to accept responsibility for a little bit more!

Until now, we have used a very basic job chart…

Yep, pretty basic, huh?!

I think I originally drew it really fast, with the only 3 colored pencils that were on hand! It has worked well enough — we simply move the names down one place each week so that the children rotate around the best and worst job — but the chart has got rather tatty now, and poor Eden has lost her name altogether (she has tried getting out of doing her job by telling me that her name isn’t on any of the jobs listed, which must mean that she doesn’t have to do a job!).

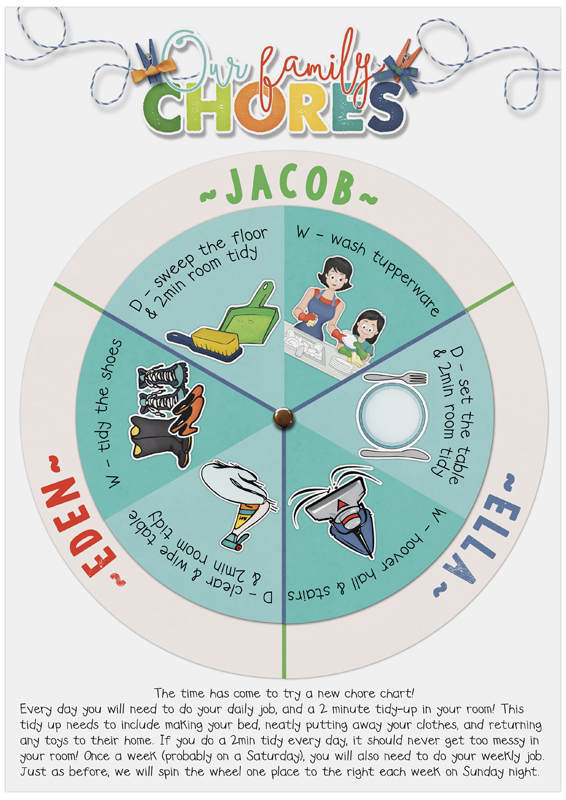
So the time has finally come for an all-new and improved job chart (or “chore chart,” if you prefer!). This time, I wanted to include the daily jobs that I expect the children to do… but also a reminder about keeping their room tidy and their clothes put away. I also wanted to add a new weekly job for each of them, as well.

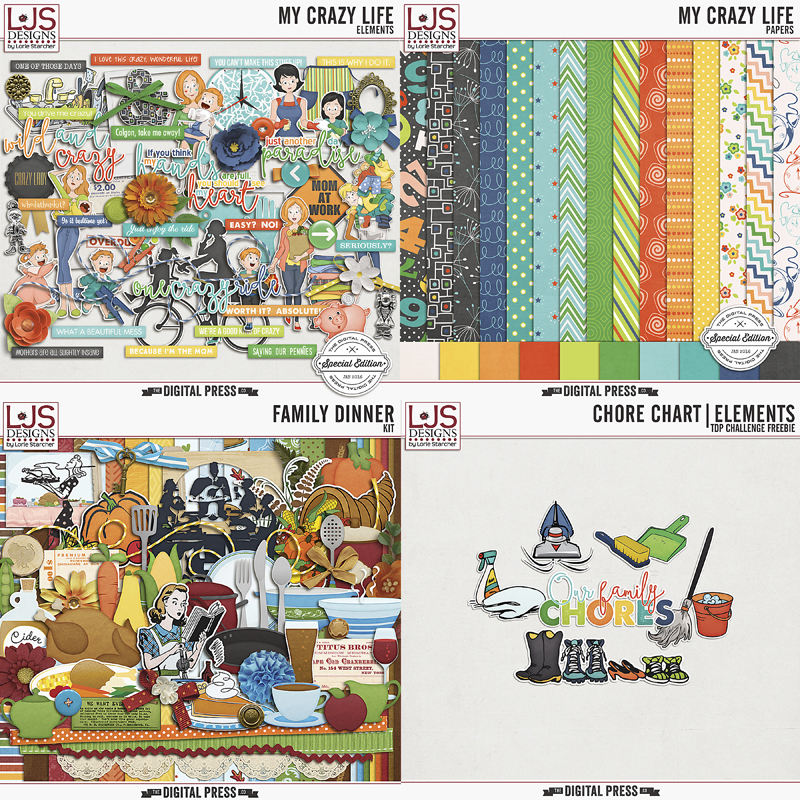
LJS Designs released the My Crazy Life  collection a couple of weeks ago, and I knew it was just what I needed for my project. I love the cheerful colors and the cute elements/images (it contains elements like a sink full of dirty dishes, a mother carrying a mountain of dirty laundry, and a stack of beautifully-folded, neatly-ironed laundry, too! So perfect for a chore chart!).

To make my chore chart, I used the My Crazy Life papers and elements, and Lorie (the designer behind LJS Designs) also honored a special request from me and kindly made-up a special CHORE CHART FREEBIE (<–click here to download it!). This free download is available for everyone, and goes alongside the kit to help illustrate even more chores! Finally, I also used a few elements from her Family Dinner kit, as well.

Here’s a look at everything I used… and please note that the kit names (above) are all linked to each item in The Digital Press shop, and/or to the direct download for the freebie… 🙂

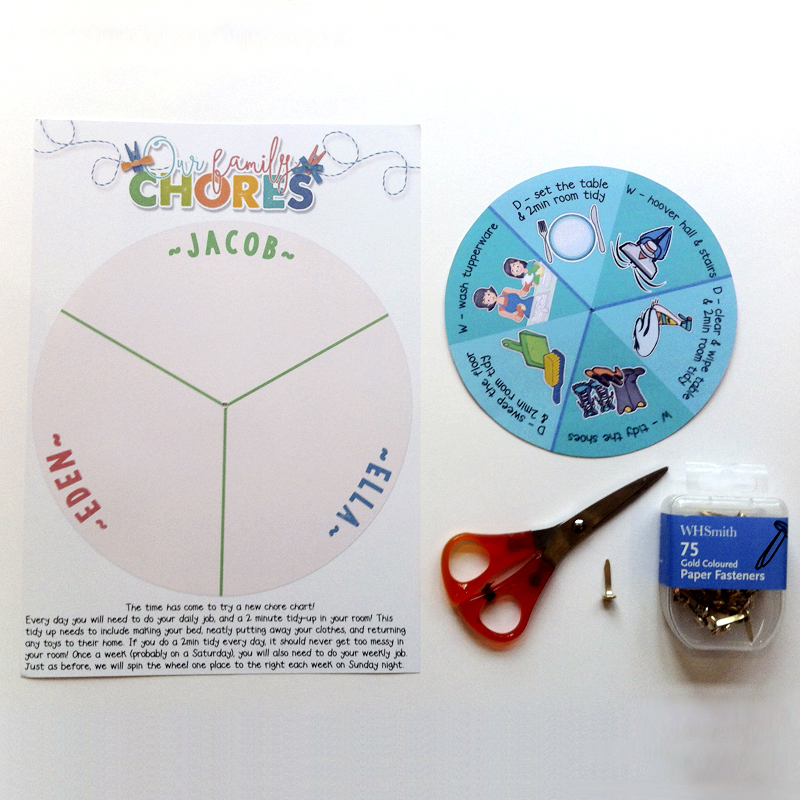
Supply-wise. all I needed for my chart (apart from the two pieces of printed material), were my trusty scissors, and a split pin — nothing too tricky!

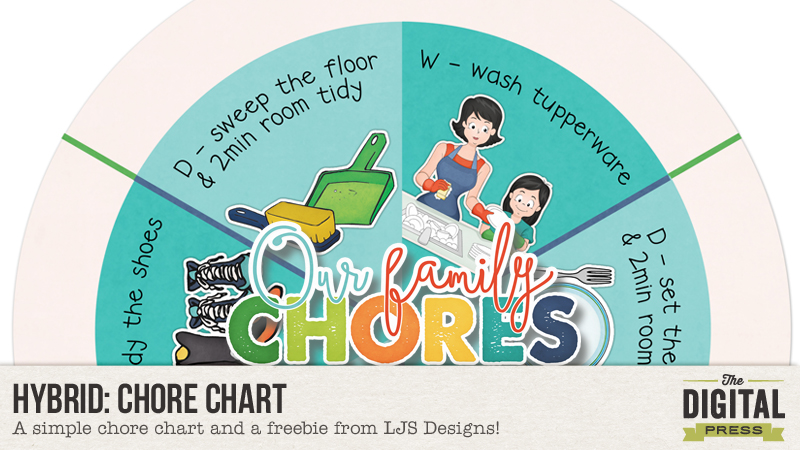
It couldn’t have been simpler… I just created both the base chart and the top/rotating chore “list” in Photoshop (as though I was creating a digital scrapbook page), and then I printed both pieces out.

Next, I used the scissors to cut out the circle of the top piece… and then attached the circular top piece to the main chart with the split pin (thus allowing it to spin/rotate from person to person each week). And then, hey presto, a new chore chart was born! I am sure you can imagine the gasps of delight as I unveiled the completed chart to my family…

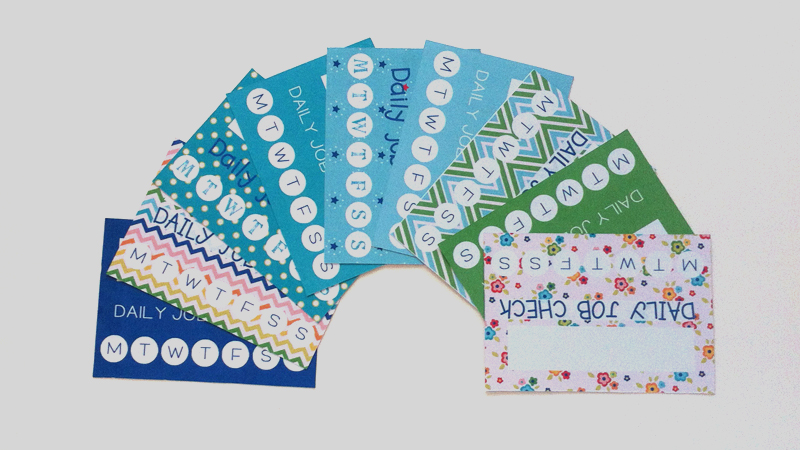
I also used a few cute papers from Lorie’s My Crazy Life to make some little daily check cards (shown below). The children can write their name in the top box, and each day when they have completed their daily jobs, they can bring the card to me and we will tick the little circle, or punch out a shape with my little paper punches. It’s just something to add a little more fun to the process… at least until these jobs become a habit.

If you are thinking of renewing your goals of a clean and tidy organized home this year… why not try making a chore chart for yourself or your family? If you would like to use the chore chart elements freebie from LJS Designs, the just CLICK HERE TO DOWNLOAD IT.

Meanwhile, please come on over to the forum and join this week’s hybrid challenge that is inspired by this blog post!

I’d love to have you come join in the fun, and show me what you end up making!


CorrinAbout the author  Corrin is on the creative team here at The Digital Press, and is a fan of the Big Bang Theory and a lover of cozy pajamas. She lives in the chilly South of England with her husband and 4 crazy kids, who regularly discover & plunder her secret chocolate stashes! She is still trying to get the house straight after moving 2 years ago. Who knows… maybe this will be the year she reaches the bottom of the laundry pile!
Create A Vision Board


Have you set any intentions or resolutions for 2016? I have been a big goal setter in the past years and close to never pulled through the first month of the year. Last year was different. I achieved most of what I envisioned at the beginning of 2015. What did I do differently? I did not only jot down my goals, I also made scrap pages about them and made my goals visible.

This year I want to achieve even more and decided I would make my vision boards hybrid and hang them in our gallery.

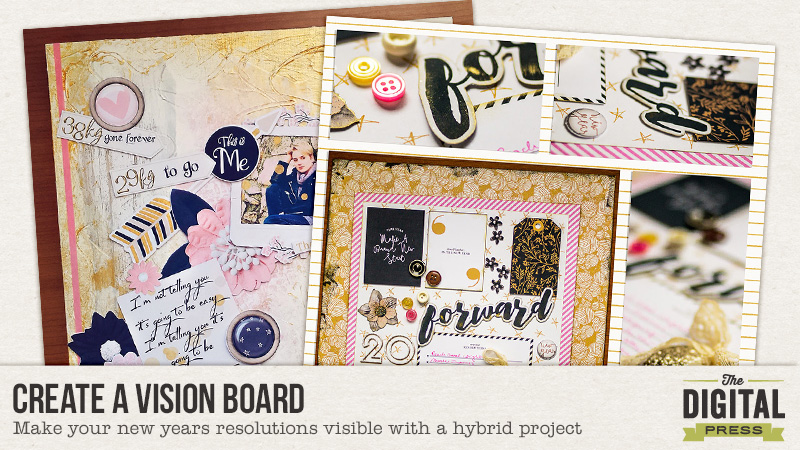
A vision board is tool used to help make your goals more clear and visible, to be able to focus on them on a daily basis. It’s a canvas for your desired future life with images that represent what you want to see, feel, do and be in your life.

Sounds intriguing? Good! I will show you what I made, hybrid and mixed media style.

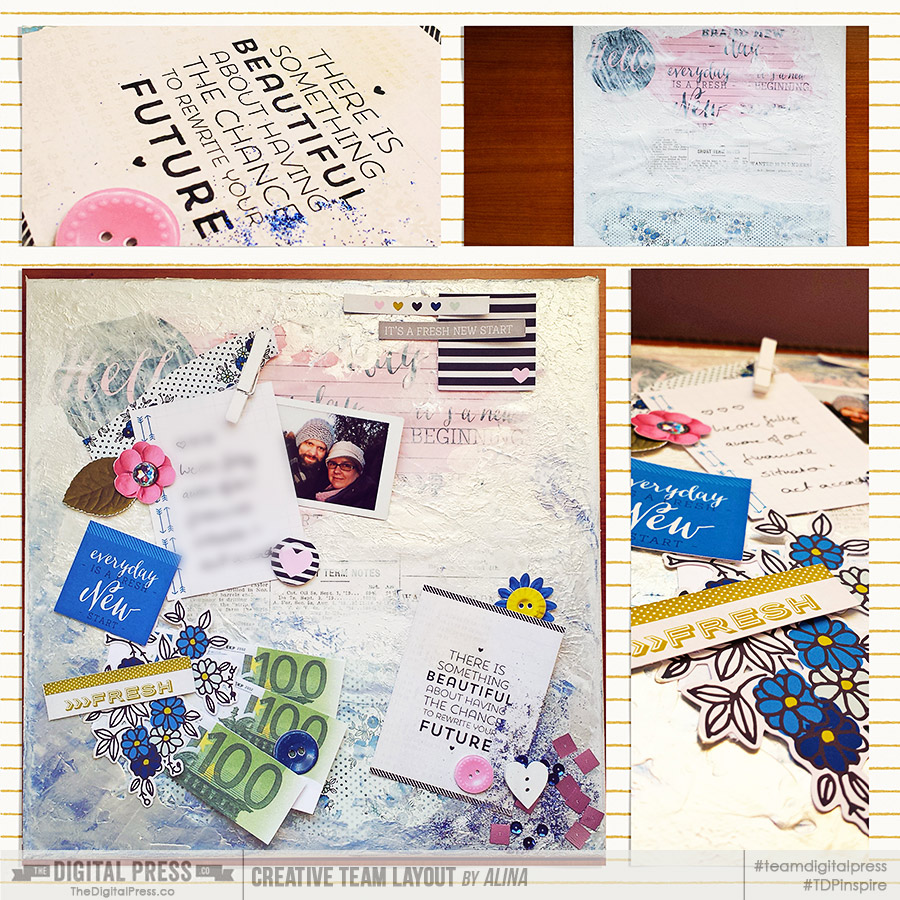
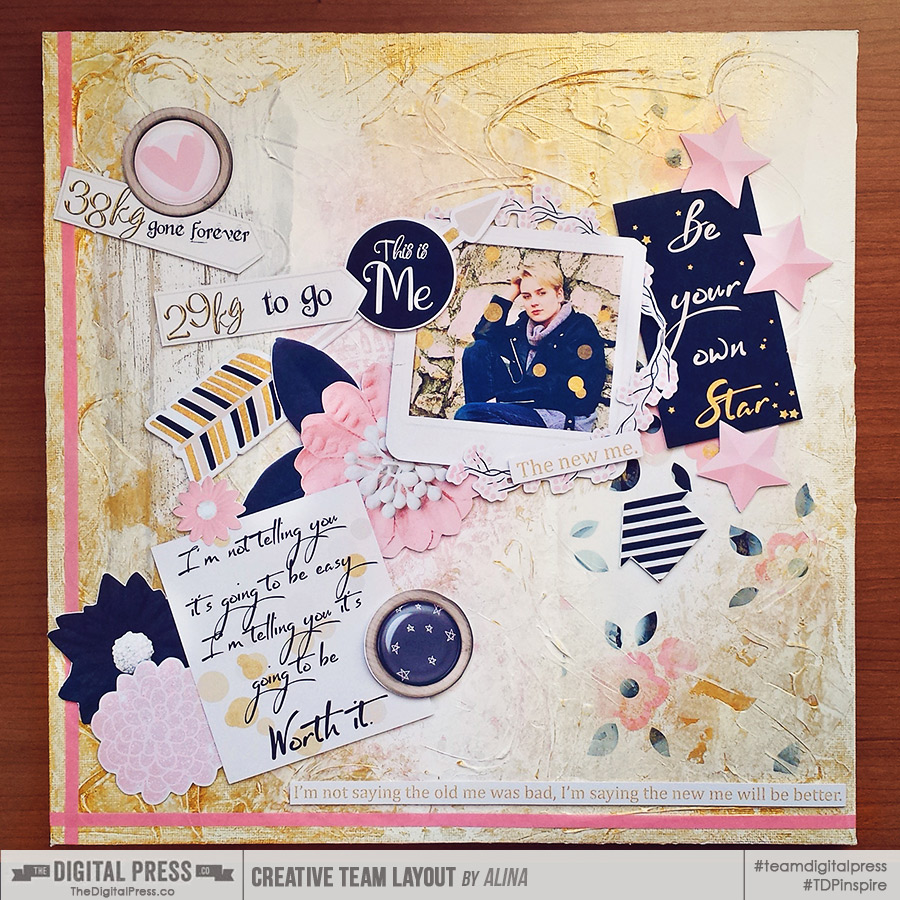
I got out my “real” canvas and planned out on what I wanted to do on which goal. For this one I decided on the “A New Me” kit by River Rose. I printed three paper pieces, tore the edges and glued them to the canvas with my structure paste. After it dried, I painted some gold paste on. I got my cameo a workout with printing and cutting elements and an older photo, that shows me when I was at my current (hopefully to soon be) goal weight. I arranged all the pieces before I glued them to the canvas and added some washi tape.

It was the first time I did hybrid on a canvas and I love how it turned out.


Here’s a pictured outline of the process with my second canvas. I used “Fresh Start” by Mari Koegelenberg for this one. I was printing and ripping the paper, getting structure and color paste on it and added the print and cut embellishments.


And here’s the full layout.


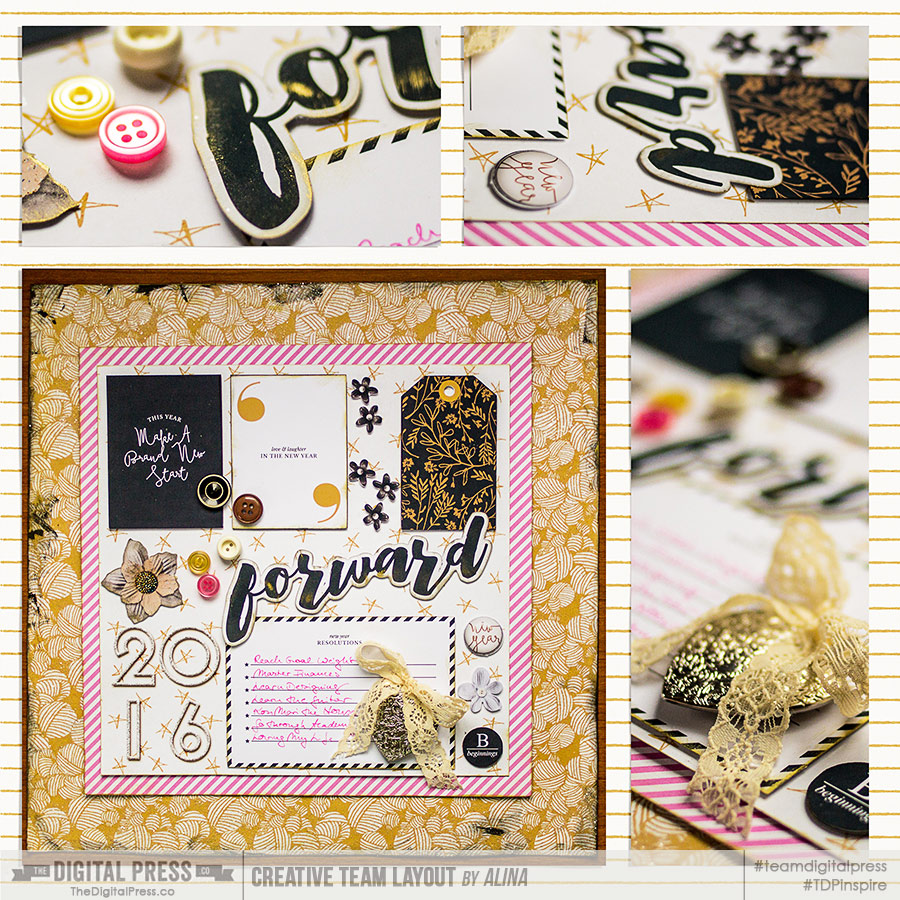
I did several canvases for my goals. I also made one with my one little word for 2016. I used “Midnight” by Sahin Designs.


I enjoyed the process of doing something mixed media style. I also found, that it’s not as time consuming as I thought. It takes more off time when waiting for paste and color to dry, but it’s sweet to come back to a layout from time to time to add something new.

Now it’s your turn! Visit us in the challenge forums and show us your own vision board creations!


AlinaAbout the Author: Alina enjoys sitting in front of her large computer screens too much. Apart from that she loves walking her dog and watching sunsets while being amazed of life in general. She is married to her best friend. Tries to manage the needs of her two cats and her dog and badly fails when they all want their cuddle time at once. Everything else is scrapping, taking photos and currently crafting. Having said that, she needs a bigger craft room.


Tutorial Tuesday | Five Inexpensive Hybrid Gifts

AHG_giftyhybrid1

It never fails — someone unexpectedly gives you a gift. You heart rate jumps, and your mind races, and you think, “oh no, I need to reciprocate — and FAST!”

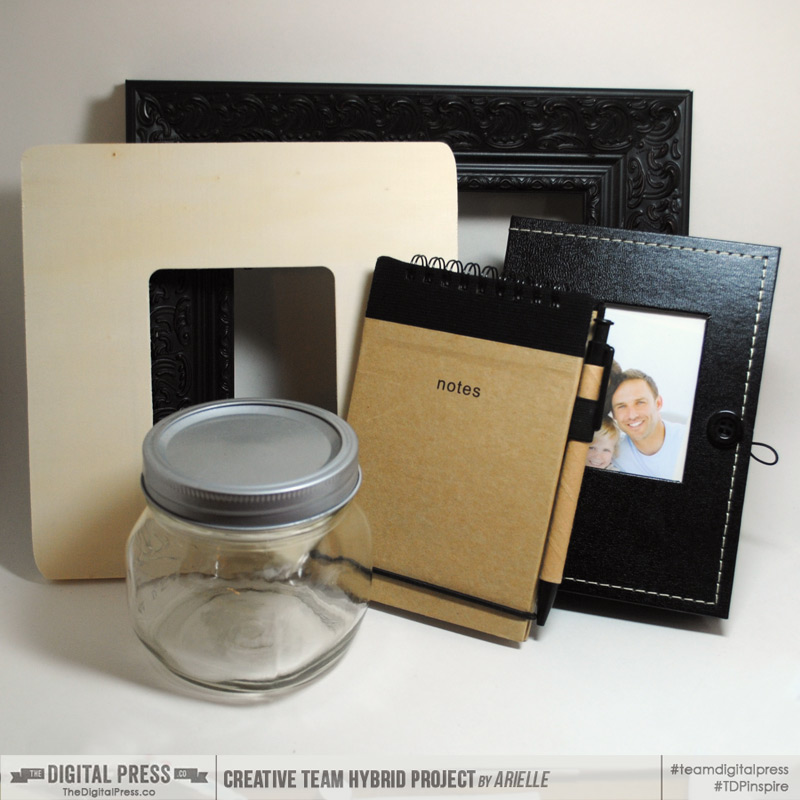
Well, today’s Tutorial Tuesday post will show you some really great, fast, and inexpensive gifts that you can make using items you might already have on hand. Albums, notebooks, frames, and jars are all the perfect mediums for hybrid crafting! Today, I will show you how I transformed these items into terrific customized gifts… and quickly, to help you deal with surprise gifting emergencies!

AHG_giftyhybrid1

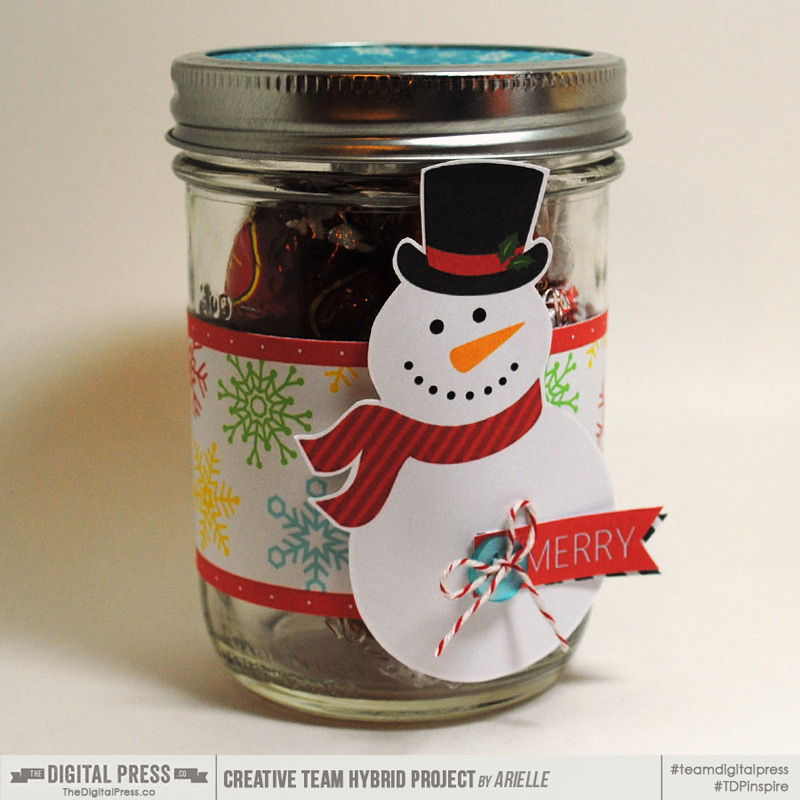
The first item you can use — JARS! Jars are so easy and fun, you can fill them with anything… candy (my favorite), sewing kits, a candle… you name it, and it will probably fit in a jar! The only thing you have to worry about is a nice little band to go around it, and a focal point. For the example shown below, I used Dunia Design’s 25 Days Kit to create this adorable little candy jar. I made a 2″ band in Photoshop using 2 complementary papers, and printed the band… along with that cute snowman and a sentiment. The top of the jar is covered in a cupcake liner, but could have easily been another paper from the kit. All I had to do at the end was add a button and twine, and that was it! Easy-peasy!

AHG_giftyhybrid2

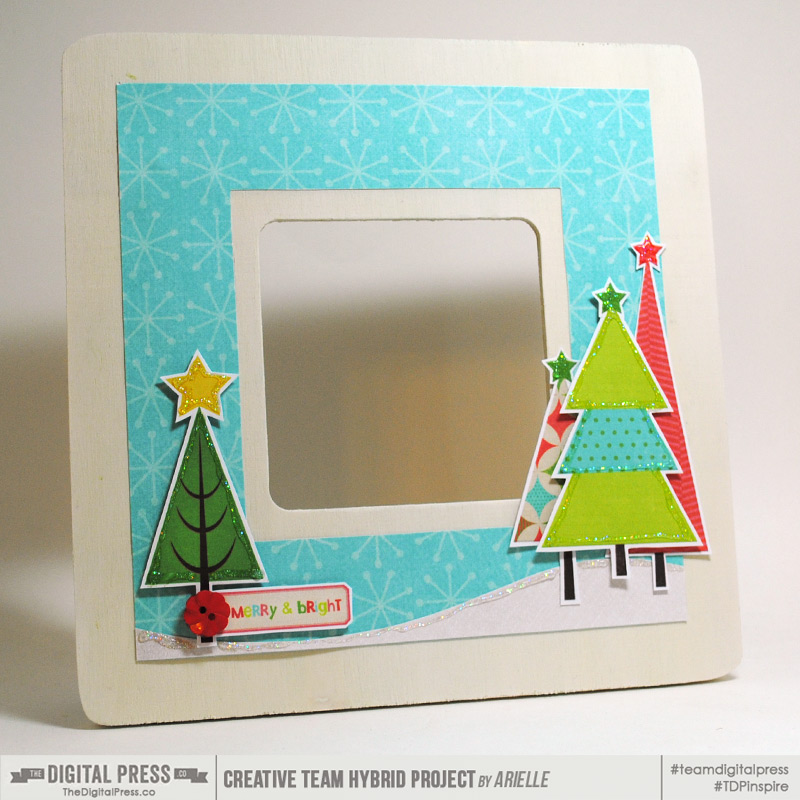
The second item we’ll use today — FRAMES! Craft stores have all kinds of DIY frames, and the one I used (shown below) cost me just one dollar. I loved the elements in Mari Koegelenberg’s 12 Days | Full Kit, as well as the bright colors. Using white acrylic paint, I whitewashed the frame, and then let it dry. While it was drying, I measured my frame, and set it up in Photoshop exactly how I wanted it to look (what can be easier than that?! …and the benefit is, you can save your project to print & use again & again). After I set it up, I separated all of the elements for printing. Setting it up this way allowed me to print only what was needed, which cuts down on ink! I popped a couple of the trees up with dimensional adhesive, then outlined some of the elements with glitter glue.

AHG_giftyhybrid3

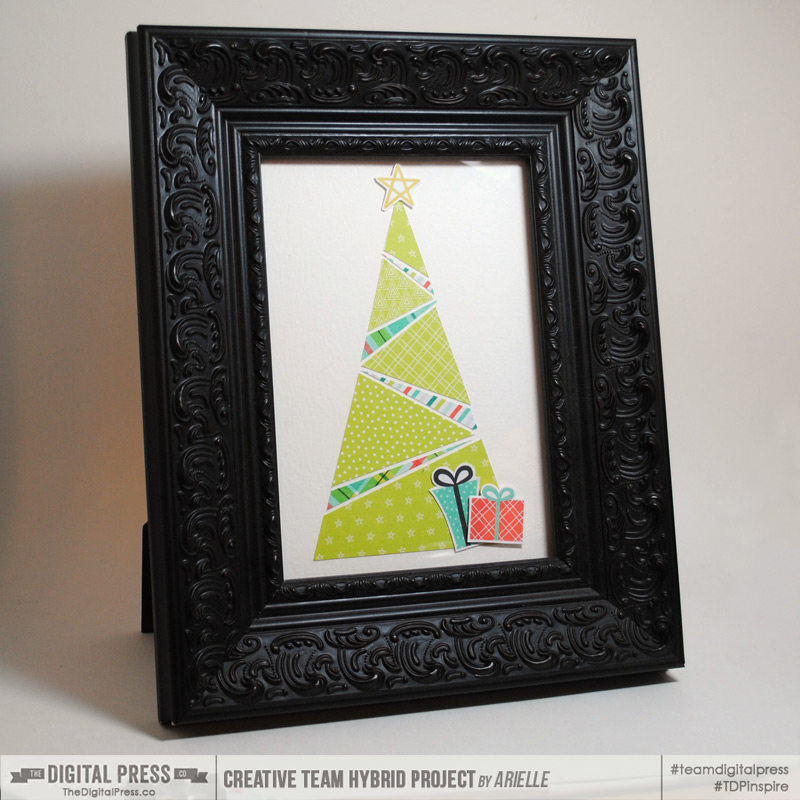
Item number three to share with you today — HOME DECOR! This is probably one of my favorite types of projects. For an easy and yet elegant project, search online for quilt patterns! I found this awesome tree and converted it into a template. All the gorgeous papers in Scotty Girl Design’s Season of Joy Collection popped in my mind, and I knew it would be the perfect digital collection for this project! Again, I set up my design in Photoshop first, and then I printed, trimmed, & adhered it all to a cardstock base. I also added a few elements from the collection, and adhered them with dimensionals. Finally, I added a nice frame, and it was all finished!

AHG_giftyhybrid4

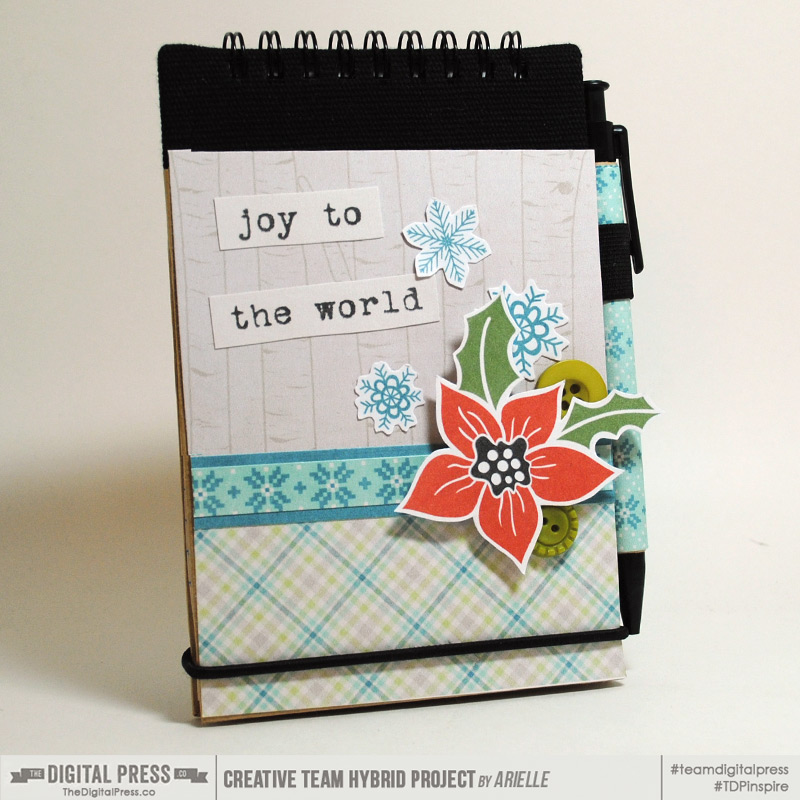
My fourth project use another great/inexpensive item — NOTEBOOKS! Shown below is a little notebook I snagged in a dollar bin somewhere (and I won’t pretend that I bought just one!). To use it for this hybrid project, I first measured the notebook and then made (in Photoshop) a little panel to adhere to the front, using Project Twenty-Fifteen | December Kit by Laura Passage and a few physical supplies like buttons. If you have a note-taker in your life, this would be a fine gift!

AHG_giftyhybrid5

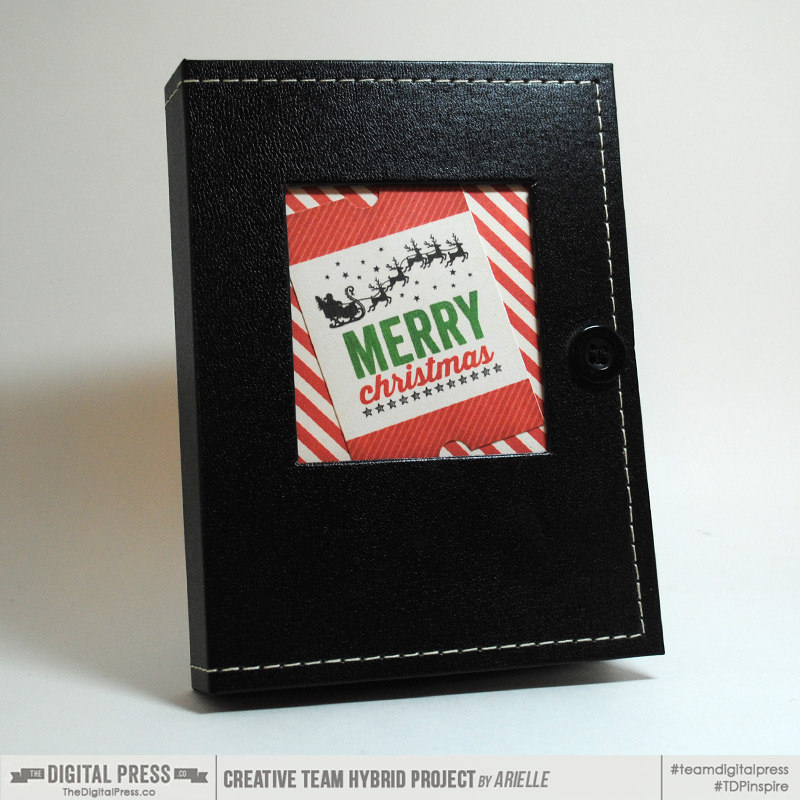
Finally, the last item we’ll look at today — ALBUMS! This cute 4″ x 6″ album was also a dollar store find. I loved all the journal cards in Twenty Five | The Collection by Mari Koegelenberg, so I decided to use them to make this ready-made album. I can’t think of anyone who wouldn’t love this for Christmas (or any other day of the year!); all they have to do is add their own photos. 😉

AHG_giftyhybrid6

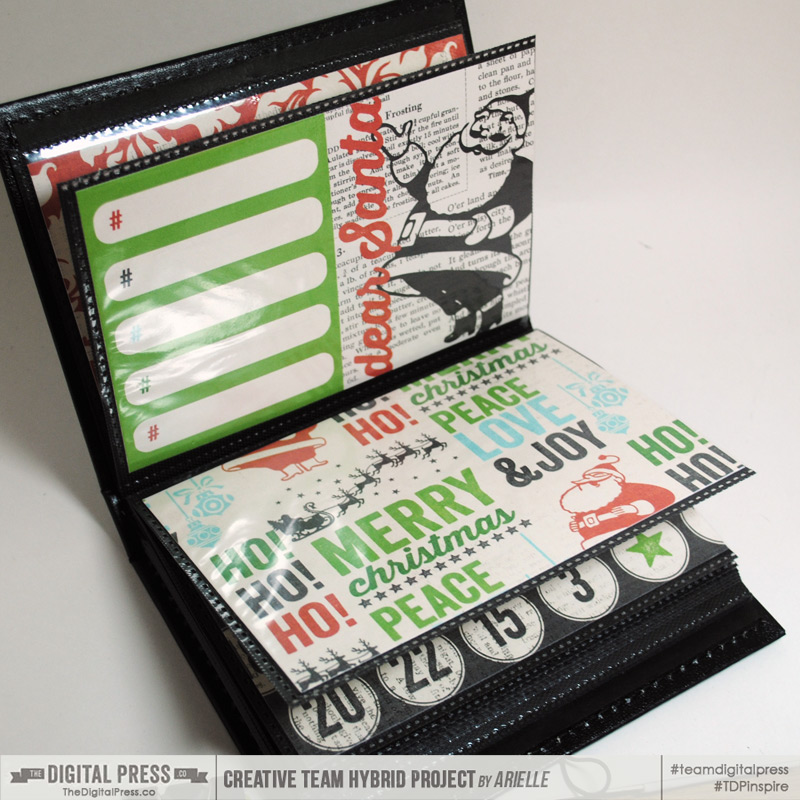
Here’s a look at the inside; journal cards and patterned papers combine to make a fun little album. Just set up a Photoshop template for the size of your pages, and mix & match to your heart’s content. If the recipient is a little bit crafty, you could even print out & trim some elements for them to add for themselves!

AHG_giftyhybrid7


All in all, these five projects cost me less than a total of $20 (not including the price of the digital products used), and now they are ready and waiting in case I forget to shop for someone and/or get an unexpected gift!

Want to give this a try? We would LOVE to see your hybrid holiday decor – please share it with us over in the hybrid gallery and/or our The TDP Facebook page.


Arielle H GordonAbout the author  Arielle H Gordon is a wife and mom of two crazy kiddos, ages 5-1/2 & 7. She moved around (a lot!) before returning to settle down in her hometown of Enterprise, Alabama, to marry her sweetheart and start her family. She is an avid crafter — digital, hybrid and otherwise! She LOVES Jesus, family time, camping, gardening, reading cozy mysteries, hot tea, popcorn, and anything on the BBC! This time of year, you’ll find her glued to the Hallmark channel watching every single Christmas movie — even if she’s seen them 5 times each!
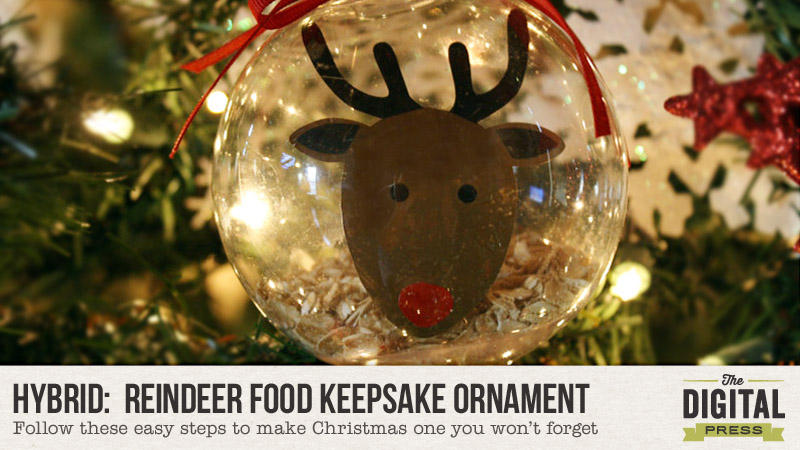
Hybrid: Reindeer Food Keepsake Ornament

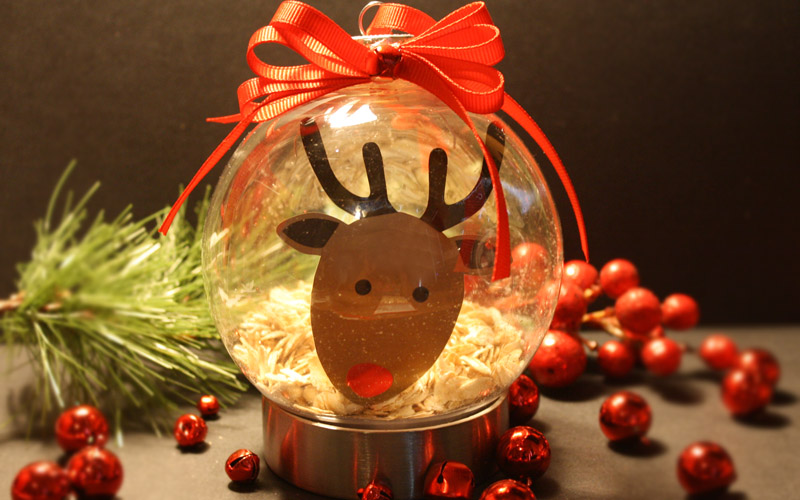
Reindeer Food Keepsake Ornament


I can’t believe Christmas is just around the corner. It’s all happening way too fast this year; even my boys mentioned that it doesn’t quite feel like Christmastime yet. I mean, I just put up my tree and haven’t even gone shopping yet… and before you know it, we will be cheering “HAPPY NEW YEAR!” I’m going to do my best in the next two weeks to slow down and enjoy the holidays. I’ll let you know how that works. 😉

Meanwhile, today I am here to show you how to make an adorable “Reindeer Food” keepsake ornament!

I have seen the idea behind today’s tutorial before (the concept of making “Reindeer Food,” that is)… and I thought it would be cute to put my own little twist on it. Instead of simply putting the reindeer food in baggies to put out on Christmas Eve, I decided to also make an ornament so that when the kiddos are done putting out their reindeer food the can have a cute ornament to keep.

SUPPLY LIST

  • 4 in plastic fillable ornament (I purchased mine at the Dollar tree)
  • projector sheets (acetate sheets; found at any office supply store)
  • vinyl (I got mine from Hobby Lobby)
  • white cardstock
  • ribbon
  • printer and cutting machine (I use a Silhouette Cameo)
  • the special reindoor food (see below for recipe)
  • digital scrapbooking kit of your choice (I used 25 Days by Dunia Designs; I am absolutely in love with this kit!)

kit

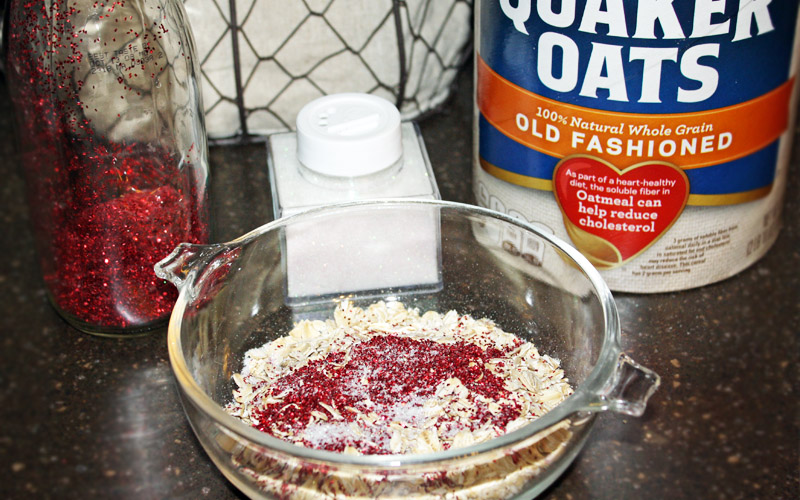
Here is my secret Reindeer Food recipe: oats and glitter (I use both red and green). That’s it! …top secret, right!? I have also seen cheerios and little Christmas candy beads use before, too. I’m sure you can just add whatever you think Santa’s reindeer will eat. If they were my reindeer, they would be filling up on sweets… lots of sweets… 😉

food1


Next, we’ll create the ornament. First on that task list is creating the clear acetate insert for the ornament.

If you don’t have cutting machine available to cut the vinyl shapes that make up the reindeer, you can also print the reindeer directly onto the acetate sheets (just make sure that you get the right sheets for your printer). I like the look of the vinyl on the acetate, so the next few steps will detail that method.

First, you need to draw out the ornament template… and then use that shape to cut out the insert from the acetate so that it will fit inside the ornament. I cut my inserts at about 3.75 inches.

templates


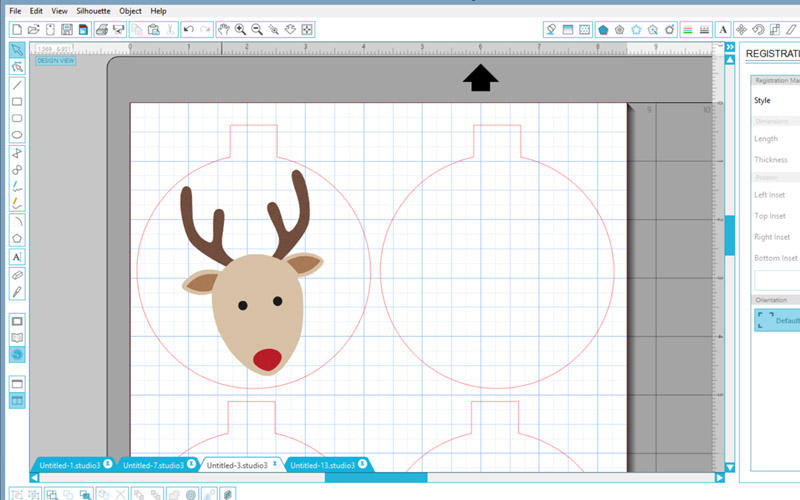
I chose a reindeer image from the digital kit, and then before I “pulled it apart” (see below for explanation), I first laid it on top of my ornament template to test it and make sure it would fit.

sizehead


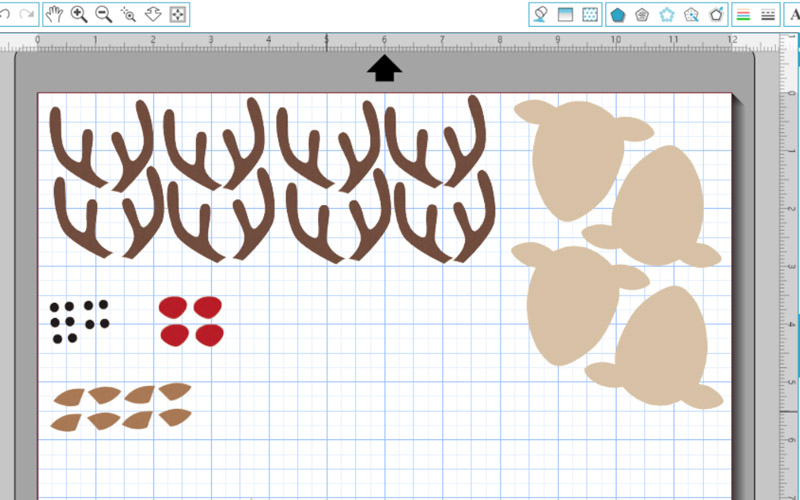
Next, I traced the pieces of the reindeer and separated them in my software (I use Silhouette Studio Designer Edition v3). I laid it out as shown below (separated by color) so that I could put my different pieces of vinyl on my mat in the same places cut one time instead of five.

vinylcut

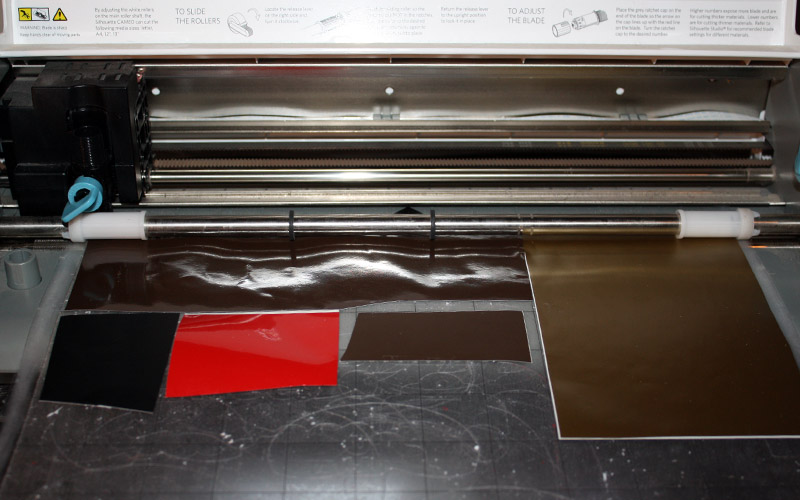
Here’s a look at how I arranged my vinyl pieces on the mat; notice how the arrangement corresponds with the layout of the reindeer pieces in the image above. This is a good way to use up those vinyl scraps (I don’t do a lot of vinyl projects with my Cameo, so most of my pieces are scraps). My favorite thing to do with my machine is print and cut.

vinylpieces


After I had my vinyl reindeer pieces, it was time to fill the clear glass ornament. First, I removed the top of the ornament and filled it with the reindeer food…
fill


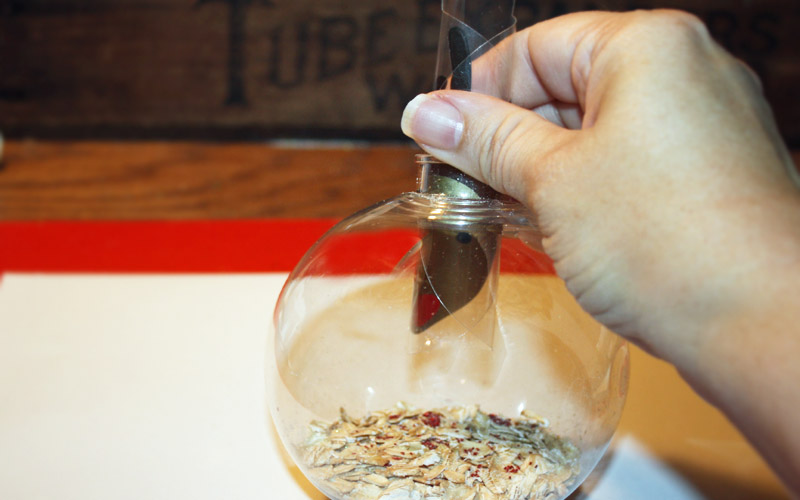
…and then it was time to assemble the rest. I inserted the clear acetate sheet with the reindeer vinyl adhered to it as shown here:

roll


To get the projector sheet in the ornament, simply roll it up and stick it in the ornament.  It will unroll when it is all the way in, and will look like this:

ornie

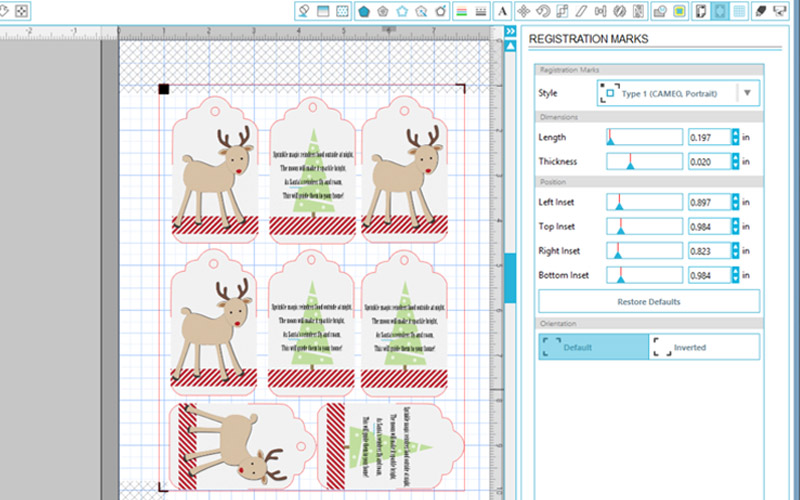
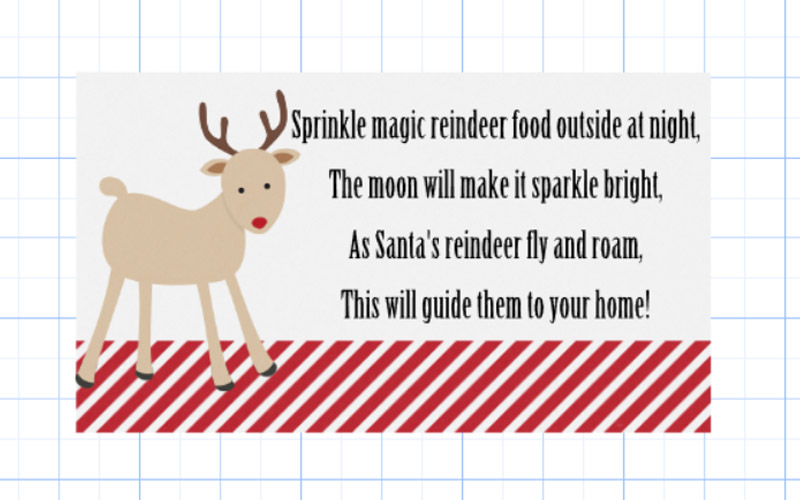
*NOTE* If you don’t have all of the necessary supplies to make the ornament, you can also simply design a header and fill little treat bags with the food — no cutting machine required! With that in mind, a tag comes in handy (you can also use a tag like this on the ornament itself). Here’s how to make the tag…

tagreindeerfood


I created the tag in the Silhouette software… but you can also do this with any photo editing program and a pair of scissors.

tags

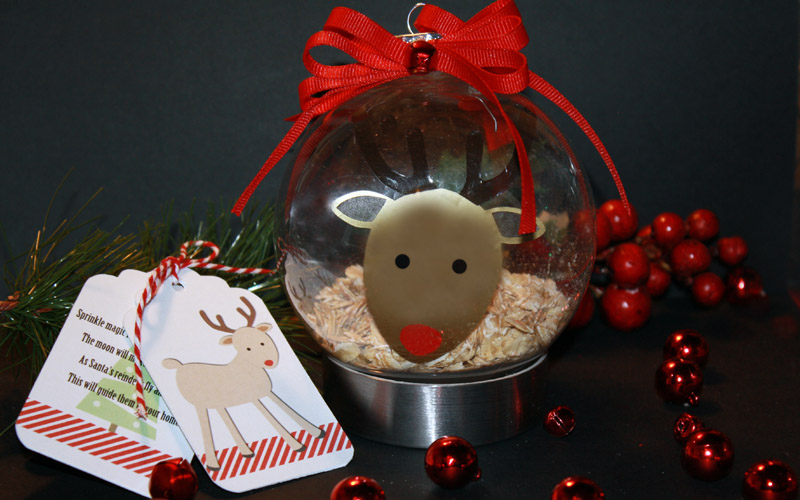
I created two tag images (one reindeer image, and one with a written sentiment), and then tied them together. Aren’t these so cute?

tag

Here’s a look at the final version of this ornament with the tags. I love this little reindeer! I made a couple of these ornaments for some friends’ little guys… and they loved them!


tagblub


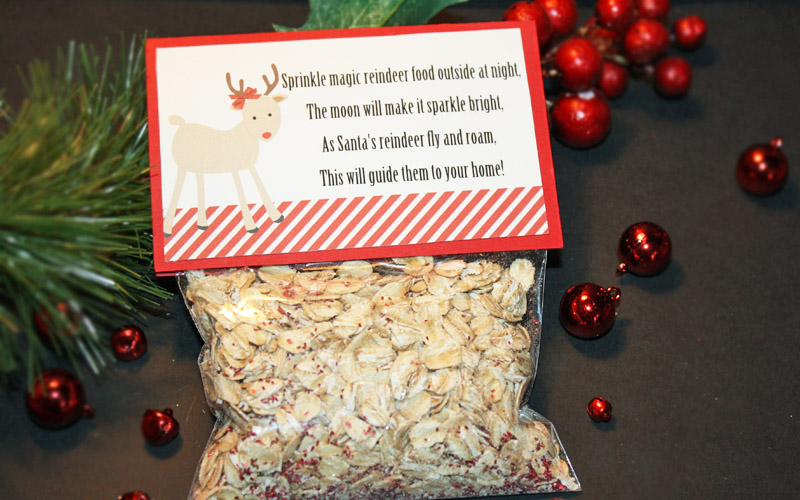
I also put the same sentiment onto a wider piece of cardstock in order to make a “treat bag topper”…tagreindeerfood_21


Here’s a look at the treat bag (just the reindeer food, without the ornament). This is a fun little gift, as well!


lightned


And there you have it!

I hope this tutorial has inspired you! If you’d like to give it a try, please join me in the forum and have fun creating something awesome for Christmas. You can earn points toward this month’s hybrid challenges! I can’t wait to see your creations.

Have a very Merry Christmas and a Happy New Year. Take time to slow down and spend time with the ones you love the most!


About the Author  TanyaTanya is a part of the hybrid team here at The Digital Press. She has been hybrid crafting for at least 10 years now, and loves creating and sharing those creations with others. Her all-time favorite tool is her Silhouette Cameo. She has been married for 26 years and has two sons: Chris, 23 and Chance, 19. She also enjoys crocheting, photography and woodworking.

12 Days of December – Day 9 – Holiday Cards and Teacher Gifts


Can you believe it?! It’s December 9th already, and we are into our 2nd week of December. The Christmas holiday is rapidly approaching and we are gearing up for a very fun (but busy!) couple of weeks.

For us expats living and working abroad (our family is in Shanghai, China), it can be also a difficult time due to the many farewells, as lots of families and their children relocate in December. It’s tough to say goodbye to dear friends so the moment our kids began attending the International School, I made it a habit to have little holiday gifts and personal cards ready for them to give to their classmates. Today, I want to share one of these gift ideas with you… and show you how to use your digital holiday kits to the max.

As an added bonus (because this month can be really busy with work, school activities, winter concerts, cultural activities, and parties), it’s great to be able to create these little gifts with minimal effort. This is a “quick and dirty” way to have something special and custom to give to loved ones. 😉

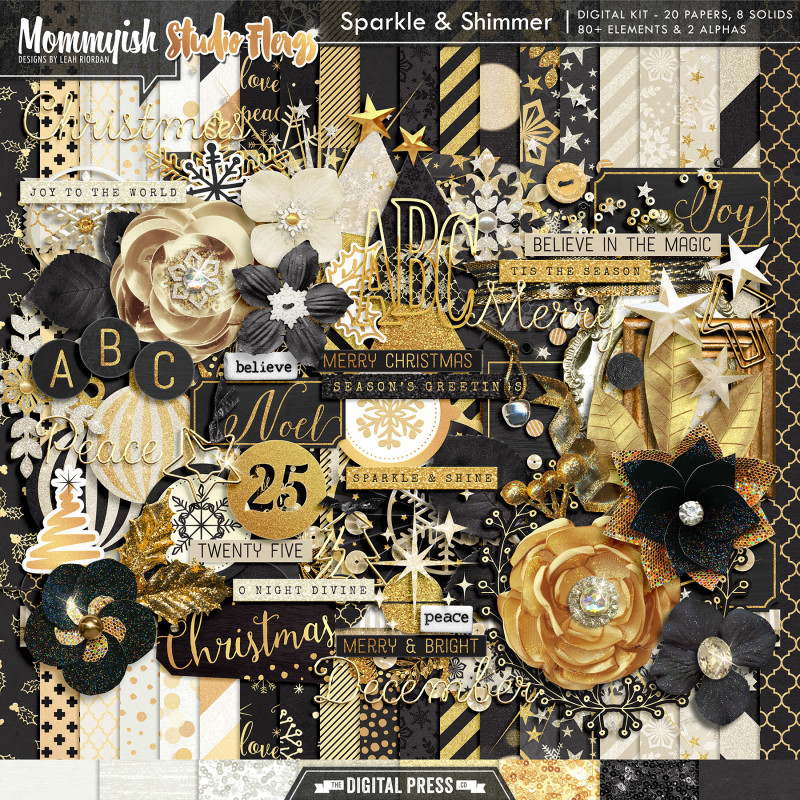
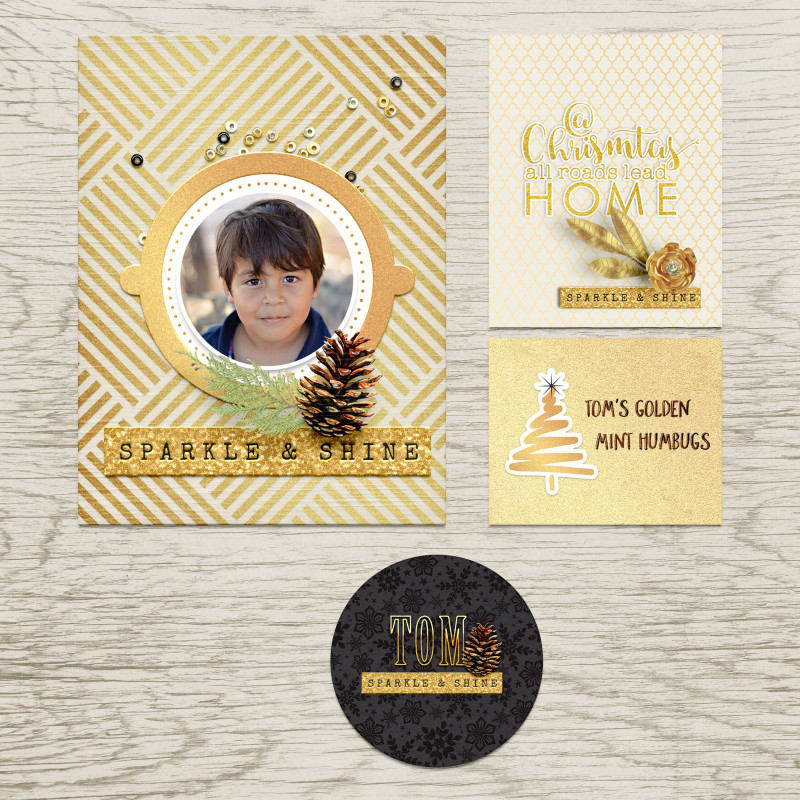
To get started, you will want to choose a digital kit/collection to work with. Lately, I have been loving the look of golden bling… and I couldn’t resist using the gorgeous Sparkle & Shimmer collab by Mommyish and Studio Flergs. This kit has so many awesome papers, journal cards, and elements that are perfect for adding some holiday sparkle…

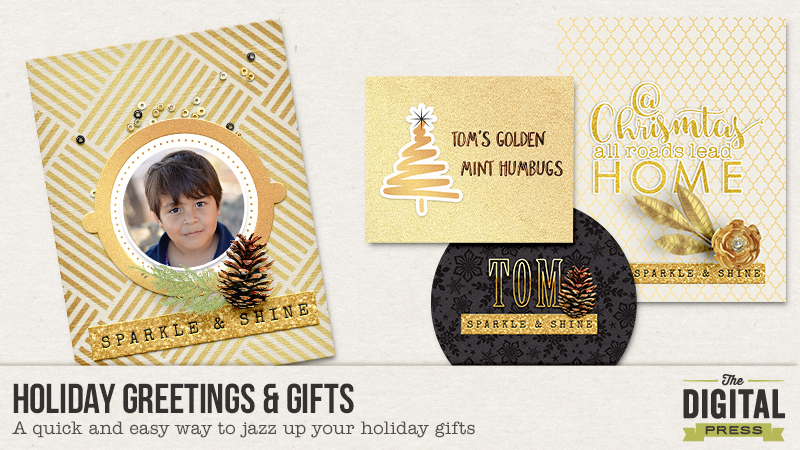
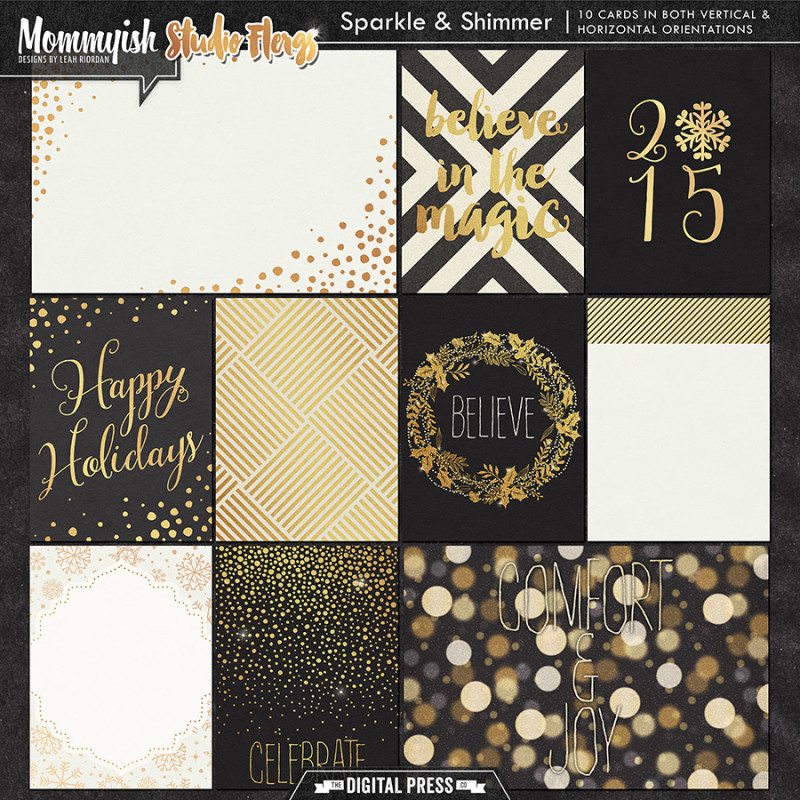
For the little tags I love to use journal cards/pocket cards, because most of the time they are the perfect size and you just have to add elements or word arts to make the tags your own. I chose to use these…

I also used an element (the little pine cone you see in the image below this) from the kit Traditionally Festive by KimB Designs (coming to TDP on Friday!).

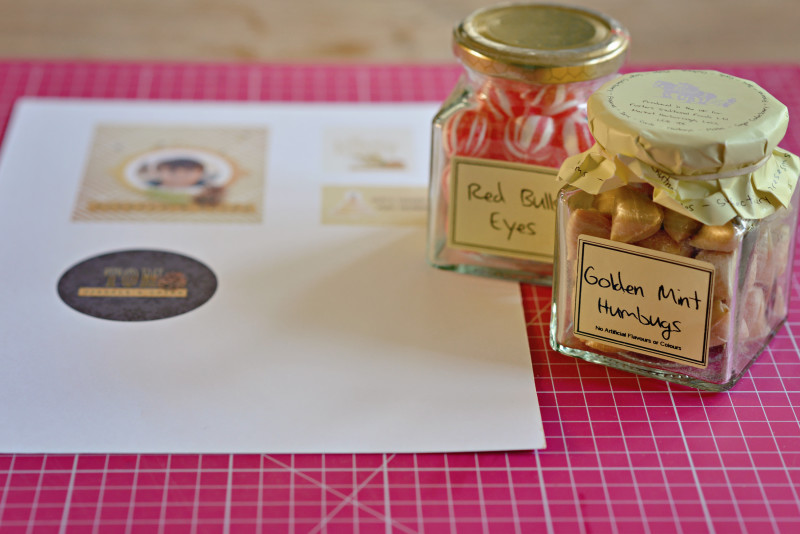
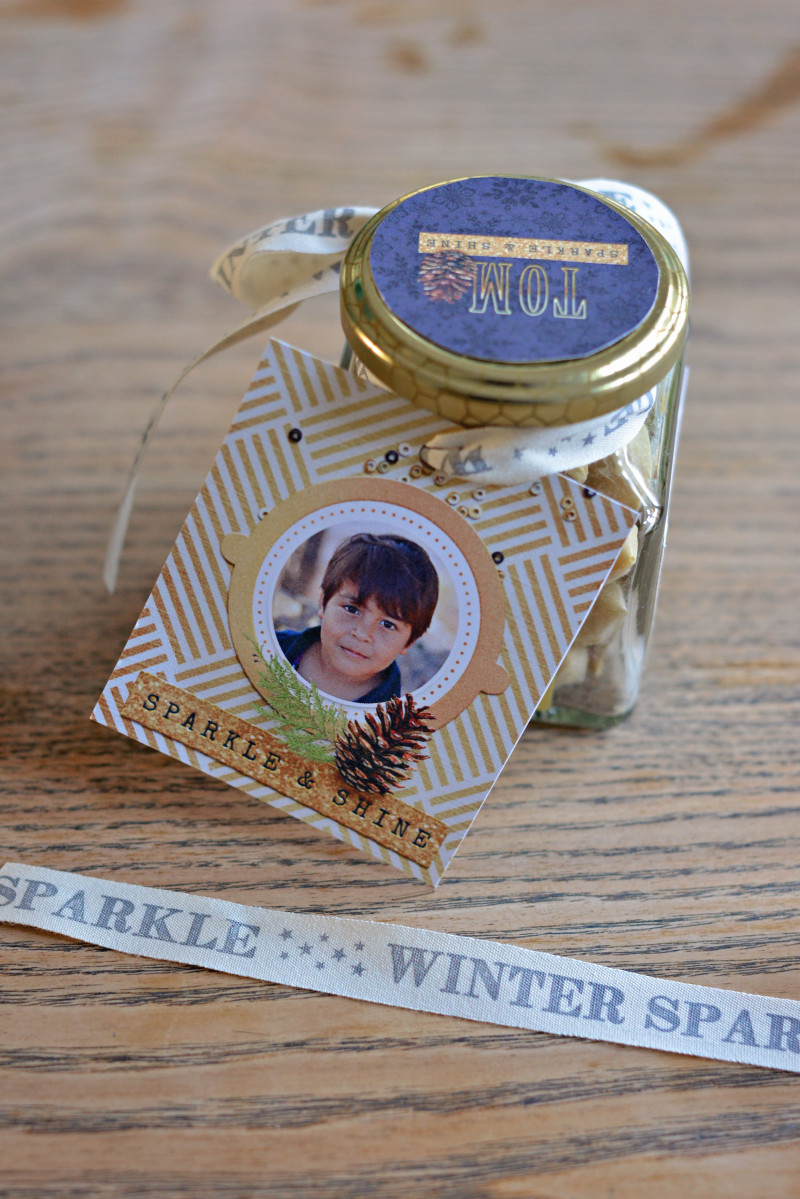
For this tutorial, I will be showing you how to decorate little candy jars. You can either buy the ready-made ones (pre-filled with goodies), or find yourself some mason jars & fill them yourself. For this blog post I am using ready-made versions.

Before I started to make each tag, I first measured the dimensions of the space I wanted to cover. For the candy jars (see below), I wanted a rectangle for the front & one to cover the back (I want to leave the ingredients list untouched). I also want to have something covering the cap as well.

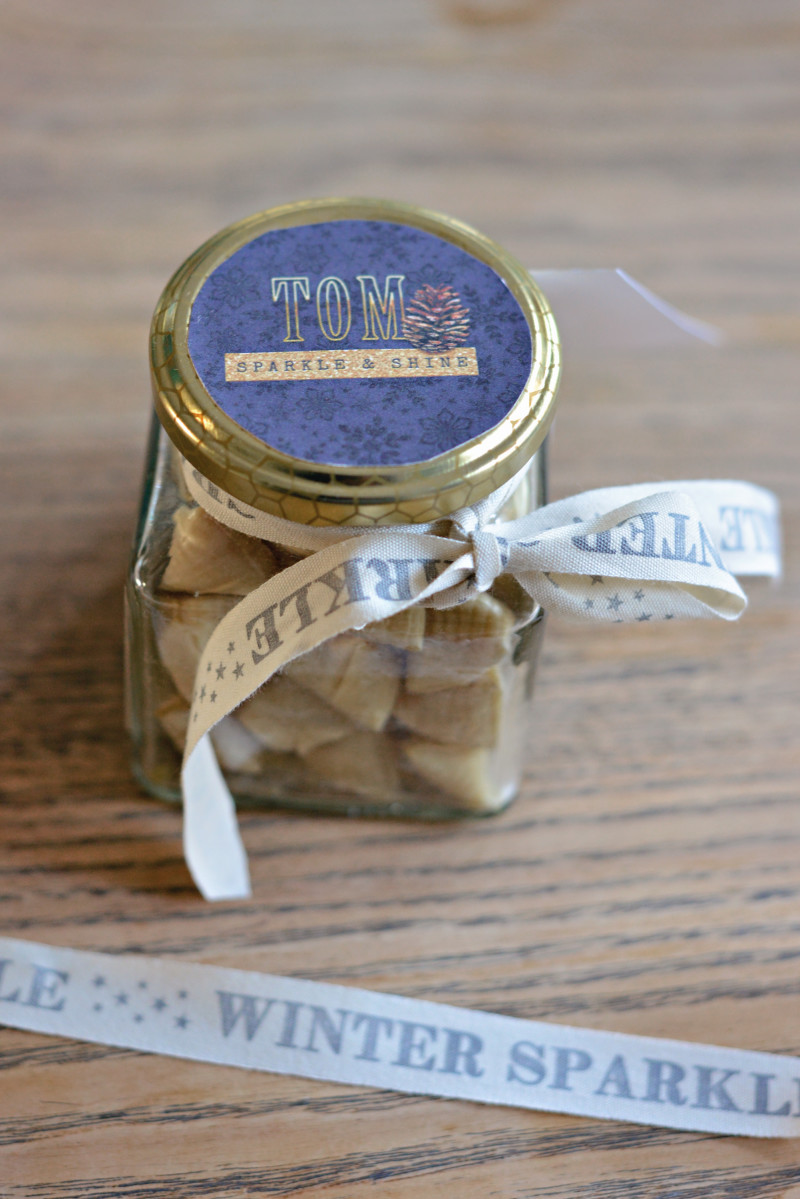
Once you have measured/planned and you are happy with your designs on the computer screen, print them out and then the magic can start. Here’s a look at a circle I printed out for the cap…

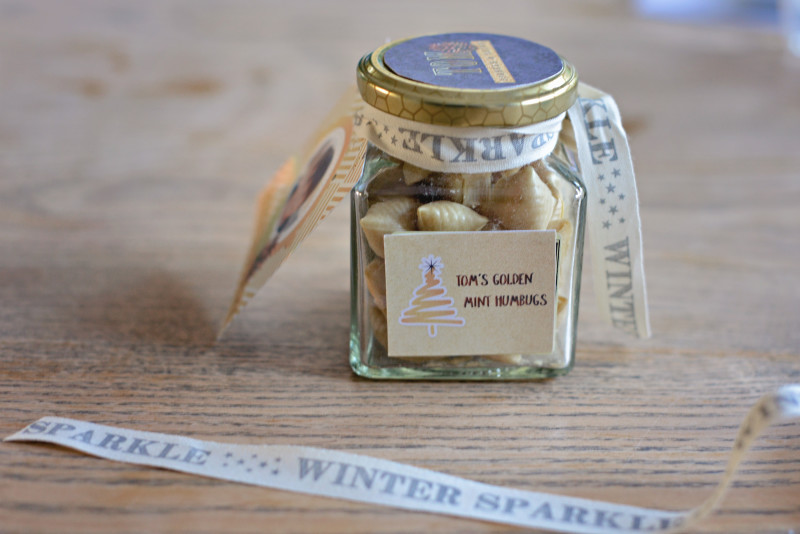
Here’s a look at the rectangle I used on the back, along with the tag I created to hang around the “neck” of the jar…

When I tried to add the gift tag I realized that it was a tad too large… so I ended up eventually cutting some from the top and the bottom.

Another option for small/simple gifts that I love to use… peppermint candy canes. Kids love them, and it’s a really easy item to tie a little tag onto (and then place all together in a bowl; I love to use the little Chinese steamer baskets — it looks awesome and makes it easy to share for my youngest).

It took me about 15 minutes to design the labels & tags. I printed them on 120 gr white paper, added some pretty ribbon, and in 30 minutes max I finished these cute little gifts for their teachers and good friends.

Hopefully I have inspired you to create some wonderful holidays gifts, as well. If you give it a try… please come show them off in the gallery or forum here at TDP, because I would love to see what you create and get inspired as well!


Cecilia About the author Cecilia (aka MissK) is a member of the creative team here at The Digital Press. This Dutchie is at the moment living and working in Shanghai, China as a photographer. Together with her husband, Udo, and kids Lana (7) and Tom (5), she loves to explore the world and enjoy life to the max. Carpe Diem!