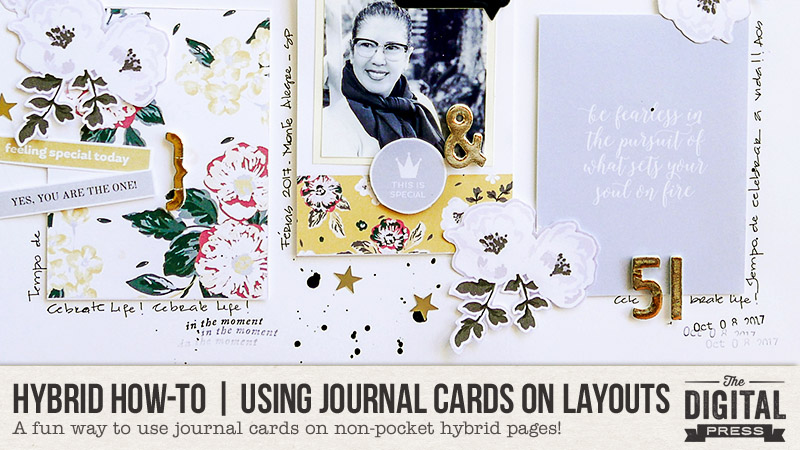
Category: Hybrid Crafting

Hybrid How-To | Using Journal Cards to Design Hybrid Layouts

Hello everyone! It’s the third Saturday of the month, and therefore it’s time for another edition of our Hybrid How-To series here on The Digital Press blog!

Today, I’m going to show you how to use digital journal cards in a fun way — to help create non-pocket-style hybrid layouts!

Supplies Needed

  • 12×12 white cardstock (or any other color and size, as you prefer)
  • Any physical supplies/embellishments you might want to add (I used enamel stickers, gold foam stickers, and little gold stars)
  • Stamps and spray paints
  • Digital kit of your choice (I used Limited Edition By Sahin Designs)

Instructions

First, I always start my project in Photoshop. I opened a new document in Photoshop and used a canvas that was the same size (12×12) as my eventual physical layout.

Next, I chose to work with a grid design for my page. By dragging different cards and elements from my digital kit onto my canvas in Photoshop, I made a digital version of the layout. I love to work this way; it’s easy and quick, and a great way to see the final result before I actually glue things together.

Here is a screenshot of my workspace in Photoshop…
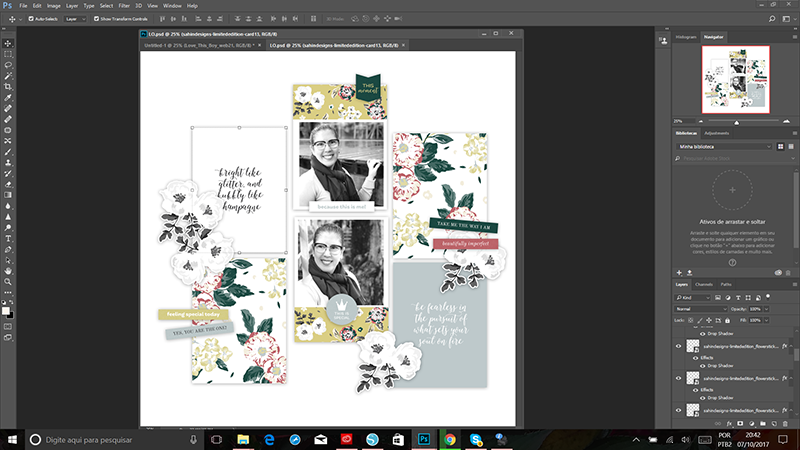
I had so much fun arranging my cards, photos and elements until I became happy with the result. I really love this process. But when the digital version is done, the even more fun part starts. It’s time to cut and paste!

At this point, we will have to use different adhesives and try to give dimension to our project. It really brings interest to the page. For some elements I used regular double sided tape, and for others, I used foam tape (raised/dimensional). I also used foam tape for the journal cards. I think it helps them to pop up on the page and have more focus.

Here is a close-up look, showing these different dimensions in the layout as I worked…
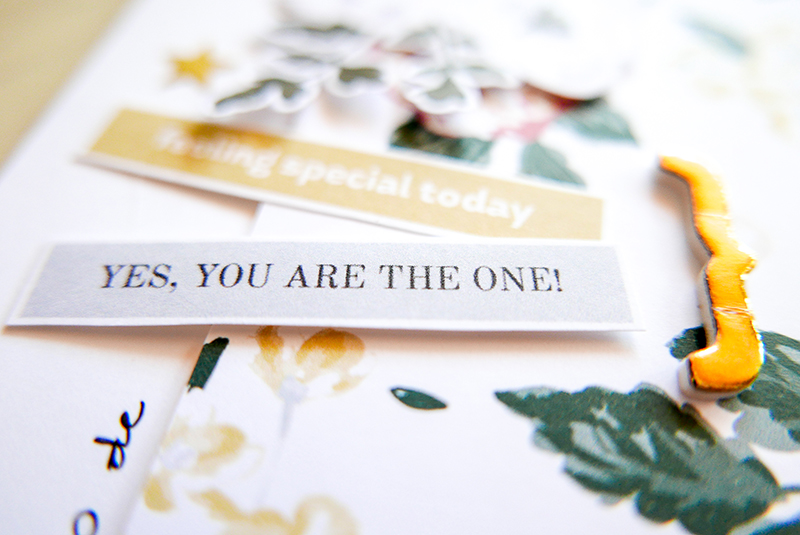
Here’s another look…
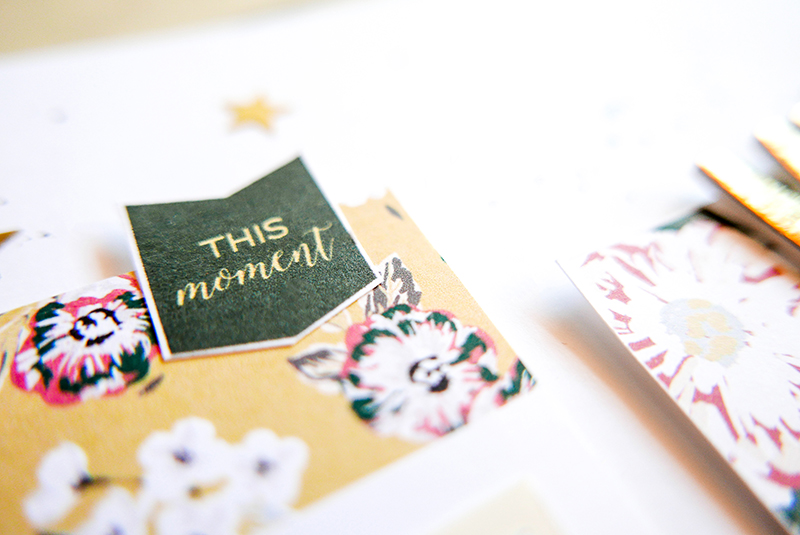
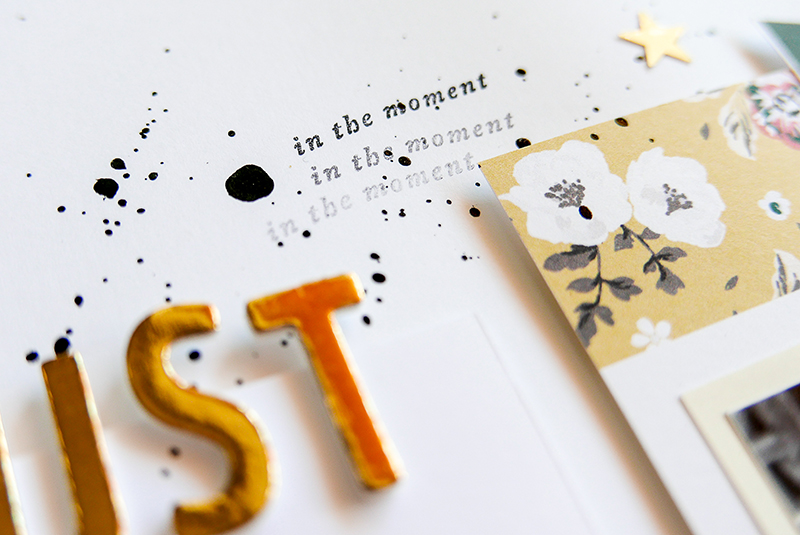
Once all things are glued, it’s time to bring our page to life and give it texture with some physical elements, stamps and paint splatters.

I love to use small stamps and use the ghosting technique which consists in stamp more than one time without put more ink on the stamp. It brings a lovely texture to the project. I also like to add contrast to the page by adding some paint splatters in black.

All these add-ons and the physical embellishments give more interest to the page. I really love this part of the process.

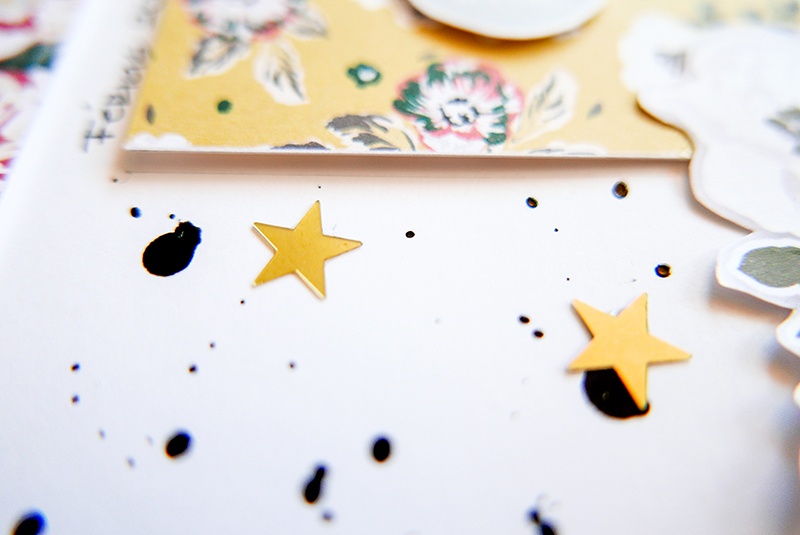
In order to embellish my page, I used some gold foam tickers for my title, an epoxi speech bubble, and some little gold stars.

Here is another close-ups view (note the stamps and paint)…
And here’s a good look at the pretty gold star embellishments I added…
_1020908

I chose to write my journalling along the cards to ensure that my page will be cohesive. Here is a look at the final result…
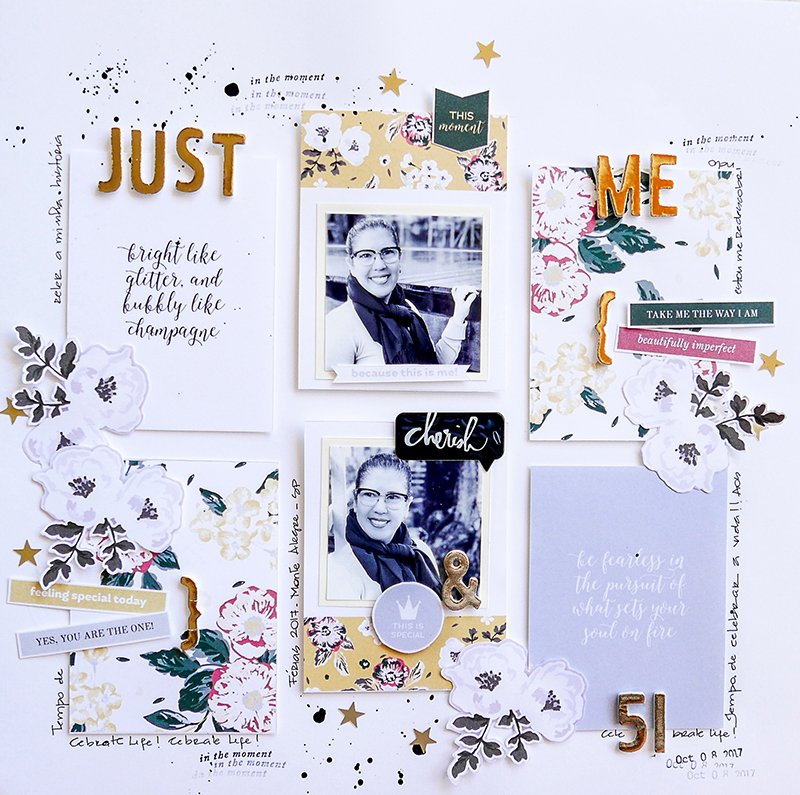
As you can see, using digital journal cards is a fun and easy way to make a beautiful, quick, and cohesive layout.

If you’d like to give this a try, too, don’t forget that you can earn challenge points at The Digital Press! Come visit the CROSSWORD SECTION in The Digital Press forum, and you’ll find this month’s Hybrid Challenge thread (*NOTE* for each month’s Hybrid Challenge at TDP, you get to choose one of the two (2) “Hybrid How-To” tutorial posts from here on the blog for that month, and then you get to make your own version of that chosen project). If you choose to give today’s project a try… all you have to do is make a hybrid layout using digital journal cards and elements that have been printed and cut into a physical format (similar to mine, but it doesn’t have to be identical in size or format — you can do what works for you!).

Give it a shot, and share your final results with us! We can’t wait to see what you come up with. 🙂 Have a great weekend… and happy scrapping!


About the Author  Andrea Albuquerque is part of the Hybrid Creative Team here at Digital Press. Andrea has been a scrapper since 2010 and a photographer since 2012. Although she adores the flexibility and creativity of digital, she can’t resist playing with paper, paint, and embellishments… so hybrid scrapping is the perfect medium for her! She lives in Brazil with her hubby.

Hybrid How-To | Customizing Digital Elements

One of the key things that attracts me to hybrid memory-keeping are all of the wonderful digital embellishments that can be used (and/or tweaked to work for any project!). Namely, the ability to print and cut digital elements many times over is definitely a huge bonus for crafters on a budget (one purchase = endless uses!). Even better, though, is the fact that if you need to alter an element slightly to make it fit into one of your projects — with digital elements, you can do this! Today, I am going to show you how to take a standard digital element and customize it for your project.

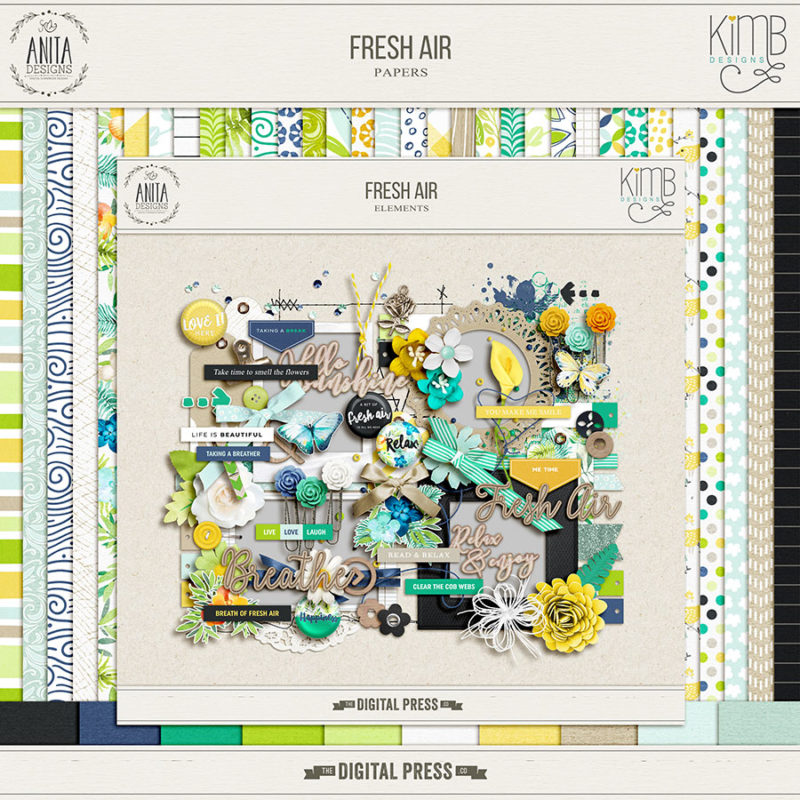
The first step is to choose a digital kit from the amazing selection at The Digital Press. I chose the gorgeous Fresh Air collection designed by Anita Designs and Kim B Designs, because I love the color combination and the clean lines…

For my projects, I wanted to use one of the tags found in this collection (see below). The “Love” tag in the kit is gorgeous — but I wanted a shorter version for my project, so it would fit better into the space I had available. This next simple editing trick works wonders for tags that have a plain section.

Shorten a Tag

You will need photo editing software such as Photoshop (PS) or Photoshop Elements (PSE) — but there are plenty of alternative applications (there’s even a free online PS tool/version).

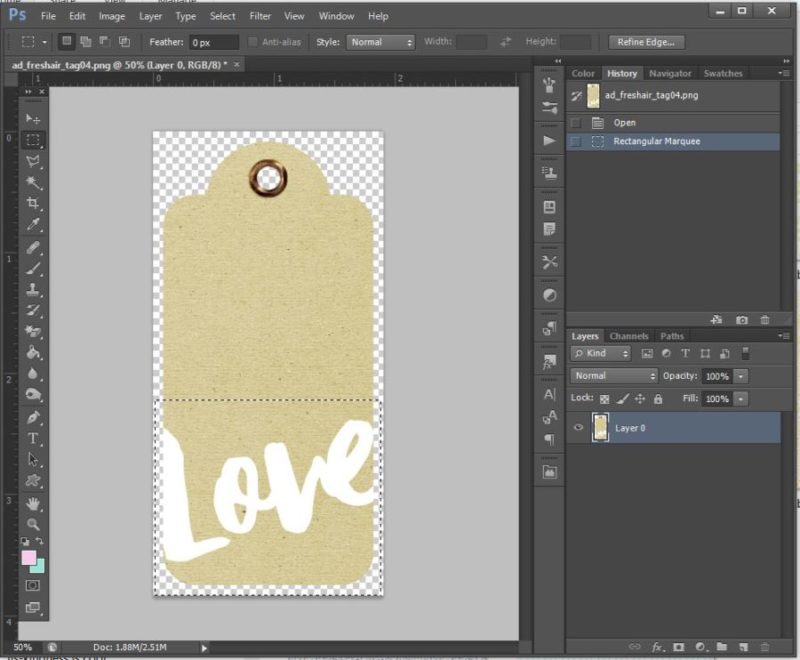
  1. Open your tag in the editor and select the marquee tool (shortcut key + m + the dashed rectangle on the left).
  2. Now select an area to move. We will shorten the tag by moving the lower section up towards the top of the tag. Drag the mouse to select an area as shown below…

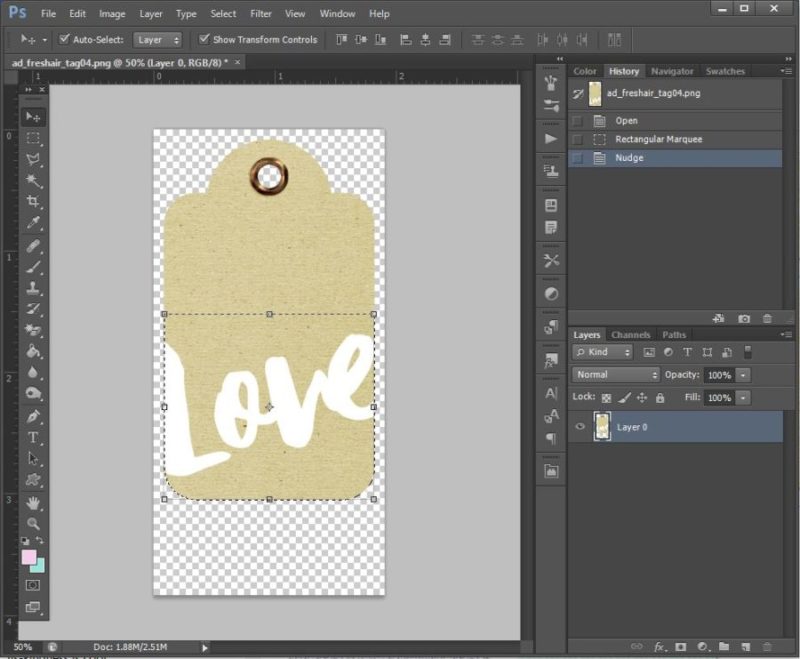
3. Switch to the move tool (shortcut key =+ v).
4. Using the arrow keys, move the selected area up; you should see the tag becoming shorter as you move it…

Voila! The tag is now shorter — and it’s just right for my project! This techinique is very simple but very effective.

*TIP* don’t forget to “Save As” a new document, or you will actually overwrite the original file — which you don’t want to do!

Cookie Cut Your Own Tag

Next up, how about making your own version of the tag? We will use a cookie cutter effect to create another tag from patterned paper. This time I’ll use the free online Photoshop tool to demonstrate…

  1. Open a tag and paper; the paper can be patterned or plain.
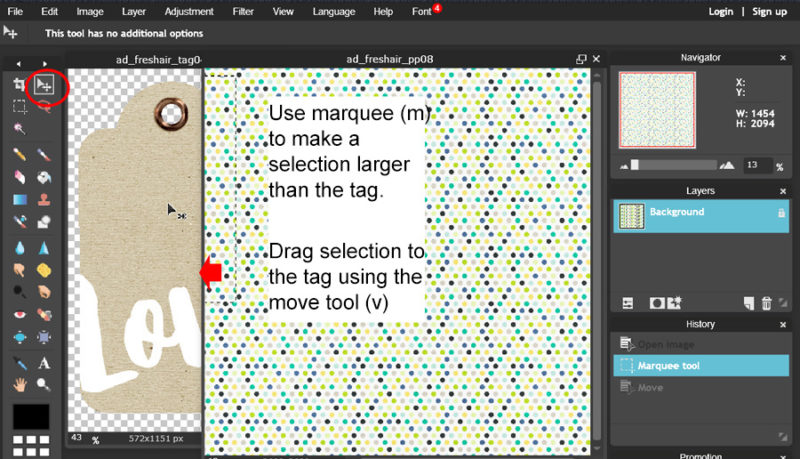
  2. On the patterned paper window, make a selection larger than your tag using the marquee tool (m).
  3. Now click and hold on the selected area to drag the paper selection across to the original tag. There will be 2 layers in the tag window.
  4. Close the patterned paper.

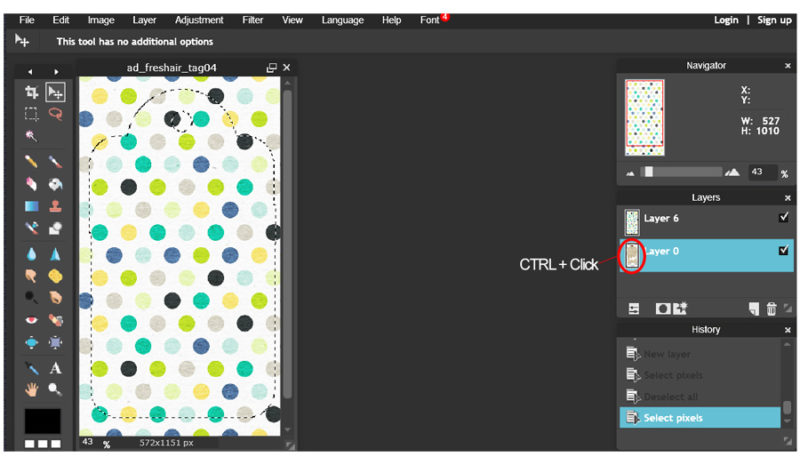
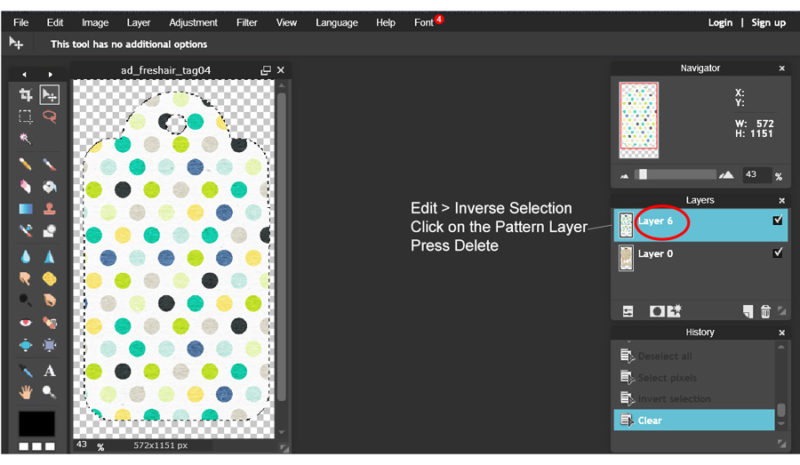
5. In the tag window, Ctrl+click on the icon on the tag layer (layer 0 as shown above). This selects the image outline. You will see the “marching ants” around the outside of the tag.
6. The current selection is the tag itself but we only want to cut the ‘excess paper’ outside of the tag. To invert the selection, Edit > Invert Selection. This selects everything except the tag shape.
7. To cut out the patterned paper in the shape of the tag, click the patterned paper layer.
8. Click Delete to delete the selected area. The excess paper is deleted leaving only the tag behind.

Ta-da! Your new tag is ready to decorate… but again, don’t forget to save as a new document first (so you don’t overwrite your original file).

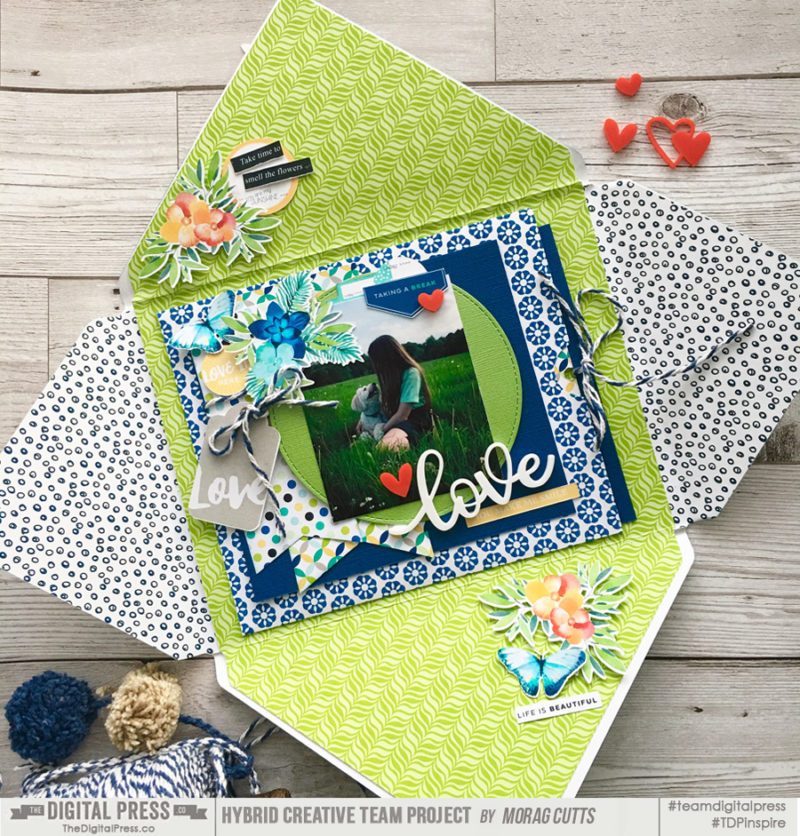
Here’s a look at my finished project, which is a decorated envelope (happy mail!)…

I used patterned papers from the kit to make an ‘envelope’. There are plenty of free envelope templates on the internet to use as a guide.

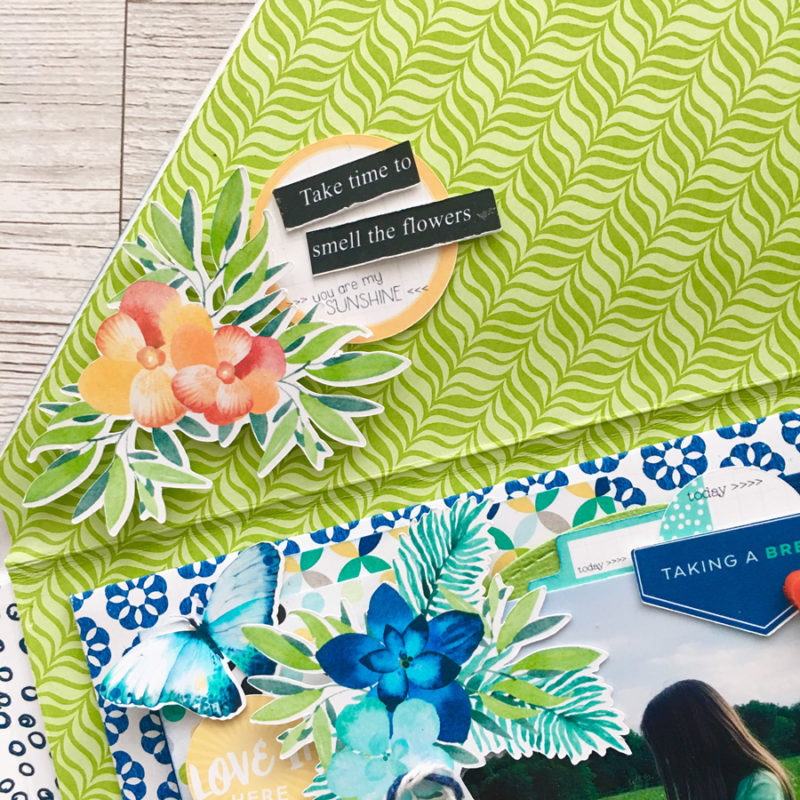
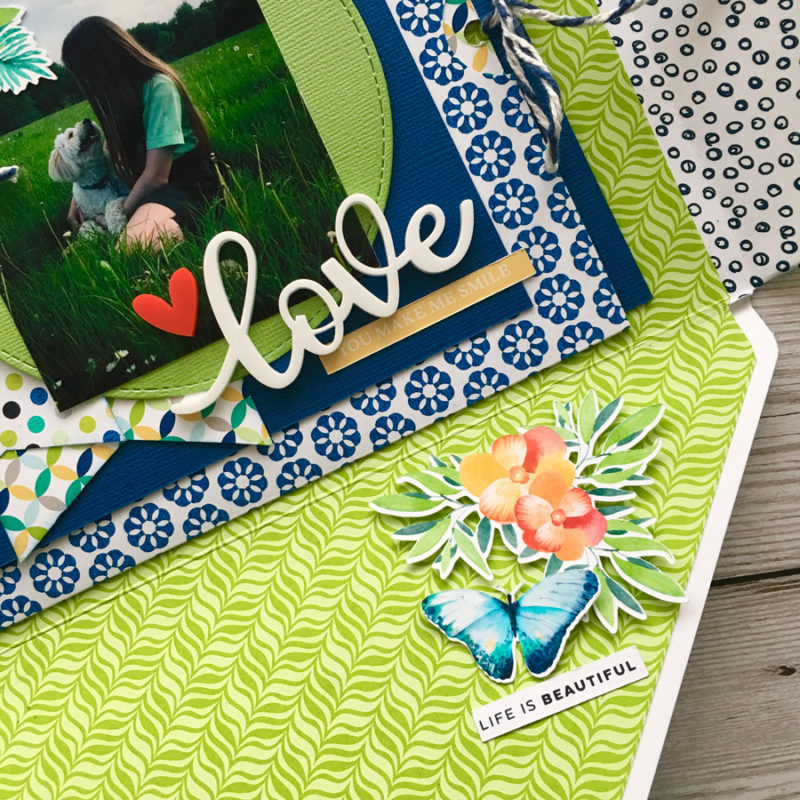
Here’s another closer-up view…

I only have singled-sided printing paper, so I lined the envelope with different papers. I really like the additional interest this created. It also made the project a bit more sturdy. A simple pocket holds a tag (for a message or for adding journaling). To finish off, I fussy-cut some flowers and butterflies and added tags and labels…

I hope that with a few of these ideas, I have inspired you to use elements from your own digital stash and tweak them around to make them work better for your own projects (and maybe even inspire you to try making your own happy mail and embellish with customised elements?). I think receiving a project like this would really make someone’s day!


Morag Cutts is part of the Hybrid Creative Team here at Digital Press. Morag has been an avid scrapper and photographer for ten years.  Although she adores the flexibility and creativity of digital, Morag can’t resist playing with paper and embellishments – so hybrid scrapping is the perfect medium for her!  Morag lives in the UK with her hubby, two kids and puppy.

Hybrid How-To | Custom Canning Labels

Hello everyone! Kate here, bringing you another edition of our Hybrid How-To series on The Digital Press blog!

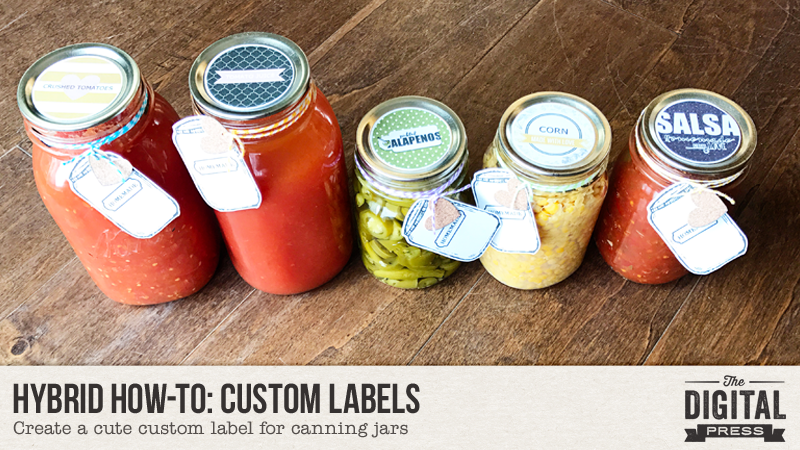
Today I want to show you how easy it is to make custom labels for all of your jars. 🙂 August and September are canning months where I live. I mostly can tomatoes (I have 48 tomato plants this year!), but I love doing relishes and pickled vegetables as well. It really helps stretch the budget for our big family.

Supplies

  • digital scrapbooking kit of your choice (I used Homemade by Anita Designs)
  • cardstock OR printable sticker paper
  • cutting machine or scissors
  • hot glue (if not using printable sticker paper)

Instructions

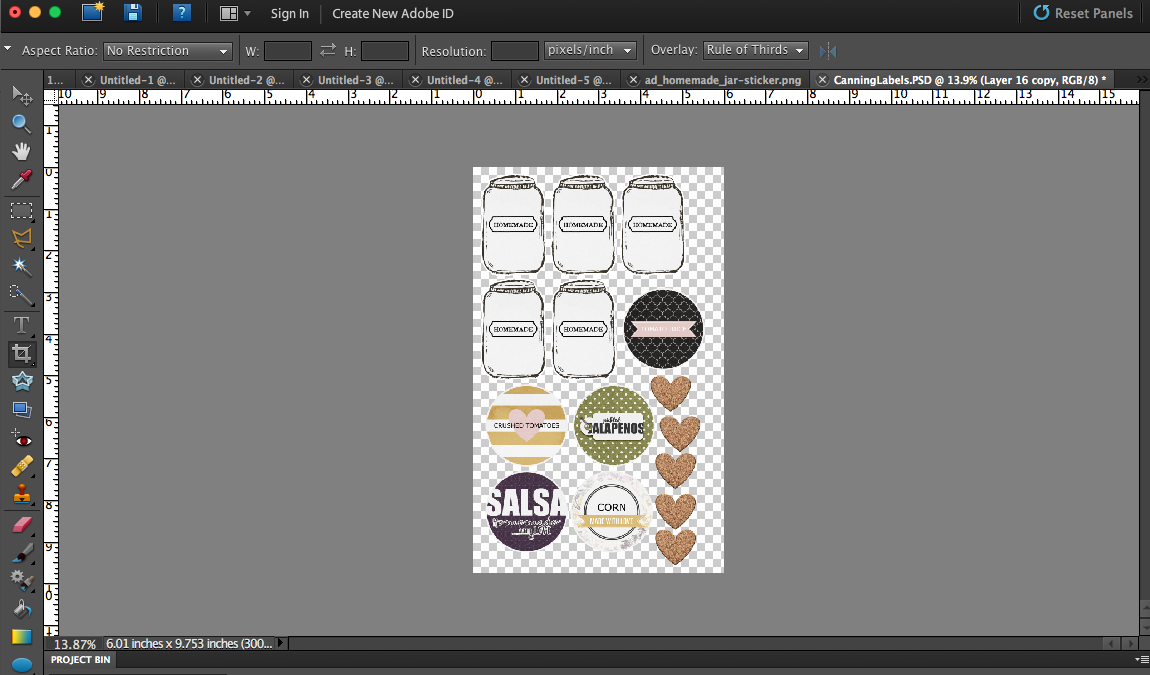
First, you’ll design your labels in a photo-editing program like Photoshop (PS) or Photoshop Elements (PSE). For regular-mouth jars, start with a 2″ circle as a template. If you’re just doing the labels (not the extra decorative tags), I recommend sticker paper. It’s so easy to copy the design for however many jars you have and fill the page with your labels, with no other adhesive necessary.

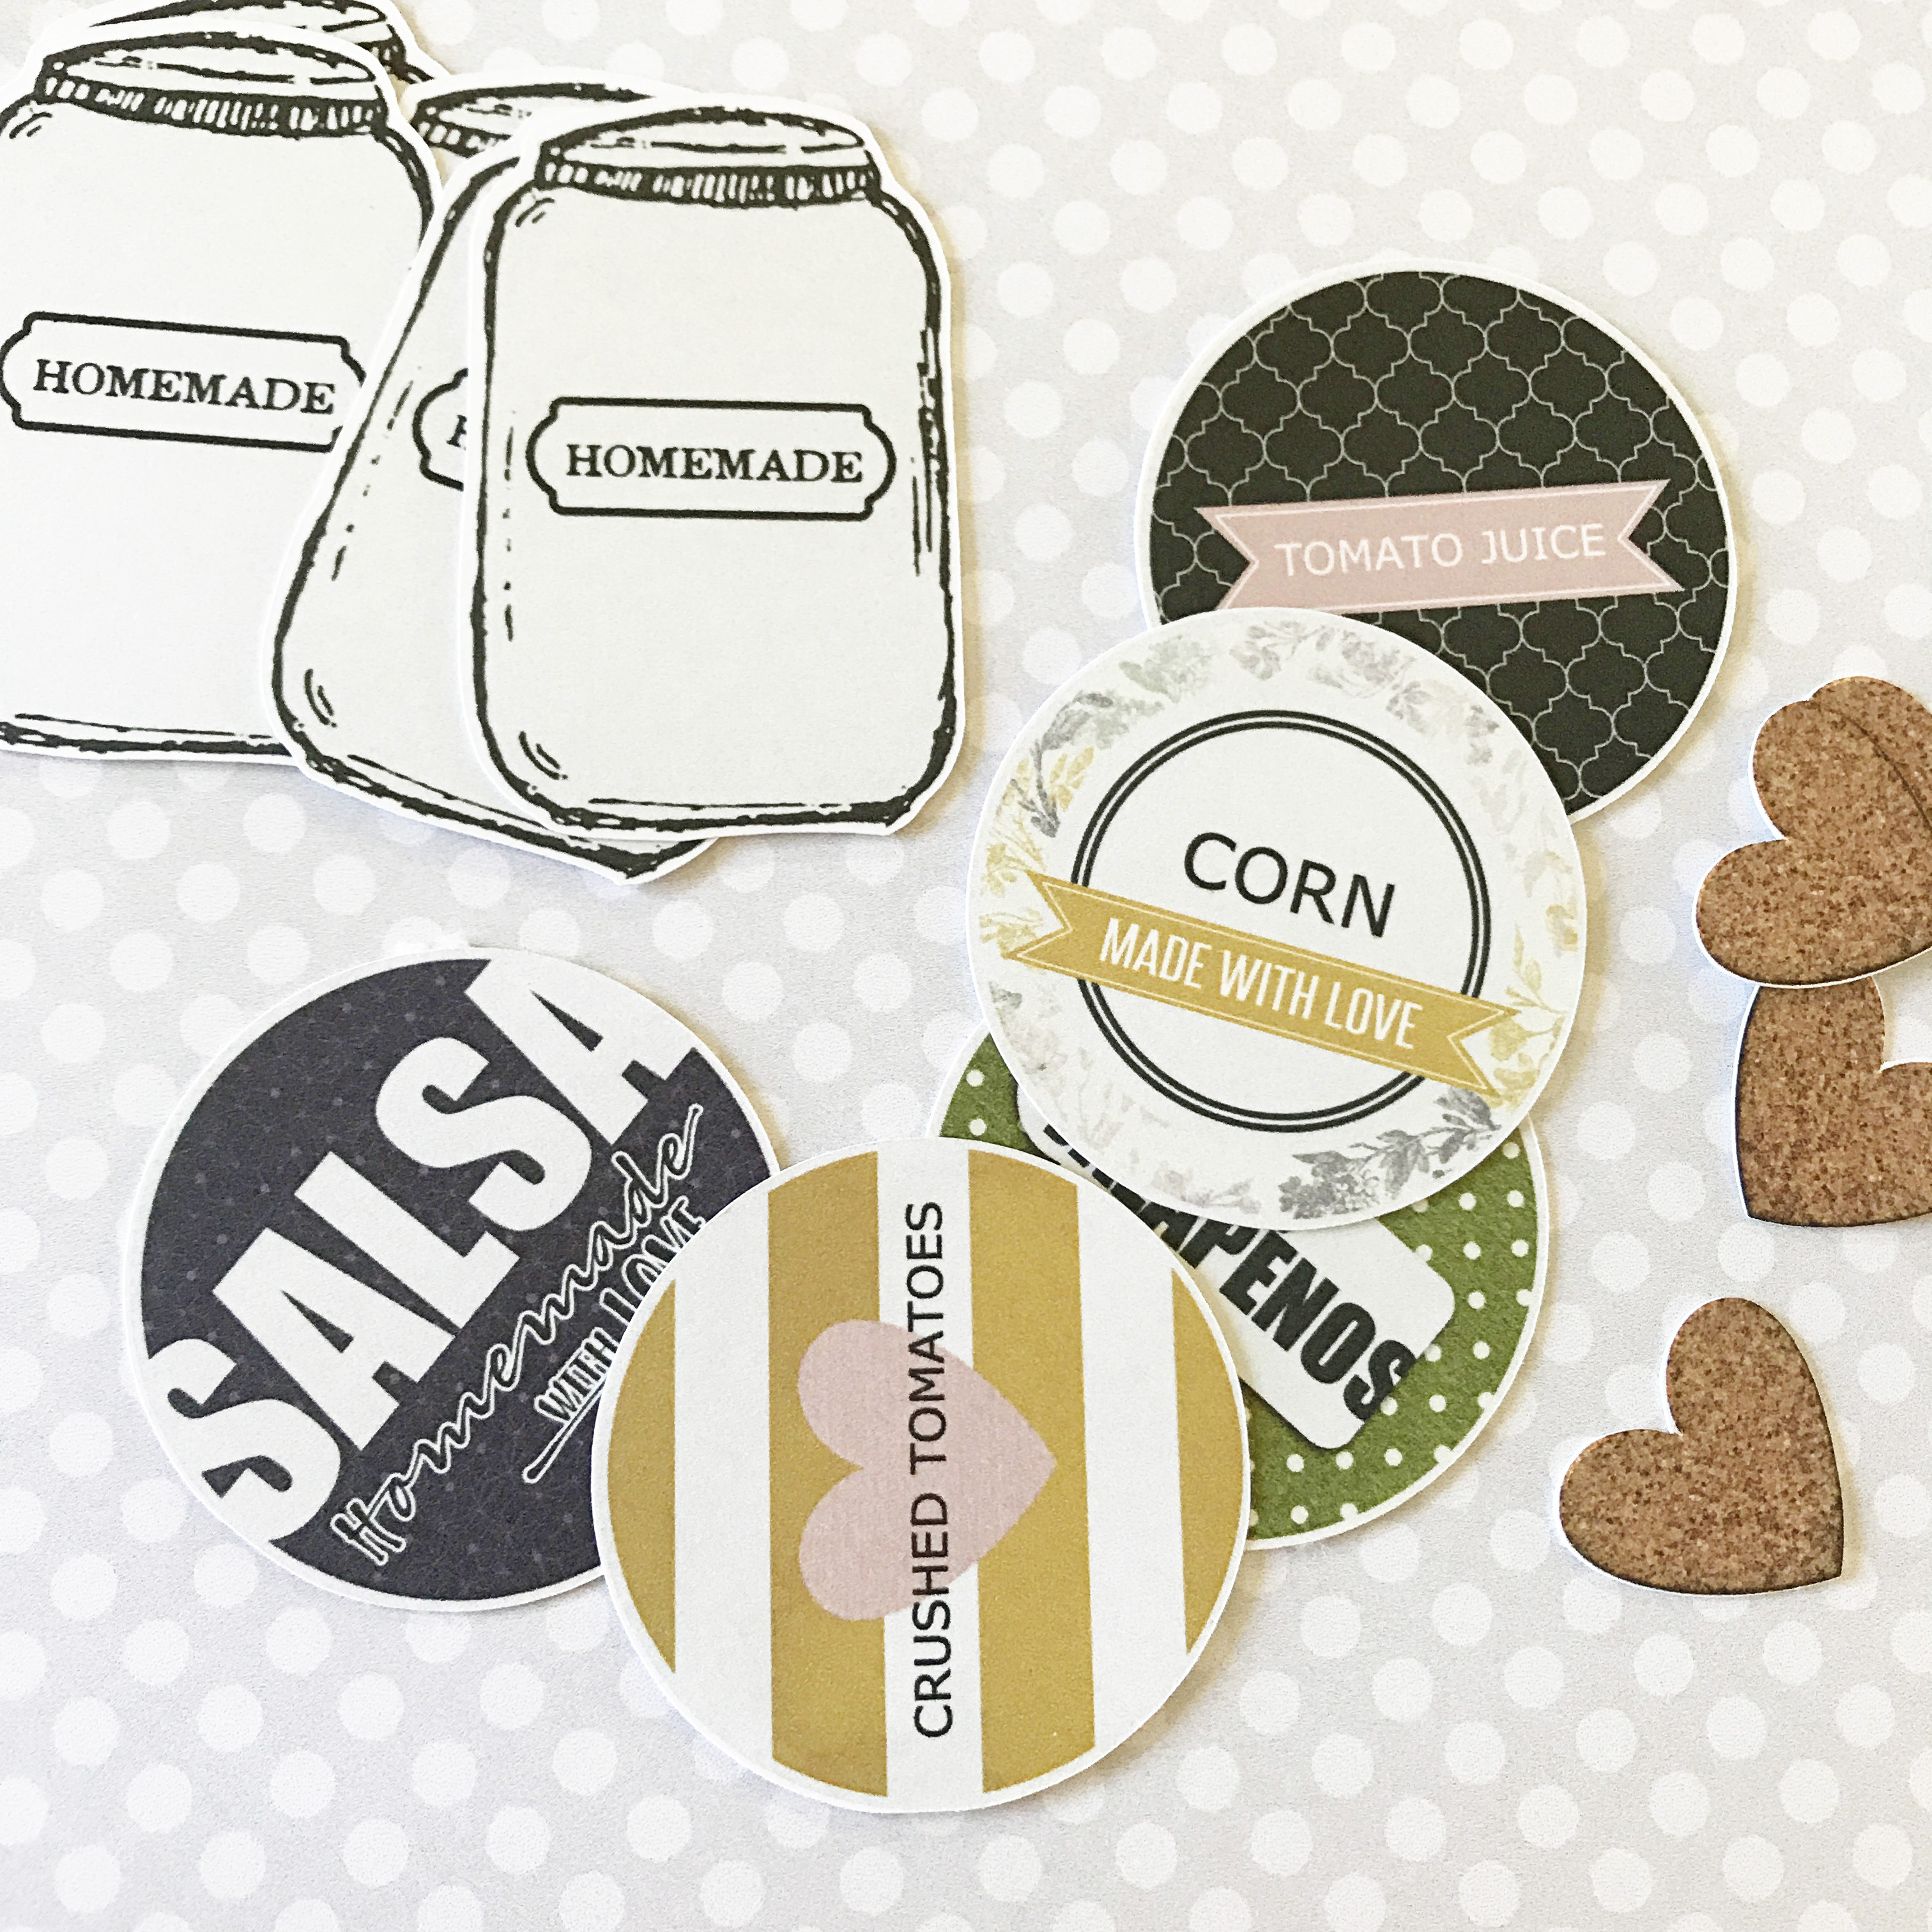
Next, you’ll print and cut your labels…

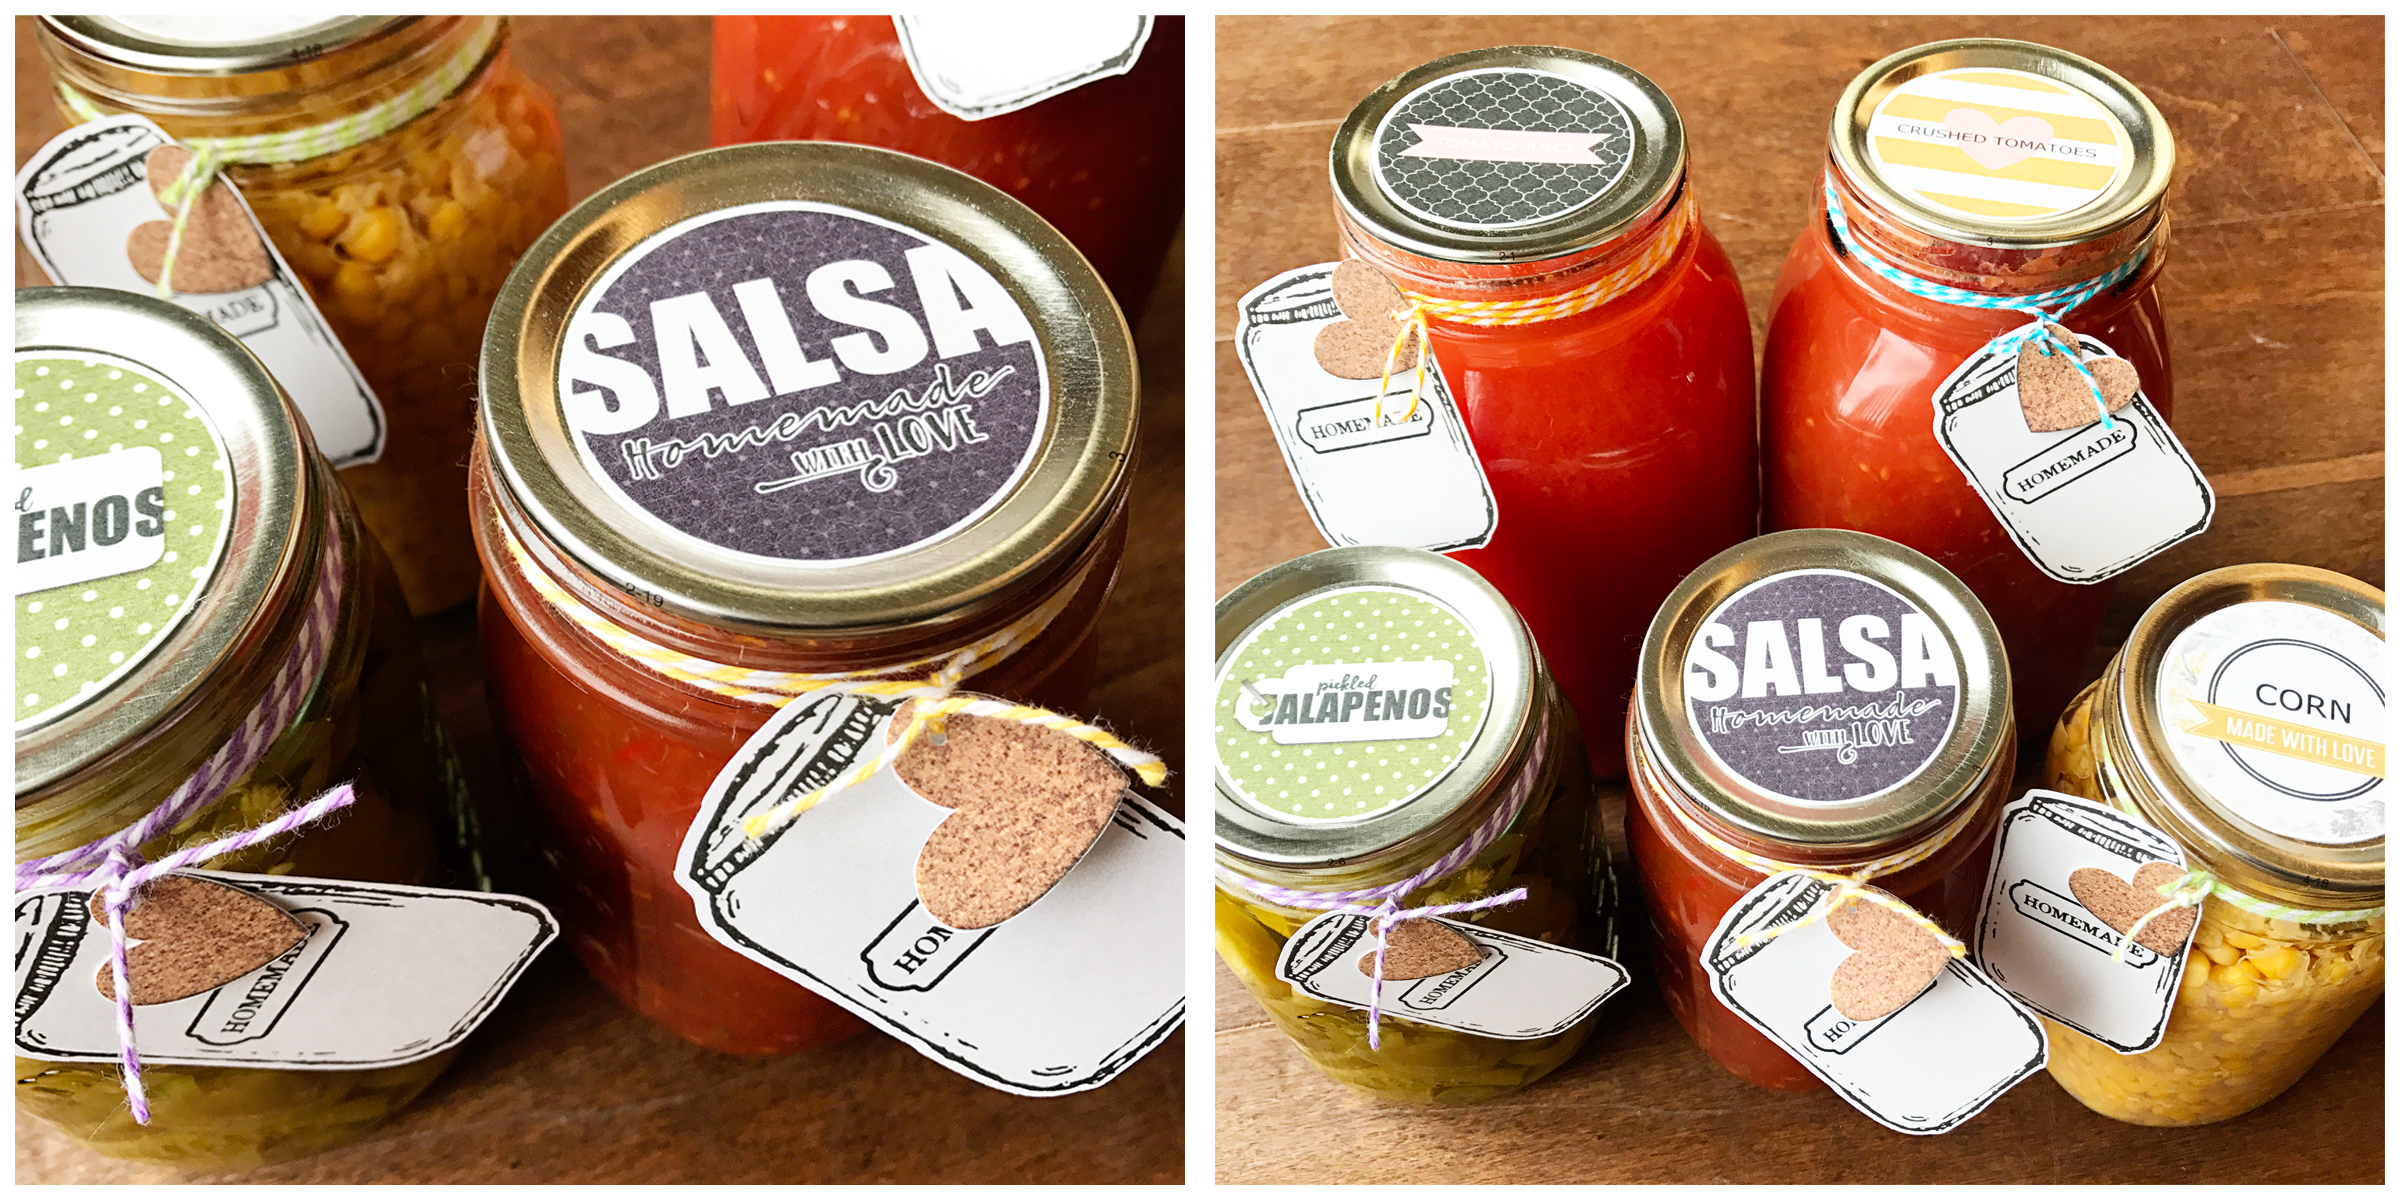
After that, you simply need to adhere the labels to your jars (and/or create hang-tags to tie onto jars with string, etc.). If you’re not using sticker paper — I have found hot glue to be the best choice for adhering the labels straight to the lid.

Here’s a look at a finished batch of my jars with labels…

Aren’t those cute? And so easy!

I hope you’ll give these a try! If you’re interested in earning points in The Digital Press’s challenge system (good toward earning everything from discounts to free kits!)… come to the forum and jump into this month’s hybrid challenge!


Kate About the Author  Kate is on the hybrid team here at The Digital Press. She lives on the Utah/Colorado border with her husband, 5 kids, 10 chickens, and a dog named Gracie. She’s a city-born girl who found she’s really a country girl at heart. She can be found outside, barefoot, and probably in her garden.

Hybrid How-To | Back To School Bookmarks

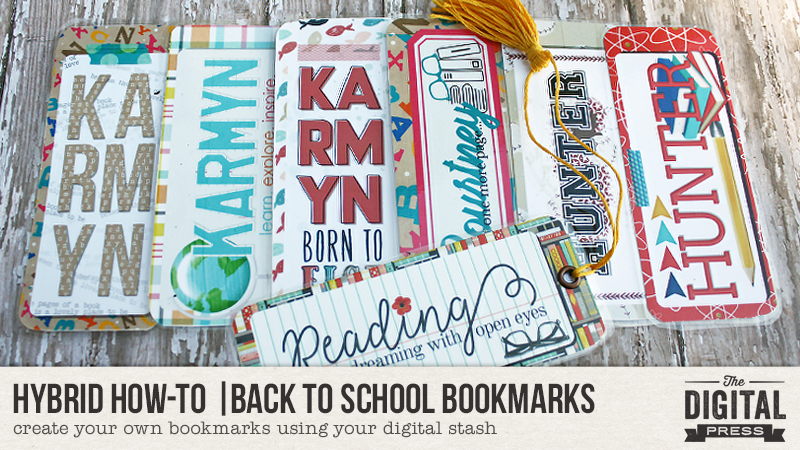
Hello everyone! It’s Tanya here, and I’m excited to share another Hybrid How-To post here on The Digital Press blog! Our team took the month of August off from blogging during TDP’s bi-annual Pennysaver event, so it’s been a while since I’ve posted… but can you believe that it’s Back To School time already? And what better time to show you how make these super cute bookmarks using your digital stash… 🙂

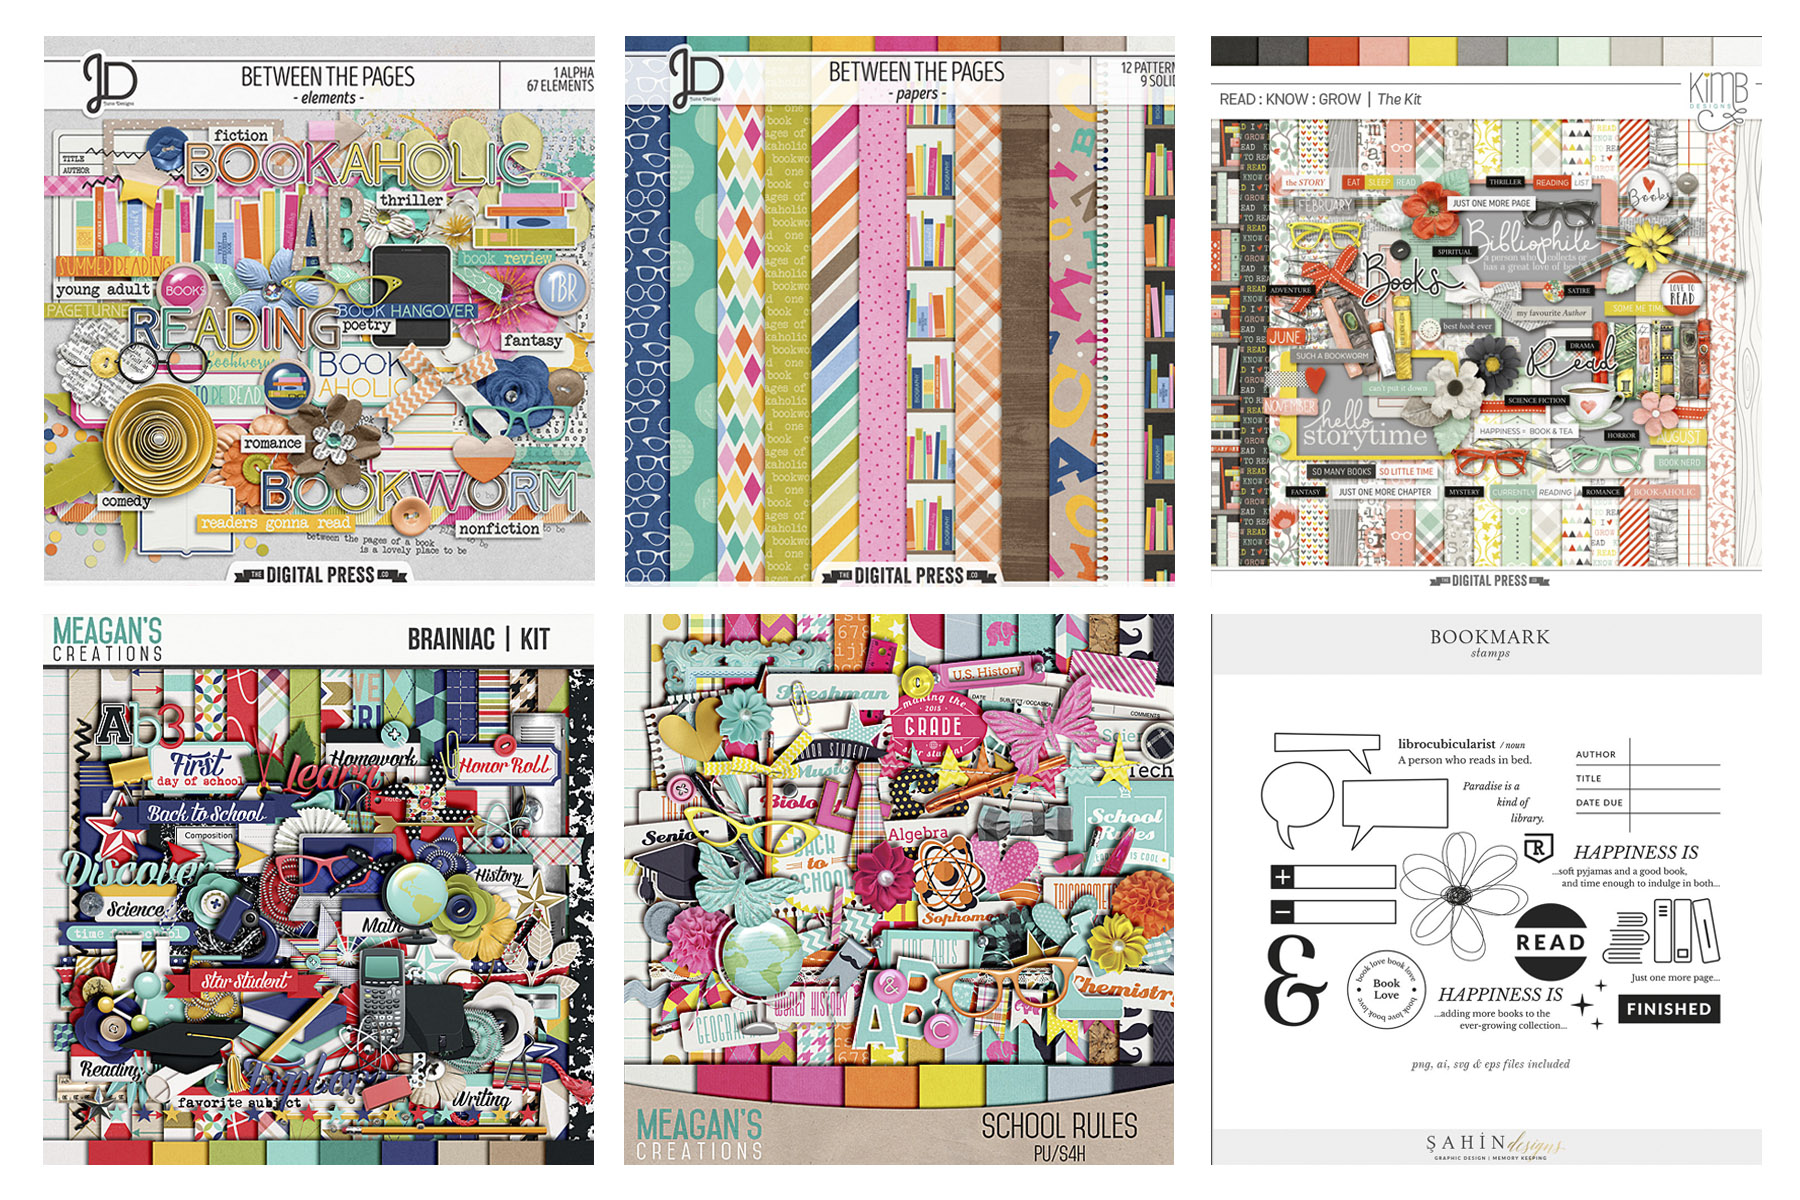
When planning out this project, I originally started with digital kits that have a “book” theme. Once I got started, though, I began to think… why not do something more personal for the person I am making them for?” My kids are grown, so I always tend to make things for my friends’ kids — and as you can see, below, Karmyn loves fishing and Hunter loves baseball! So I added those themes into the mix of products I was choosing, as well.

In the end, I used the following digital kits from The Digital Press to create my bookmarks:

OTHER SUPPLIES NEEDED:

  • Card stock
  • Printer
  • Corner punch
  • Scissors
  • Paper trimmer

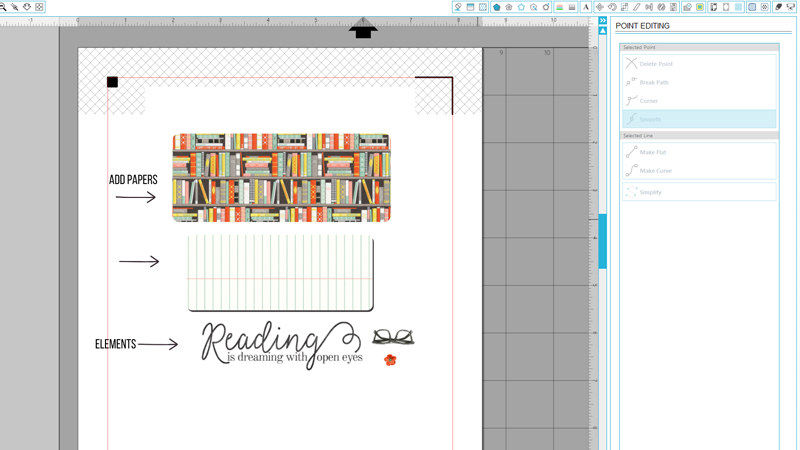
I used Silhouette Studio to create my bookmarks, but you can use any photo editing program.  I find that Silhouette Studio is pretty simple to use, and you can do almost anything in it that you can do in other photo editing software (I haven’t fully figured the shadowing out quite yet… still working on it!).

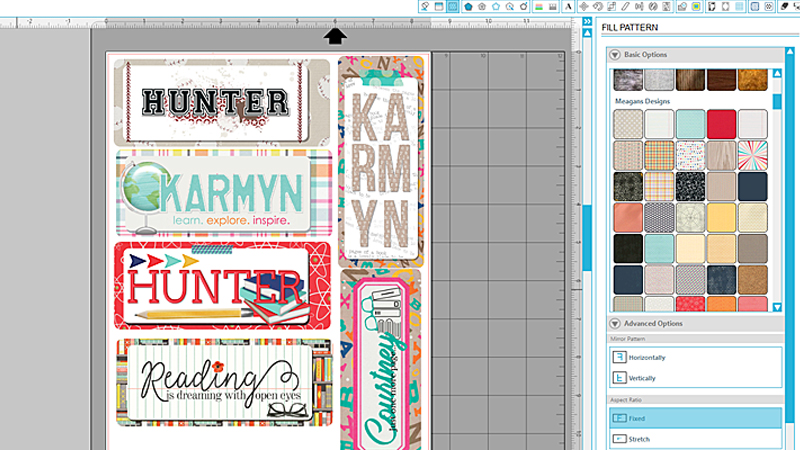
The first thing that I did was to draw out two rounded rectangles using the drawing tool. One is 4.5″ x 2″ and the smaller one is 4″ x 1.6″.  Then, I added papers and elements that I wanted to use for each bookmark…

Next, I moved my layers on top of each other and arranged the elements, as shown below…

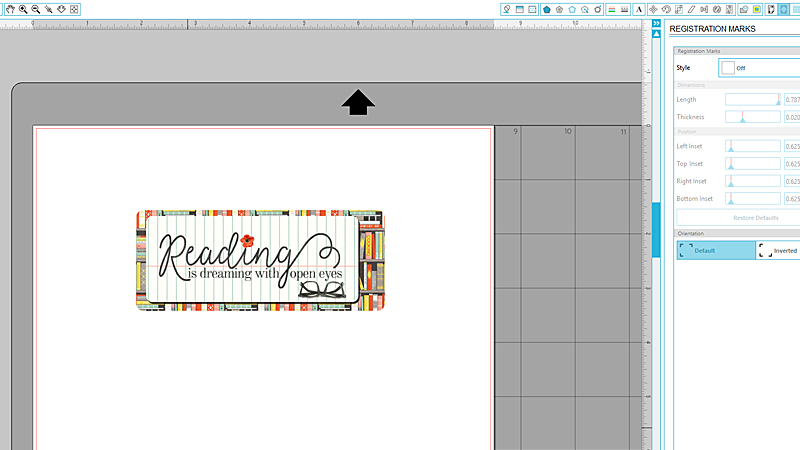
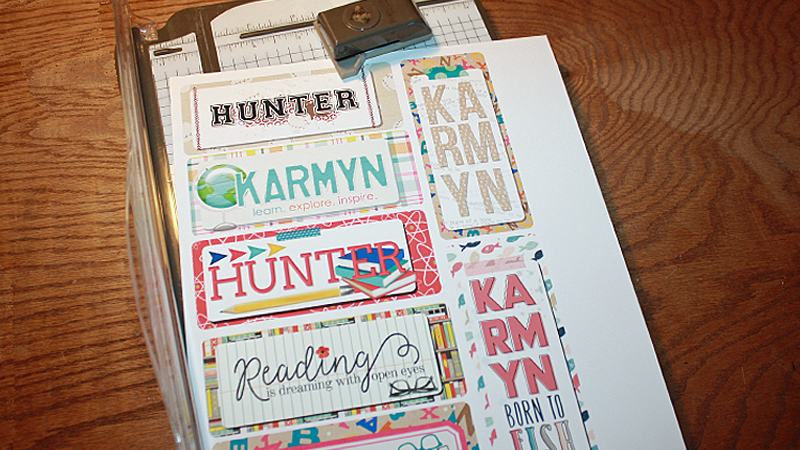
At that point, I actually decided that it would be just as easy (if not easier?) to simply cut these with a paper trimmer instead of doing a print and cut… mainly because the shapes are so simple. Thus, I turned off the registration marks in the Silhouette software so that I could fit more bookmarks to a page…

Once everything was printed, I used my paper trimmer to cut out the bookmarks, as described above (instead of doing a print-and-cut with the cutting machine)…

*NOTE* If you do not have a paper trimmer, you can simply use scissors and then use a corner punch to create the rounded corners.

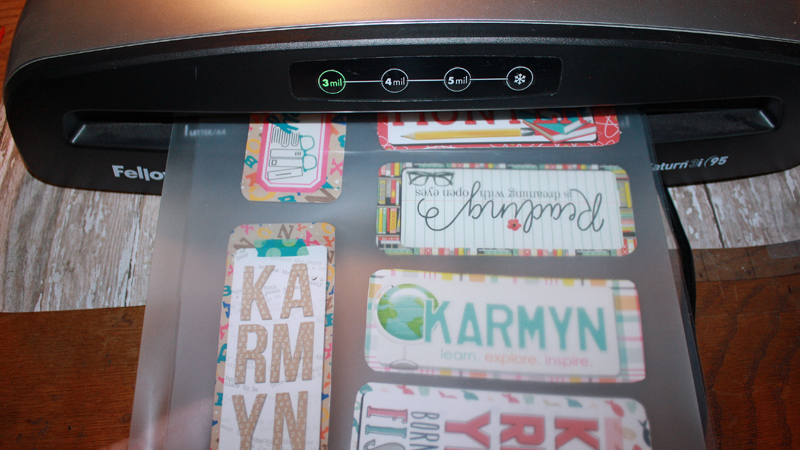
I  decided to laminate the bookmarks that I made, but it’s not a must. I have a laminating machine, so why not use it, right? 🙂 I figured that the bookmarks will probably last longer this way…

*NOTE* If you make bookmarks for the kids in your child’s classroom, many schools usually have a laminating machine and you can probably have them laminated that way.

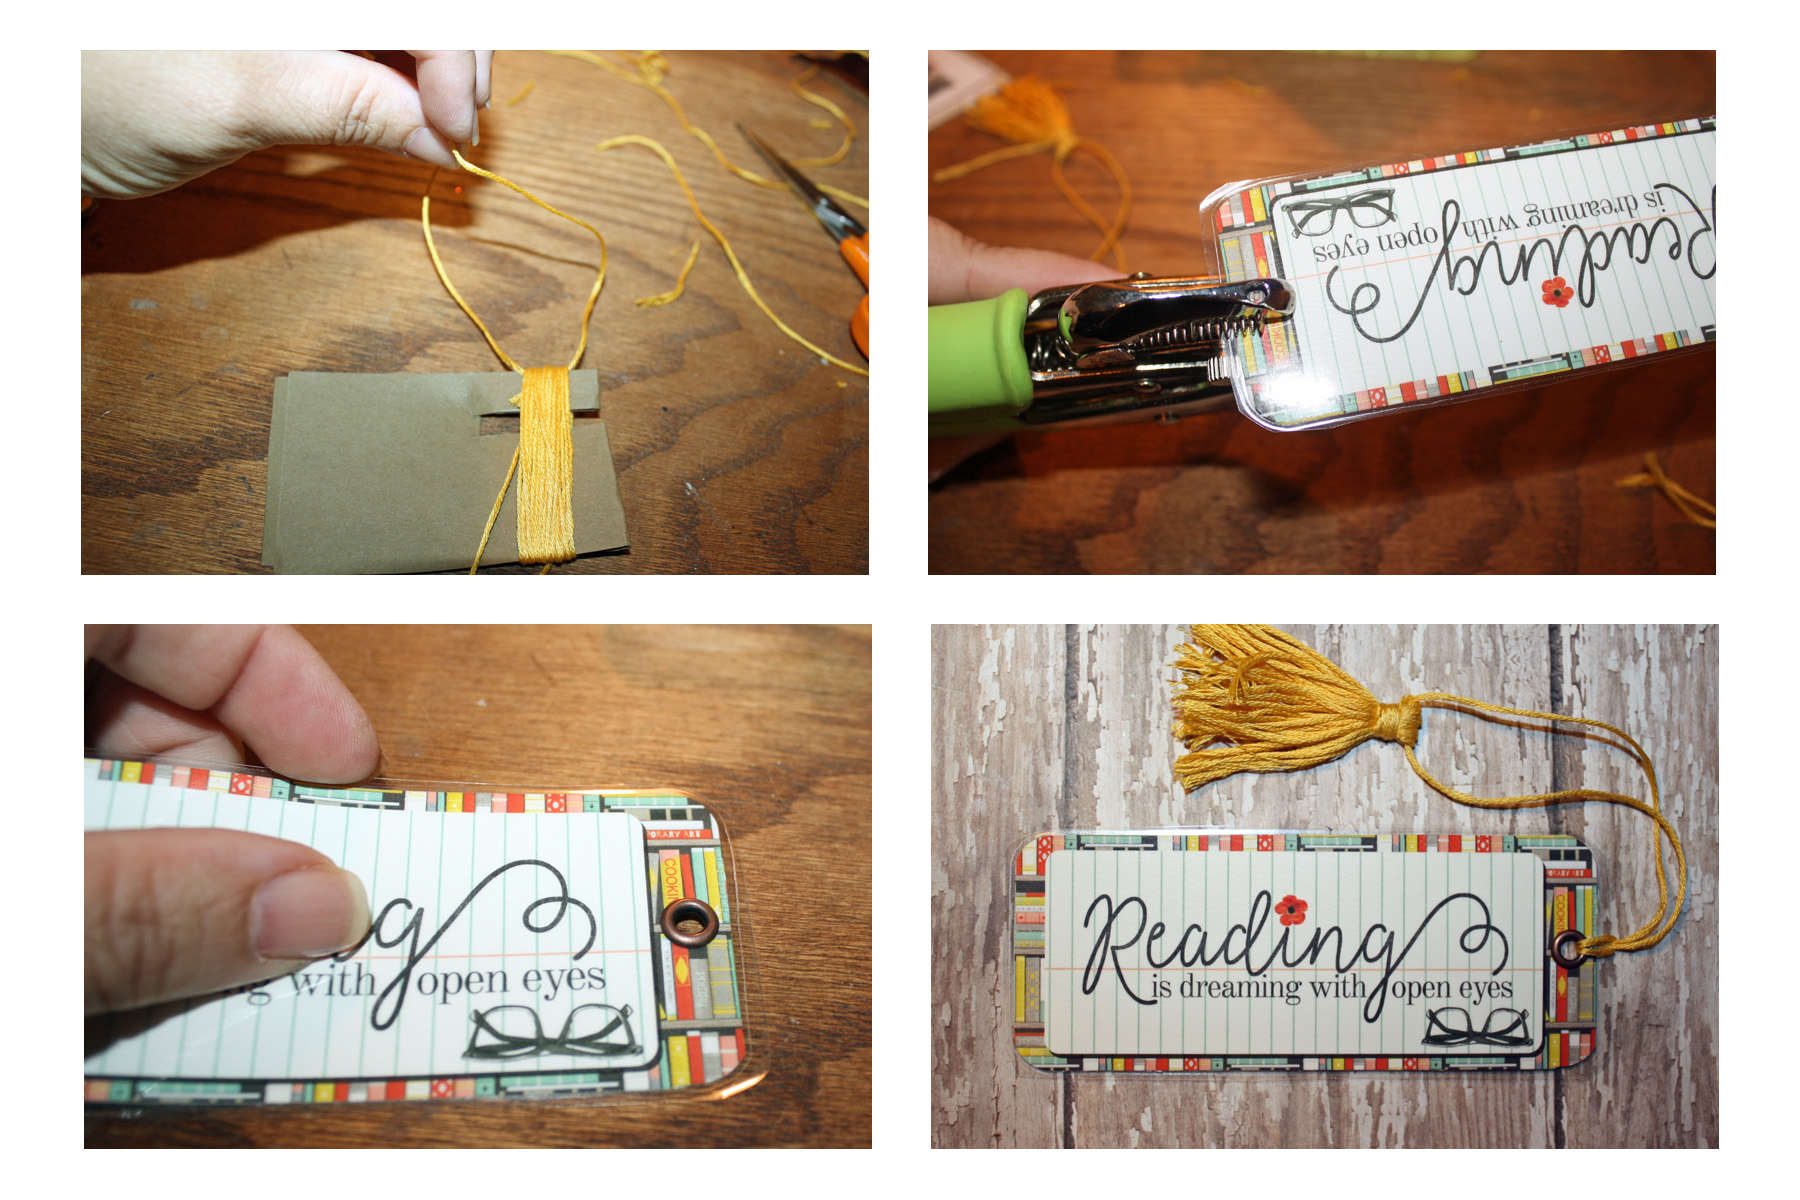
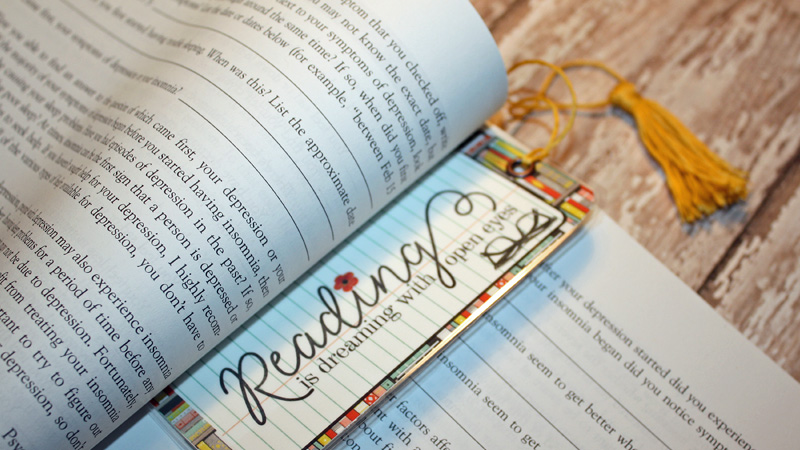
The following images show some of the features I added to my bookmarks. First, I made a tassel to go on one of them, using yellow floss. Oh… and while I was going through tons of craft supplies I have stashed everywhere, I found my crop-a-dile tool! The crop-a-dile is so much fun! You use it to punch a hole and add an eyelet, and then you use the tool to crimp it down. It gives your project a polished look. This particular bookmark is for a friend, so I thought it would be a nice touch; however, if you make them for younger kids, I probably wouldn’t do this.

Here’s a look at that finished bookmark, in use…

Can you believe the only book I could find to photograph the bookmark with is a book about insomnia? I haven’t read it yet, but I desperately need to!

I hope that you have enjoyed this edition of Hybrid How-To, and that you will give this a try and come up with some of your own bookmarks. Don’t forget to visit the CROSSWORD SECTION in The Digital Press forum, and jump into this month’s Hybrid Challenge if you are thinking of trying this project. You can earn points toward discounts & FREEBIES! I hope that you will join in!


Tanya

About the Author  Tanya is a part of the hybrid team here at The Digital Press. She has been hybrid crafting for at least 14 years now, and loves creating and sharing those creations with others. Her all-time favorite tool is her Silhouette Cameo. She has been married for 28 years to her high school sweetheart, Richard and has two sons: Chris, 25 and Chance, 20. She also enjoys crocheting, photography and woodworking.

Hybrid How-To | Traveler’s Notebook

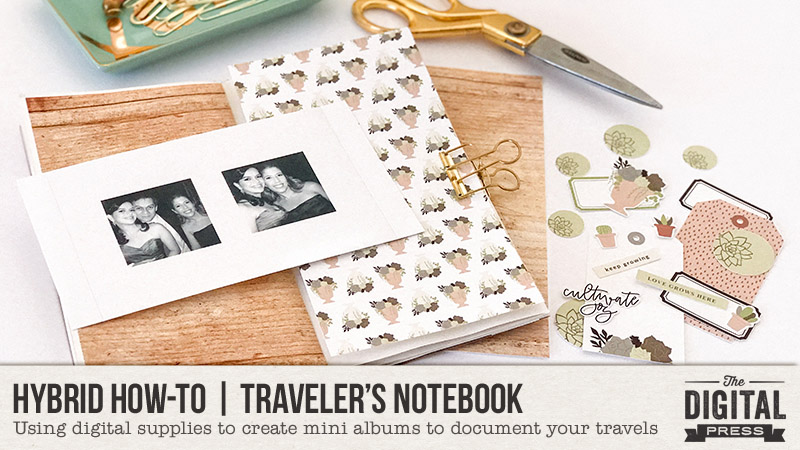
Hello everyone! It’s Saturday, and therefore it’s time for another edition of our Hybrid How-To series here on The Digital Press blog! Today I’m going to show you how make a traveler’s notebook using supplies from your digital stash.

Supplies Needed:

  • A small notebook
  • Any physical supplies/embellishments you might want to add (I used enamel stickers and glitter tape)
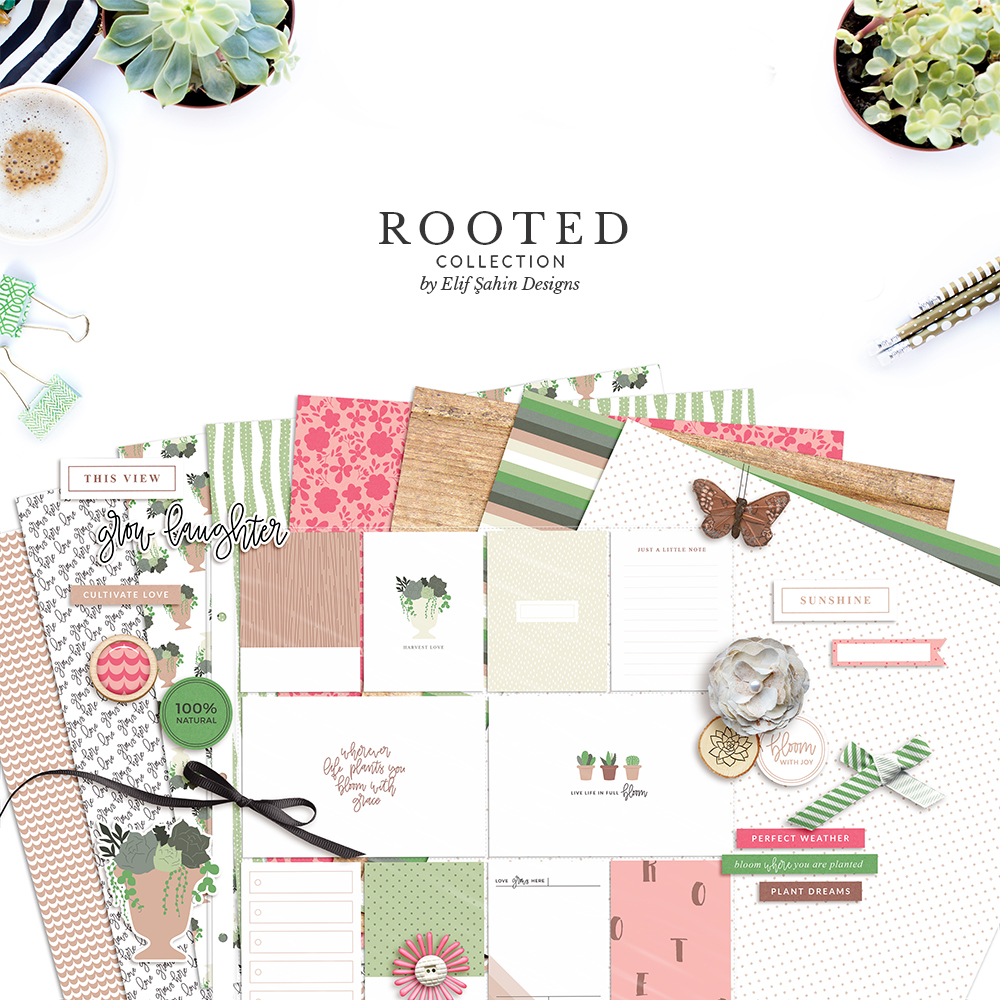
  • Digital kit of your choice (I used Rooted By Sahin Designs)

Instructions:

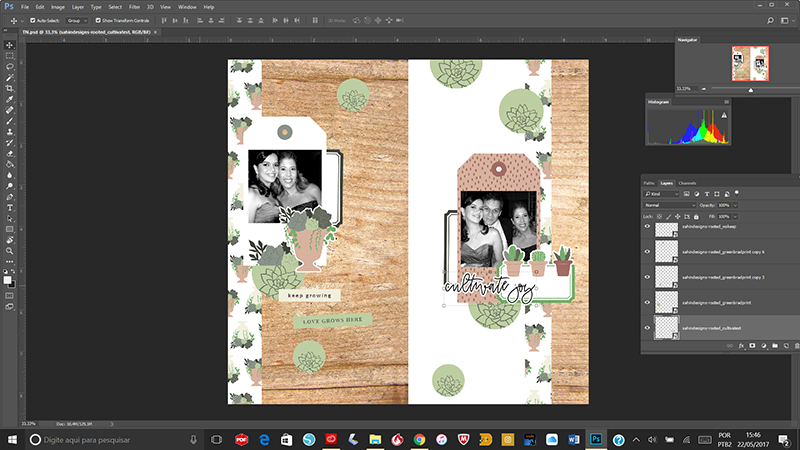
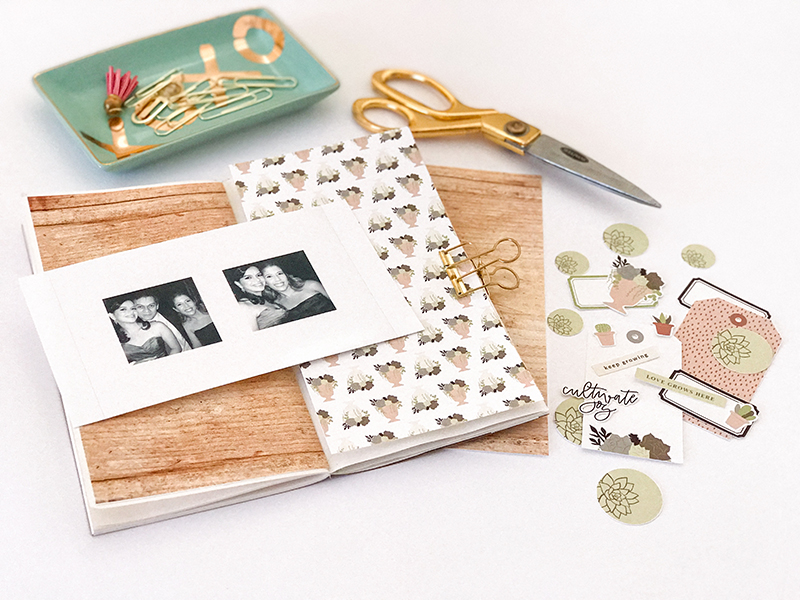
First, I measured my notebook and then opened a new  document in Photoshop and used a canvas that was the same size as my notebook’s pages. By dragging different papers and elements from my digital kit onto my canvas in Photoshop, I made a 2-page spread as shown the image below…

I always make my hybrid projects in Photoshop first, in order to print the papers and the elements in the correct size and quantity. Then, once I know which items I want to use, I print them out separately. After printing, I cut out all of the individual pieces using my Silhouette Cameo (you can also use scissors and fussy cut everything, too, if you don’t have a cutting machine). This transforms the printed digital elements into beautiful die cuts…

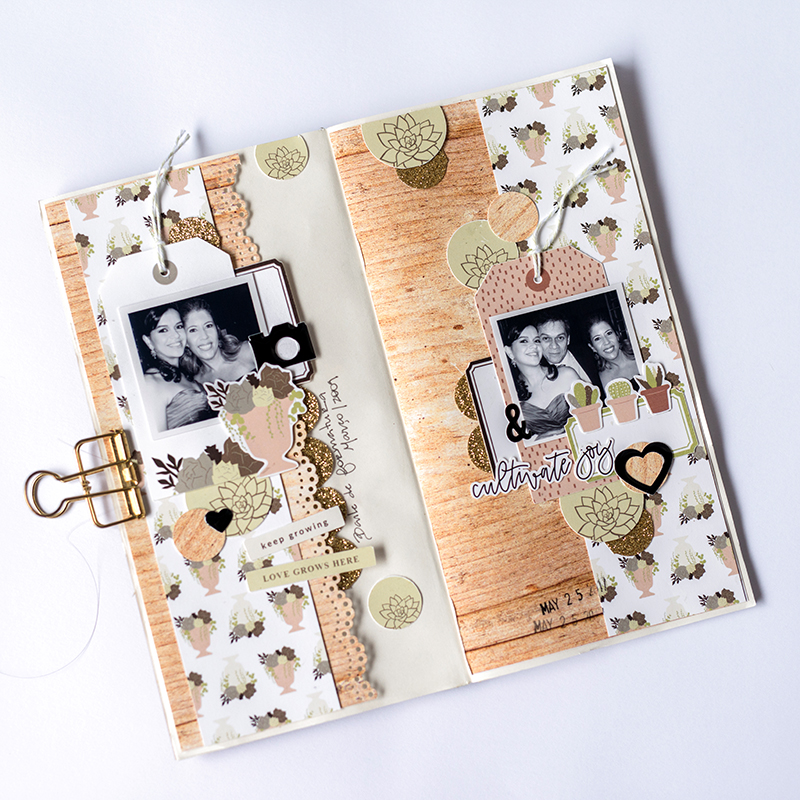
Now, it’s time to assemble it, which is always so much fun! You’ll notice that as I began arranging my items, I changed my mind a little bit and the final spread is different from the digital version I originally made in Photoshop (up above).

Here is a look at the final project as it took form…

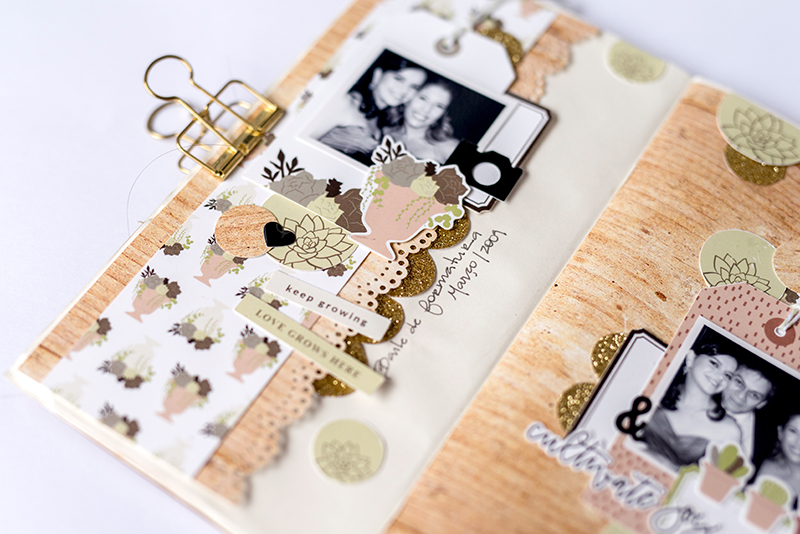
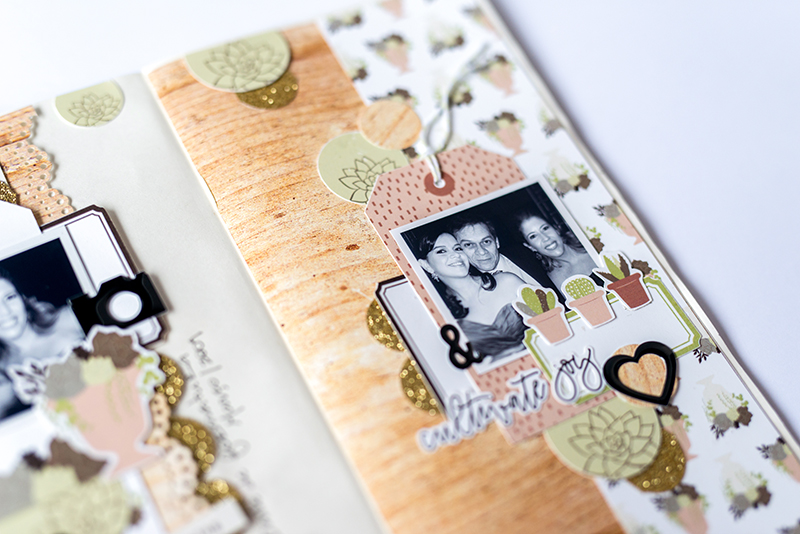
I used some enamel stickers, glitter tape, and a scalloped border punch just to give more depth and details to my spread…

BLOG 4

I really love using digital kits and turning them into physical projects. It’s so much fun to see something that starts out digital take form in a physical format… and the added benefit is that we can print digital products as many times as we want!

BLOG 5

As you can see, a traveler’s notebook such as this is an easy and fun project that you can make in just an hour or two using any notebook or planner you already have on hand.

If you’d like to give this a try, too, don’t forget that you can earn challenge points at The Digital Press! Come visit the CROSSWORD SECTION in The Digital Press forum, and you’ll find this month’s Hybrid Challenge thread (*NOTE* for each month’s Hybrid Challenge at TDP, you get to choose one of the two (2) “Hybrid How-To” tutorial posts from here on the blog for that month, and then you get to make your own version of that chosen project). If you choose to give today’s project a try… all you have to do is make a traveler’s notebook using digital papers and elements that have been printed and cut into a physical format (similar to mine, but it doesn’t have to be identical in size or format — you can do what works for you!).

Give it a shot, and share your final results with us! We can’t wait to see what you come up with. 🙂

Have a great weekend… and happy scrapping!


IMG_5877About the Author  Andrea Albuquerque is part of the Hybrid Creative Team here at Digital Press. Andrea has been a scrapper since 2010 and a photographer since 2012. Although she adores the flexibility and creativity of digital, she can’t resist playing with paper, paint, and embellishments… so hybrid scrapping is the perfect medium for her! She lives in Brazil with her hubby.
Hybrid How-to | Easy DIY Embellishments

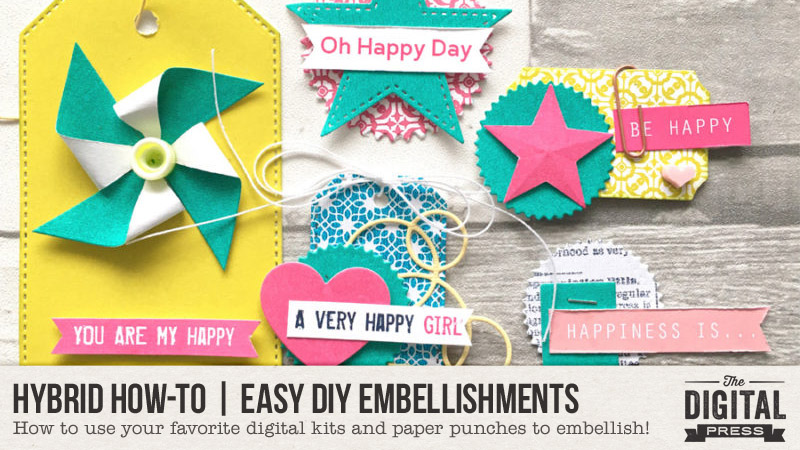
Hey everyone. It’s the first Saturday of the month, and so it’s time for another edition of Hybrid How-To here on The Digital Press blog! Today I am here to share some ideas for creating unique decorative embellishments using your favourite digital kit along with some dies and punches.

Like many crafters, I love using stickers, die cuts, and other decorative items… but my budget doesn’t stretch to buying lots of them. Therefore, creating my own embellishments from a digital kit is not only thrifty… but they really add a unique and original touch!

Supplies Needed:

  • Punches, dies, and/or decorative scissors
  • Foam tape, glue, and/or double-sided tape
  • Accessories such as paper clips, enamel dots, sequins, etc.
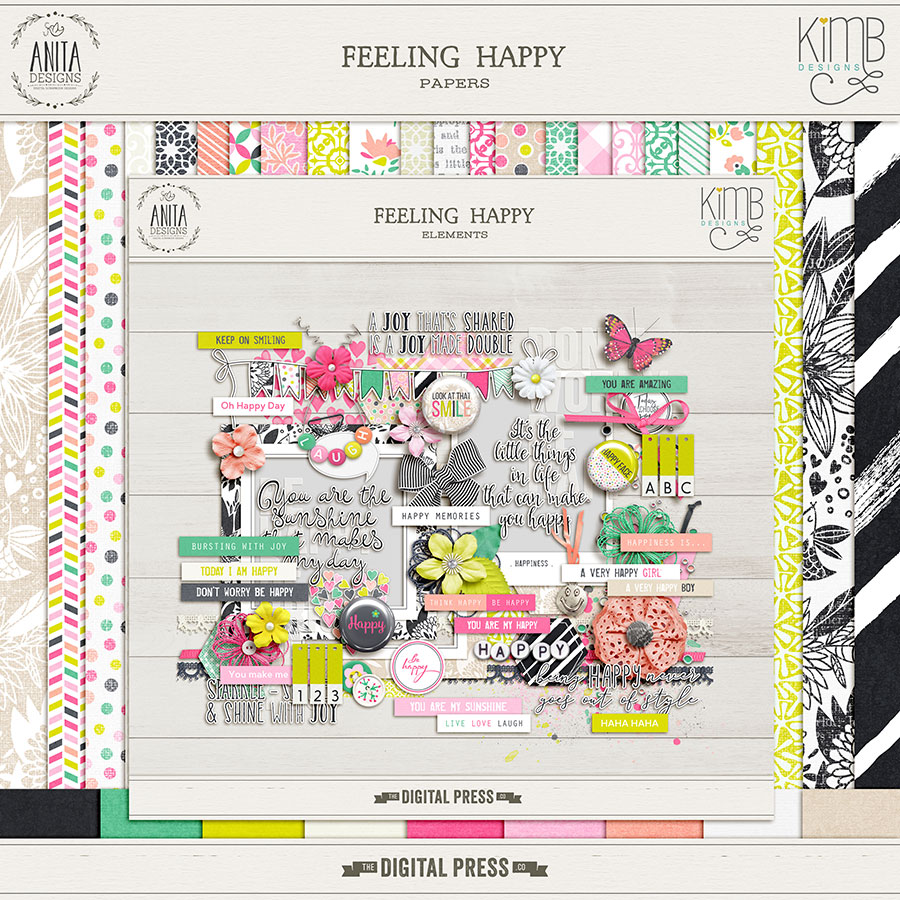
  • Digital kit of choice (for this tutorial, I’m using Feeling Happy by Anita Designs & KimB Designs)

Instructions:

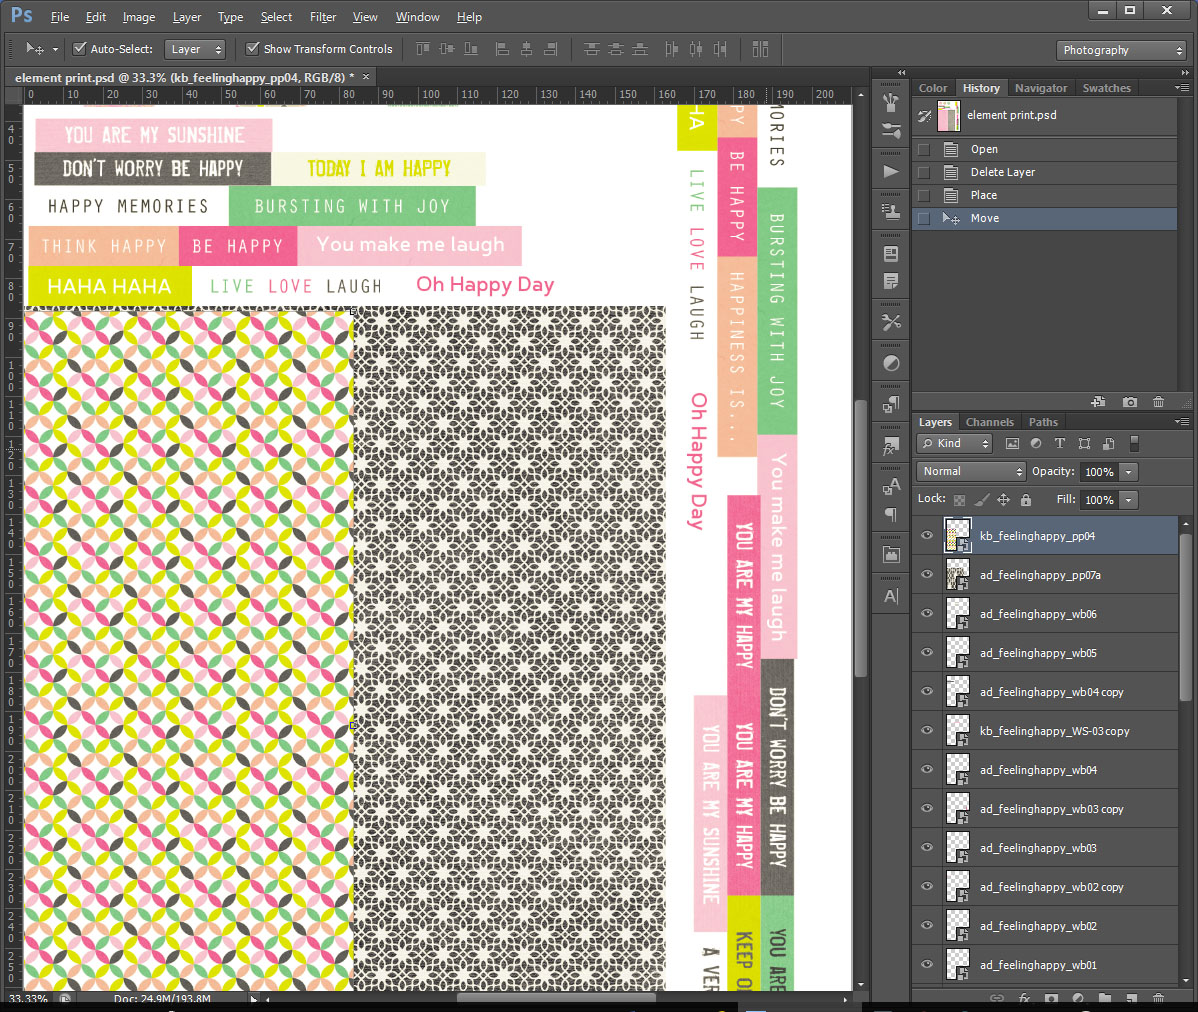
I always like to start my projects by printing the embellishments as die-cuts. I use Photoshop and just drop my favourite embellishments onto a page to be printed later.

Because I will be creating small embellishments to fit into a Traveler’s Notebook for today’s project, I also scaled the patterned papers down slightly, as shown here…

Die-cutting is still a firm favourite technique and it has been seeing a bit of a revival lately. Although I own a Silhouette, paper punches and dies are really quick. The wafer-thin dies means that you can store lots of shapes now without taking up too much room!

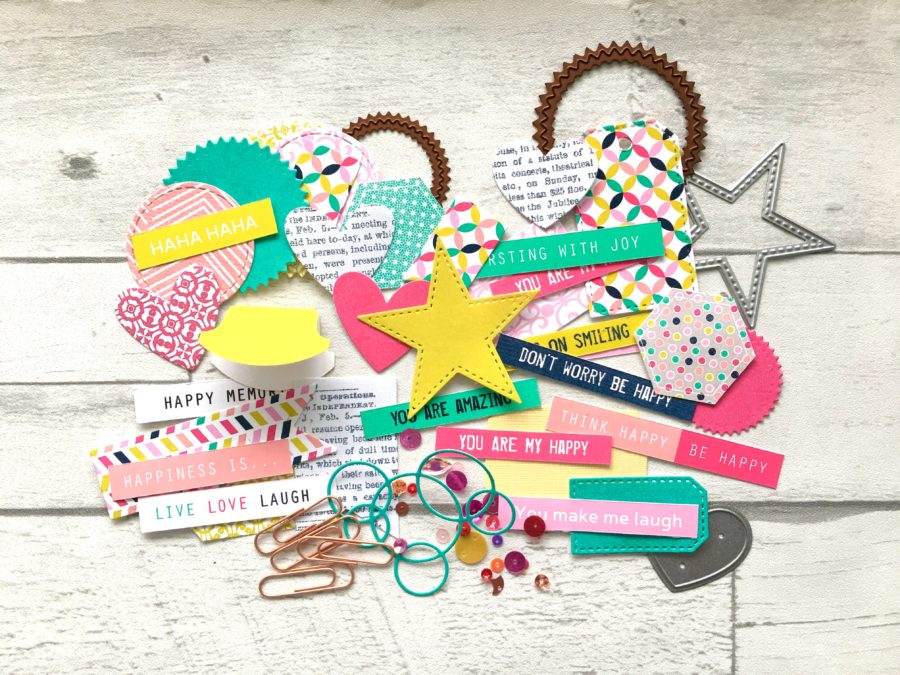
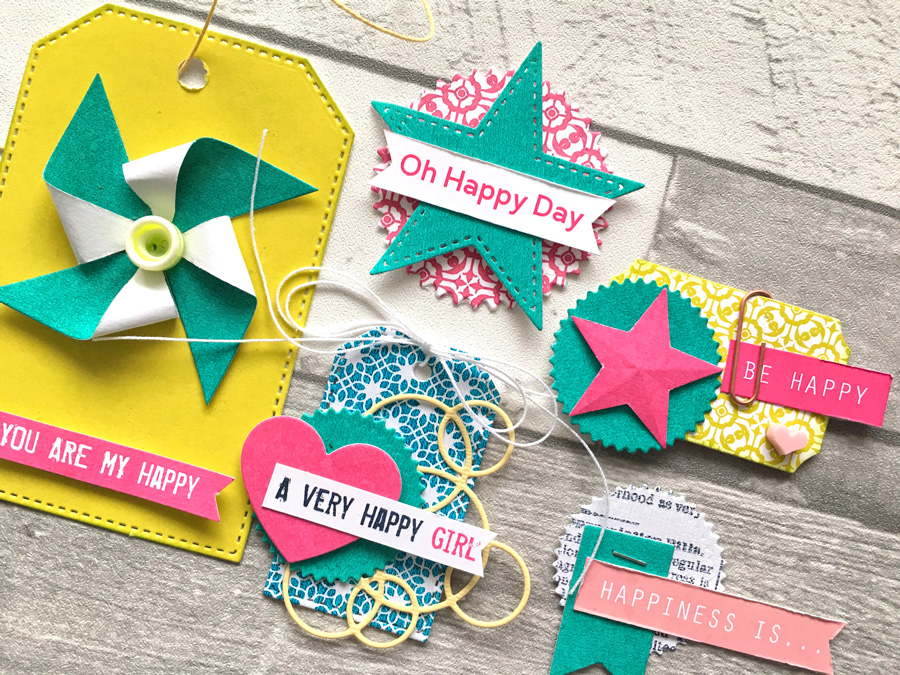
Here’s a look at a batch of embellishments I punched out, using the printed version of the page layout you saw in Photoshop, up above. I created a little pile of interesting shapes using the different patterned papers and solid papers that came with the kit…

As you can see, circles are always a great choice for a base; you can use different sizes to keep things interesting. Ticket and tags come in all shapes and sizes, as well, and are also a must-have for me.

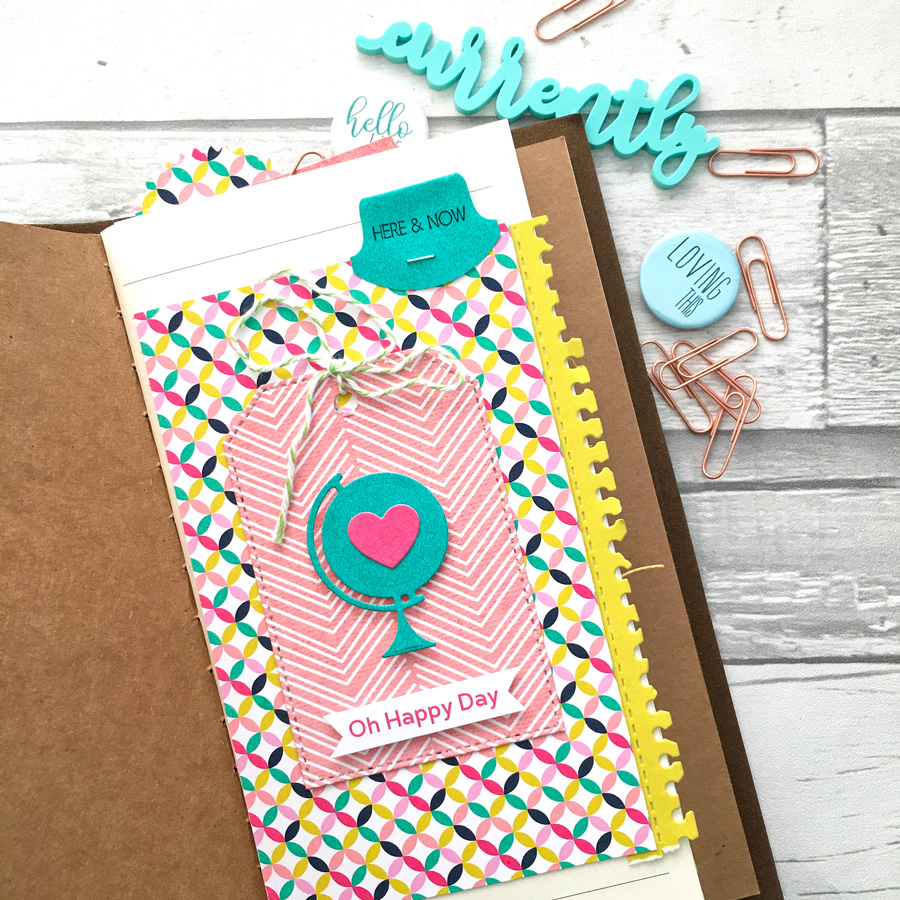
Now for the fun bit… once you have a selection of items, you can play around with layering them on top of each other, as shown below…

*TIP* As you can see above, notching out the end of the word strip sentiments adds a little more interest when it hangs off the edge of the design.

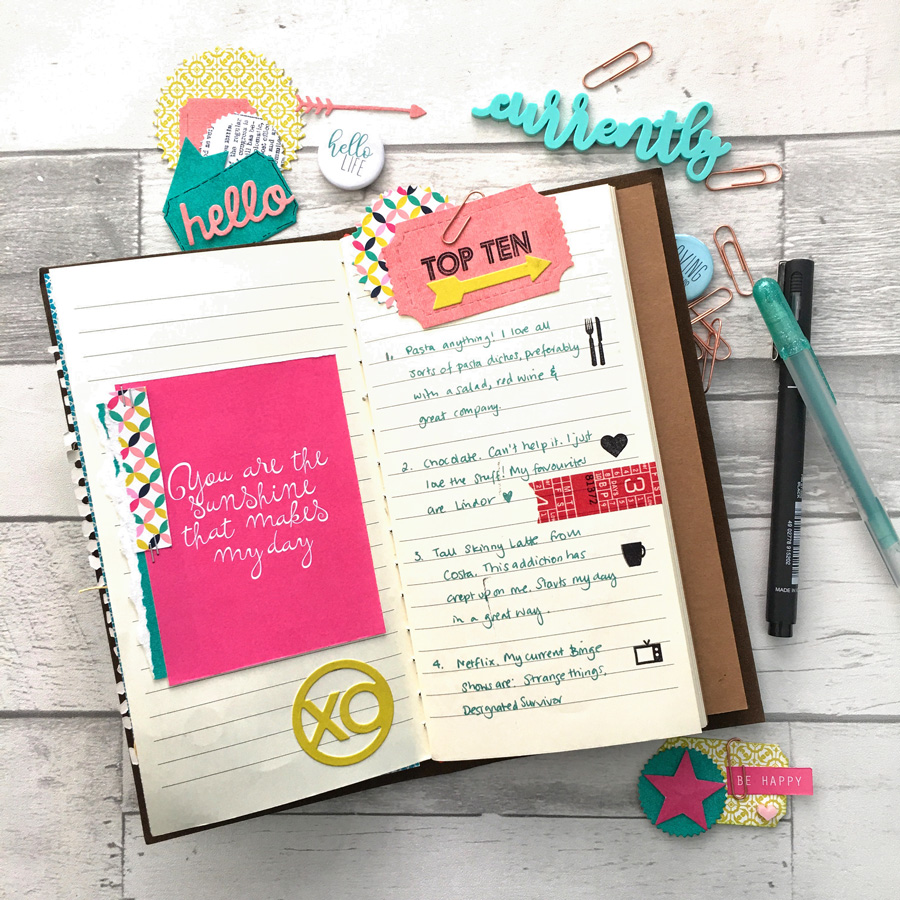
Next, for my attempt at a Travelers’ Notebook, I decorated the page much the same way that I would decorate a card or scrapbook page. This helped to warm up the creative juices…

I did a couple of list-style pages as a way to break the ice. The ready-made embellishments really added a little pizzazz to the page!

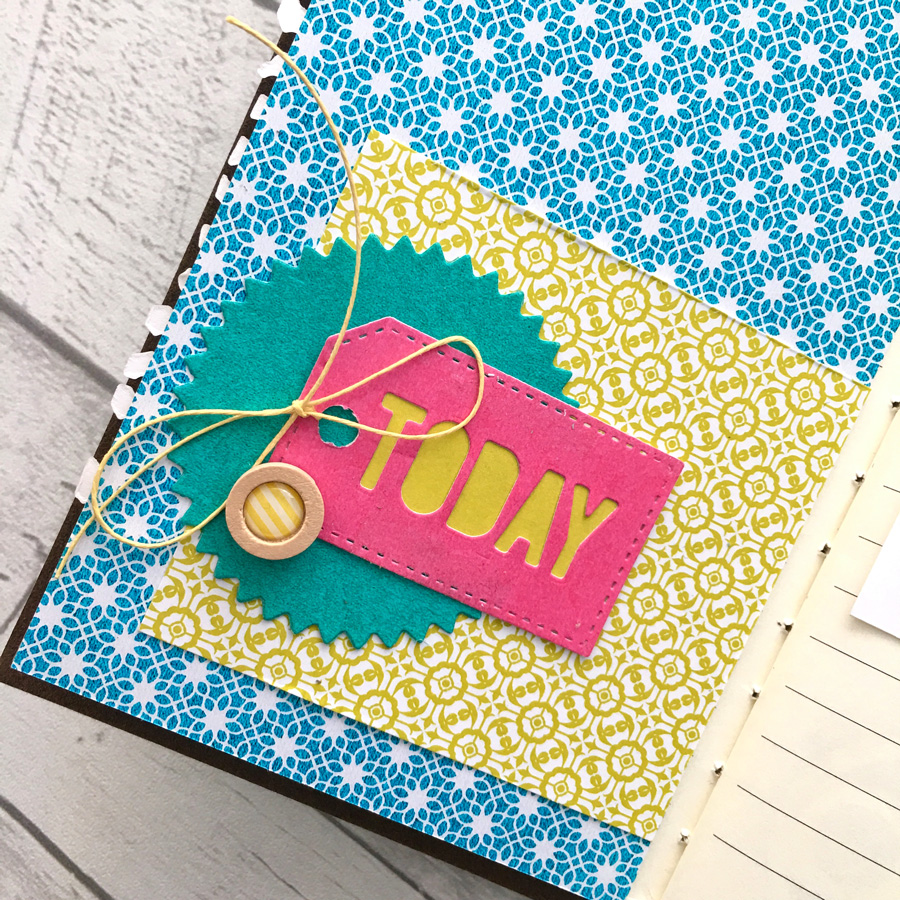
Then I also added some physical supplies and decorations to the pages (items such as paper clips, flair, and brads). Here’s a close-up look at one of the adorable little wooden brads and some string that I added…

See how easy and fun this is? Why not pick out a few of your punches and dies and create some ready-made embellishments for your next project? Having printed and punched a selection of papers and sentiments ahead of time, you will be able to whip up a unique layered embellishment in a flash!

I would love to see what you do if you give this a try. Share your homemade embellishments with us in the June Hybrid Challenge thread to earn Challenge points (you’ll find it in THE CROSSWORD SECTION in TDP’s forum). Hope you join in!


Morag

Morag Cutts is part of the Hybrid Creative Team here at Digital Press. She has been an avid scrapper and photographer for ten years.  Although she adores the flexibility and creativity of digital, Morag can’t resist playing with paper and embellishments — so hybrid scrapping is the perfect medium for her! Morag lives in the UK with her hubby, two kids, and recently-adopted puppy.