Category: Tutorials

Hybrid How-To| Creating Interactive Features

Hi everyone, and welcome to another edition of our Hybrid How-To series here on The Digital Press blog!  Today, I’m here to show you how to create interactive features — such as flaps and pockets — to add to your hybrid and paper projects. It’s a really fun way to add more photos and journaling into your projects!

I think it makes a project more interesting and fun to add interactive pages, which give the possibility of finding some fun surprises by flipping open the pages within our  notebook — surprises like hiding journaling notes and even some photos under flaps and in pockets.

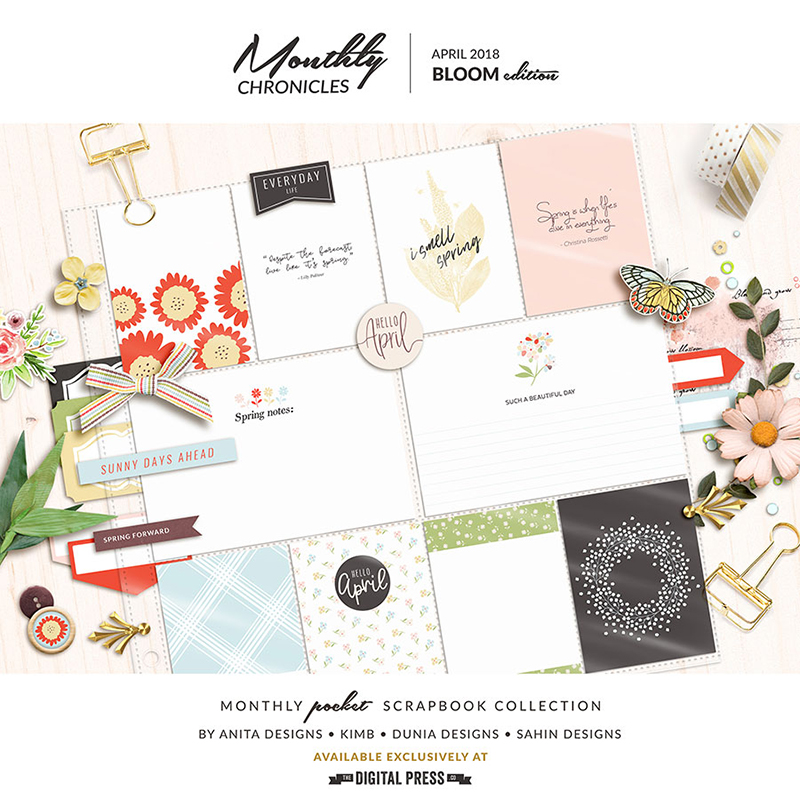
For my project today, I will be using one of TDP’s Monthly Chronicles digital collections — Bloom — shown here…

I’m going to be adding some of these interactive features to my own Traveler’s Notebook project.

Sometimes I want to work on smaller projects like this, because they’re very fun and not as time consuming. A Traveler’s Notebook is a great way to document things in a smaller format. We can make our spreads one day at a time, without being  overwhelmed about finishing a larger 12×12 page or even a full mini album. It’s also a good way to document a weekend, a trip, a single date or event, or any other small moment in our lives.

The first interactive feature I wanted to add was a tiered page, with multiple layers/flaps for the viewer to open. This is an easy technique that you’ll master in no time at all!

The supplies you will need are listed here:

  • digital printed papers
  • your favorite embellishments
  • your photos
  • trim and score board
  • double-sided tape or glue
  • a pencil

My Traveler’s Notebook is a standard size, measuring 4.33″ x 8.25″ — but you can apply this tiered page technique to any size page/album or any kind of journal, simply by adapting the measurements to fit your own project’s “canvas”. No matter what size you are creating, keep in mind that you will have to trim the paper slightly smaller  than your journal, for a nice border finish and to prevent your book from becoming too bulky.

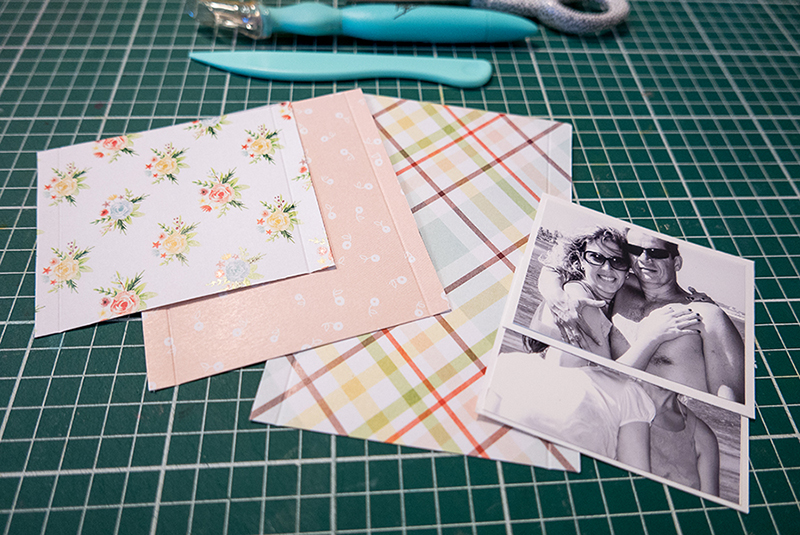
First, I cut three pieces of different patterned paper, measuring as follows…

  • 3 1/4″ x 4″
  • 4 1/2″ x 4″
  • 5 1/2″ x 4″

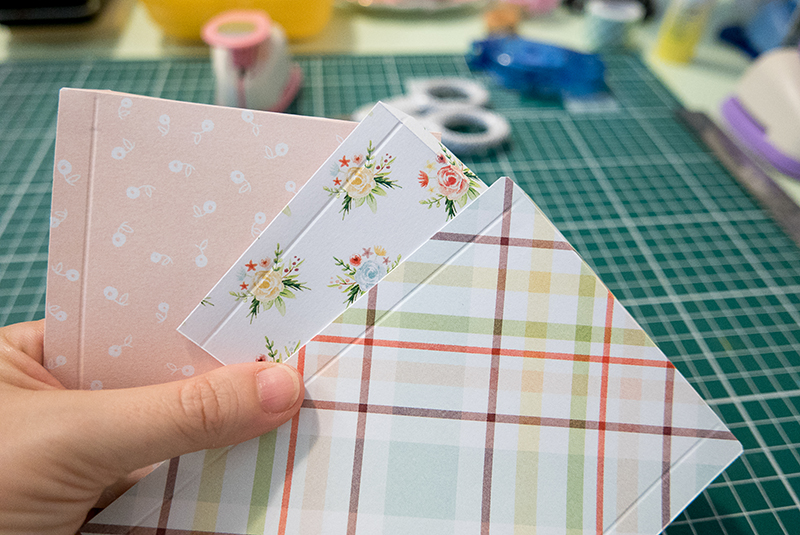
Once my papers were cut, I folded them at 1/4″ from the top, as shown in the photo above.

Next, I glued the folded top 1/4″ of each of the 3 papers down onto my main notebook page, in 3 tiers, as shown here…
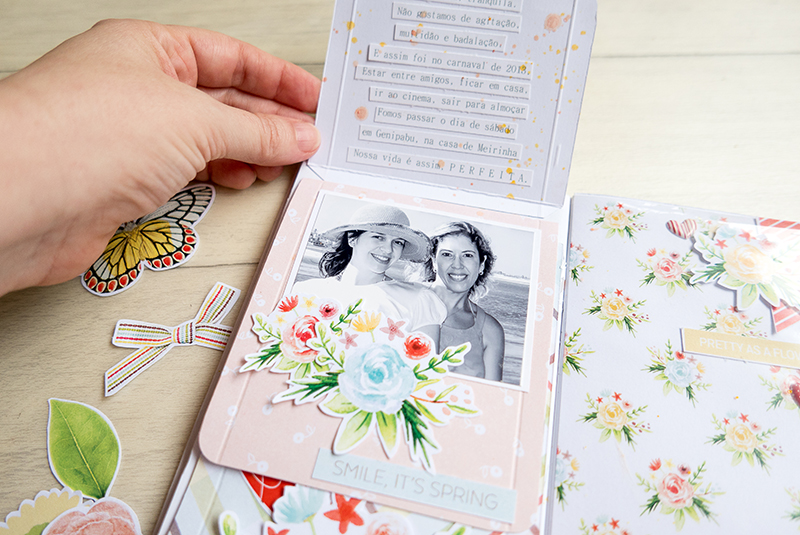
Each paper was glued just below the one above it. Here’s a look at the second level…
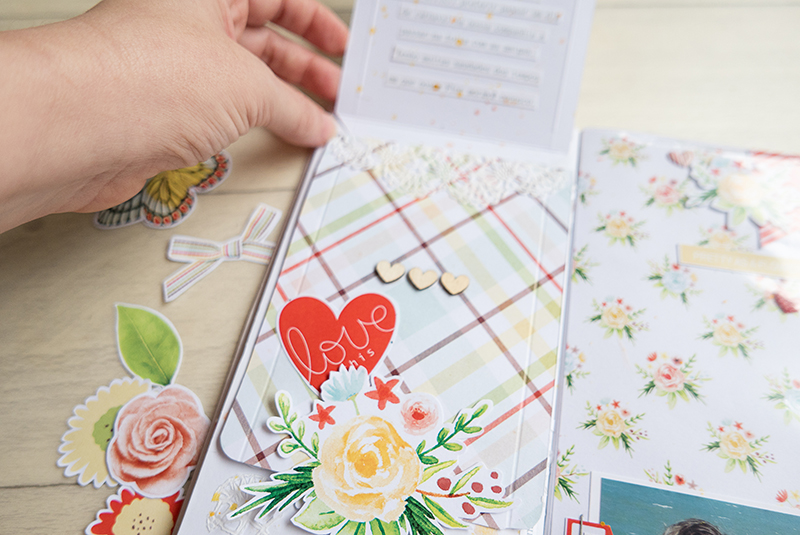
And finally, the lowest level (and what appears underneath it)…
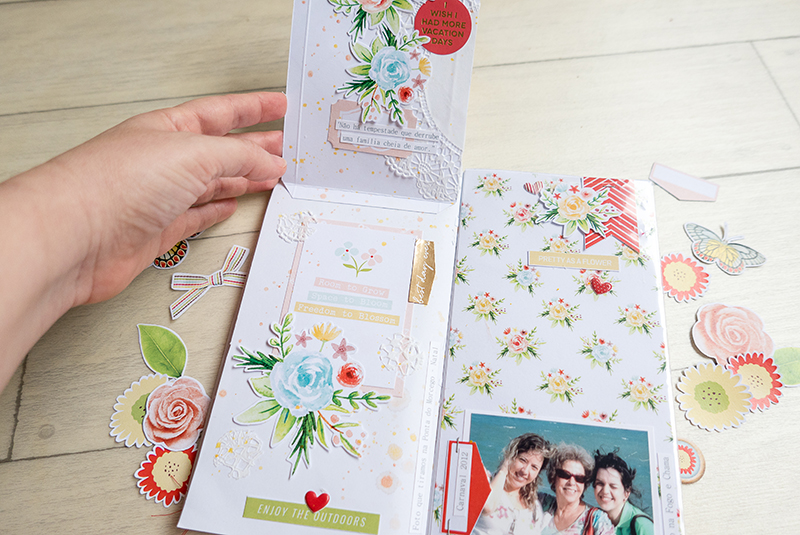
Tips & Tricks:

  • Have your paper widths cut evenly so they will all line up perfectly.
  • Keep the paper that lines your page slightly smaller for a nice border finish and to prevent your book from becoming too bulky.
  • Make sure your fold lines are nice and crisp for a sleek finish.
  • For a softer edges, you can round the corners.
  • Use different contrasting papers for each tier, which really adds to the effect of this technique.

Here is a look at my final spread; you can see all 3 layers nicely on the left side…
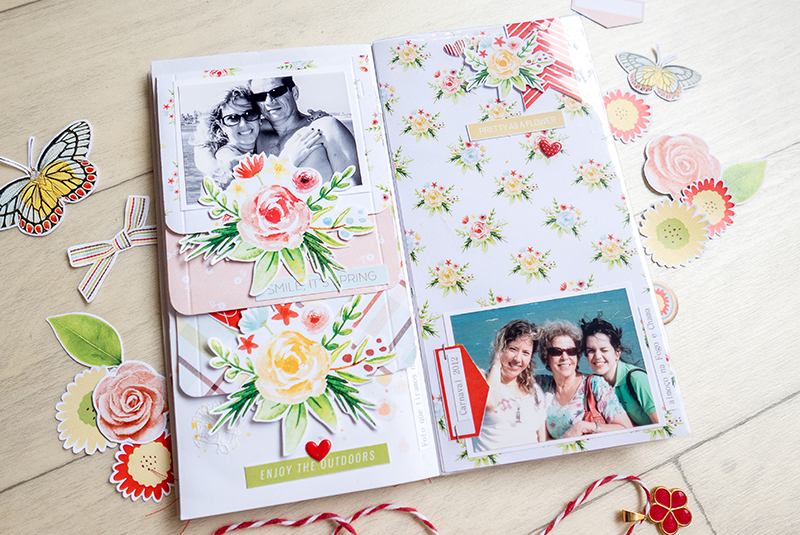

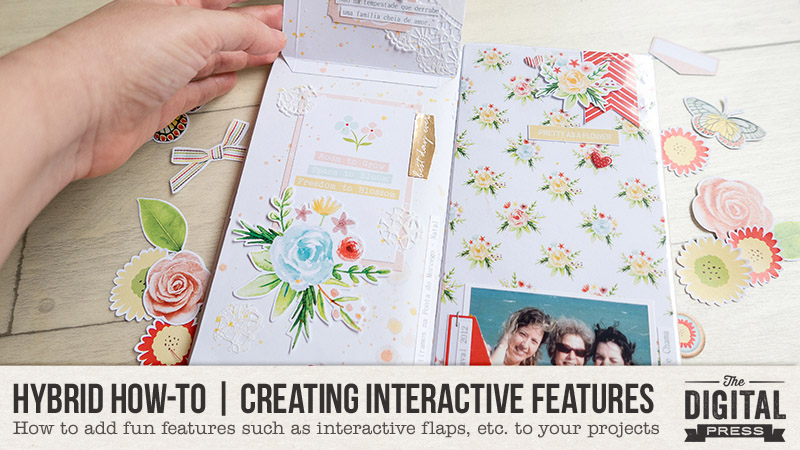
The second interactive feature that I want to show you today is a fold-out page, as you can see in the following photo…
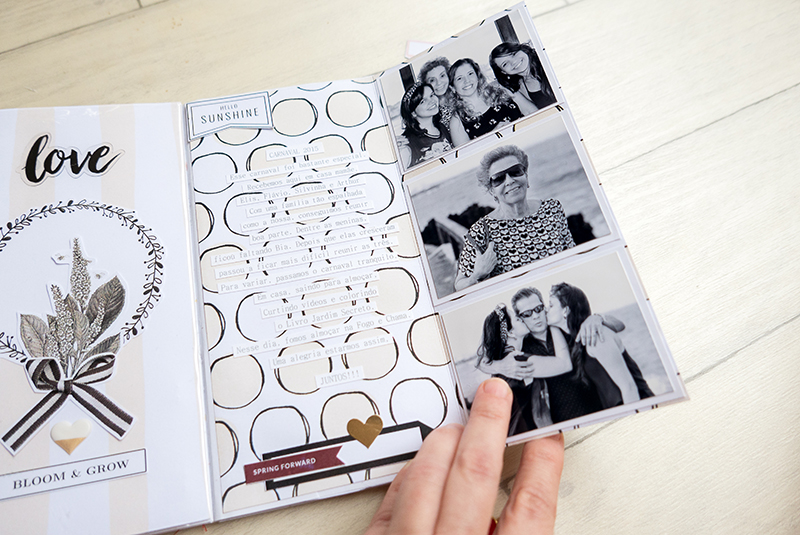
For this page, I chose my paper and cut it so that it measured 7-1/2″ x 8-1/8″. Then, I folded it at 3-1/2″ from the right side (as shown, above).

As you can see, the flap allowed me to insert three photos on the far right, and still have space for a lot of journaling in the middle section of my notebook.

It’s a really quick/easy technique that makes the page more fun and interactive!


Finally, the last interactive feature I want to show you is the addition of a pocket on one of the fold-out pages, as shown here…
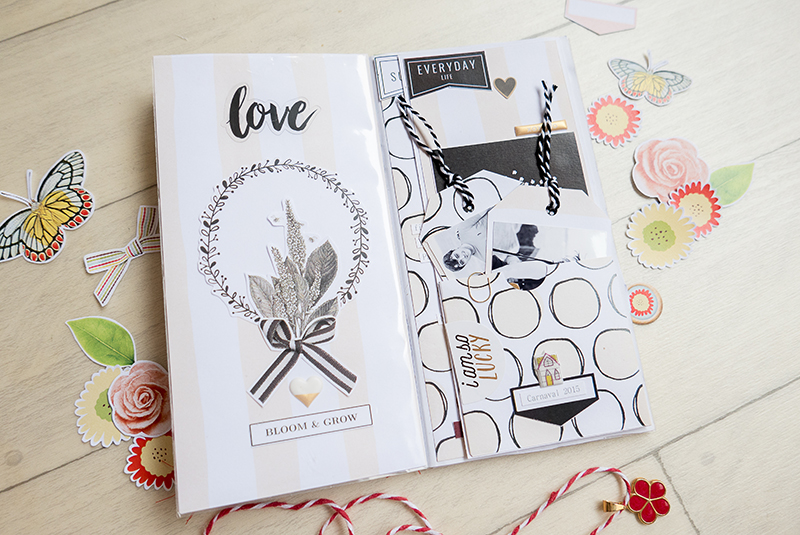
For this pocket, I cut a piece of paper, measuring slightly smaller than my notebook page’s size (mine ended up being 4″ x 3-1/2″).

Then, I folded each side at 1/4″ in order to glue my pocket on my page…
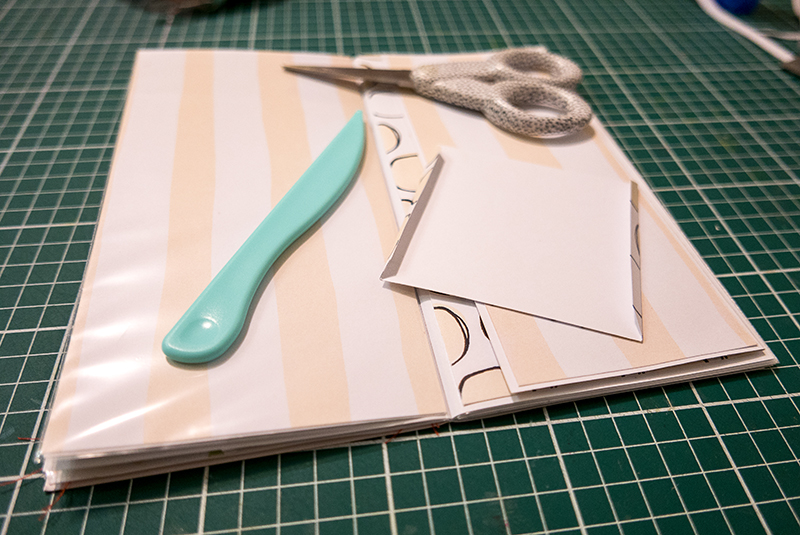
Once the paper was glued down to create the pocket, I could start sliding items inside (like the 2 tags I created, shown here)…
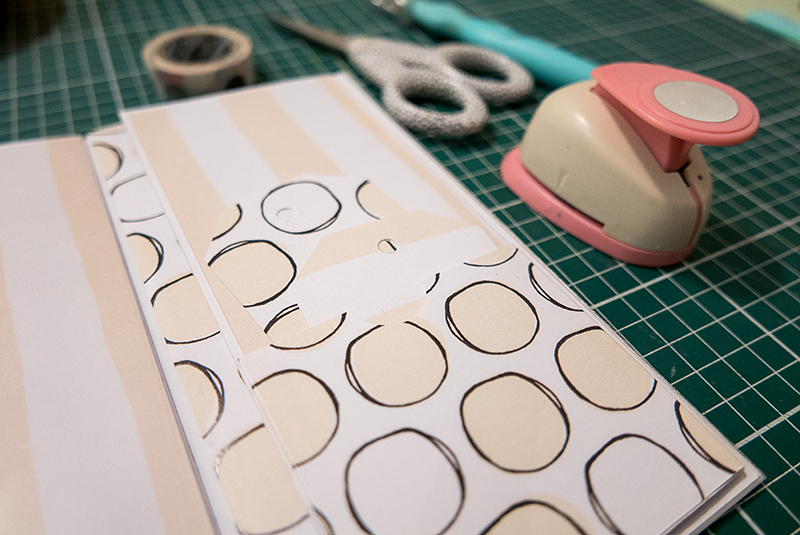
Then I glued some photos onto the tags, and added tag strings, to make the process of pulling the tags in/out of the pocket really fun…
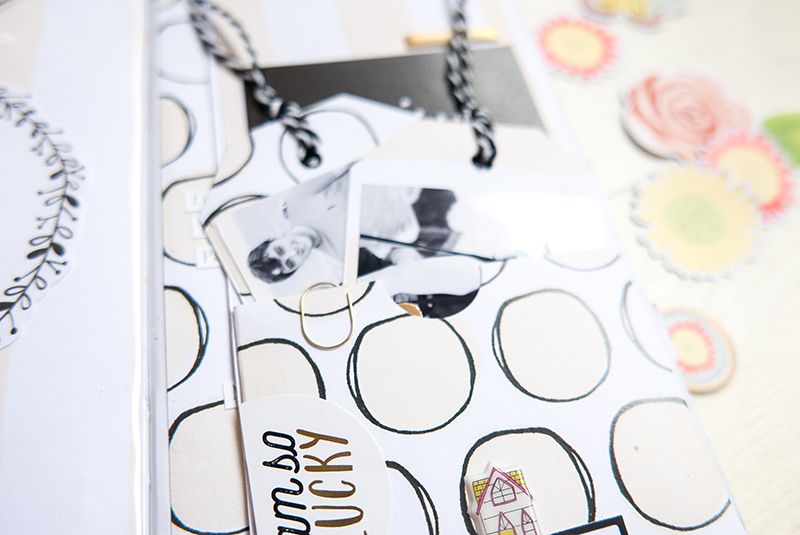
Here’s another look at the finished tags, out of the pocket…
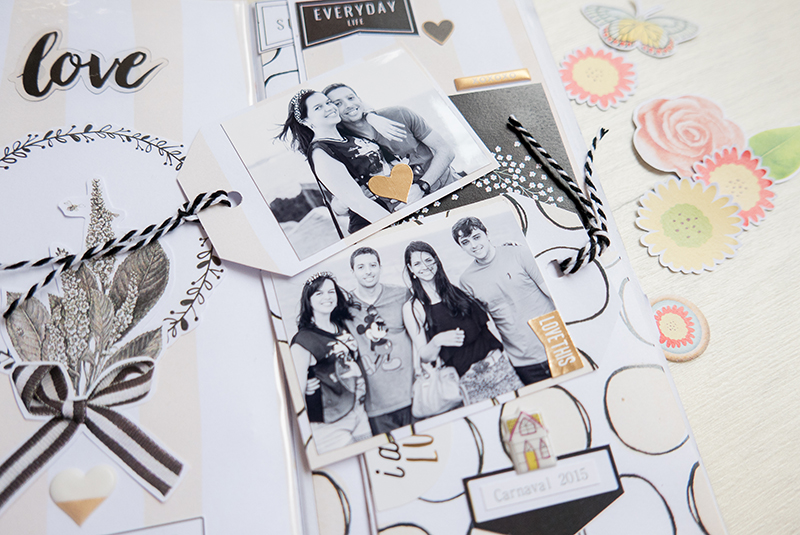
Aren’t these techniques fun? And they’re really very easy, as well!

I hope that you have enjoyed this edition of Hybrid How-To! I had a great time making this project.

If you’re feeling inspired and you’d like to give this a try, too, don’t forget that you can earn challenge points at TDP! Come visit the CROSSWORD SECTION in The Digital Press forum, and you’ll find this month’s Hybrid Challenge thread (for each month’s Hybrid Challenge at TDP, you get to choose one of the month’s “Hybrid How-To” tutorial posts from here on the blog and make your own version). You’ll see how fun it is! Give it a shot, and share your final results with us! We can’t wait to see what you come up with.

Have a great weekend you guys, and happy scrapping!


About the Author  Andrea Albuquerque is member of the hybrid creative team here at Digital Press. Andrea has been a scrapper since 2010 and a photographer since 2012… and although she adores the flexibility and creativity of digital, she can’t resist playing with paper, paint, and embellishments. Hybrid scrapping is the perfect medium for her! She lives in Brazil with her hubby.

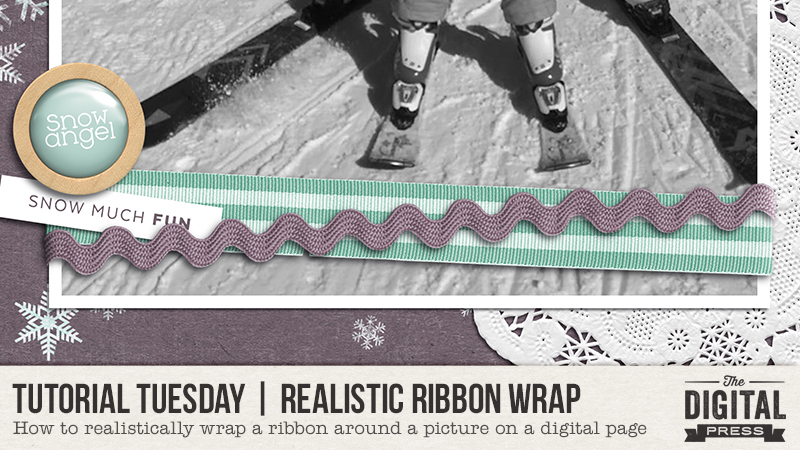
Tutorial Tuesday | Realistic Ribbon Wrap Technique

Hey there scrappers, and welcome to another edition of our Tutorial Tuesday series here on The Digital Press blog! I don’t know if you’re like me, but I loooooove a realistic digital page… one that people will want to touch when it’s printed to find out whether it’s “real” or not. With that in mind… today I’m here to share a technique for realistically wrapping a digital ribbon around another item on your page!

Today’s tutorial will show you how to wrap a ribbon around a photo or paper using photo-editing tools such as masks and dodging/burning.

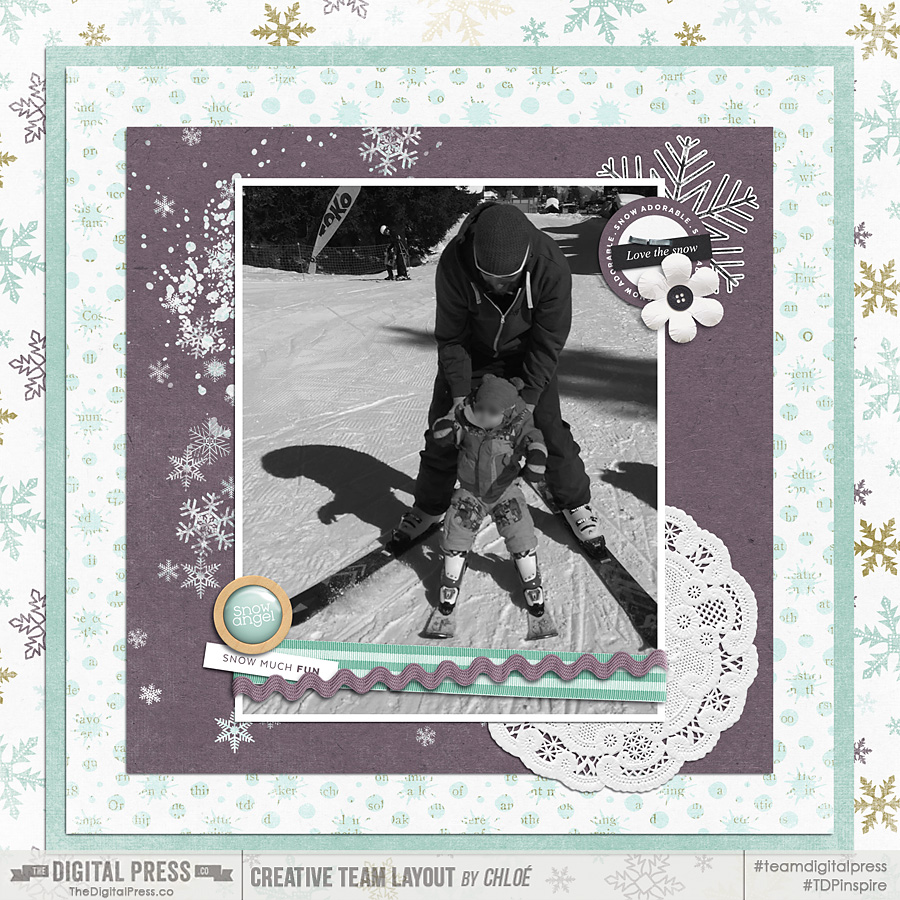
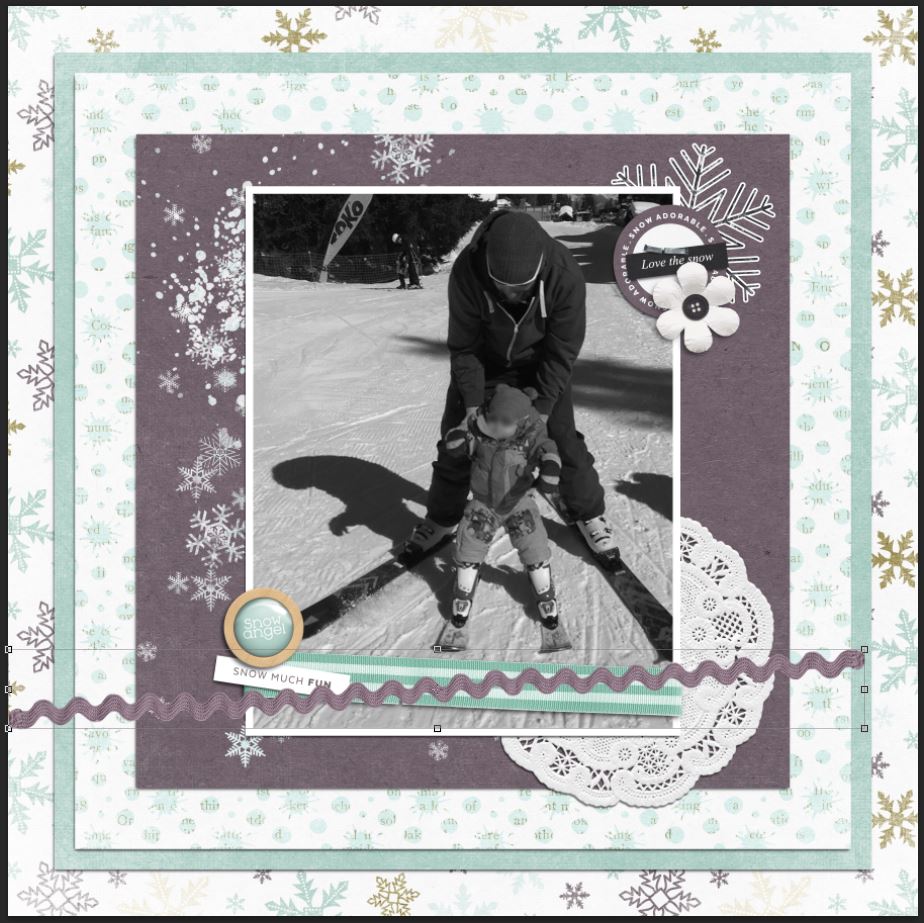
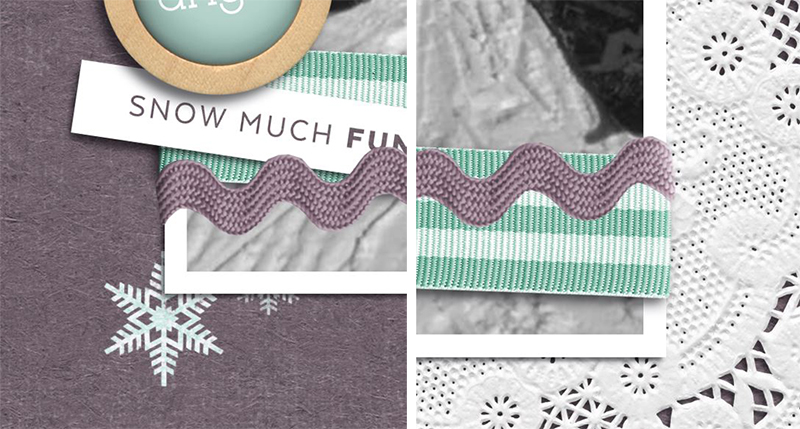
Here’s a peek at the end result…

[I used the beautiful kit “Make it count – January” by Anita Designs ]

See the ribbons that are wrapped around the bottom of the photo? To achieve this result, we have to do two things.

First, we need to delete the parts of the ribbon that are supposed to be stuck behind the photo. To do that, I like to use a mask so that all my modifications are reversible if need be (for example, I started my page above with only the ric-rac in a horizontal position, so I was happy to have more room to work when I decided to change things up, add the second ribbon and put them both at an angle).

Position your ribbon where you will want it (more or less) over the photo you’ll wrap it around, as shown here…

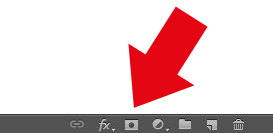
Select the layer, and then click on this icon (shown here, and found at the bottom of your layers panel) to add a mask…

tdp-tut-2

Then, you will color the mask in black on the parts of the ribbon you want to delete. Use a round brush at a level of hardness of 100%. Start with a rough mask first, then zoom it and refine the detail. For more realism, add a slight curve on the ribbon’s edge. Keep in mind that a “real” ribbon wouldn’t be completely flat where it bends, it has texture, thickness, stiffness, etc…

Finally, with your mask still selected, use the “soften” tool at a low intensity to soften the edge of your mask and make it more realistic. It’s a subtle change… but especially useful because you used a very hard brush to “cut” the ribbon, and now you need to make it a little more natural again, so to speak (and we all know that nature is never perfectly straight, right?)…

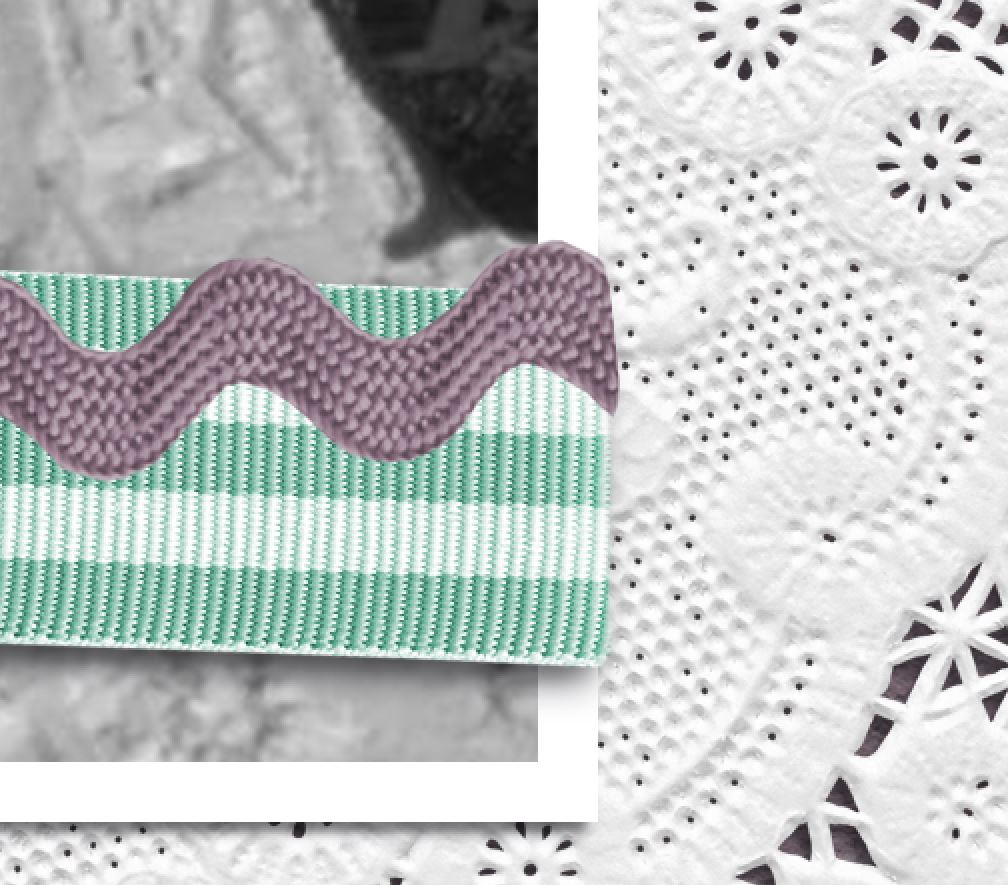
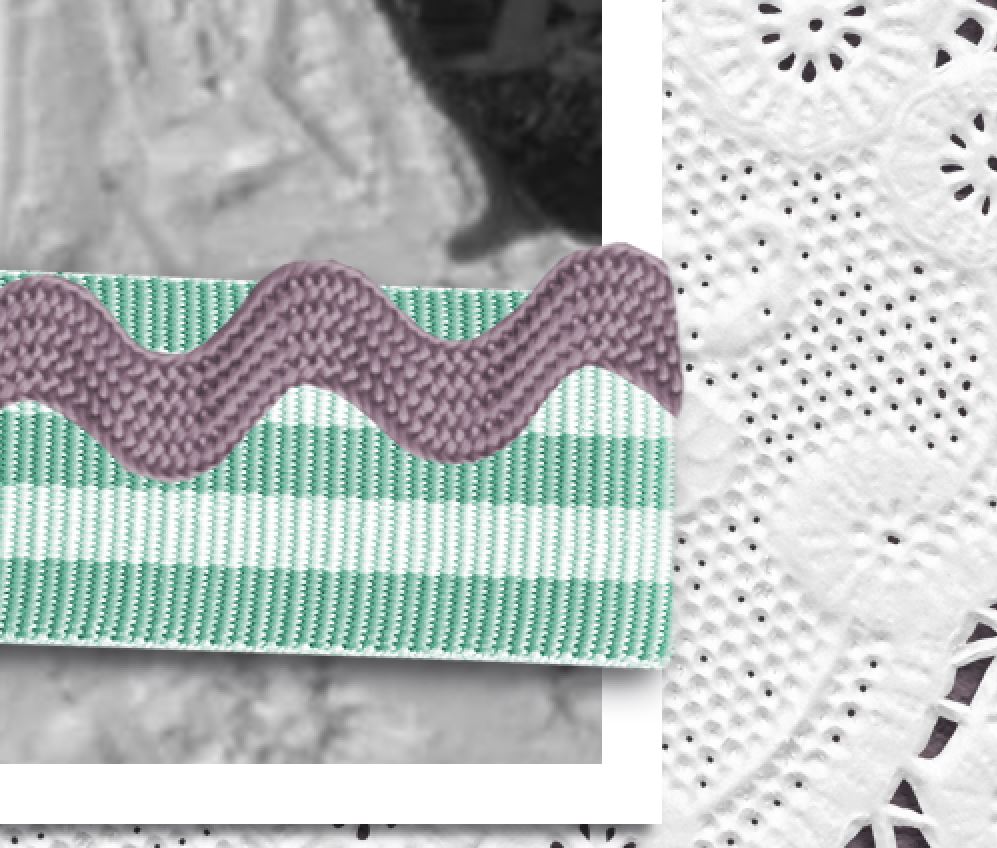
Now that your ribbon has the shape you want it to have, you will use the dodging and burning brushes to give it the final realistic touch. Start by looking at where your shadows are. Where does your light comes from? On this side of the ribbon (the side the light source comes from, that is — for mine, below, it’s the right side), you will use the dodging tool to mimic the light that will hit the ribbon and make it look brighter. Start at low intensity with a wide brush and slowly decrease the size of your brush and increase the intensity slightly each time you go over the ribbon…

Next, you will do the same thing on the other side of the ribbon, but this time — with the burning tool, to make it darker (for me, this will be the left side — opposite my “light source”). This is the side of the ribbon that is in the shadow. Always keep your edits as minimal and natural as possible. It’s better to build the effect up slowly and stop before it’s too much and it becomes unrealistic…

Finally, as one last step — you will add your shadows (if you hadn’t already) and… ta da! You’re finished, and your digital ribbon is now realistically wrapped around your photo. 🙂

I hope you will give this technique a try. It’s really fun, and adds some great realism to your digital pages! Let me know in the comments if you have any questions.


p.s. if you loved this technique for achieving a realistic-looking result on a digital page… you may also want to check out some of our site’s other tutorials for realistic-looking digital effects… for example, this one or that one about paper shadows, this one about stamping or that one about realistic text, but there are many mores. I found two tutorials that use similar techniques to the one I will show you today: this one about washi and this one about pins.


ChloéAbout the author  Chloé is in charge of PR and communication for her small town by day, is a digiscrapper “by night,” and a photographer whenever the light is beautiful. She lives with her man and fur-babies in a small town of Alsace (in the northeast of France), where she loves to read, watch good TV shows (TWD being her absolute favorite), and just hang out with her friends — no matter if they are close by, online, or away in her Swiss hometown. She recently became quite obsessed with Bullet Journaling, FLyLady and Zero Waste.

Tutorial Tuesday | Digital Mini Albums (Part 2)

It’s time for another edition of our Tutorial Tuesday series here on The Digital Press blog! Today’s post is Part 2 in a series on creating a digital mini album (you can find Part 1, from March 2018, HERE on the blog).

In that first part of the series, I shared that mini albums are handy for…

  • Scrapping a family vacation
  • Creating a special gift for someone
  • Marking a special holiday
  • Documenting a specific family tradition
  • Capturing a sports season
  • Life Events such as adoption, graduation, birthday, wedding, birth, or death

I also shared that I have found there to be four main steps in the process of creating a mini album…

  1. Planning
  2. Organizing
  3. Filling & Finishing
  4. Printing

Last time (in Part 1) we looked at the first step: PLANNING. Today, however, we will be getting busy working on…

Step 2: Organizing

Organizing is the stage where we pull everything together that we will need for creating our album and get them ready to be used in our layouts.

There are four areas that we need to focus on in this stage.

  1. The Photos
  2. The Canvas (or templates, if you are using them)
  3. The Papers and Elements
  4. The Journaling

So… lets do this!

THE PHOTOS

Most mini albums are going to be centered around photos from a particular event, or series of events, so getting your photos organized and ready to go is probably the most important part of step 2.

If you do not already have the photos you want to use all in the same place, I suggest you do that now.  This will streamline your workflow by giving you only ONE folder to search through when looking for photos.

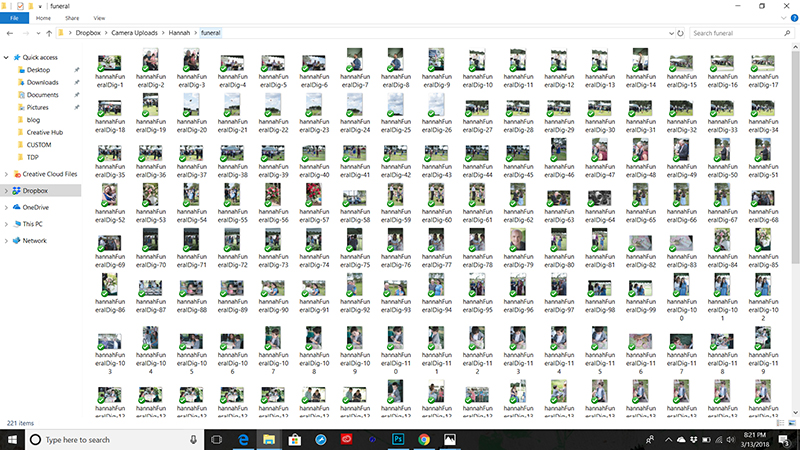
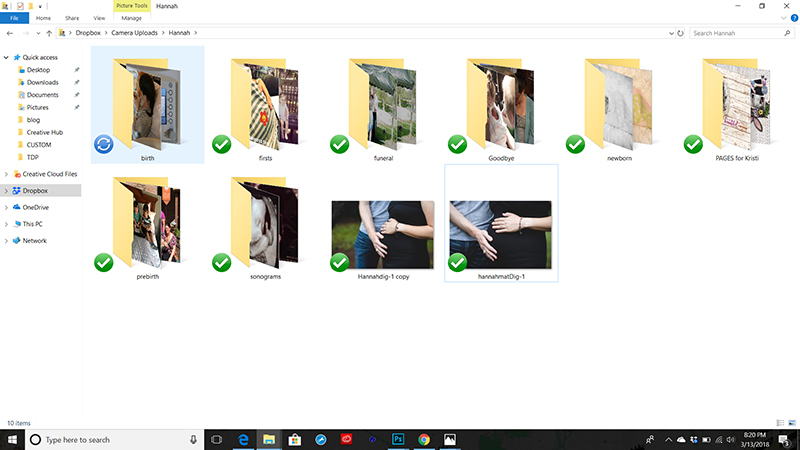
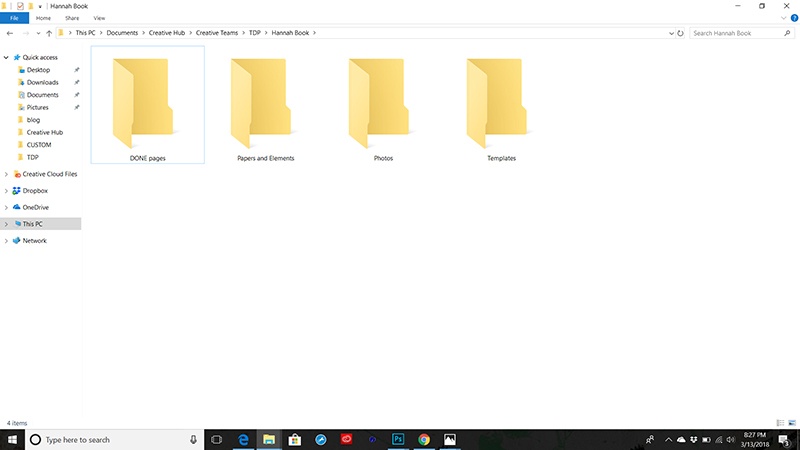
My sister and I did this by creating a dropbox folder where we could all upload the photos we took during Hannah’s short life and the events that followed after.

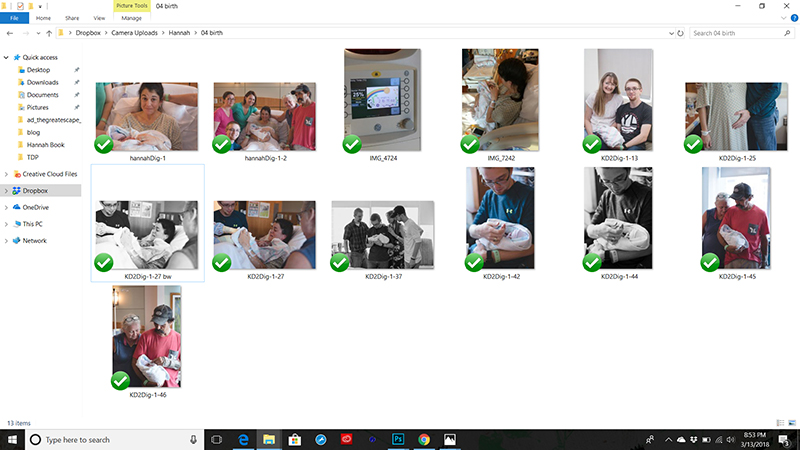
Once you have curated a collection of photos, look to see if you can divide them into pages. Some mini albums only have one photo per page, so that is pretty easy, others have an assortment of photos on one page all telling a story.  For mine, the album will go chronologically.  Some pages will have just one photo, but others, like the funeral pages, will have several.  I purposely organized the photos by creating separate folders for each page I planned on creating.  This will make it easier for me to find photos, and allow me to quickly navigate where I want to be while filling in my album in the next step.

When we finally got all our photos pulled, this folder was quite full of an assortment of photos taken by both of my sisters and myself.  I asked the sister I am making the book for to look through the photos and choose the ones she DEFINITELY wanted in the book.  We divided those into folders that coincided with pages she really wanted made. Then I added a few more photos here and there that I felt helped to flesh out the story for each folder.  I also went ahead and edited my photos, such as cropping and transfering a few to black and white.

Now when I go to make a page for this mini, all the photos I need will be in the right place and ready to go on my page.

NOTE : I am NOT going to use ALL the photos that we curated.  The point of a mini album is to tell a story using choice photos, not showcase each and every photo taken.  Be choosy in this step, selecting photos that you love, that highlight the things you plan to journal about, and that lend themselves to the story you are telling. If you want all your photos in a book, look into a seperate photo album that can perform this function, or opt for a pocket style insert between your scrap pages.

THE CANVAS

If you are using templates this step is a little easier, but the goal here is to prep the book so that all we have to do is fill it up with our photos, elements and journaling.

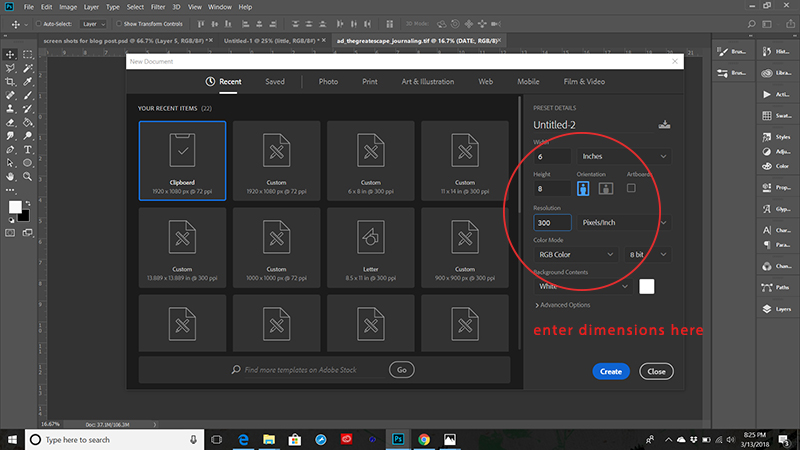
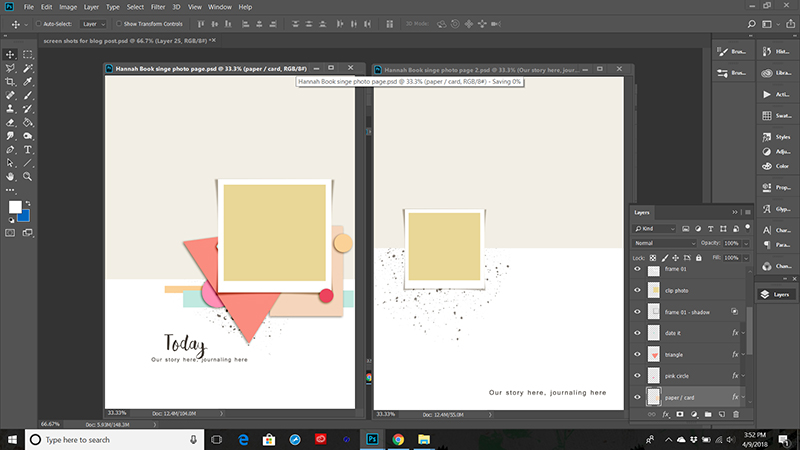
If you are not using templates, you will want to create a master template that you can use to build all of your pages.  Do this in PS by going to File>New> and then creating a canvas that fits the size and orientation specifications you chose in Step 1 Planning.  Create your master template according to your scrapping style.  If you like to scrap on the fly, at least save a blank canvas in the right size and orientation so you don’t have to recreate your canvas each time you start a new page.

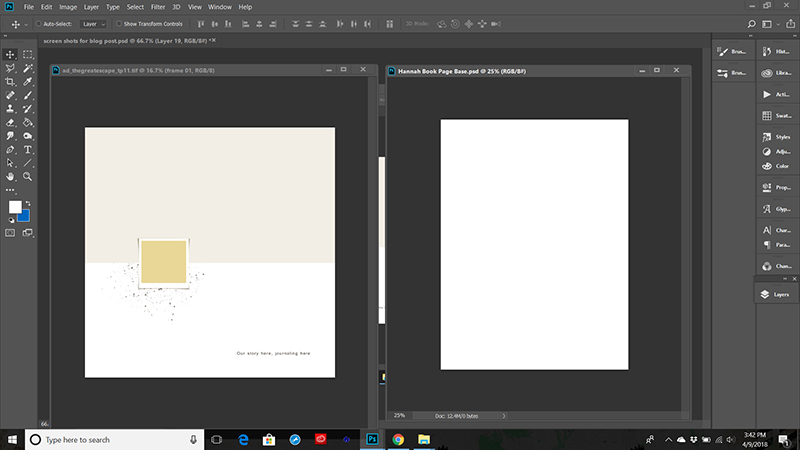
I mentioned that I am going to be printing 6×8, but I am using 12×12 templates.  In order to organize my canvas, I need to convert the templates I want to use to the right format and size. Here is how I did that.

  • Create a new canvas in the already decided size and orientation (File>New) then insert correct dimensions.

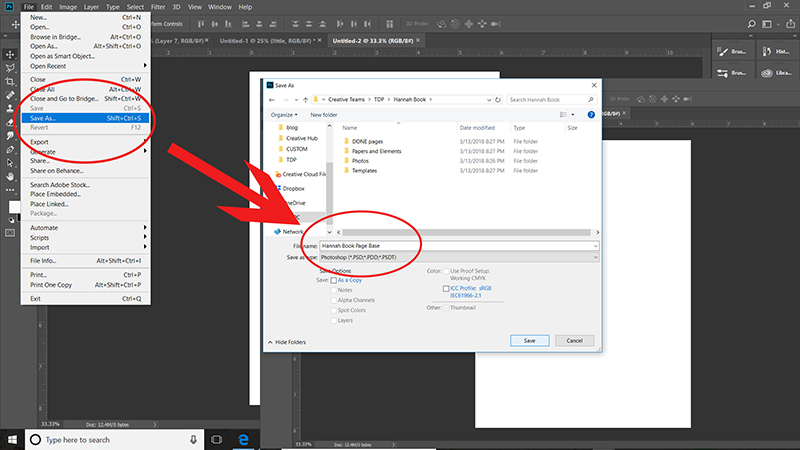
  • Save it as my page base template (File>Save As) navigate to correct place, select file type and give name

  • Open the template you wish to convert (File>Open) then select template

  • Create side by side panels by selecting and pulling down on the tabs of your canvases

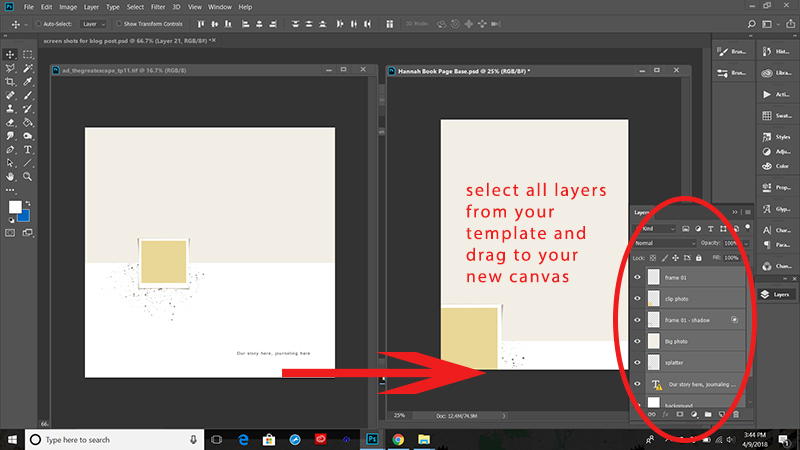
  •  In your chosen template LAYERS palette, select ALL layers by clicking to select the top layer, then holding down shift while you scroll down and select the bottom layer.
  • Drag ALL LAYERS to the new canvas by holding down shift again, clicking on your selected canvas and dragging over to your new canvas.
  • Let go of the shift key and your layers will drop into place.

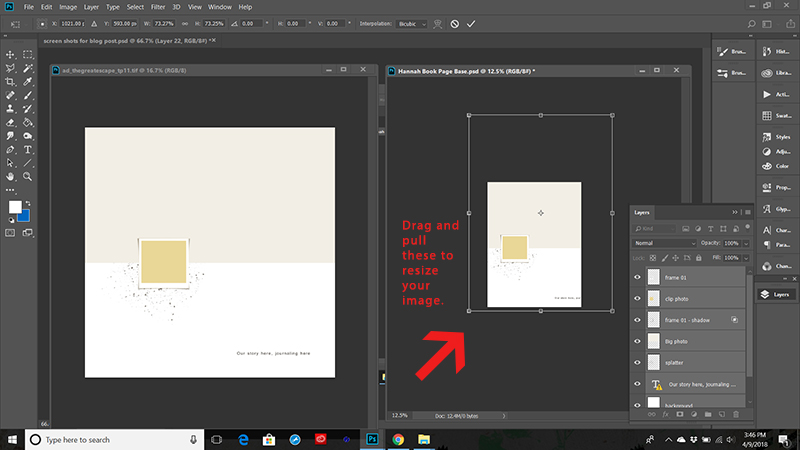
  • Resize layers by hitting CTRL>T or CMMD>T or if you would rather EDIT>Free Transform
  • Pull the little squares at the corners in until the layers are the right size.  You can also reposition them by clicking in the center of your canvas and moving the cursor around.

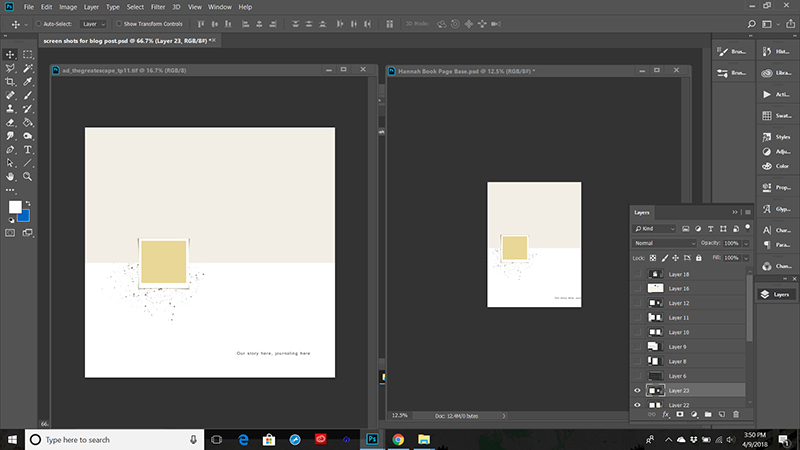
  • Now you should have a newly formatted template that is ready to be used in your mini album.

You can also play around with layers, turning them on, off, or duplicating them, to get the templates just the way you want them.

NOTE: Since I already have my photos chosen and edited, I can already see exactly how many photos I will have on each page spread.  This allows me to go ahead and utilize these gorgeous template of Anita’s to the fullest.  I can decide exactly which ones I want to use and resize or rearrange them accordingly.

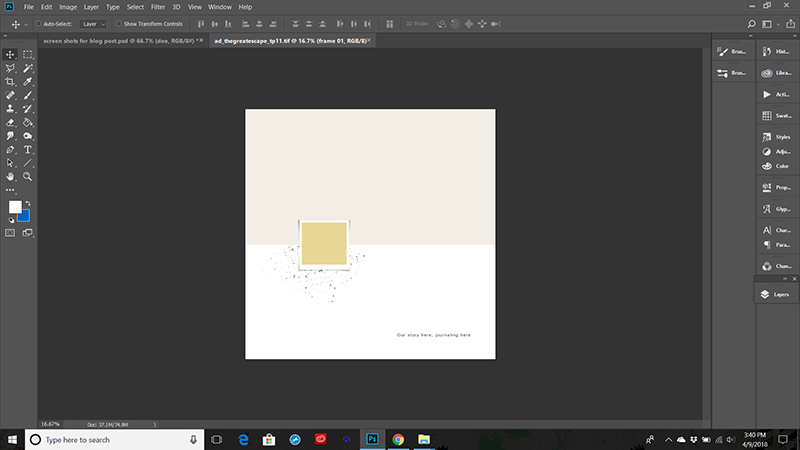
For example, we have two sonograms we are going to use, one photo on each side of a 2 page spread.  So I altered some of the templates with one photo spot just for these 1 photo pages.  Here are the two I chose, leaving plenty of room for my sister to journal.

During this step you are also going to want to consider working up an order to your pages.  This is best done when taking both your photos and your journaling into consideration.  For my purposes, this is really easy – since we are going chronologically, but if you are doing a different type of book it is something you might want to consider!

THE PAPER AND ELEMENTS

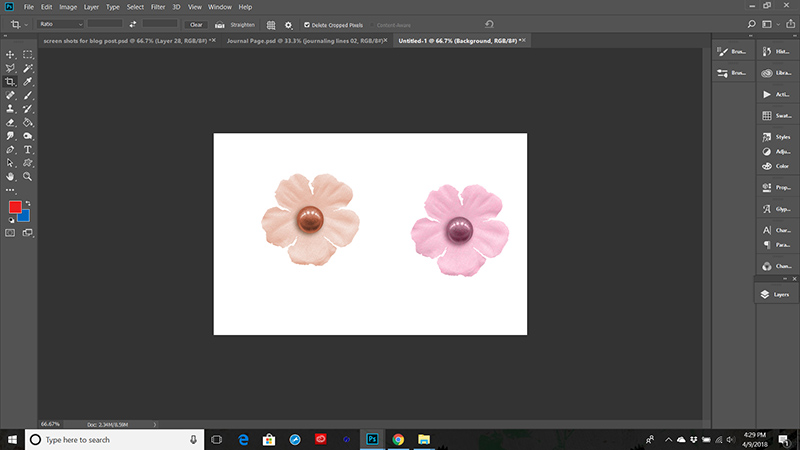
In the planning stage I went ahead and chose a base kit to use, as well as a color scheme.  What I want to do now is prep my papers and Elements to be used in my album.  To do this I am going to go ahead and alter the colors of some items just a bit to fit my color scheme, that way everything is ready when I go to use it.

There are several ways to alter colors in photoshop.  We have some blog posts about that HERE so I won’t go over it again, but do look into it if you have not ever done this – it makes your goodies so much more versatile!!

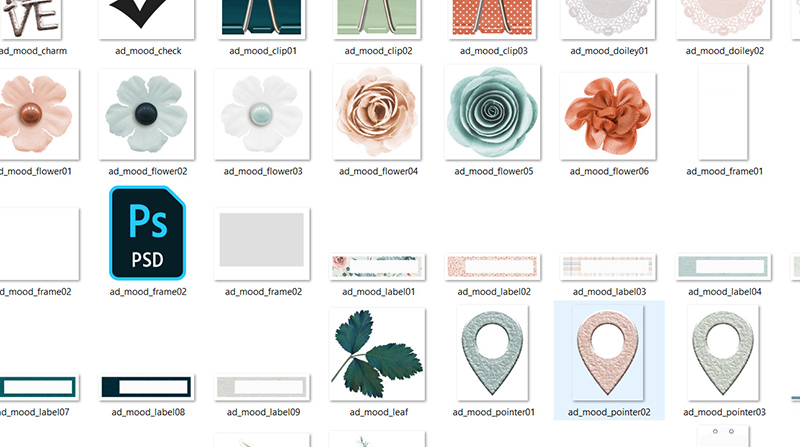
This is the part where I will also go ahead and pull in some additional elements as well.  For example, I think I will use some staples here and there, but I don’t have them in this kit, so I will go and find a staple element and copy it into my folder so that it is right there when I need it.  I can do the same for paper patterns, alphas, fonts I like, whatever I think I might use.  Just like you might pull out all your supplies to look through for creating a paper album, curate a little collection to be used digitally in the creation of your digi mini.

One note on this: for consistency it is best to limit yourself to a small number of the same type of elements.  For example, I plan to use flowers. However, instead of using different flowers on each page, I will use the same 5-7 flowers scattered and repeated throughout the album.  This creates a consistent “background” from page to page that will allow my photos, and the story to really stand out.  This also allows me to finish the project more quickly, since I will not have to keep looking for additional elements. Thankfully – this awesome kit by Anita has a good assortment of flowers that all go well together!!

THE JOURNALING

This is maybe the hardest part of organizing.  Some people prefer to go back and do journaling after they have made a page, but I have found that to be troublesome because sometimes what I have to say is far more than I created room for.  A middle ground is to look through your photos and consider which ones will have more journaling, then make sure to leave enough room for it on those pages, or go ahead and journal first, that way you know exactly what room is needed.

Since I am making a book for someone else, this part is actually pretty easy for me.  My sister has been filling a word file with her journaling for me, so I know exactly what she wants to add as I make each page.  You might consider doing this yourself.  Go ahead and take some time to write out the parts that are most important to you.  You can do this while sorting through your photos and putting them in folder.

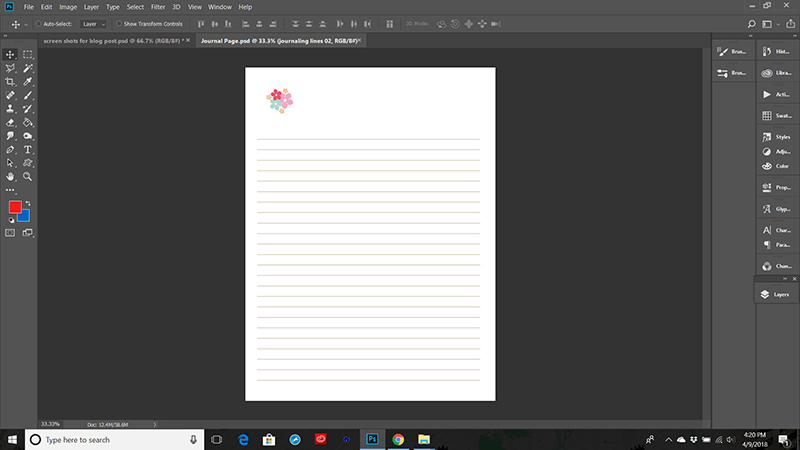
OR, you can make yourself some extra little journal insert pages, like I did – just in case things come up later 🙂


Alrighty, we have worked hard and everything should be organized and ready to pull this mini album together  in its final stages.

The next installment will focus on the Filling and Finishing – and that is where all the fun is right!!

See you next time!


ErinErin is an artsy crafty kind of girl who is currently dabbling in far too many things, but is working hard to enjoy every moment of it, while avoiding the rain, which is difficult due to living in the land of many rains. She is slowly learning to use her smart phone to capture all the fun little bits of life that would otherwise go unremembered in the busy craziness that is raising a family!
Hybrid How-To | Memory Flip Calendars

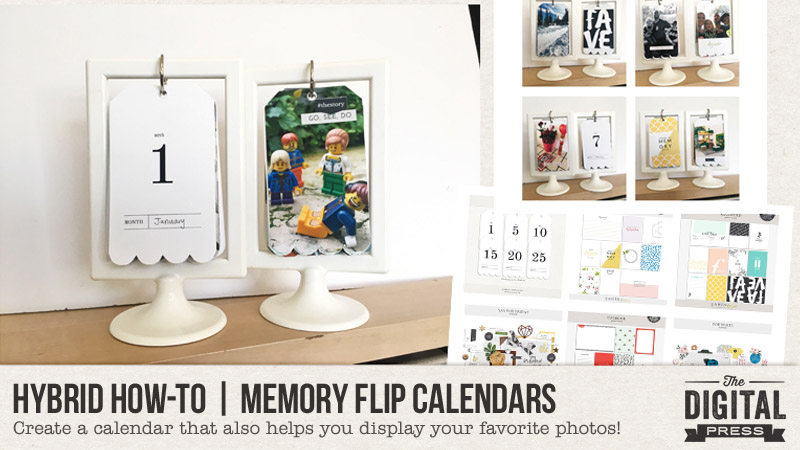
Hi everyone! This is Sabrina from the hybrid creative team at The Digital Press, and I’m here on the blog with you today to share a really fun and easy hybrid project that you can create in order to showcase some of your favorite photos — a memory flip calendar!

I think you’ll really love this project. Let’s get started!

To begin this project, I first gathered my favorite photos from 2017. I went with “weekly favorites” in order to correspond with the numbers on each of my date tags.

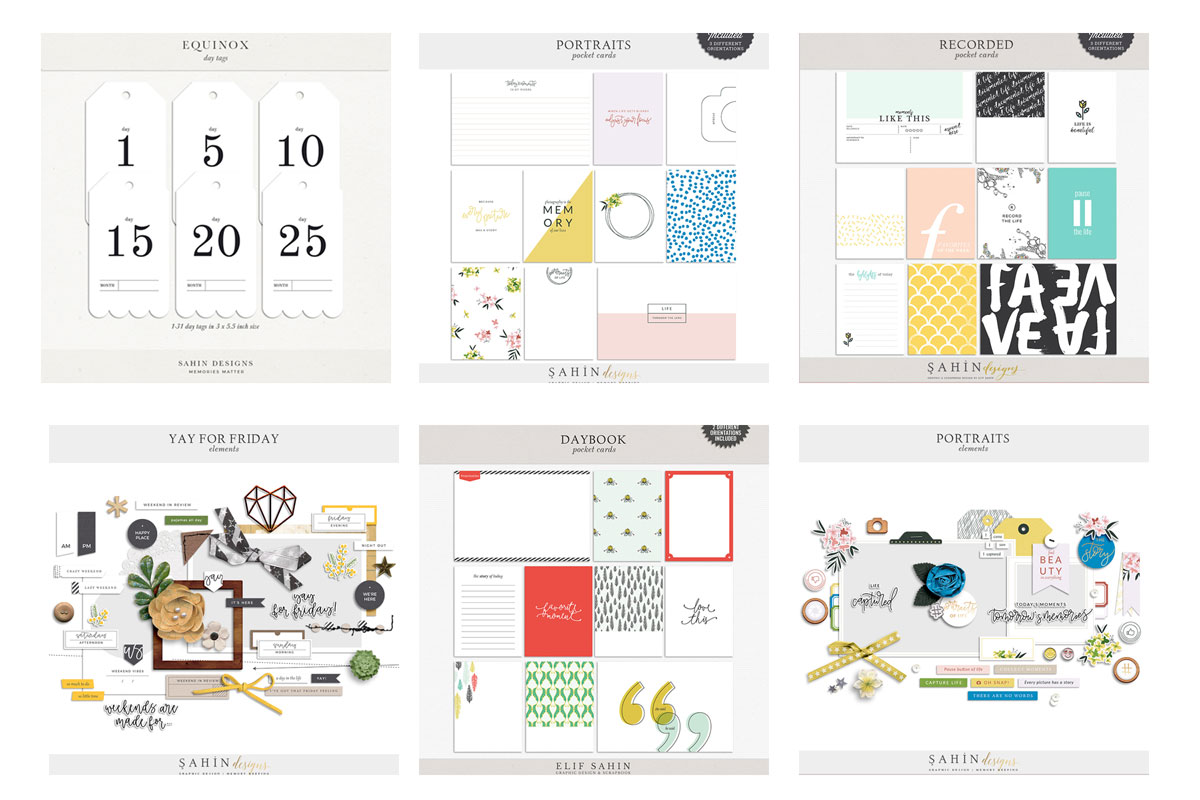
Once I had my digital photos collected and ready… I selected some digital products to use. Here’s a look at just a few of the products I chose to use (all of them came from the Sahin Designs shop at TDP)…

The main product I used, which became the foundation for my entire project, was the Equinox Tags (see above, upper left image).

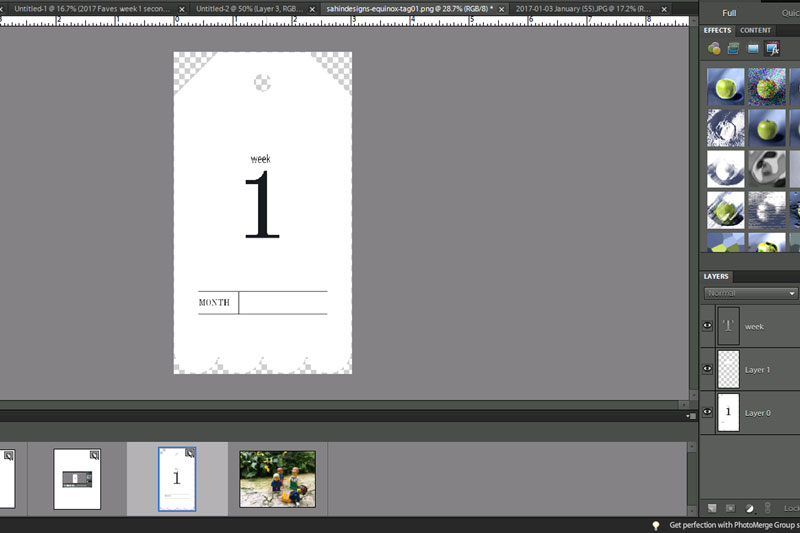
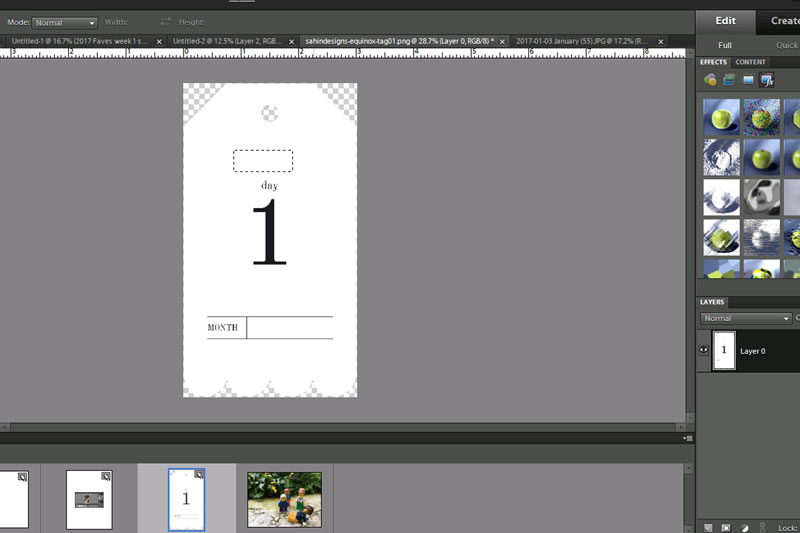
After compiling my photos and digital products, I was ready to begin! The first step was to open the Equinox Tags in my photo-editing software; I use Photoshop Elements (PSE).

I decided to change the text on the tag from “day” to “week” (because my calendar was going to be a weekly calendar, instead of a daily calendar). I did this by covering the word “day” with a white piece of the tag to cover it up and then typing in the word “week” above it.

Here’s a look at the “before” tag (with the word “day” …and I’m in the process of getting ready to cover it with a rectangle of white tag)…

…and here’s where I covered it with the new word, “week”…

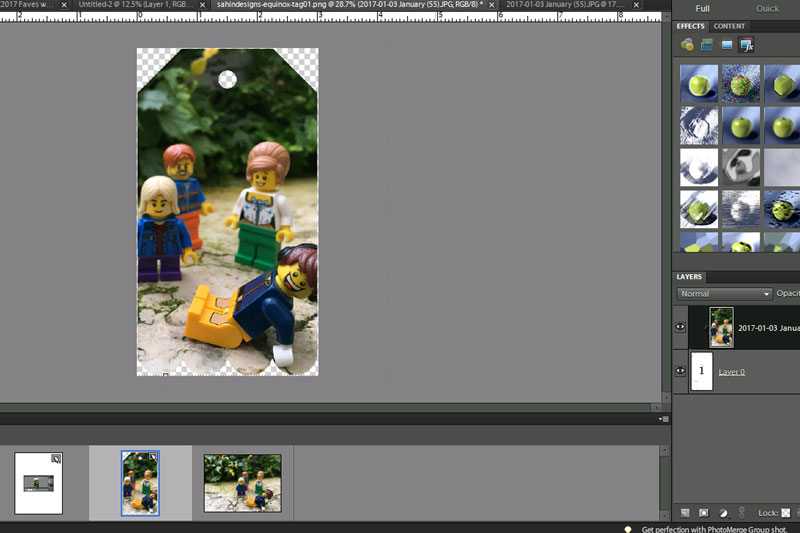
After getting the calendar date tags ready, as shown above… I began using the same tag shape as a clipping mask to shape my photos (in PSE, you place the photo in the layer above the tag… and use Ctrl-G to clip it; in Photoshop (PS) you do the same thing but the keystroke command is Ctrl-Alt-G).

As you see in this screenshot, my photo took on the same shape as the tag I clipped it to… 

Next came the fun part! …printing and putting everything together. 🙂

You can either use the print-&-cut feature of a paper cutting machine like a Silhouette… or… you can print and then fussy-cut by hand with scissors or a paper trimmer. Whatever works best for you!

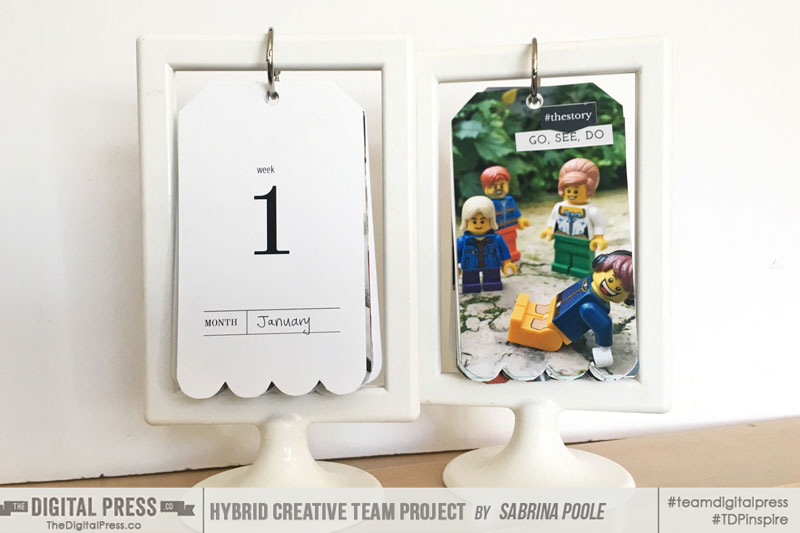
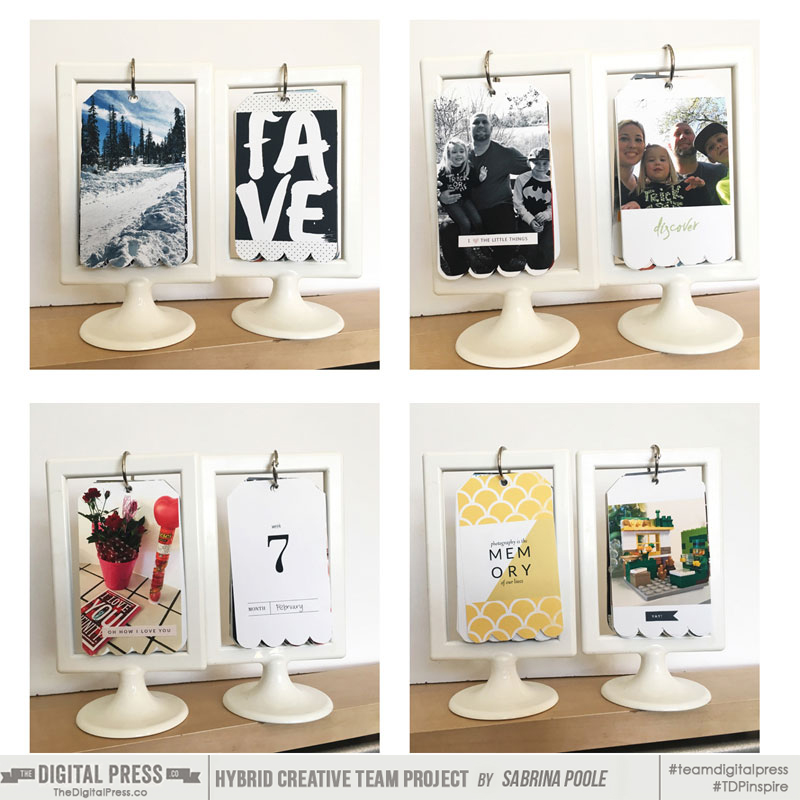
Once I had everything printed & cut out, I attached my tags to single binder rings hanging from empty frames, as shown here…


Once I had it assembled, I found that it actually worked better if I trimmed off an additional 1/4-inch from each tag — to make the flipping of the pages easier once they were on the frame.

Here are a few more shots of the calendar and its different pages…

Isn’t that fun? A flip calendar to remember the best moments of the year!

I loved how this project came out… and I hope you’ll try making a fun memory flip calendar of your own, using your digital supplies! If you do… please share your projects with me — I’d love to see what you come up with! If you’re participating in The Digital Press’s challenge system for April 2018, don’t forget to visit the CROSSWORD SECTION in TDP’s forum to get the details about this month’s Hybrid Challenge — because you can earn challenge points if you give this project a try (earning you points toward discounts & FREEBIES)!


00 HeadshotAbout the Author  Sabrina is an avid documenter of life — herself, her children, her hubby, and her everyday life. There is beauty in the ordinary moments, and they are what she loves to scrap. She is also always on the hunt for a quiet, peaceful moment… and she usually spends it reading or playing at her crafty desk.
Tutorial Tuesday | Selecting a Background

Hello there, and welcome to another edition of our Tutorial Tuesday series here on The Digital Press blog! Today, we’ll be talking about the process of selecting the “perfect background” when creating a digital layout.

When I started paper scrapbooking, I always needed help in choosing papers to match my photos or make them really pop. Our goal as scrapbookers and memory-keepers is to make the photos the center of attention and to have the background bring out the best of them, without competing with them. Doing this when you have a mix of strong colors within your photos, however, is not always easy. Sure… you can change the photos to black and white — but if you don’t want to do that, then this tutorial is for you!

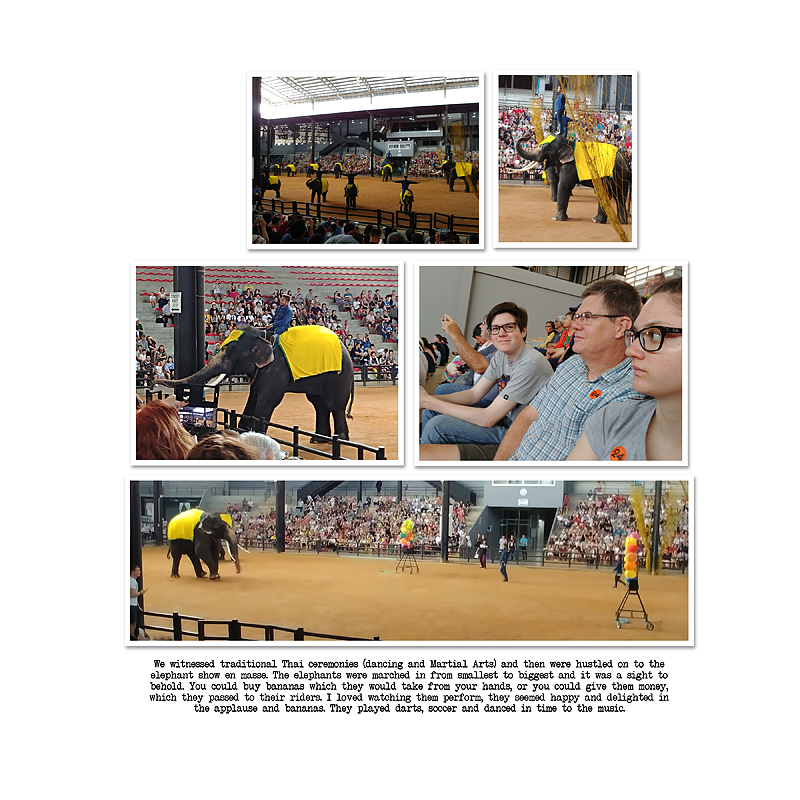
I start out my layouts with the photos sized and shadowed as I want them, and the journaling written… and that way, I know the most important items are already taken care of…

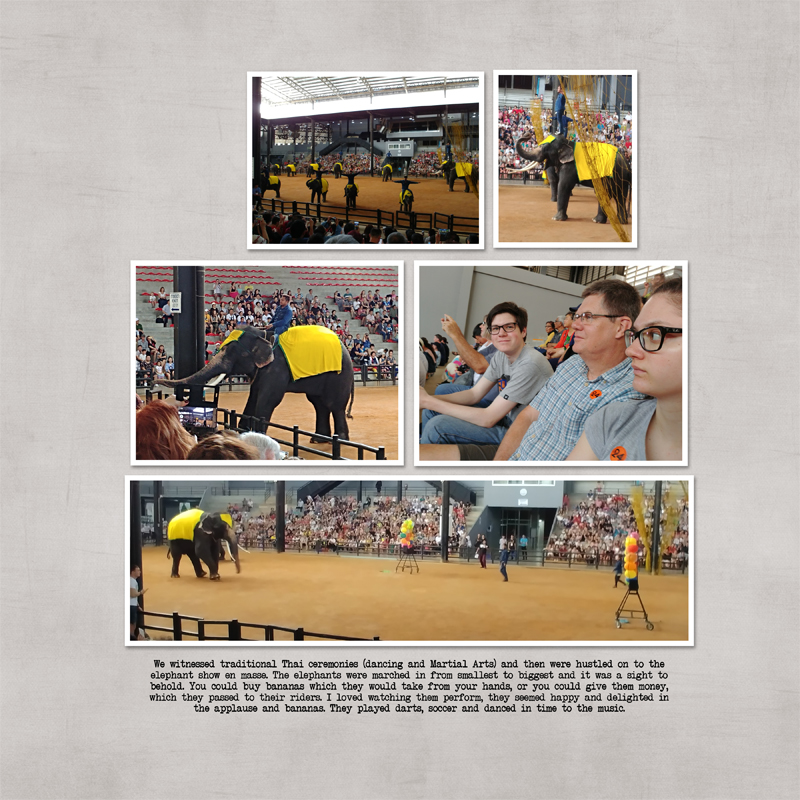
I don’t always add a title. This layout is one of a series that details our travels to Asia last December. Next, I choose a kit or collection that I want to use (I find that TDP’s store collabs are often my go-to for a fabulous mix of goodies in my desired colour palette). As I began this layout, I found that I loved Fresh Air by The Digital Press Designers.
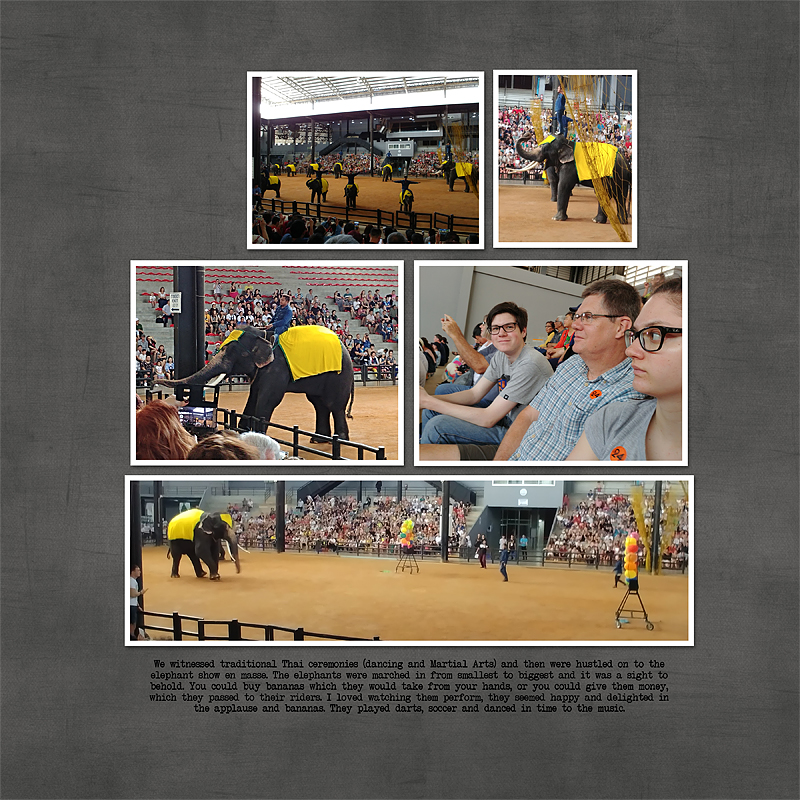
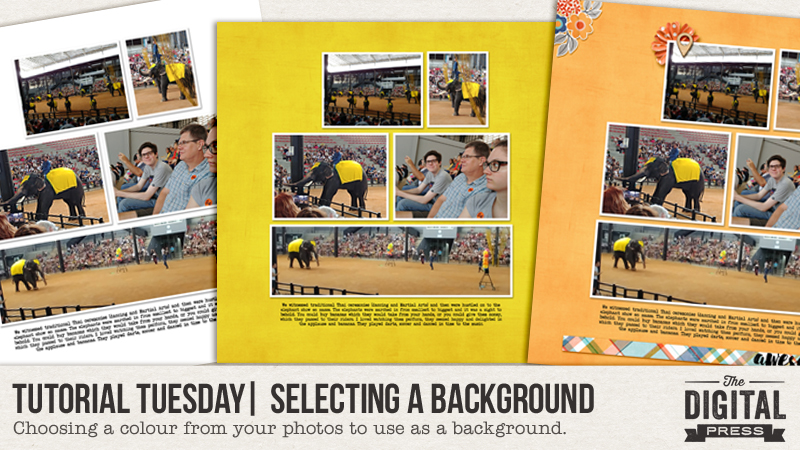
When thinking about a background, I started with the dark grey — thinking that it would draw attention to the elephants…

And while I thought that this color did work, I also thought that the bright yellow of the cloth on the elephants became a bit of an eye sore (contrasting too much for my liking).

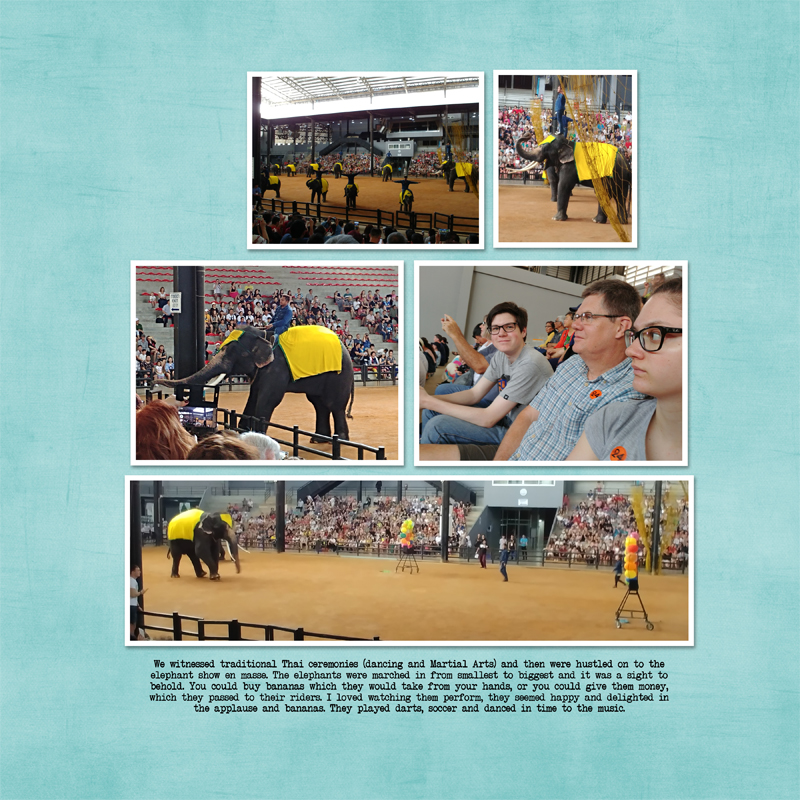
Therefore, next I tried the light blue of my hubby’s shirt, but still was not completely thrilled with the result…

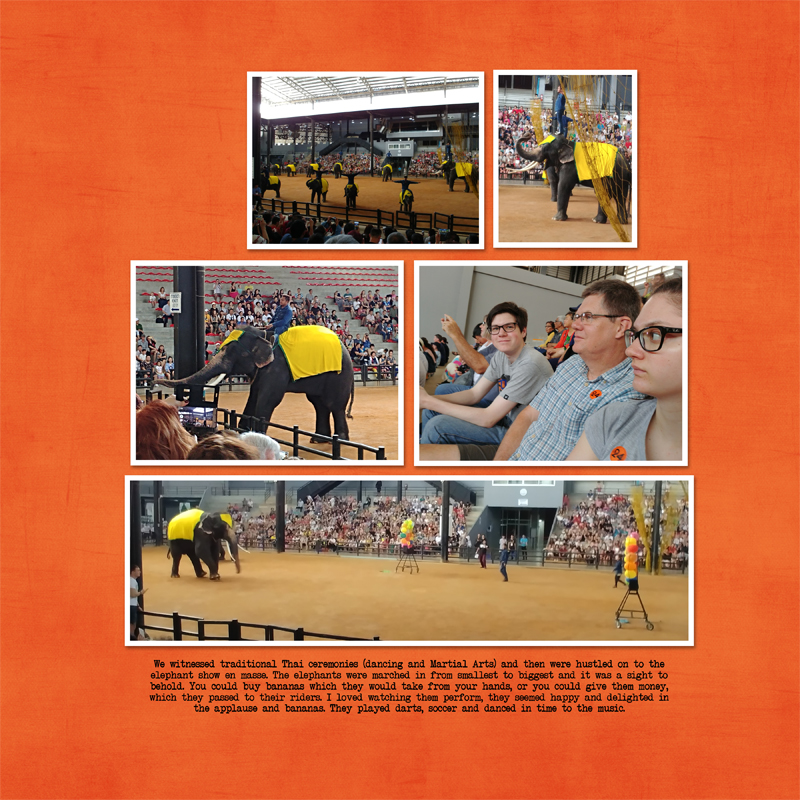
Next, I tried the bright orange background — which was bold and not really my style. It did draw attention to the “24” stickers we were each wearing, and to some of the balloons, but still not quite right…

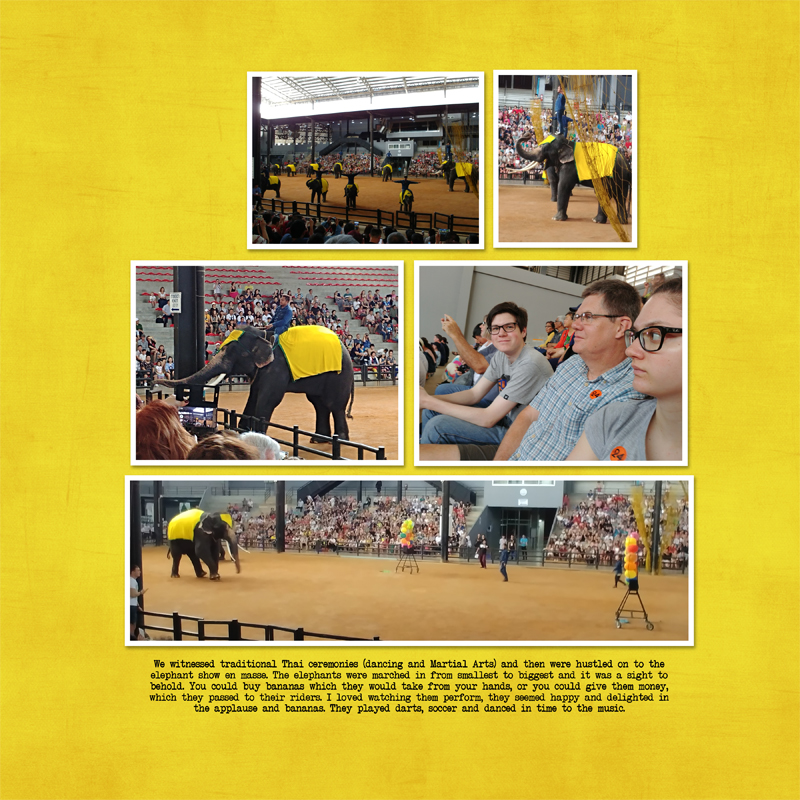
Next, I tried to create my own custom background color — by adding a hue and saturation layer and playing around with that a little bit, while trying to re-create the bright yellow of the elephant’s cloth…

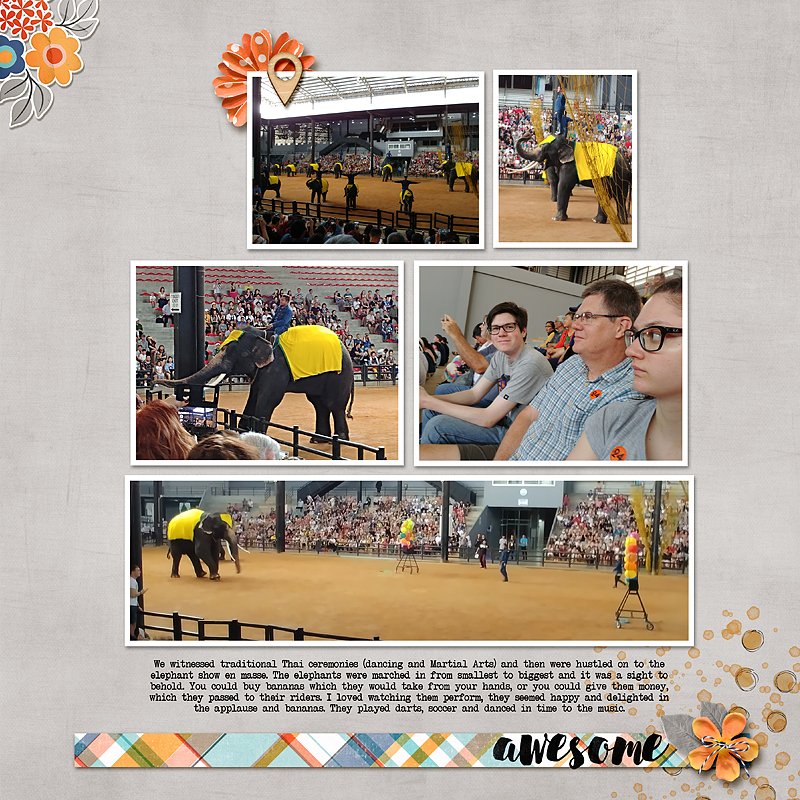
The yellow still didn’t feel right… so I tried out the light grey solid paper as a background. I found that it was easier on the eyes and drew attention to the light grey of my son’s and my daughter’s clothing (and to the stands in the background of the photos).

I decided that it worked, and so I added a paper strip from the kit that contained all of the colours that were present in the photos, serving to tie everything together and give a cohesive feel to the layout. I also added some coordinating embellishments…

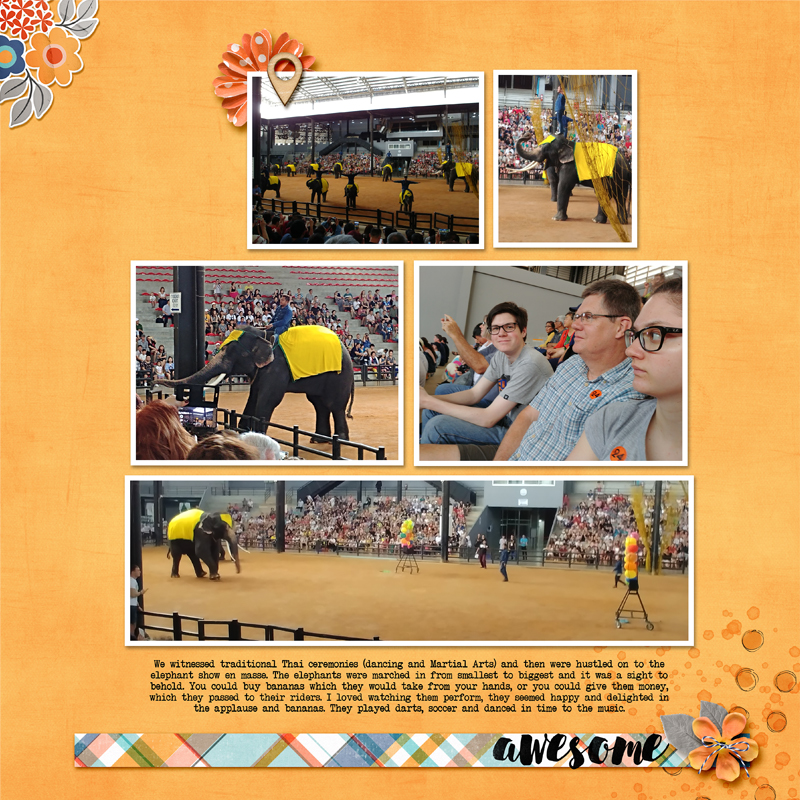
To be honest, at this stage I was happy with it and saved it, walked away, and made tea. But when I came back I was inspired to try one last background paper colour — one that felt warmer, as it was hot and humid in Asia.

My new choice was a warm yellow/orange color that resembled the sand found in the photos…

As soon as I saw it, I knew that this last option was the correct one for me!

As you can see, choosing a background colour is a personal choice… and is one that often requires/involves some trial-and-error to achieve a result. I find that it’s helpful to see all of the different options in order to choose the one that works best for your page. And that’s the beauty of digital scrapbooking — you can try out any number of different background color choices without any hassle!

In general, though, my rule of thumb is to choose a background paper that coordinates with one of the background colours from my photos, and/or a color found in the focal photo. I definitely encourage you to play around with different color options — especially if you’re working with a kit that contains solid papers in all of the colors of the collection (in which case, the designer has done all of the hard work for you!). Once you choose your favorite main/background color… you can add a small-scale patterned paper or a striped paper or a plaid paper strip, etc. — something to tie the colors together and lend cohesion to the layout.

Have fun and fill your albums or photobooks with layouts that make your heart sing when you leaf through them!


small avi

About the author Stefanie is a member of The Digital Press creative team and a stay at home mother of three older children living in Cape Town, South Africa with her hubby of 30 years, two of their three children and 4 Siamese cats. She loves photography, traveling and digital scrapbooking, documenting the good and the ordinary everyday.

Tutorial Tuesday | Scrapbooking Inspiration

tt-032018

Hi gang! Happy to be here with another Tutorial Tuesday. For this week’s focus, I wanted to create a little inspiration for alternative things to include in your scrapbooks – and it’s all about screenshots!

It’s certainly easy to pick the major moments of life – weddings, birthdays, trips, etc. – for the subject of a page or an album, but I think often that some of my favorite things about my life are not those major occasions, but rather the millions of tiny, every day, regular moments that fill in the rest of the space. It’s usually these random moments that make the sweetest memories for me, and the ones I really want to remember. Luckily, since we’ve all got our smart phones around us pretty much all the time, it’s easy to capture screens and remember moments like these. I wanted to share a couple of ideas that I’ve used to preserve some of these moments.

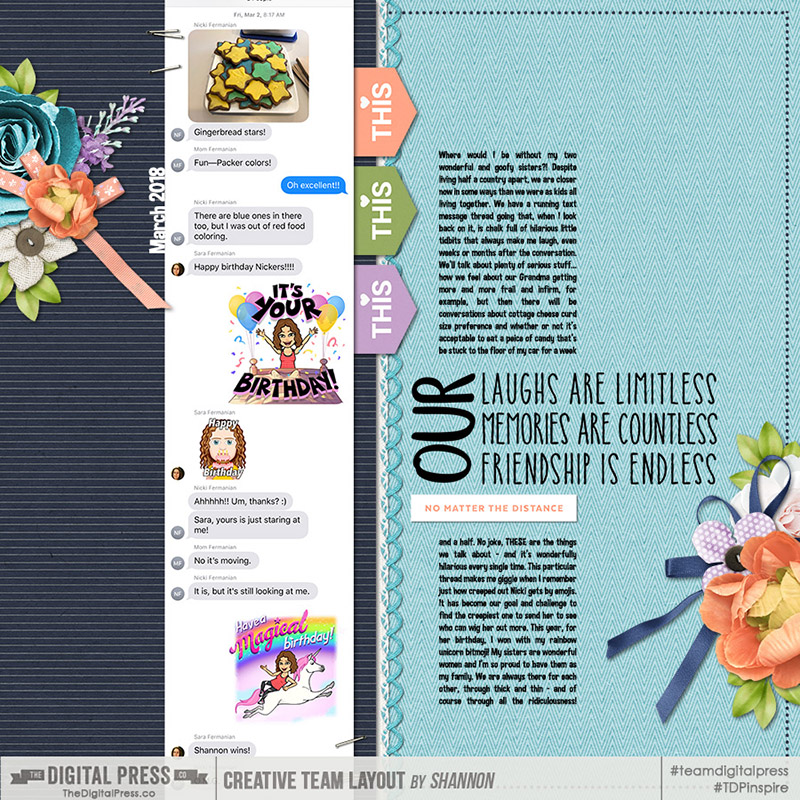
Text Message Threads

I’ve got a running text message thread with my two sisters. We don’t live near each other, but we sure do text a lot! And 9 times out of 10 the conversations turn really silly, really quickly. They are the conversations that keep me giggling days, weeks, and even years in the future, so it’s important for me to remember them! I’m an iPhone user so I can give a bit of guidance there – but you can apply the same concepts to whatever device you use.

  1. Depending on which phone you have, there’s a certain set of buttons to press to capture any given screen. On the iPhone 7, for example, you click the circle button and the screen button at the same time to take a capture. The image gets saved in your Camera Roll.
  2. Sync your phone with your computer to be able to access the images and use them in a scrapbook spread.
  3. If the conversation is long, you can take multiple screenshots and stitch them together on the computer to have the entire conversation be visible.

As an alternative – at least for iPhone and iMessage users – you can take a screenshot from your computer to get a larger area all with one screen capture. On Mac, you can hit Shift-Cmd-4 and you’ll get a little crosshairs icon. Click and drag around the area of the screen you want to capture – the screen capture gets saved as a PNG to your desktop.

Here’s my layout of a text message thread of mine:


FaceTime

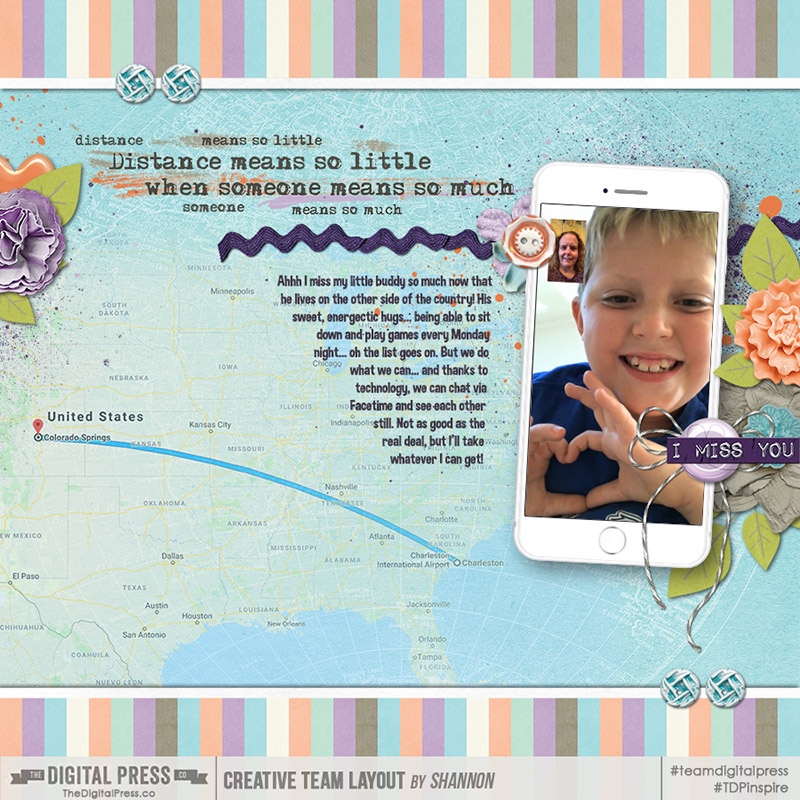
Another thing that I do a lot of – thanks to technology! – is Facetime with my niece and nephew. They recently moved to the other side of the country, so we don’t get to see each other nearly as often. But we hop on Facetime frequently and I discovered that you can take snapshots during the Facetime to keep as still images.

  1. During the FaceTime, there is a little white circle button that appears on the screen (not the iPhone button). If you tap that, it takes a still of theFaceTime session from that point and saves it to your Camera Roll.
  2. Sync your phone with your computer to be able to access thoseFaceTime stills and use them in a scrapbook spread

Here’s a layout of a FaceTime capture I took:


Other Screenshot Ideas

There are plenty of other screenshots you can take that are worthy of documenting the everyday moments of your life. Here’s a couple of additional suggestions to get the creative juices flowing…

  • Screenshot of the current weather – if you’re like me and live in a place where it gets REALLY hot, you probably check the weather app on your phone and marvel at temps shooting PAST 110 degrees Fahrenheit. Combine that with a couple of fun shots of the family enjoying the pool and you’ve got a fun summer spread!
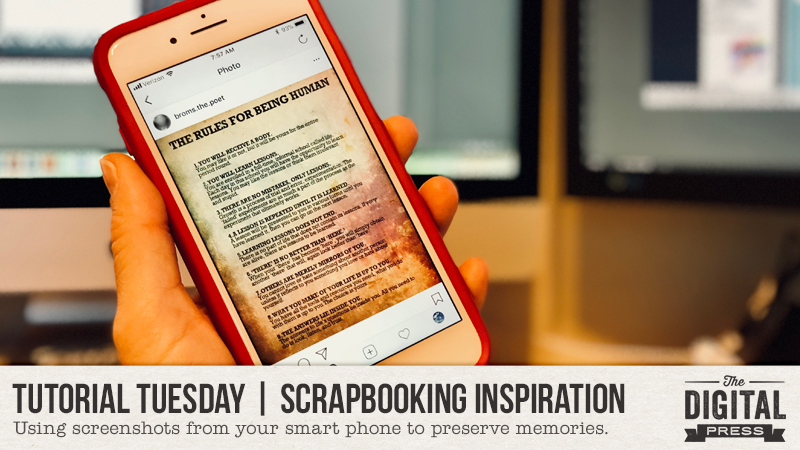
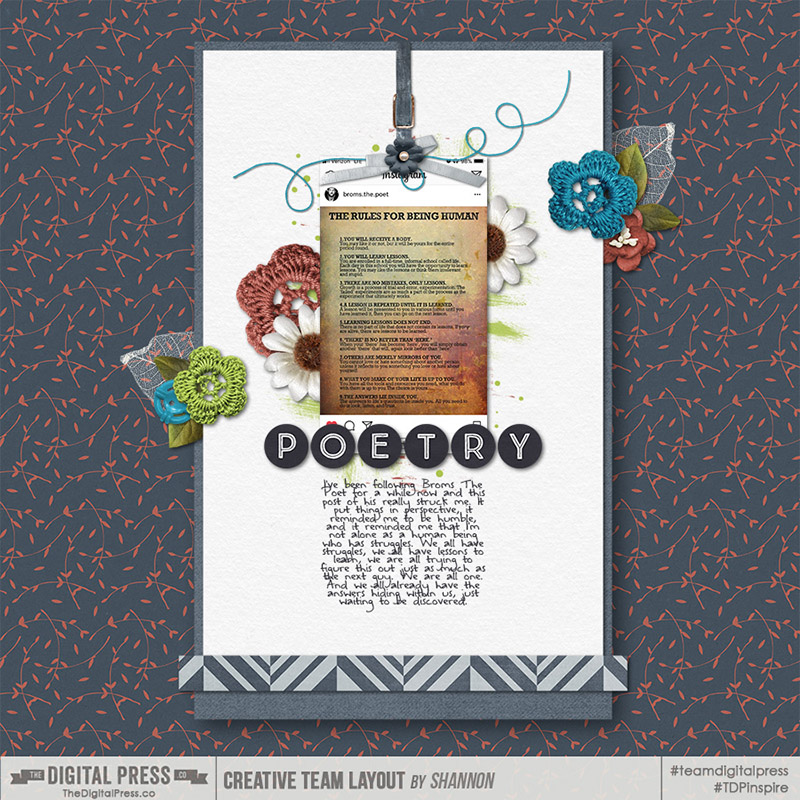
  • Screenshot of Instagram favorites – I follow a couple of really inspiring Instagram accounts. One example is a feed of all of the beautiful natural places of the world – I look at those pictures and am always inspired to travel. Scrapbooking a page with those screenshots serves as a sort of Dream Board for my future self! Another account I follow is a guy who writes really amazing poetry… some of the poems really strike a chord with me and a page showcasing that poem with some journaling about how it made me feel seems really special.
  • Screenshots of Game apps – I know I’m not the only one addicted to a particular game on my phone… I just know it! I have a friend who lives across country and one of the ways we “keep in touch” is through friendly competition at Bejeweled. I have a handful of screenshots of high scores that I’ve taken, accompanied by a text message thread conversation full of friendly competitive banter. It’s little moments like this that keep me feeling close to my friends, ridiculous as they are.
  • Screenshots of Exercise Tracking – There are all kinds of apps that will map and track your hike, bike, run or walk. I’ve been on my fair share of exercise kicks and have gone through phases and recording EVERYTHING! A screenshot of a particular tough hike log along with a picture of triumphant smiles at the top of a mountain makes for a great memory.
  • Screenshot of Pinterest saves – I’m sure a fair amount of you have been entertained by “Pinterest Fail” videos… or have been wowed by “Pinterest Win” pictures and videos. I’ve been known to take screen captures of a Pinterest pin and compare it side by side to my attempt at recreating it. It’s either amazing or hilariously awful – but it’s a fun memory to preserve!

Here’s a layout I did with a screenshot of an Instagram favorite:

You can see that there a ton of ideas out there for alternative things to scrapbook – and so many just in the realm of screenshots. I’d love to see what other ideas you all have come up with – or challenge yourself to think outside the box and do something you haven’t before.


About the Author  Shannon has been completely addicted to digiscrapping since she began in early 2016 (though she’s been a scrapper since 2000). Her early morning ritual of a few quiet hours of scrapping while sipping a chai tea is her favorite part of each day. She is also the owner of a web design company, and when she’s not at the computer designing websites or digiscrap layouts, she’s probably hiking one of the local mountains in her hometown of Phoenix, Arizona. She is an avid reader and loves to travel to foreign countries.