Category: Tutorials

Tutorial Tuesday | Using Digital Cut Files

BlogHeader_0517_CutFiles

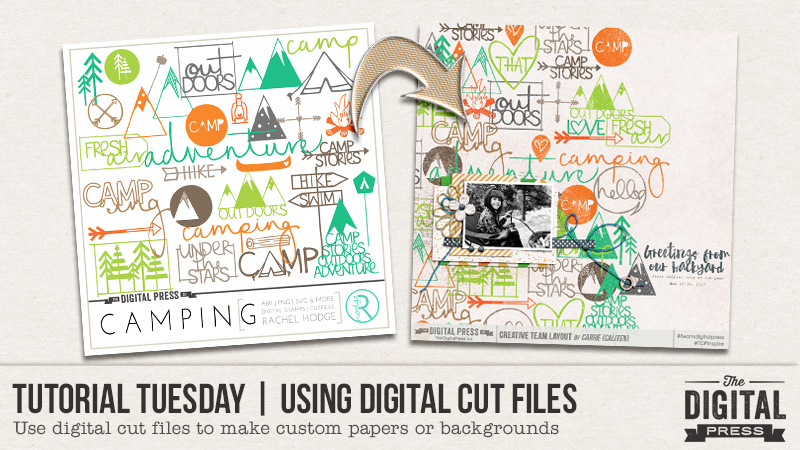
I love cut files.  I yearn to make lots of beautiful hybrid pages with little shapes and words cut out of colored paper and delicately adhered to my layouts, or tucked safely away in transparent pockets.  But, reality has a bad way of crashing down on me.  I don’t own a digital cutter.  And I lack the patience to hand cut more than one anything.  But I still love cut files, and I frequently used them as elements or stamps in my all-digital layouts.  I also use them to customize background papers for my all-digital layouts, and simple technique I’ll share with you today….no scissors required.

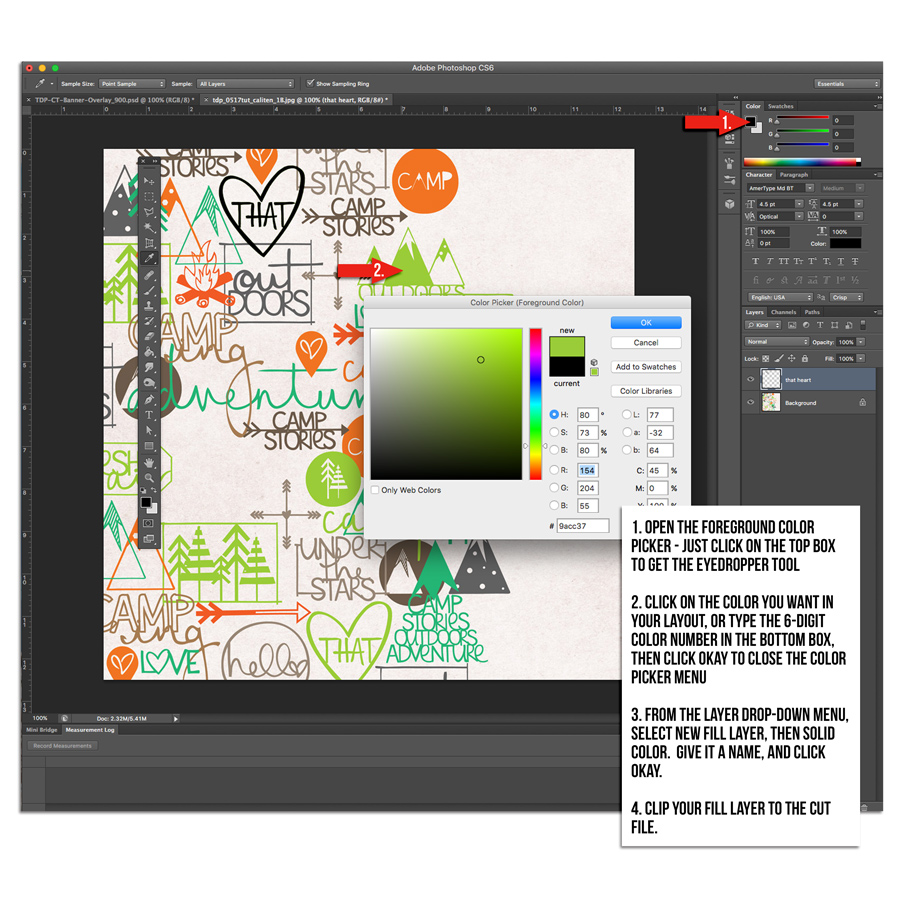
Cut files aren’t just for hybrid scrappers!  They can totally be used in an all-digital layout too.  The technique for using cut files to make a custom paper or background is fairly easy.  Open a new layout, and drag in a lightly textured solid background paper.  Select and open all the cut files you want to add.  I use the .pngs, and drag them to roughly where I think they should be when I first pull them into Photoshop.  The most time-consuming part of this process is moving around the cut files to fill the space.  Since I like a full, but not cluttered look, I overlap some, and duplicate others, being sure to keep some space between the duplicates so the paper doesn’t feel repetitive .  Sometimes I change the color of an element to give it better flow in in the background, or to make it coordinate with the rest of the cut files I’m using if I’ve got cut files from different sets.  To do that, I use the color picker to select the exact color I want, then create a new fill layer using the steps shown in the next image.
tdp_0517_tut1

You could also use the paint bucket tool to change the color of the cut file, but you still have to follow steps 1 and 2 above to get the desired color in your bucket.  Once I have the cut files colored and arranged the way I want, I merge them into a single layer, then apply a distressing mask to give the paper a stamped look.  That’s it.  Easy custom background paper using cut files.

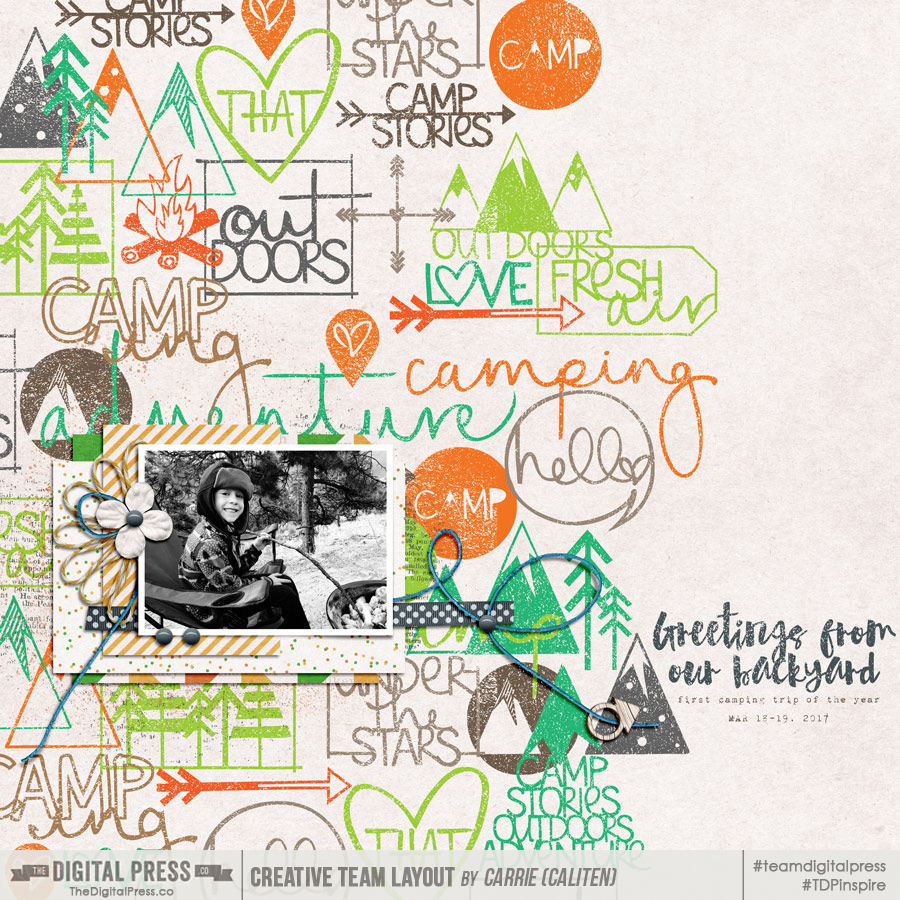
Here’s my finished layout.  I used cut files from the Camping Set and a freebie that coordinates with the Love This Set by Rachel Hodge.  The papers and elements are from Homecation by May guest designer ninigoesdigi.
tdp_0517tut_caliten_camping

This technique is great for more than just background papers too.  It works well on a smaller scale too – say for a 3×4″ or 4×6″ pocket or filler card.  Cutting files are available in themed sets in the TDP store.  There are also usually a handful in the monthly TDP store collab kits, and the Monthly Chronicle collections, as well as the quarterly Digiscrap Parade.  This technique could also work well with the digital stamps that are included in many of the digital kits in the TDP store.  The opportunities abound, and I encourage you to try using digital cut files on your next all-digital layout!


About the Author  Carrie is a creative team member here at The Digital Press. She and her family enjoy spending time outdoors, year-round, near their home in Colorado. In addition to scrapbooking and the occasional hybrid home decor project, Carrie also reads voraciously, accumulates fabric, makes soap, brews beer, grows hops, and tries to keep indoor plants alive.caliten

Tutorial Tuesday | Custom-Made Journal Cards

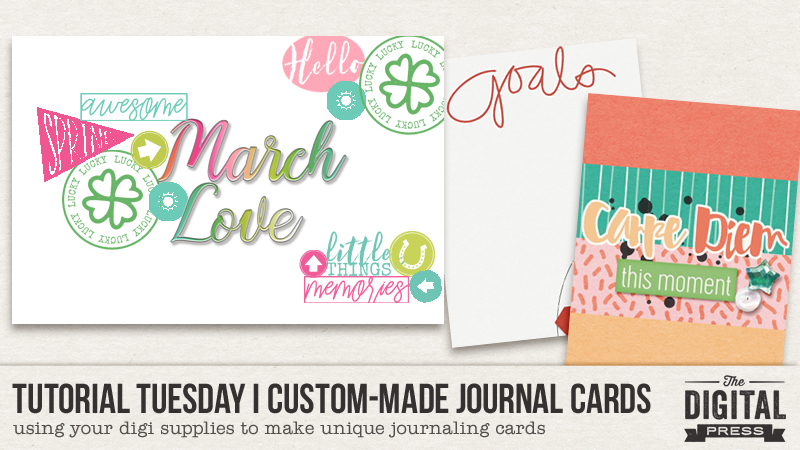
Hello, and welcome to another edition of Tutorial Tuesday at The Digital Press! Today, I will be showing you some fun ways you can use your own digital kits to create custom journal cards.

You can really stretch your digital stash by making your own custom pocket cards with the various pieces included in the digital kits. Even if the kit comes with cards already, you can still create your own customized cards with photo editing software and digital papers, brushes, and elements. Getting creative with your supplies and making cards not only stretches your kit, but it adds a personal touch to your projects.

Let’s get started!

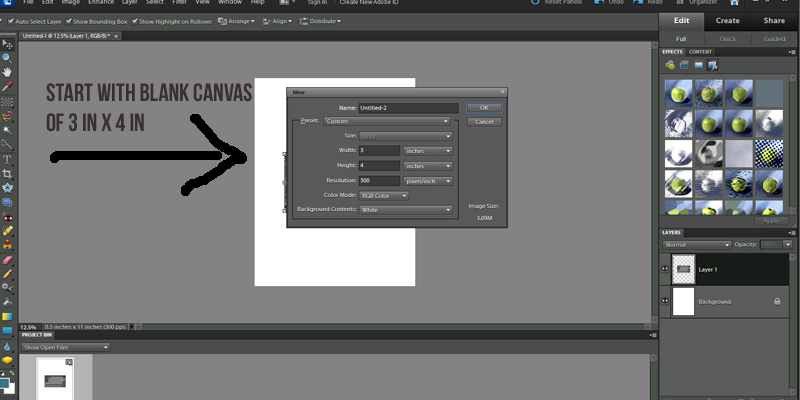
First, choose your canvas size. In Photoshop (PS) or Photoshop Elements (PSE), you will select File –> Open New File …and then a screen will pop up where you can enter your desired canvas size. Change pixels to inches, if necessary, and then select your size. I went with 3×4 for my canvas…

Now pick a kit, and start adding items to your blank canvas. Yes, it’s that easy! 🙂

EXAMPLE 1

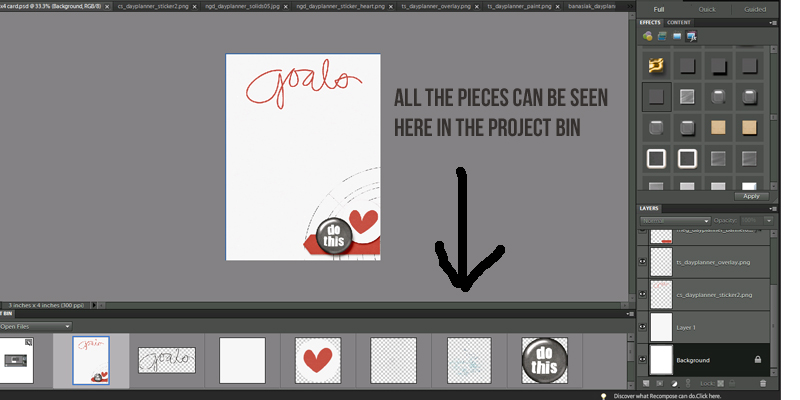
For the following card, I picked the new May 2017 TDP Designer Collab collection, Day Planner, to make my card. I added in a sticker, brush, flair, and another heart sticker. It was so quick to make… and looks awesome. Here is a screenshot with my 3×4 canvas and all the different pieces in the project bin…

EXAMPLE 2

Another example of a card you can make would be a card with separate “striped” sections. This is also really easy!

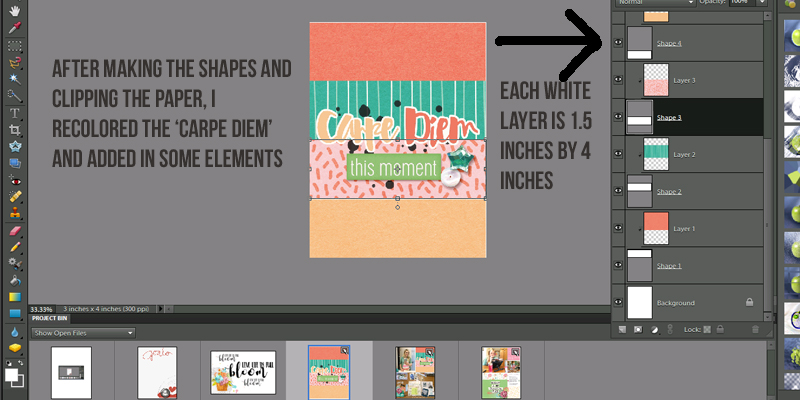
You can do this by making some rectangle shapes on your canvas, and then clipping digital papers onto those shapes to create the separate pieces. I made each rectangle shape 1.5 inches high and 4 inches wide… and then I clipped some fun patterned papers and solid papers onto those shapes. To do this, you simply place the digital paper in the layer above the rectangle shape in your layers palette (see the right side of the following image)… and then use the “clipping mask” feature (Ctrl-G in PSE, or Ctrl-Alt-G in PS).

After I had my rectangle stripes, I added in a paint splatter, a few embellishments, a word sticker, and a title word art ‘carpe diem’. Also, for the ‘carpe diem’ I changed the color from black to the orange and pink using the eye dropper tool to get the exact colors from the other papers/elements in the kit.

This is how the card looked in PSE with the layers off the right; you can see them in the white boxes…

EXAMPLE 3

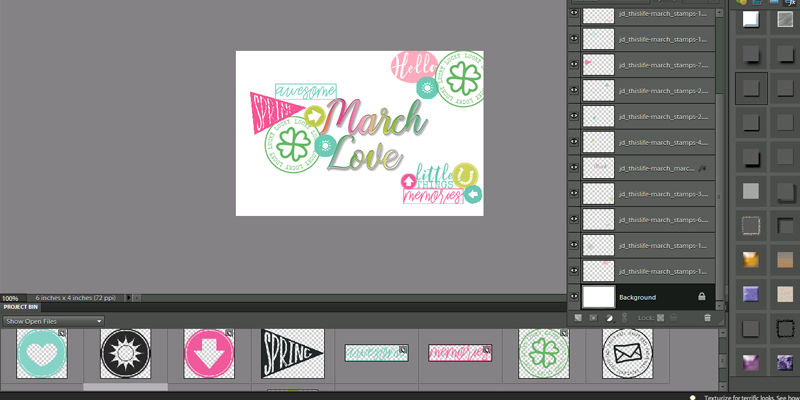
Lastly, I also created a fun 4×6 card using the digital brushes from This Life March, which can be found in Juno Designs’ shop at The Digital Press. I used a bunch of the stamps/brushes found in that collection to create a few clusters on my card…

As you can see, it’s so easy to create your own custom cards using photo editing software and the papers, elements, and brushes/stamps you find in your own digital stash! I hope these journal card examples, above, will inspire you to stretch your own kits and use them in new and creative ways!


Sabrina

About the Author  Sabrina is married to a hard-working man and has two rambunctious kids, nicknamed Captain and Sunshine. She spends every free minute creating at her crafty space. Digital layouts, hybrid layouts, project life and just anything memory keeping. She also loves to read, kickbox and go a bike ride.

Hybrid How-To | Luggage Tags

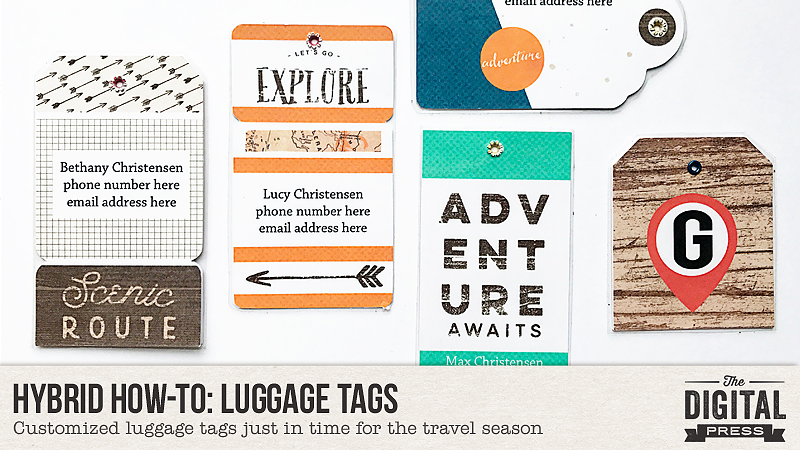
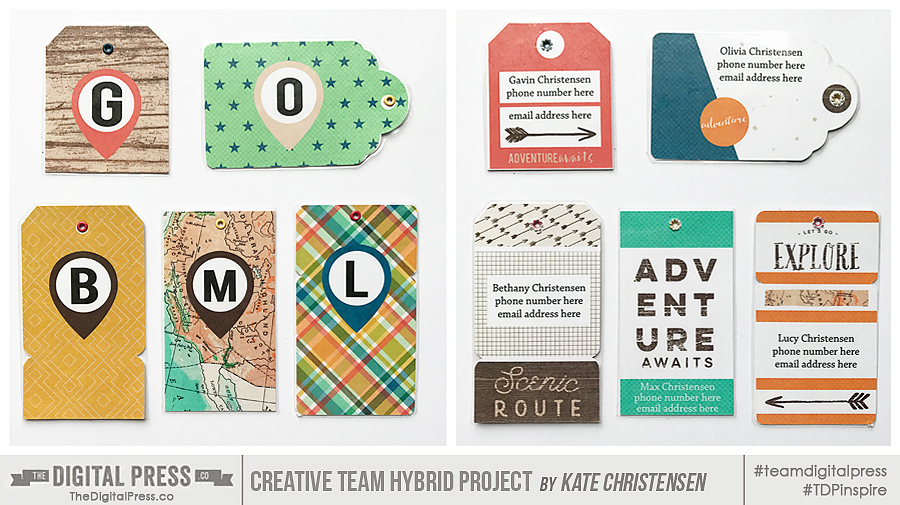
Hi everyone! It’s Kate here, with another edition of our Hybrid How-To series. Travel season is on the way, and I thought it would be fun today to show you how I made these cute hybrid luggage tags for my kids.

SUPPLIES

  • Digital scrapbooking kit of your choice (I used Happy Camper by Mari Koegelenberg)
  • Photo editing program like Photoshop (PS) or Photoshop Elements (PSE)
  • Cardstock
  • Self-seal laminating sheets
  • Scissors

INSTRUCTIONS

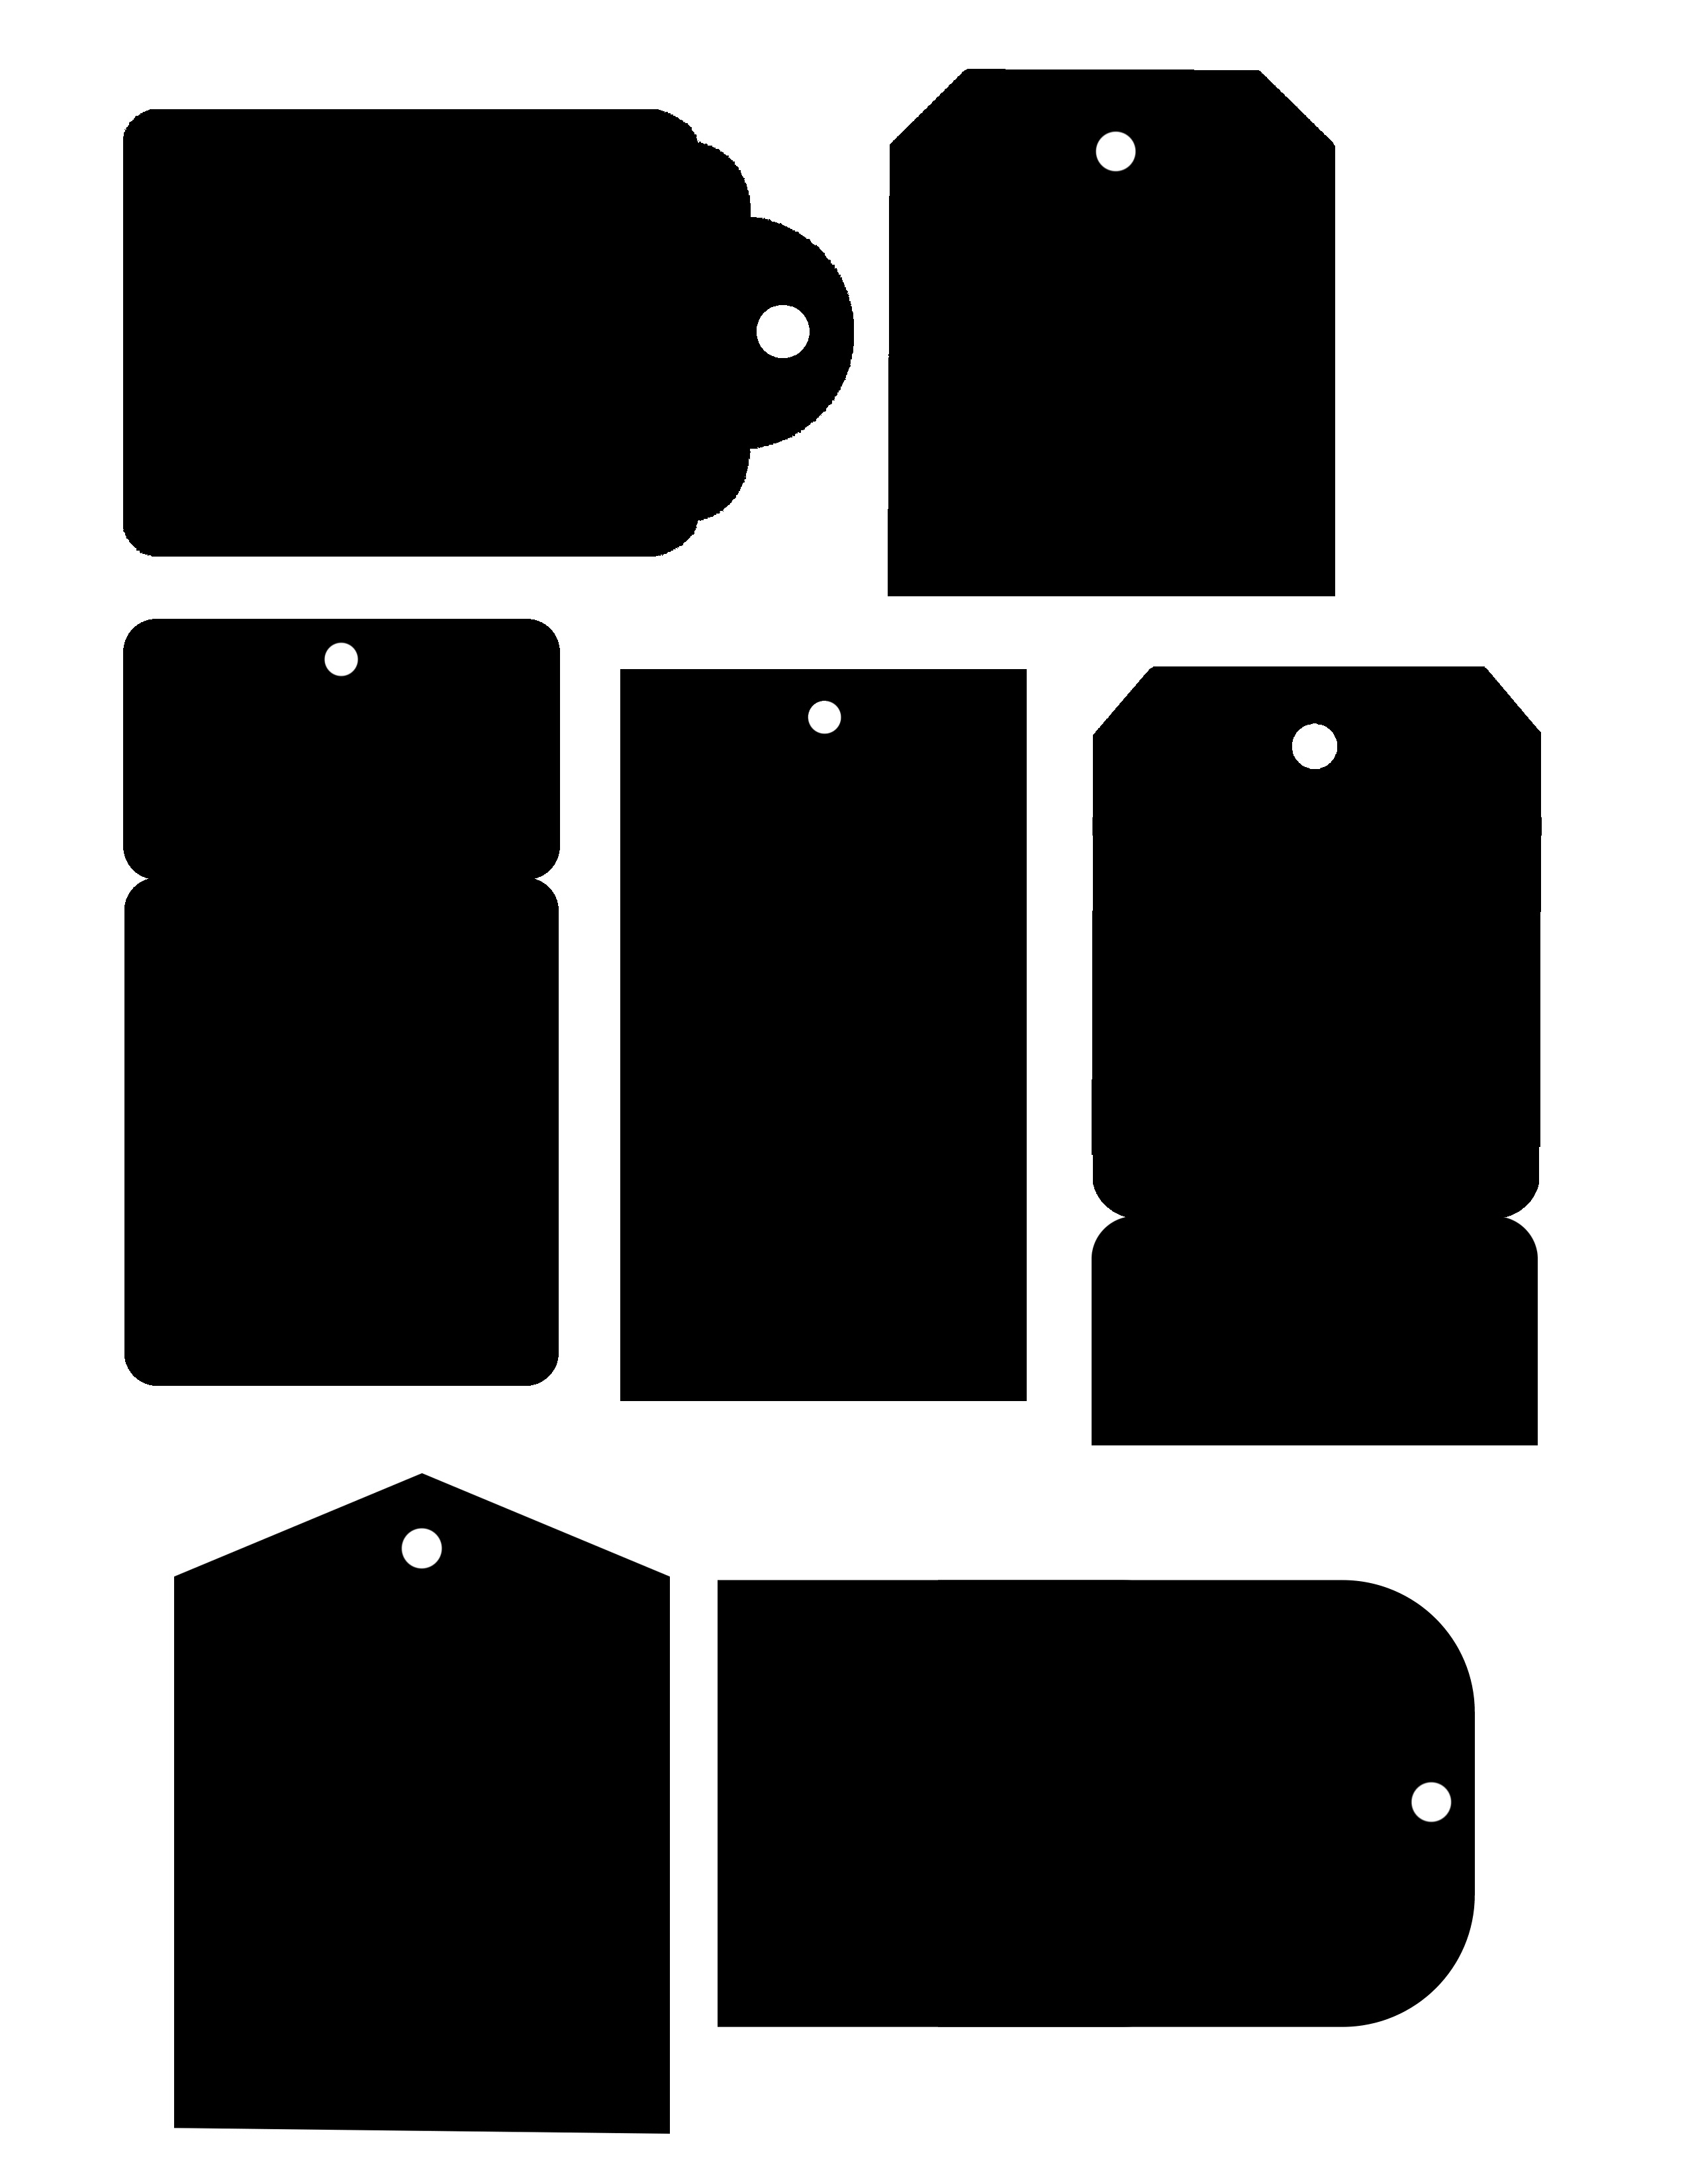
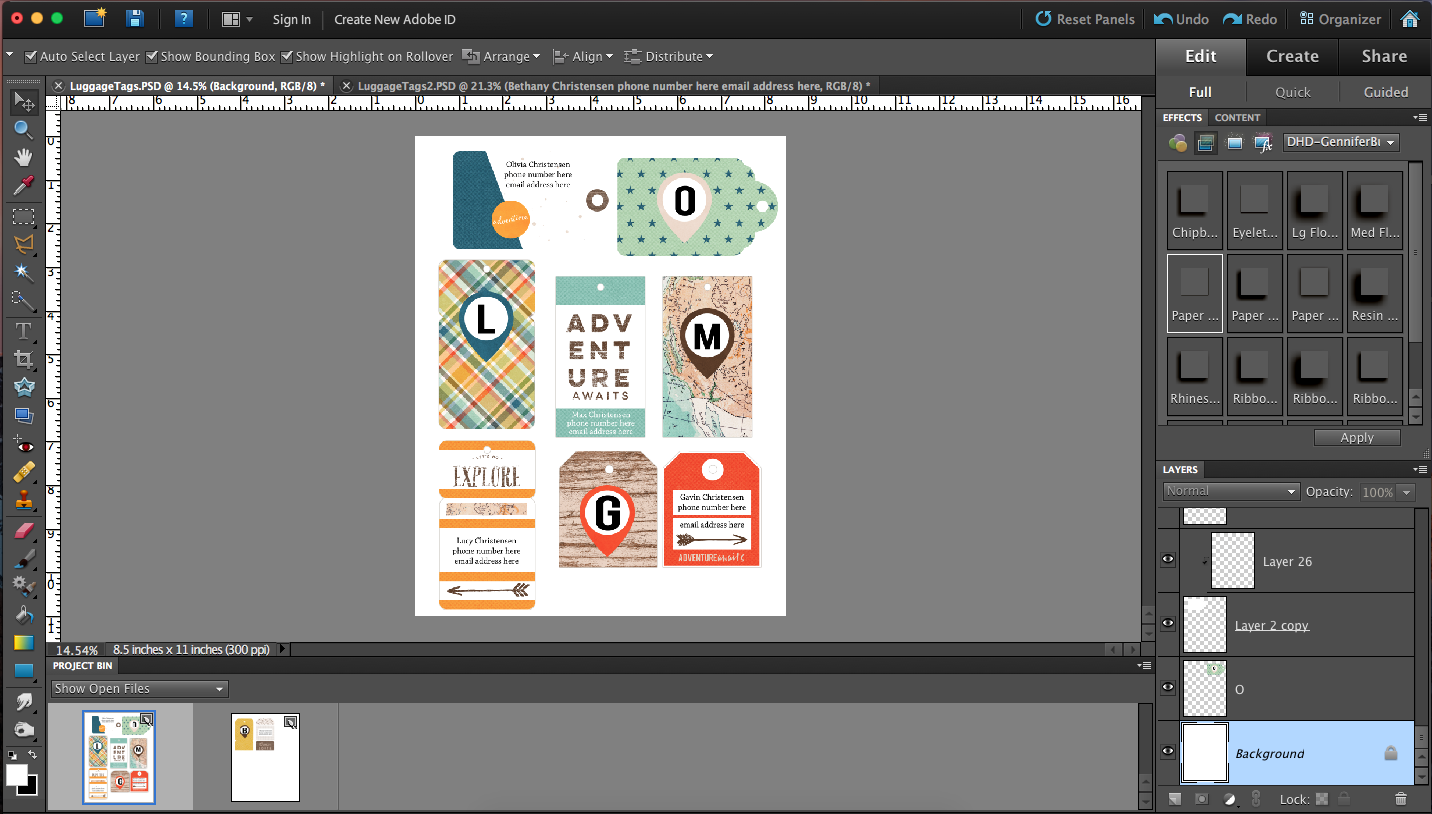
1. In PSE, I built my luggage tag templates (if you’d like to use mine, you can DOWNLOAD THEM HERE).

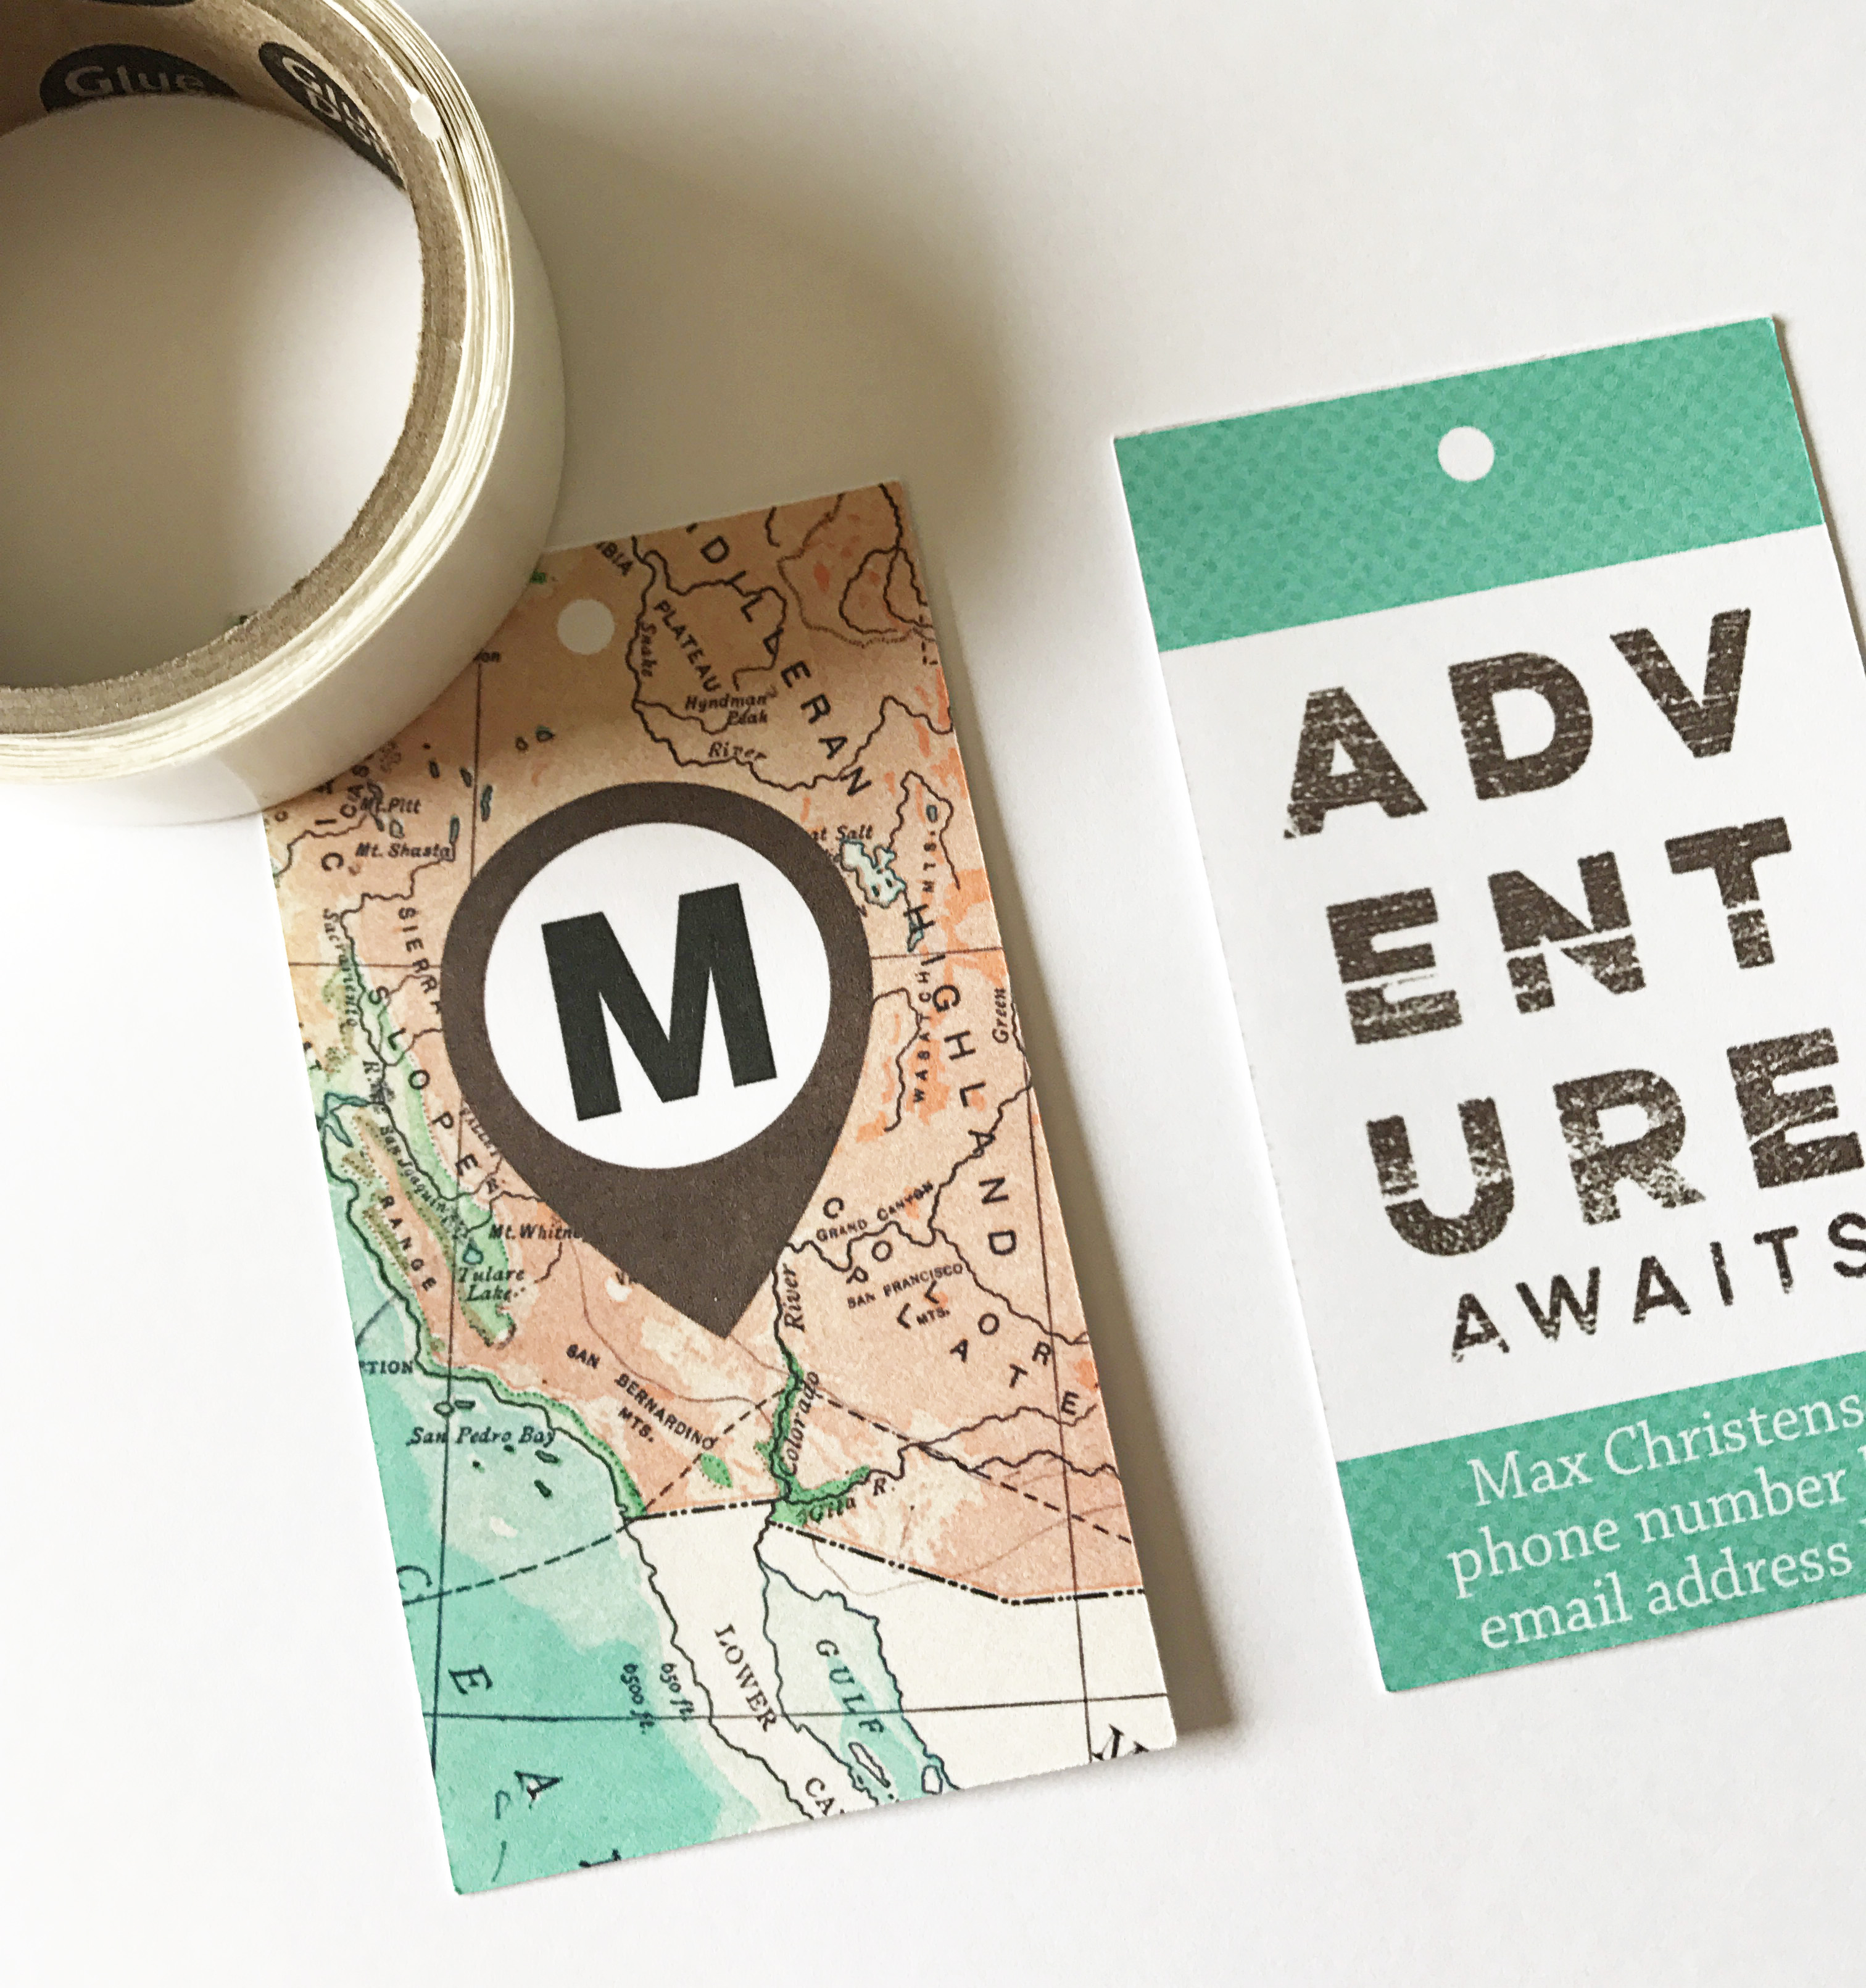
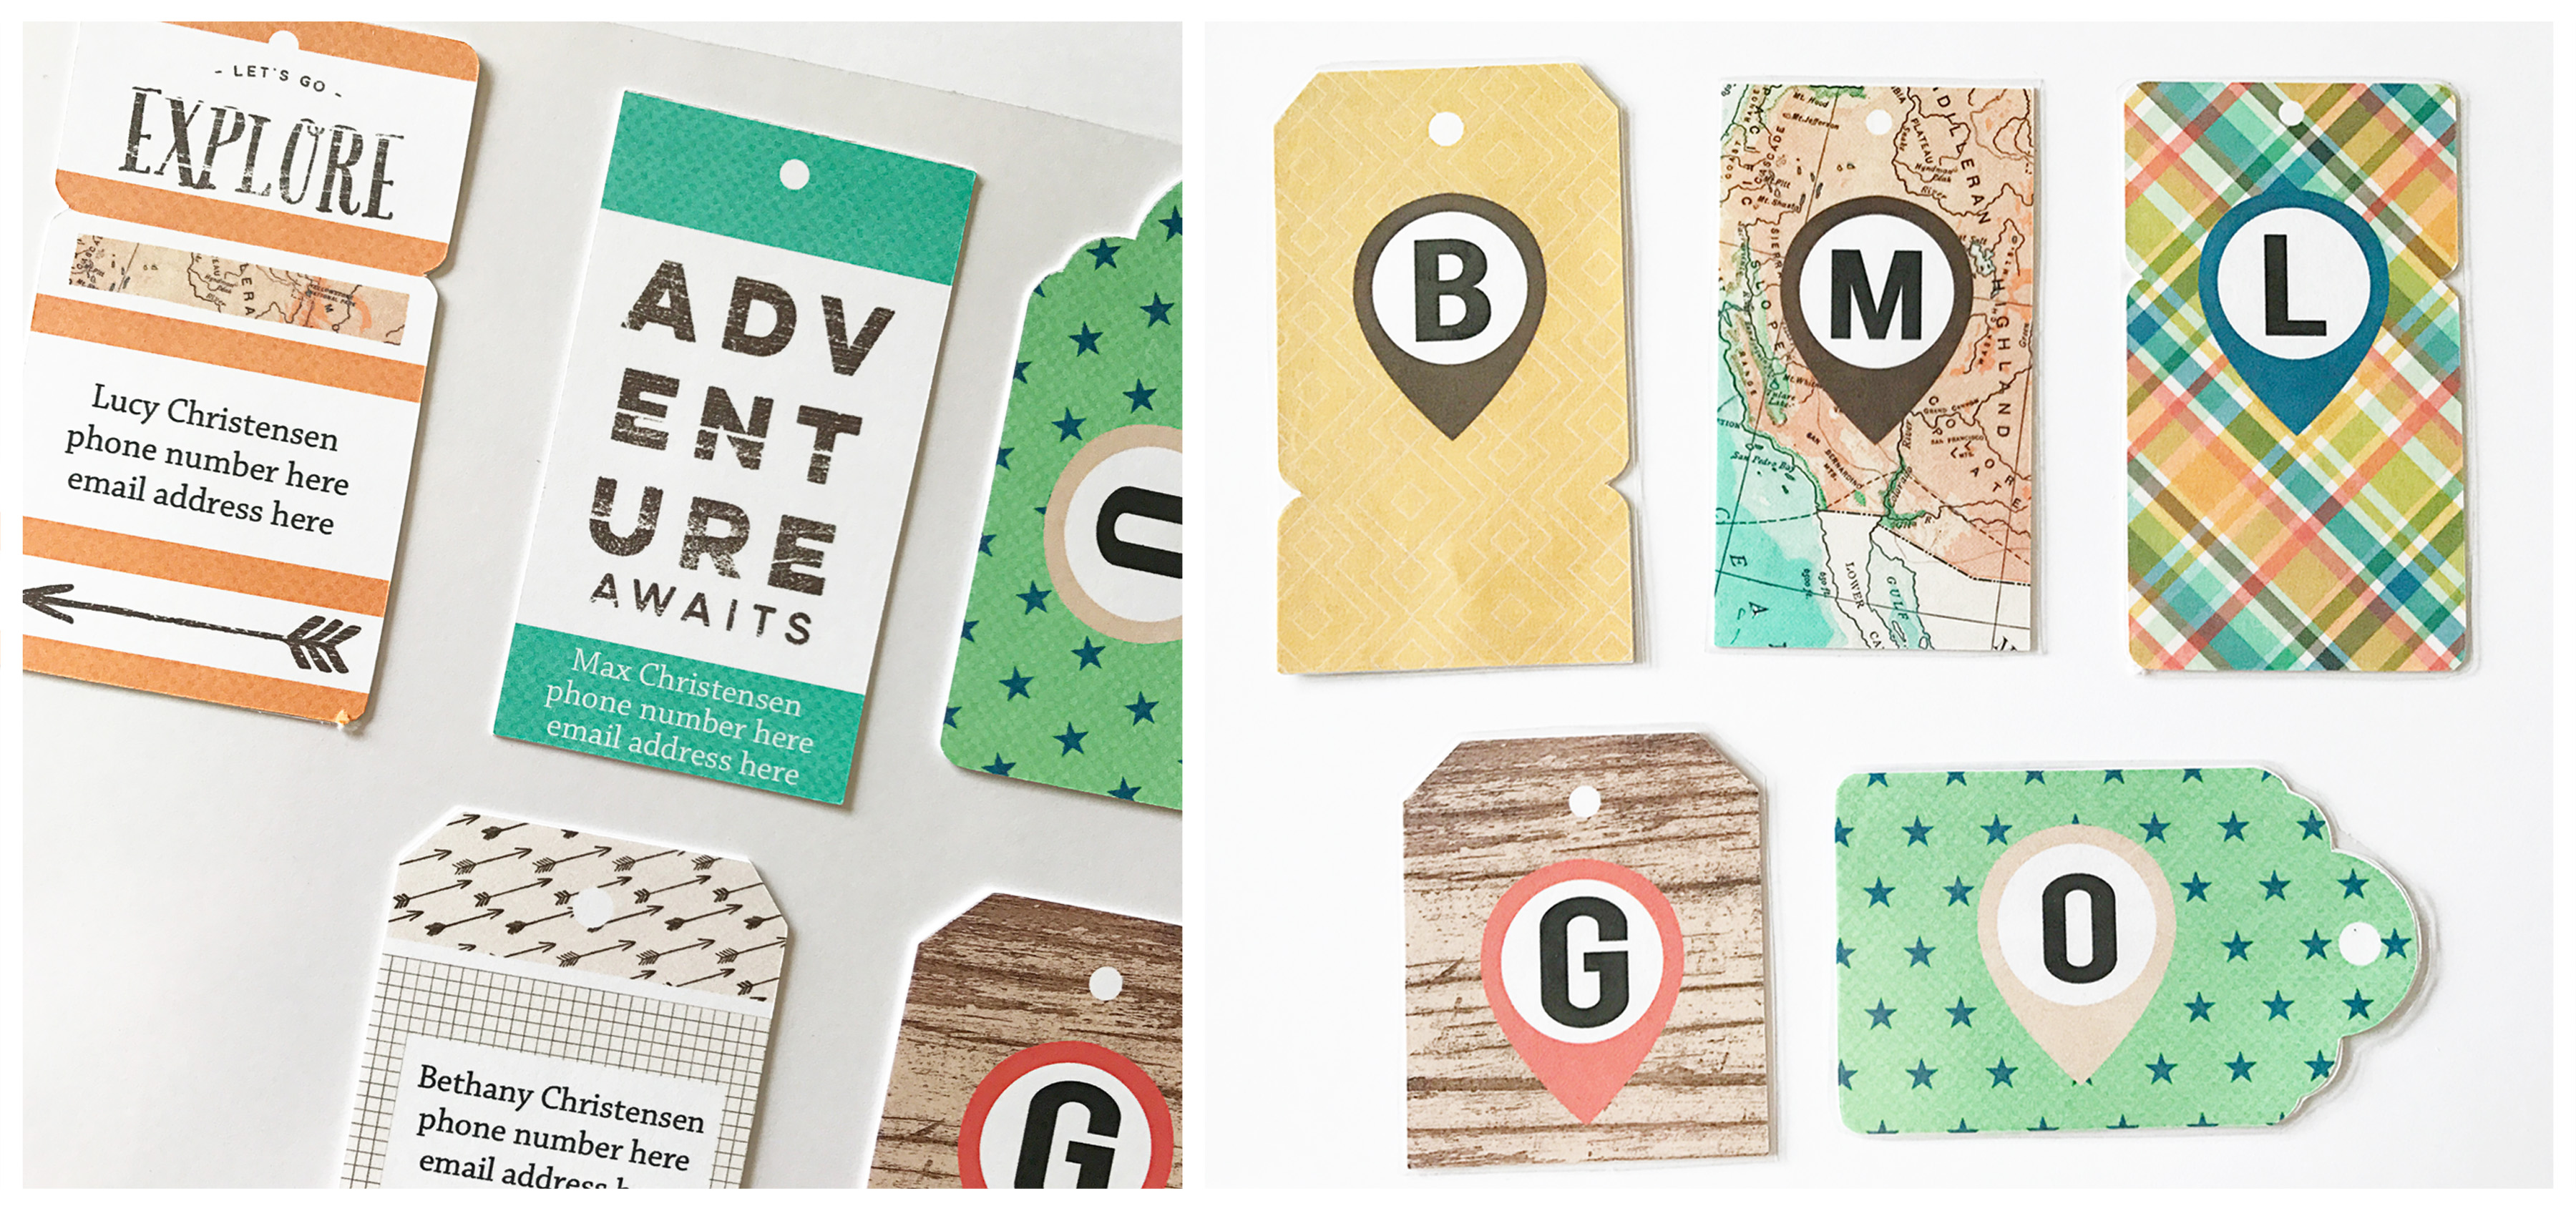
2. Add digital paper and elements to each of the tags, by using each PNG tag shape as a clipping mask (Ctrl-G in PSE or Ctrl-Alt-G in PS). Make sure you duplicate the templates so you can create a front and back for each tag. You can also add text to one side of each tag, if desired. Once you have them ready, send them to the printer and cut them out.

3. The next step is to adhere the front of the tag to the back of the tag. I used thin glue dots for this (don’t use anything too thick, or it shows up through the cardstock once you laminate).

4. Place your tags on a self-seal laminating sheet, and add another sheet to the top. Using your nail or a smoothing tool, smooth out the bubbles — especially along the edges of the tags. Cut them out, leaving a little bit of lamination for the edges.

5. At this point, you can just punch a hole and add some string or ribbon for attaching to the luggage. I chose to add a colorful eyelet to each.

And that’s all there is to it! Easy, right? 🙂

If you want to give this project a try, you can earn TDP challenge points if you post a photo of your finished project in the May 2017 Hybrid Challenge thread in The Digital Press forum.


Kate About the Author  Kate is on the hybrid team here at The Digital Press. She lives on the Utah/Colorado border with her husband, 5 kids, 10 chickens, and a dog named Gracie. She’s a city-born girl who found she’s really a country girl at heart. She can be found outside, barefoot, and probably in her garden.
Tutorial Tuesday | Creating Export Presets in Lightroom

Do you find yourself exporting your photos in Lightroom over and over with the same settings? If so, and you would like to save time by creating your very own custom presets… I’m here today to teach you how to do so!

Often, I find that I need to export a single layout in multiple different formats/sizes/etc. depending on which online gallery I’m going to be loading it into. For instance, here at The Digital Press, I size my layouts for the gallery at 900 x 900 pixels and up to 350kb in size. Because I do this with every layout I’m going to load at The Digital Press, I go through the same process over and over and over again. Thus, I have created an export preset to do just this with the touch of one button. Let me show you…

STEP 1

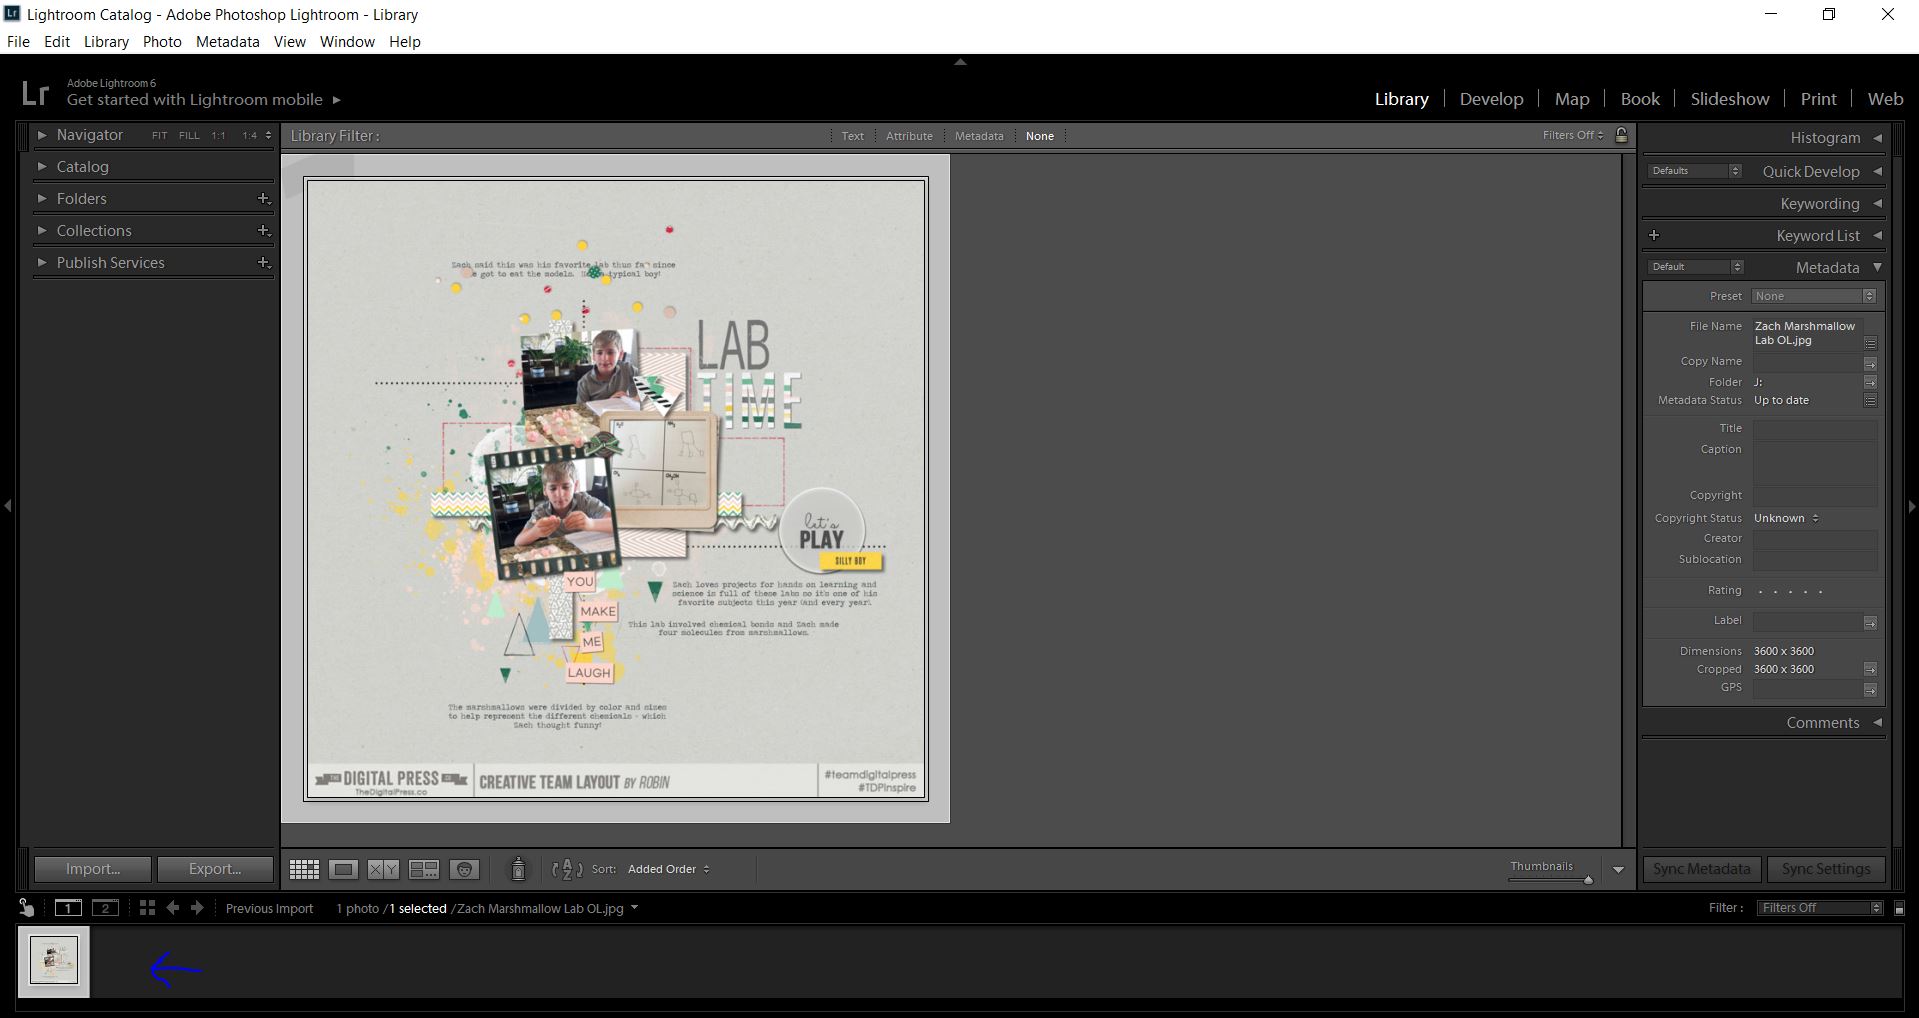
Import your layout (or photo) into Lightroom. If you don’t know how, don’t worry… we have another tutorial HERE that details the process of importing into Lightroom. Once you have imported your layout, you will want to select it for export (see blue arrow at lower left)…

STEP 2

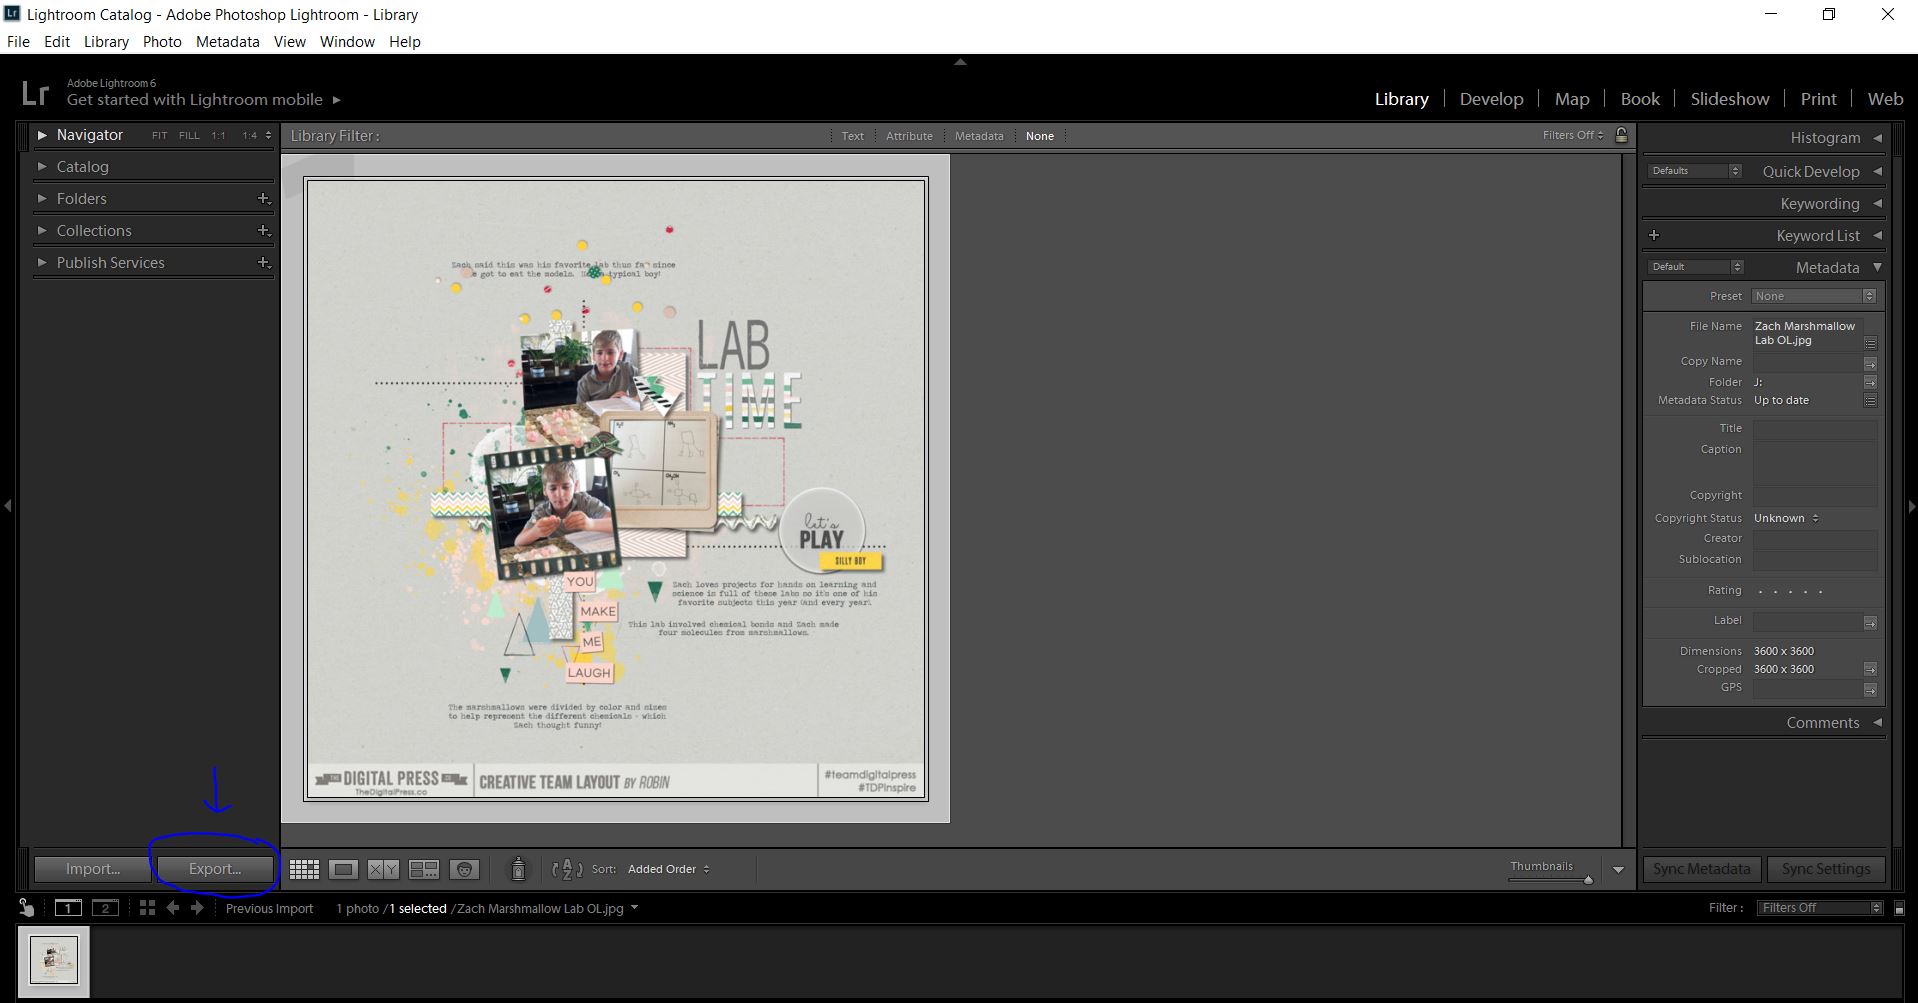
Click on the export button on the bottom left side (again, see the blue arrow at lower left)…

STEP 3

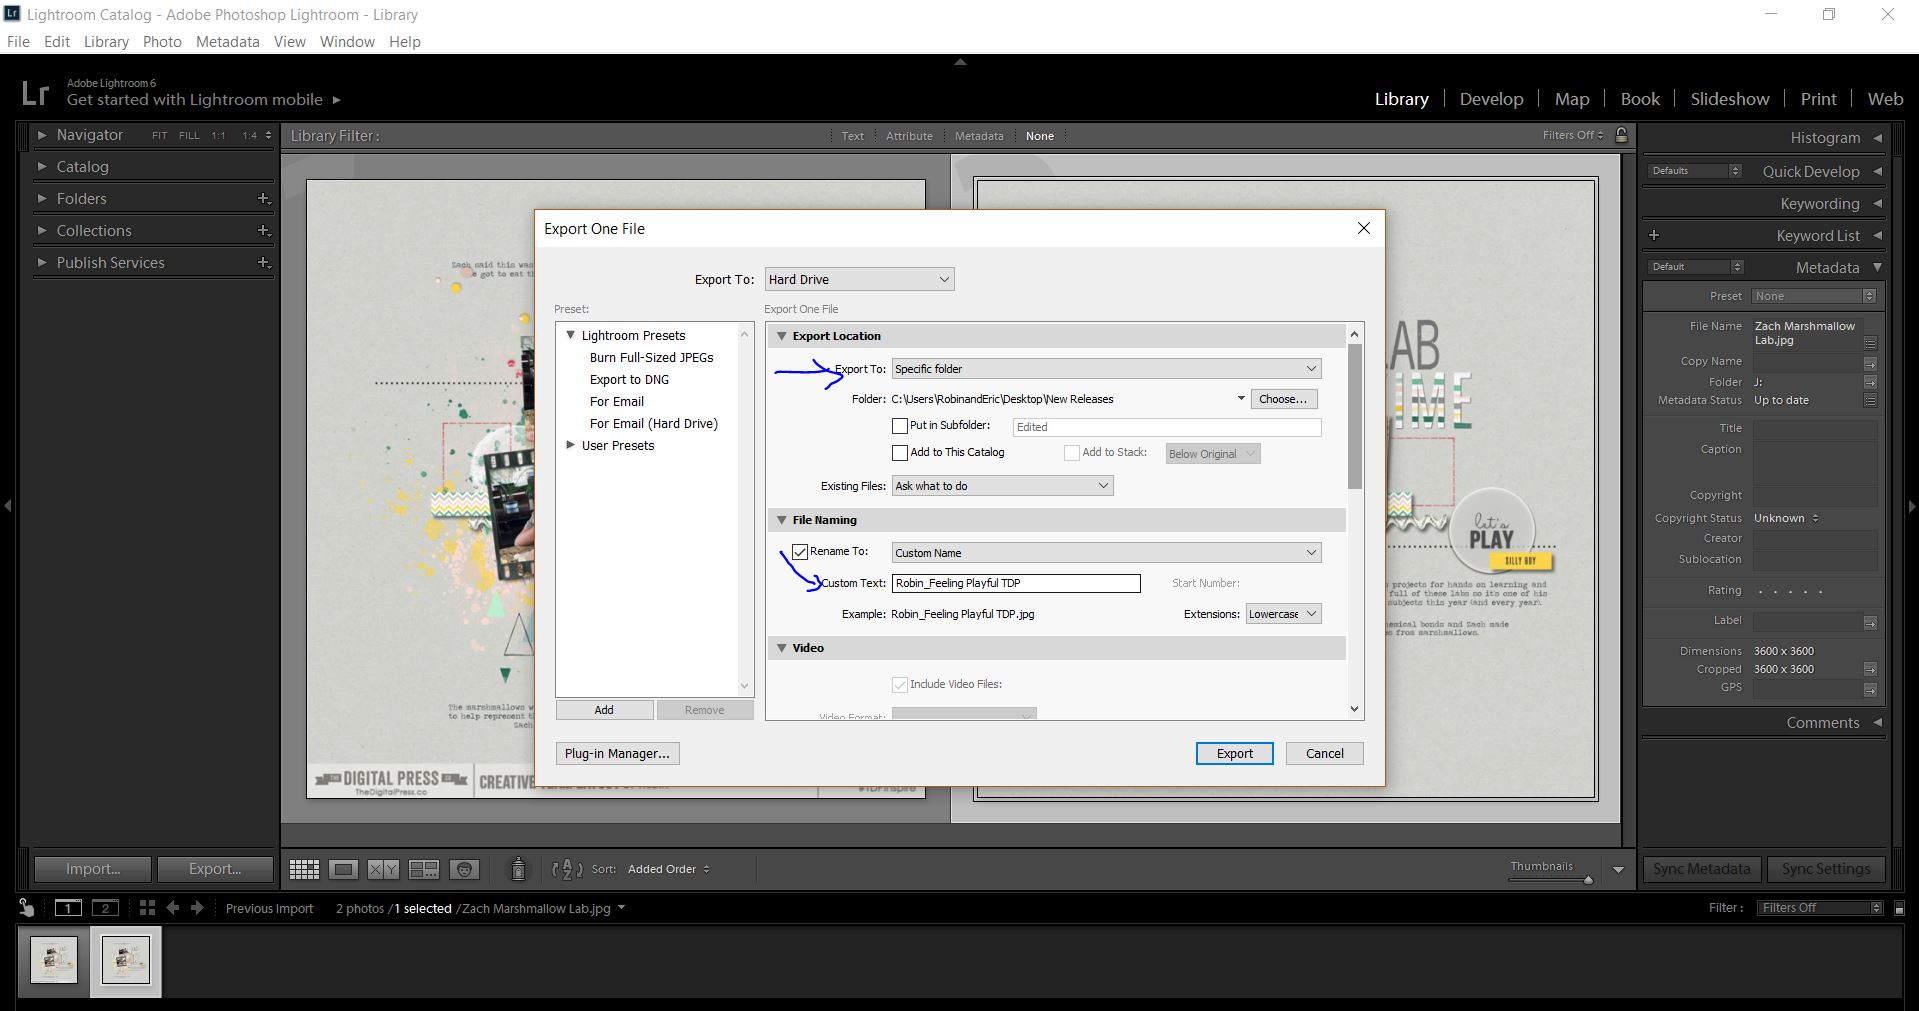
Next, click on the drop-down arrow and select the folder into which you wish to save your adjusted photos. You will have a choice between “Select Folder,” “Choose Later,” or “Same Folder As Original.”  I have created a folder on my computer’s hard drive named “New Releases,” and each week when I save a new layout, it will always go to this specific folder. That way, it’s always easy to find when I start the process of posting my pages into various galleries.

*NOTE* When I want to save pictures that I have edited, however, I use “Same Folder As Original” so all my photos stay together. The good news is that you can customize these choices and do what’s best for you!

Once you have specified where Lightroom should save your file, you will select “Custom Text” and rename it (feel free to skip this step, if you’d like). I always add a few letters after each of my titles to let me know which gallery I’ve created this layout for …which is why you see the “TDP” on the end of my name (see image above). Again, you can skip this step if it’s not relevant to you.

STEP 4

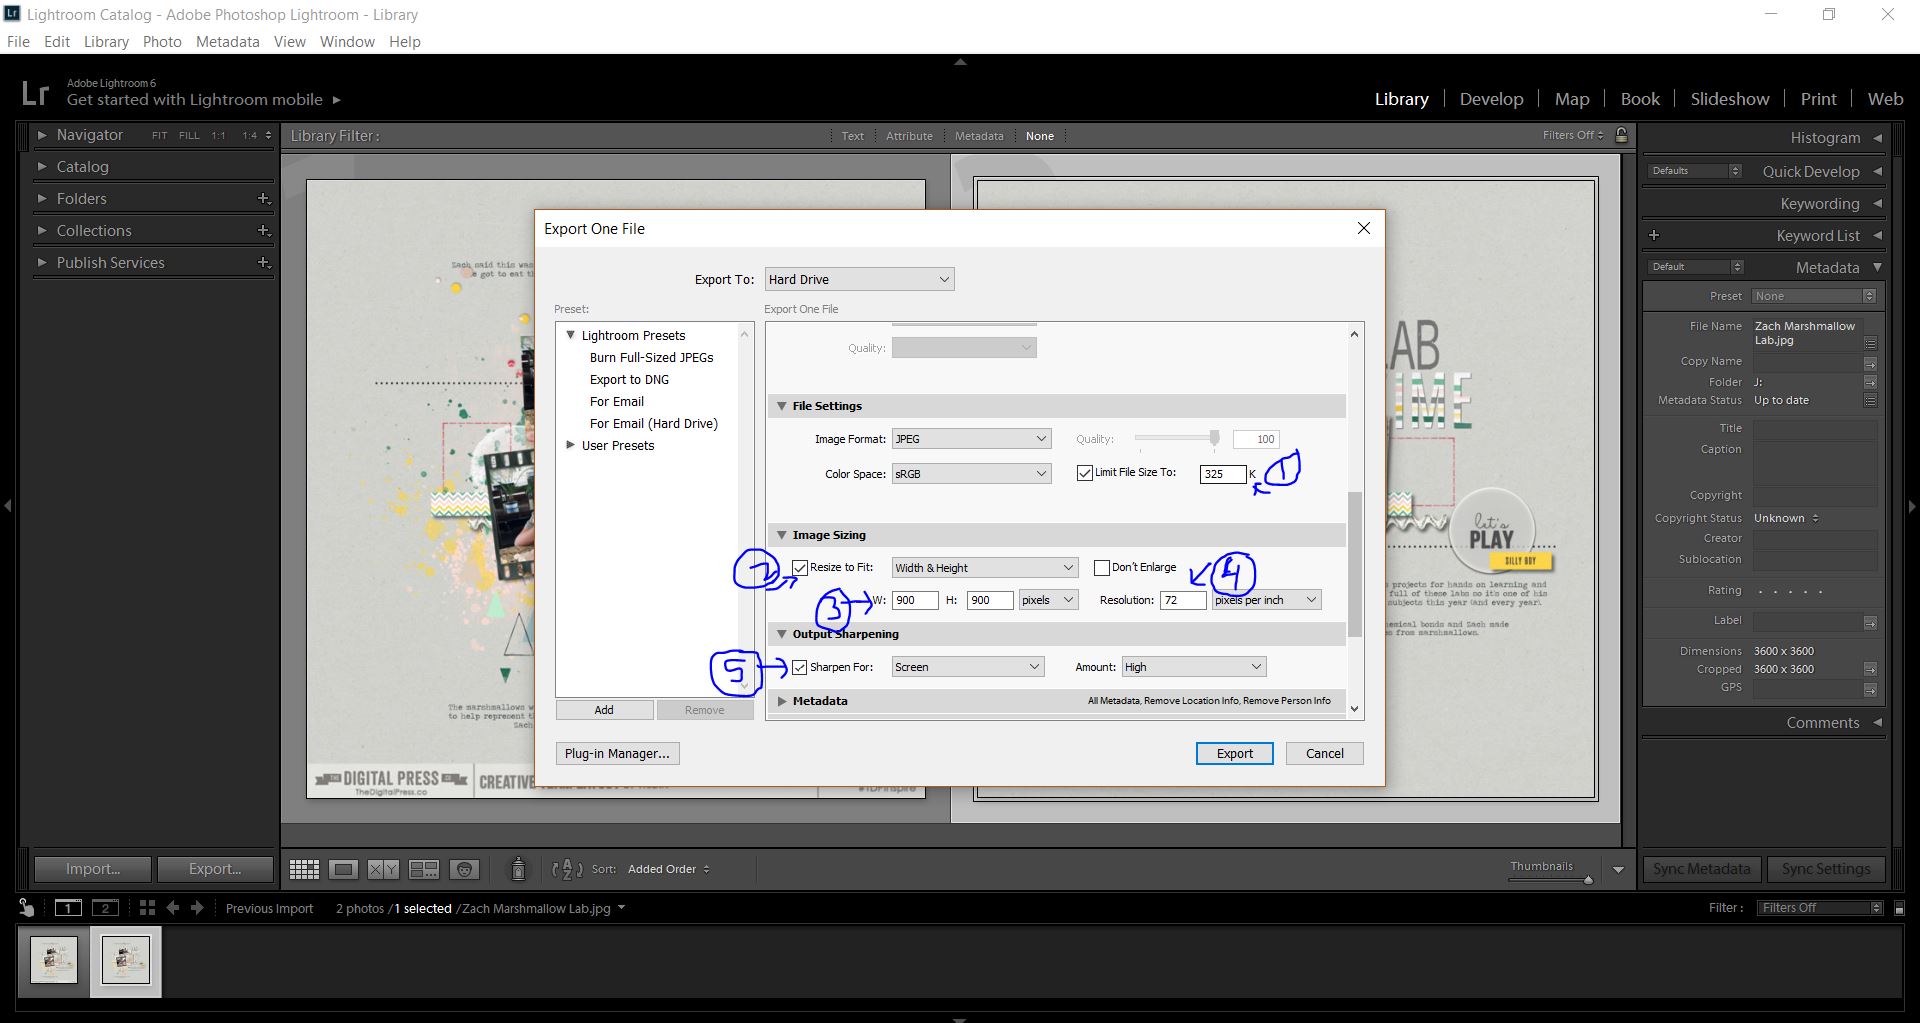
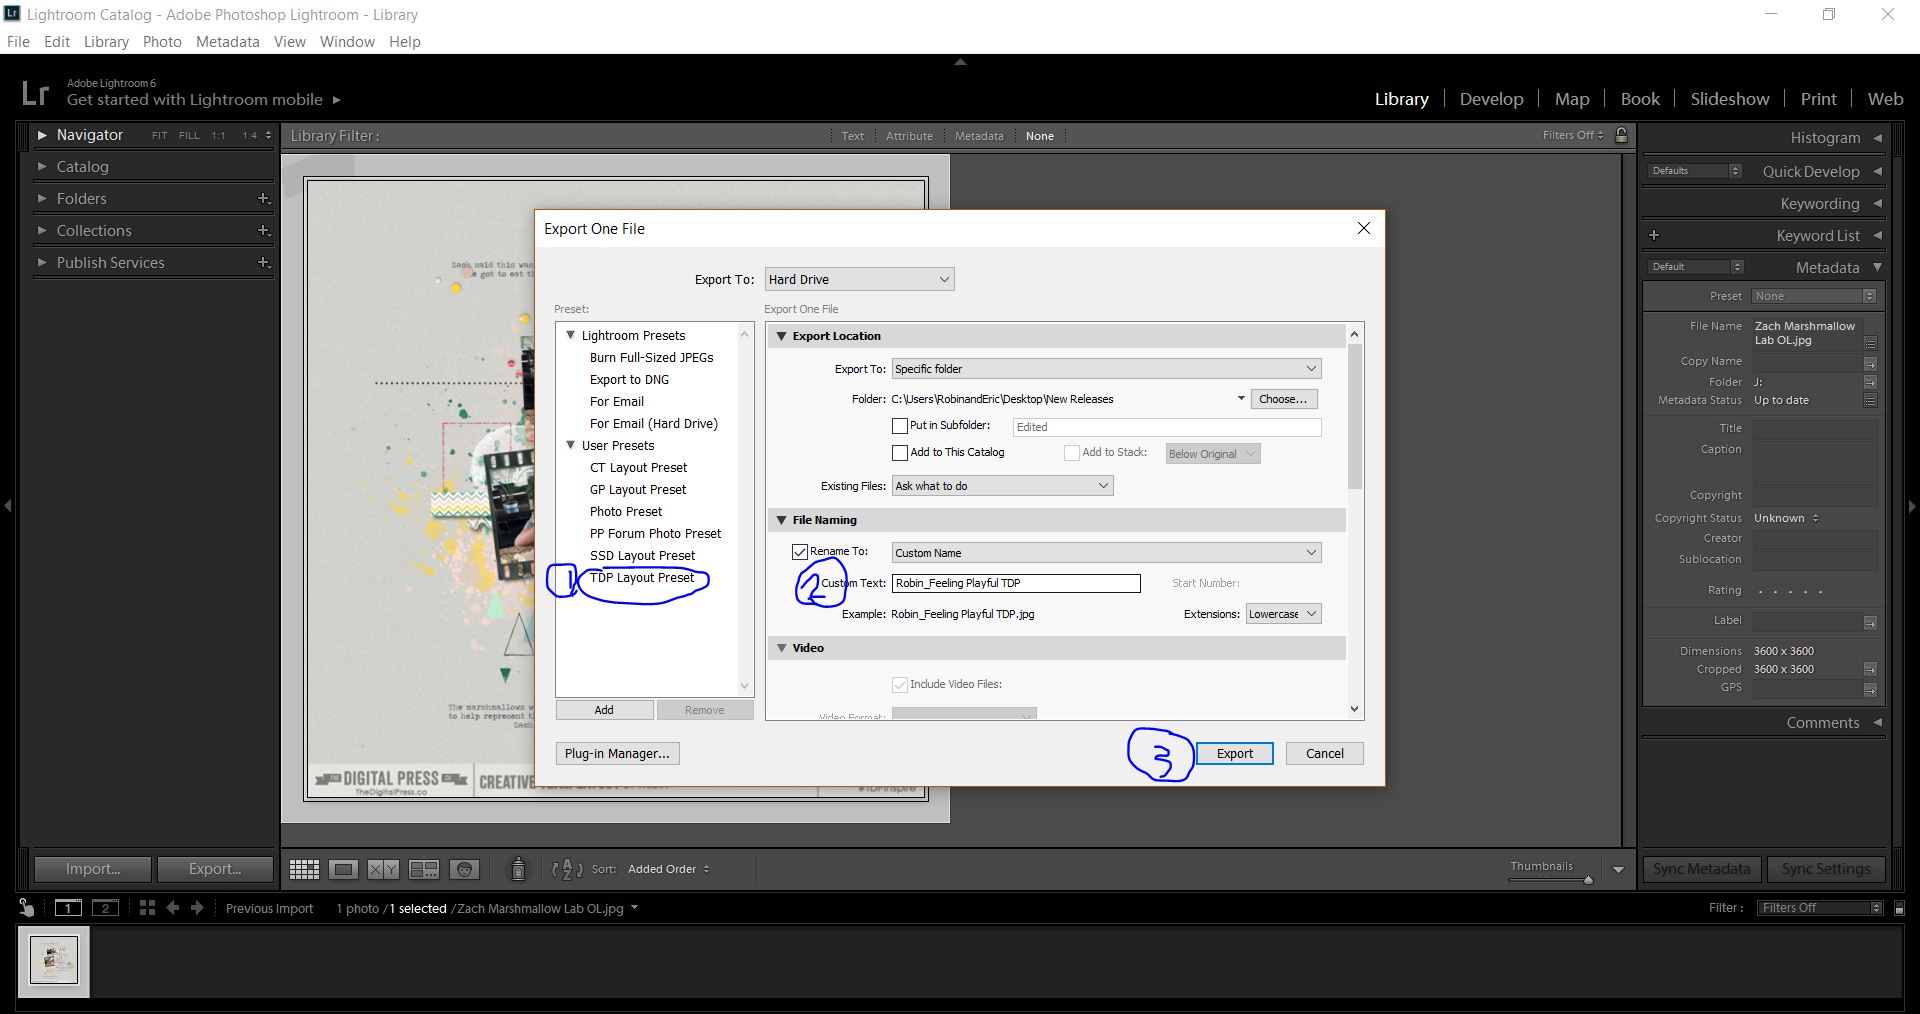
This is where you get into the details that save you time! Here’s a detailed look at my own preset (see the image, below, for the numerical references in blue)…

(1) First, I tell Lightroom to limit the file size to 325-350 for The Digital Press. All online sites/galleries tend to have different limitations, so I might choose some other file size/number in this step if my layout will be loaded somewhere else.

(2) Then, I resize the layout to fit m needs.

(3) Again, for The Digital Press, I use 900 x 900 pixels; this is where I enter those numbers.

(4) Here, I can select the resolution. For web-sized images, 72 dpi is perfect.

(5) Lastly, I add your sharpening here (if I haven’t already done this when saving my layout after scrapping).

Of course, you can feel free to change any of the above details to fit your own needs! 🙂

STEP 5

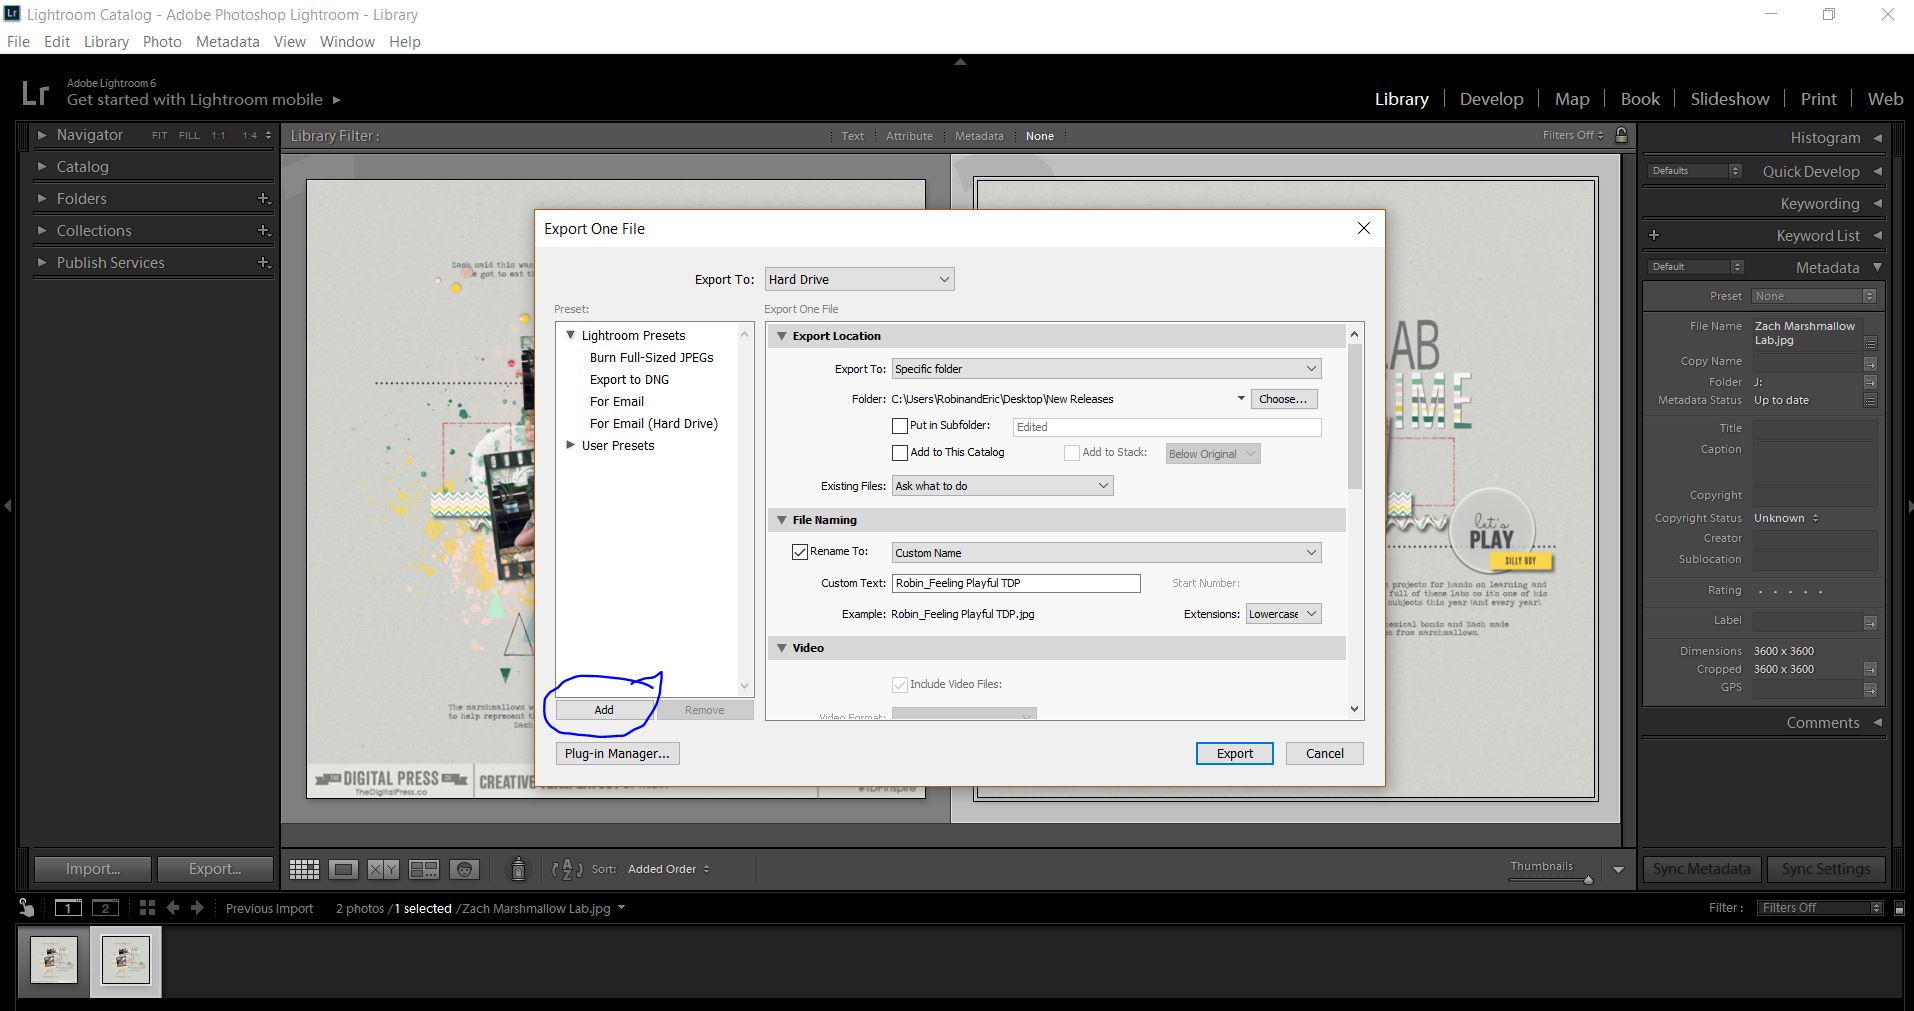
After you’ve set everything up the way you like it, you’ll click the “Add” button…

STEP 6

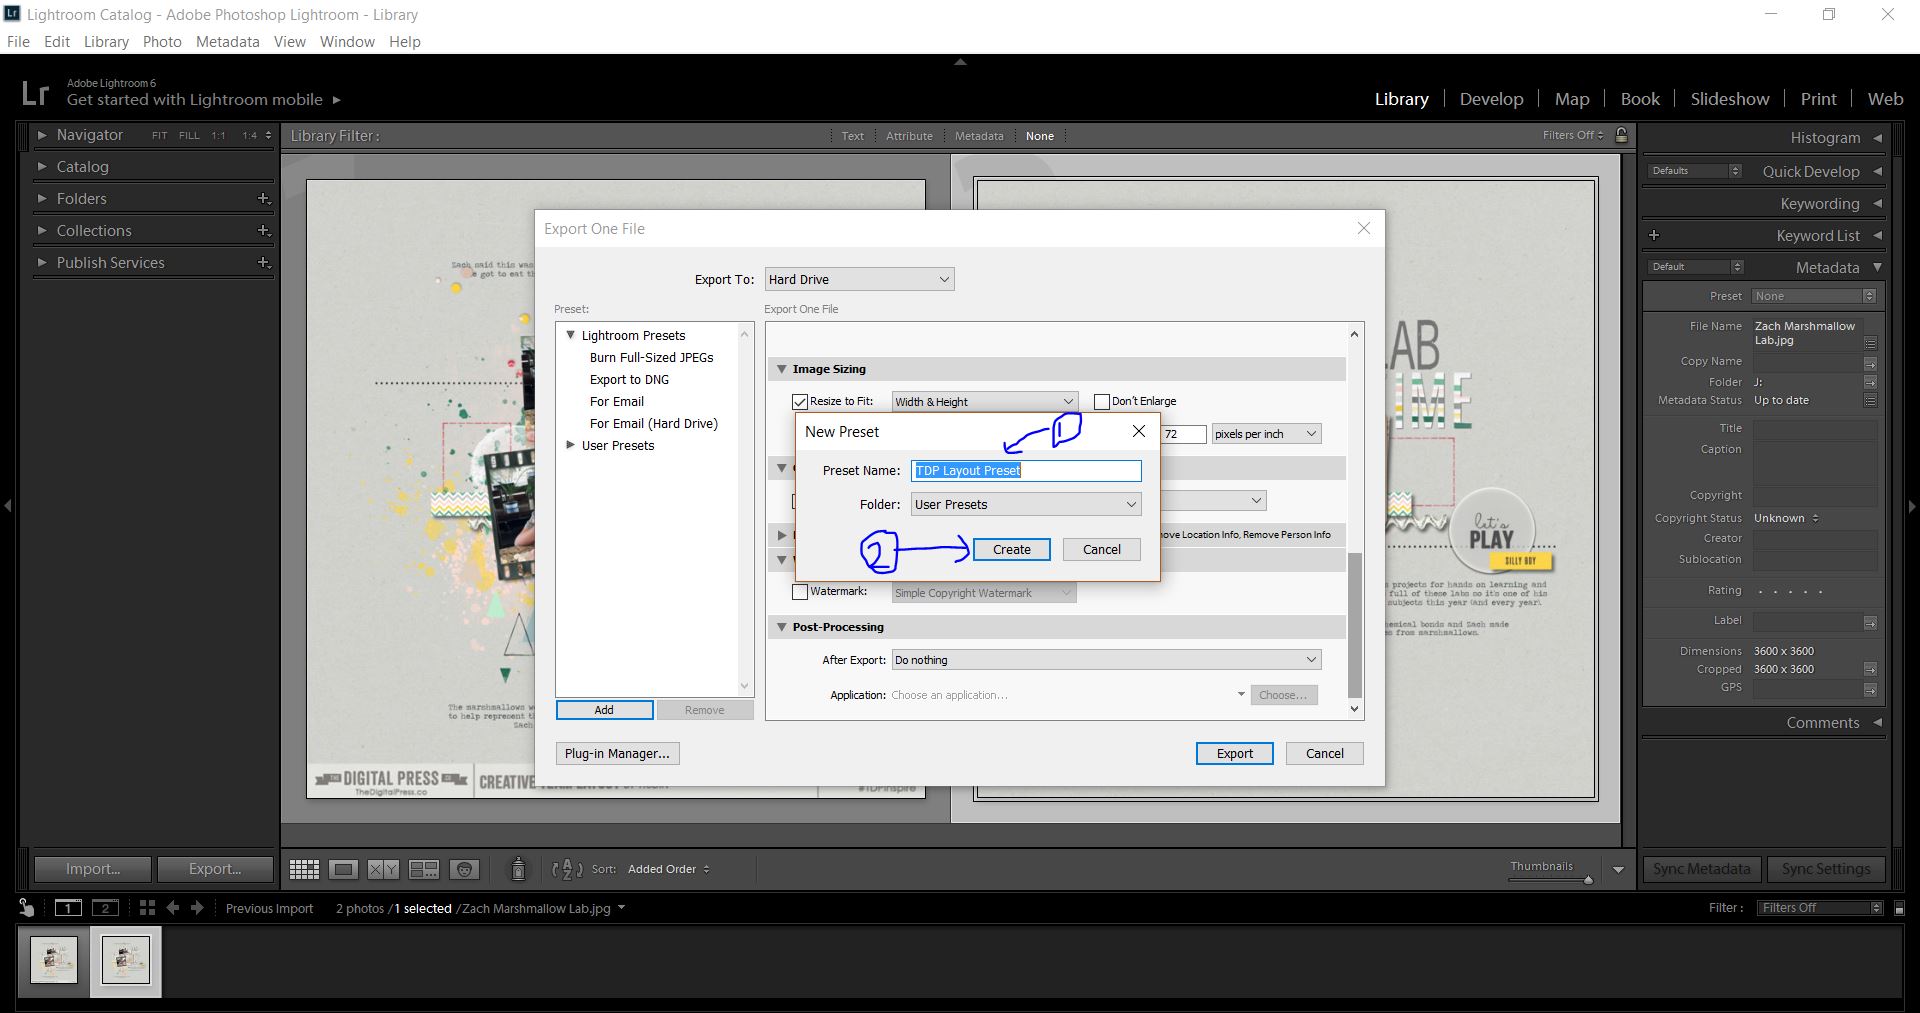
Finally, you’ll name your preset. Here, I’ve chosen to call it “TDP Layout Preset.” Brilliantly unique, I know. 😉 After you’ve typed in your new preset name, click the “Create” button…

STEP 7

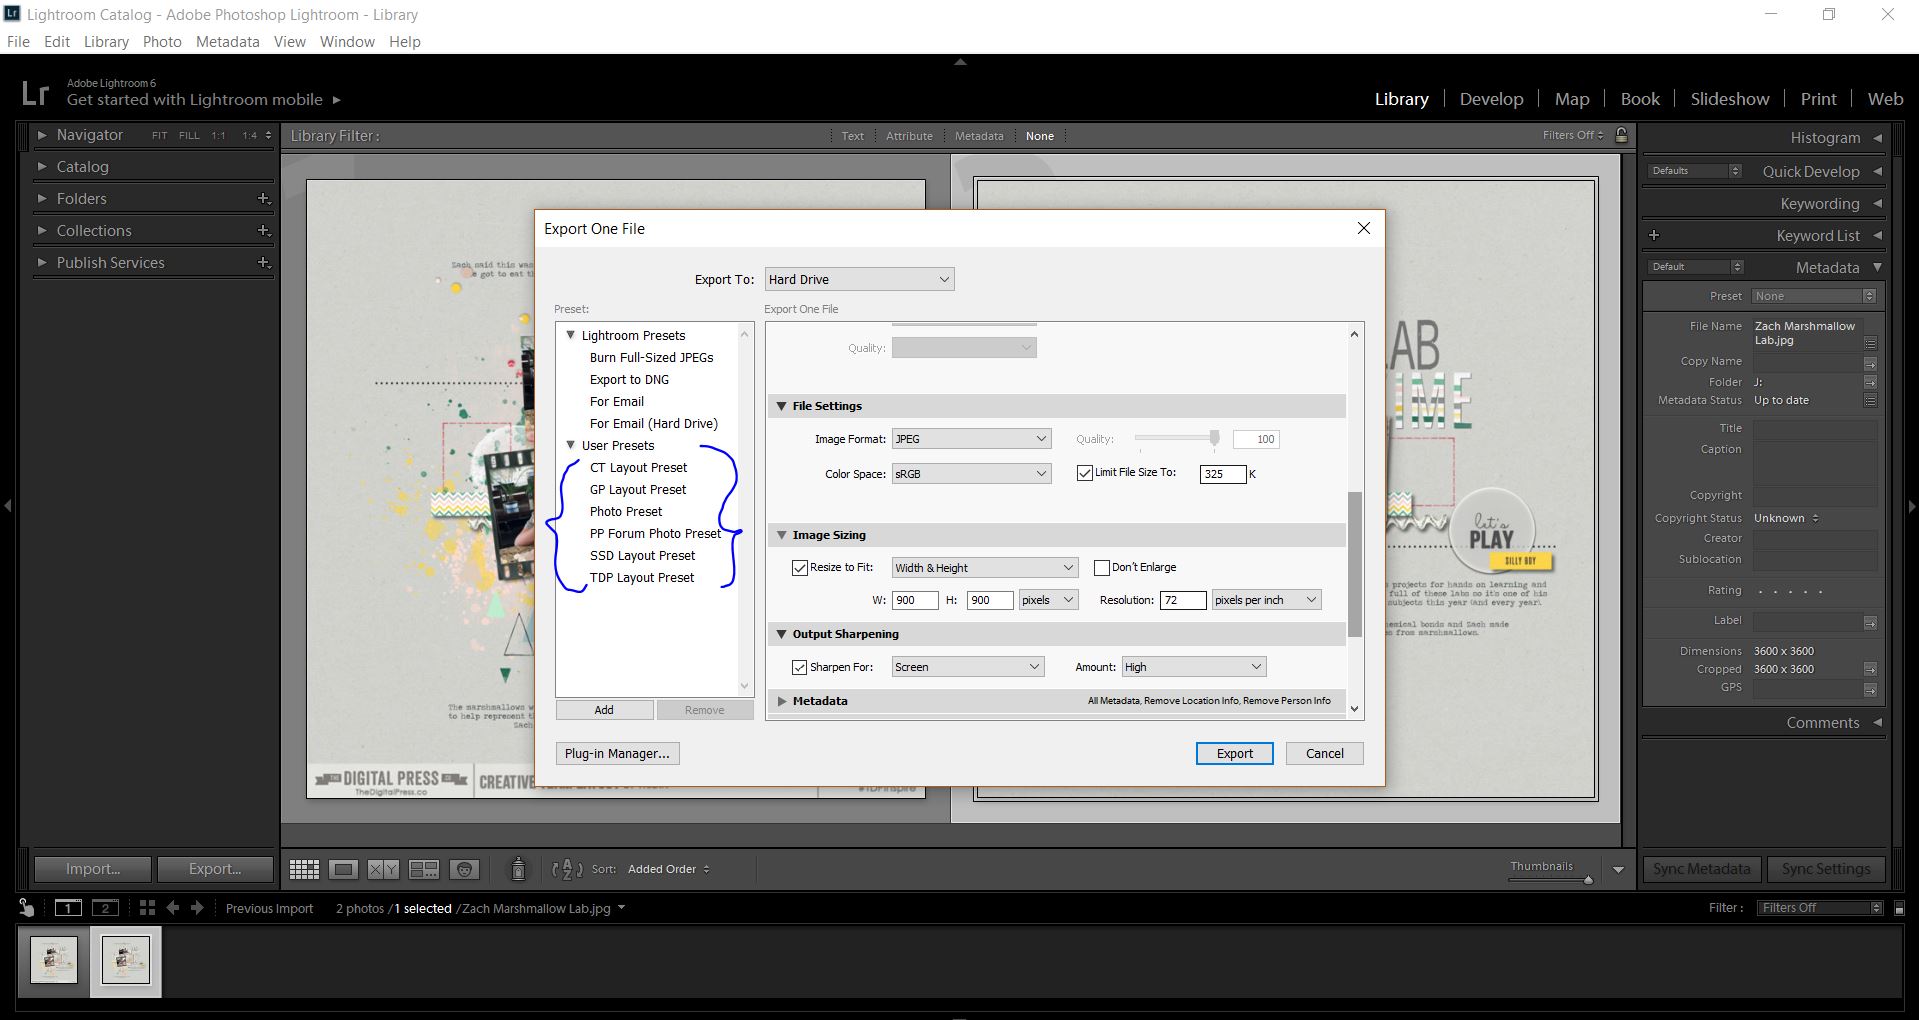
You should now be able to see your new preset under “User Presets” on the left side of your screen…

STEP 8

Now, whenever you need to use your preset… you’ll select it, rename your file (don’t worry, this won’t interfere with any of the other settings), and click the “Export” button…

That’s it! You’ve done it! You have successfully created a new preset in Lightroom, so that each and every time you want to save a photo or layout, it will be saved the same way without a lot of extra work.

As I mentioned earlier, I have created a preset for each of the galleries and blogs to which I post my layouts and photos… and it really makes my exporting workflow so much faster! Hopefully this tutorial is helpful in that way. If you have any questions, please don’t hesitate to reach out to me using the comments on this post, and ask away!


Robin

About the author  Robin is a member of the creative team here at The Digital Press. A wife of 25 years and a mom of 4 crazy children (2 in college and 2 still at home), she says that her life occurs mostly in the car as she transports said crazy kids to their many, many homeschool activities. When not driving, Robin loves to make her family cringe by pulling out her camera again (and again, and again…).

Tutorial Tuesday | The Spherize Technique

Do you ever want to jazz up a multi-photo layout, and you’re just not sure how to do that? There are so many ways to add a lot of photos to one layout, but using the ‘spherize’ technique in your layout can make it fun and unique! I’ve used this technique before, and now I just can’t stay away from it. So, without further ado…  I’d like to walk you through how to do this today.

STEP ONE

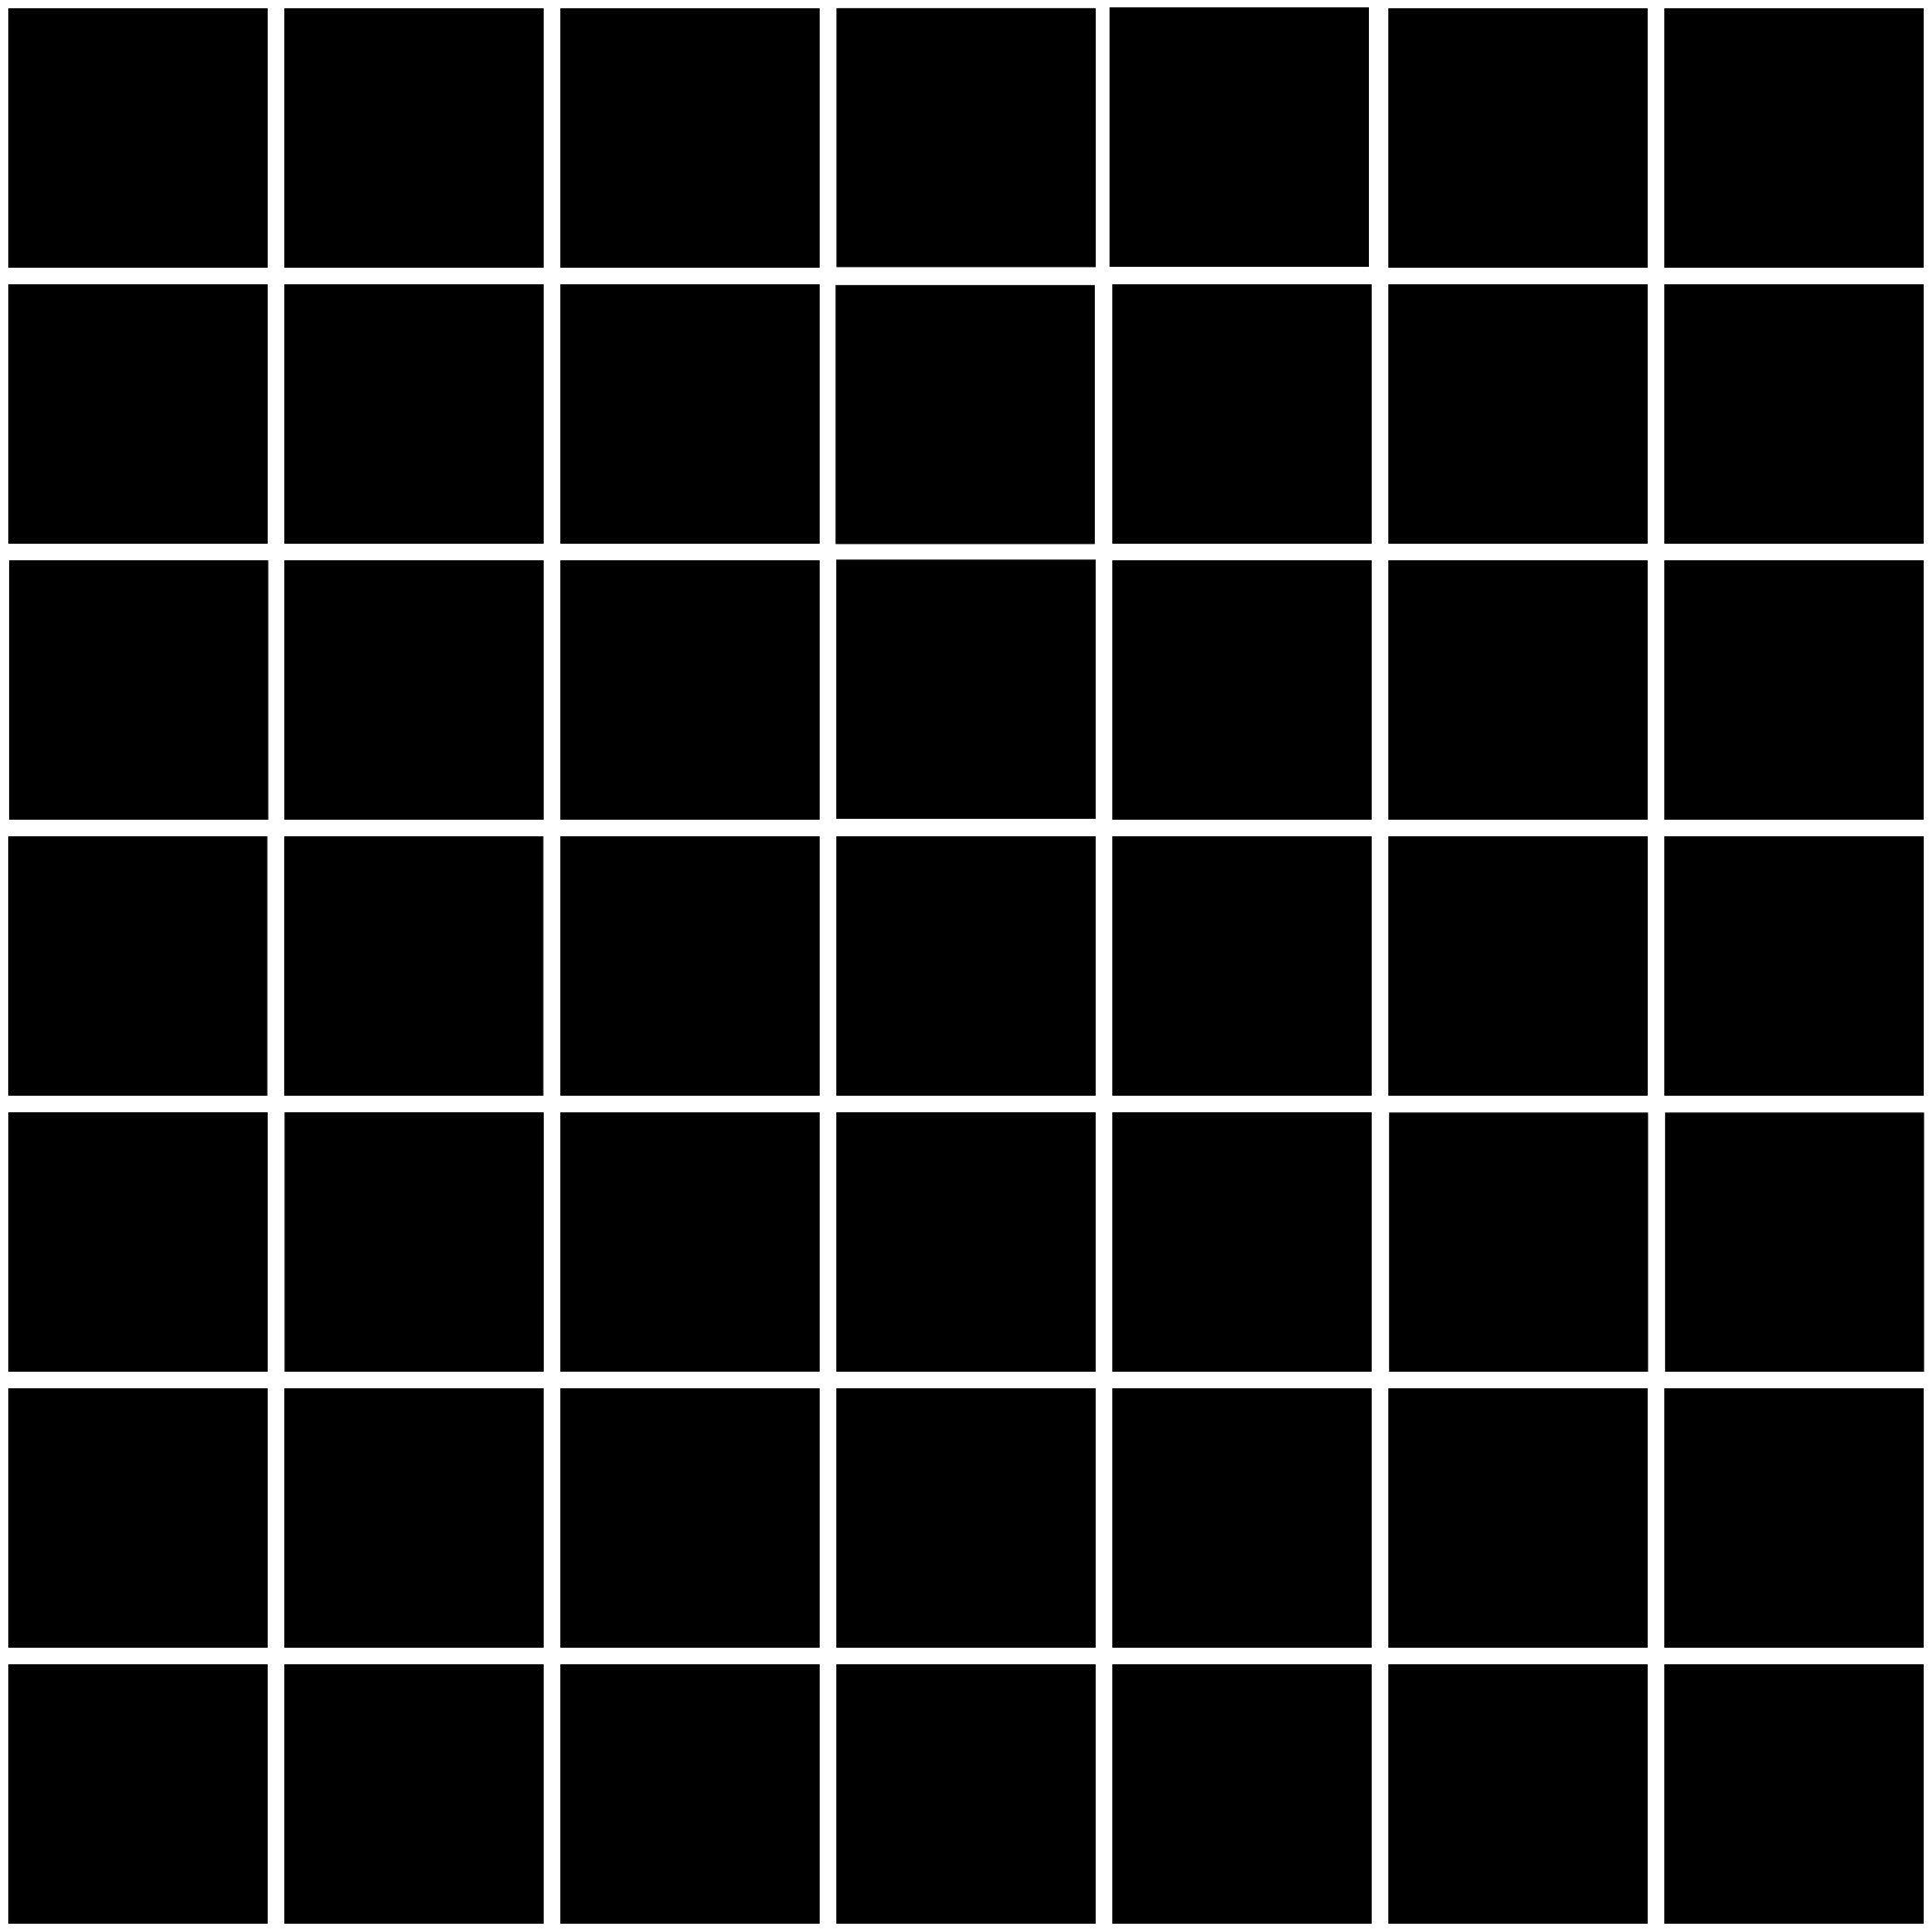
You will begin with a blank 7×7 canvas (2100×2100 pixels) at 300 dpi (want to use my grid template? you can DOWNLOAD IT HERE)…

Arrange your photos however you like, but make sure your favorites are in the center, because the photos in the corners and outer edges will be a bit distorted once you use ‘spherize’.

STEP TWO

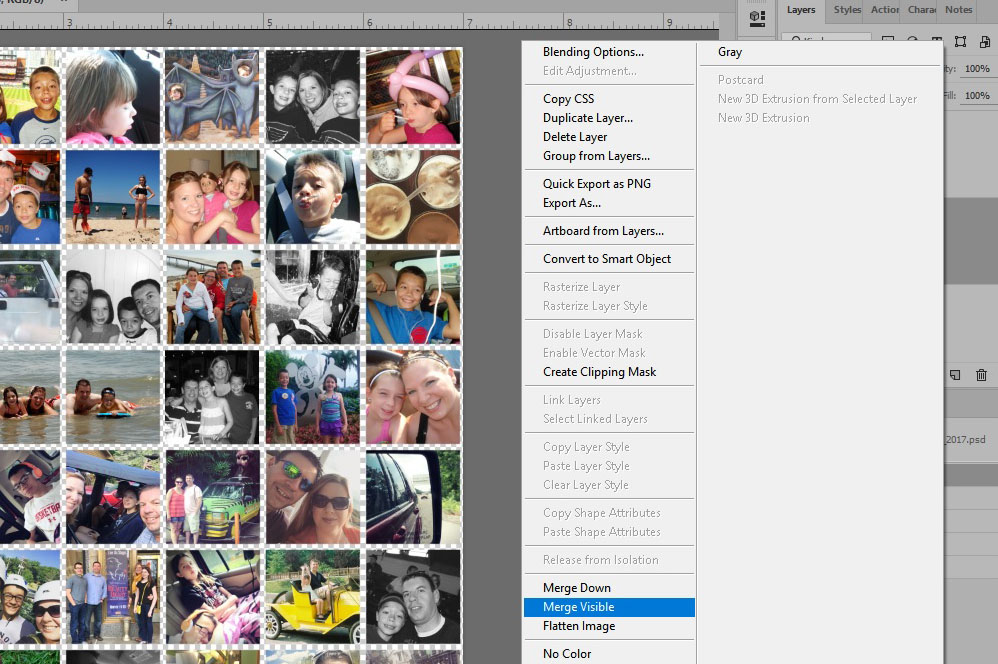
Once you have your photos arranged to your liking, in the layers palette you will right-click on any layer, and click merge visible.

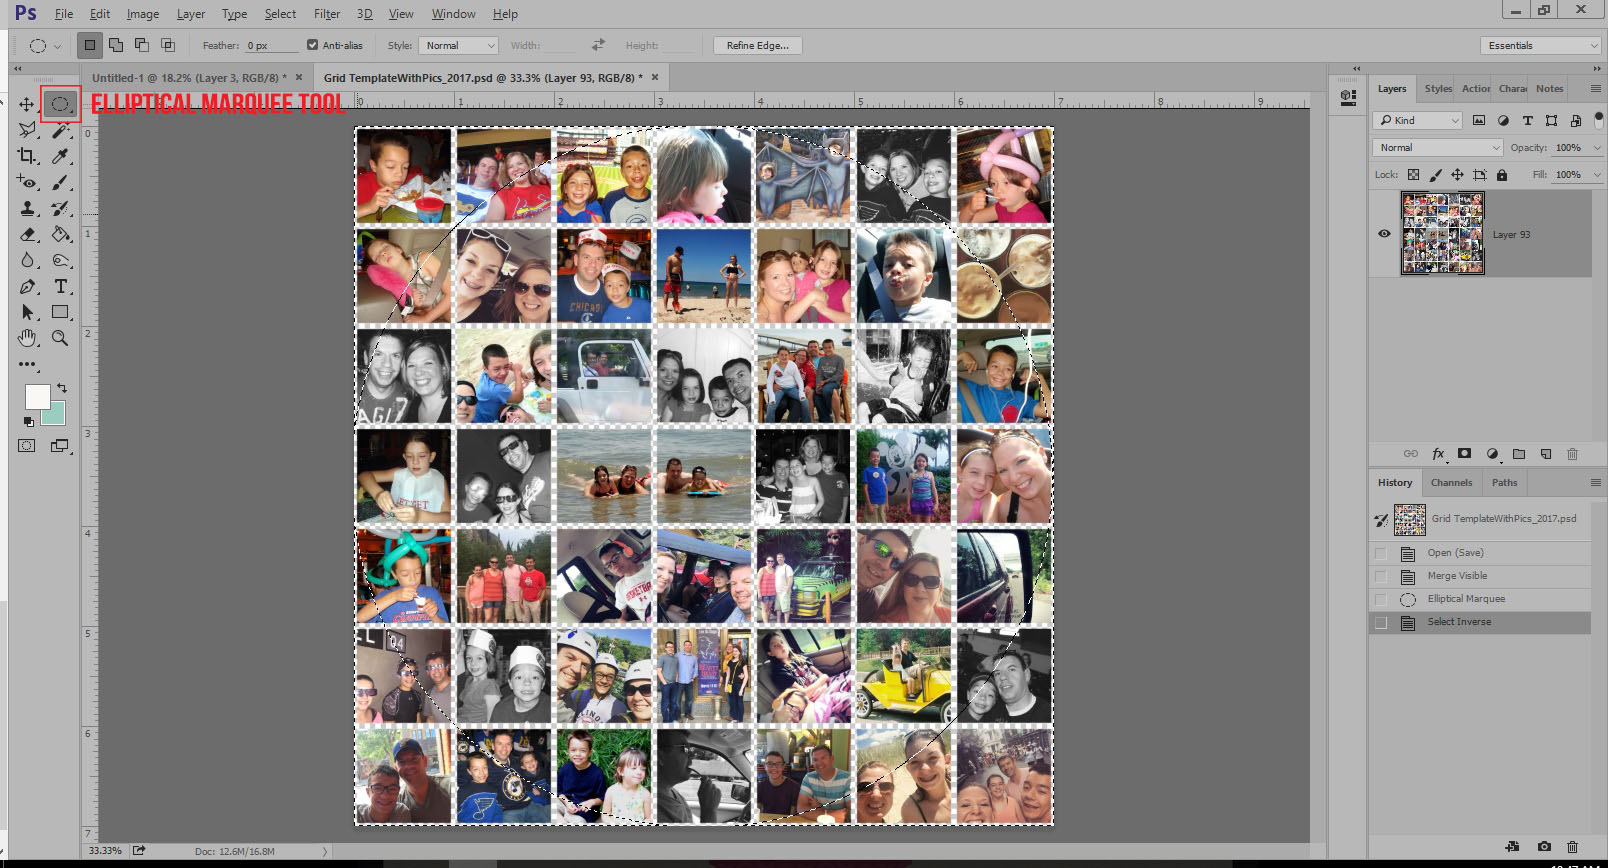
At this point, you will use the Elliptical Marquee Tool (see red text at the upper left of the following image; this is where you’ll find it. *NOTE* that you may need to right-click to find it, as it may be hidden under the Rectangle Marquee Tool) and drag your mouse from one corner of your canvas to the other to create a circle from edge to edge…

Once you have your circle drawn, Ctrl+Alt+I (all at once), OR use the “Select” drop-down, and select ‘Inverse’.  It may be a little hard to tell in the above image, but you will have marching ants in the shape of a circle and around the entire 7×7 image once you do this.

STEP 3

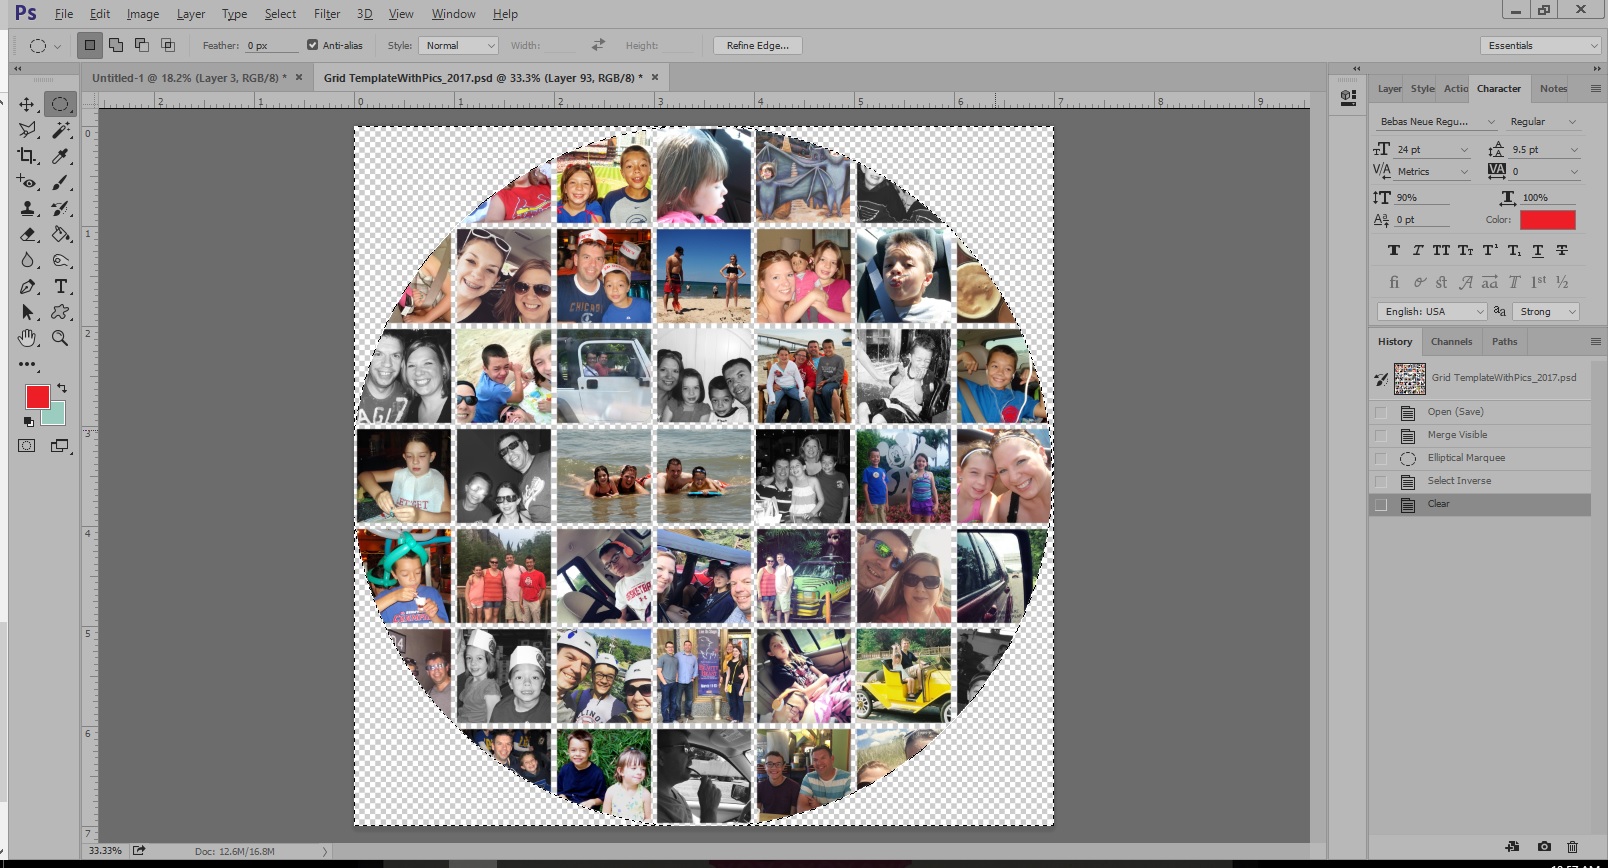
Next, you will press “Delete.” At that point, your image should look like this…

Now you will want to de-select your image by clicking on “Select” (top tool bar) and then selecting “Deselect” (or Ctrl+D). You should no longer have the marching ants on your image.

STEP 4

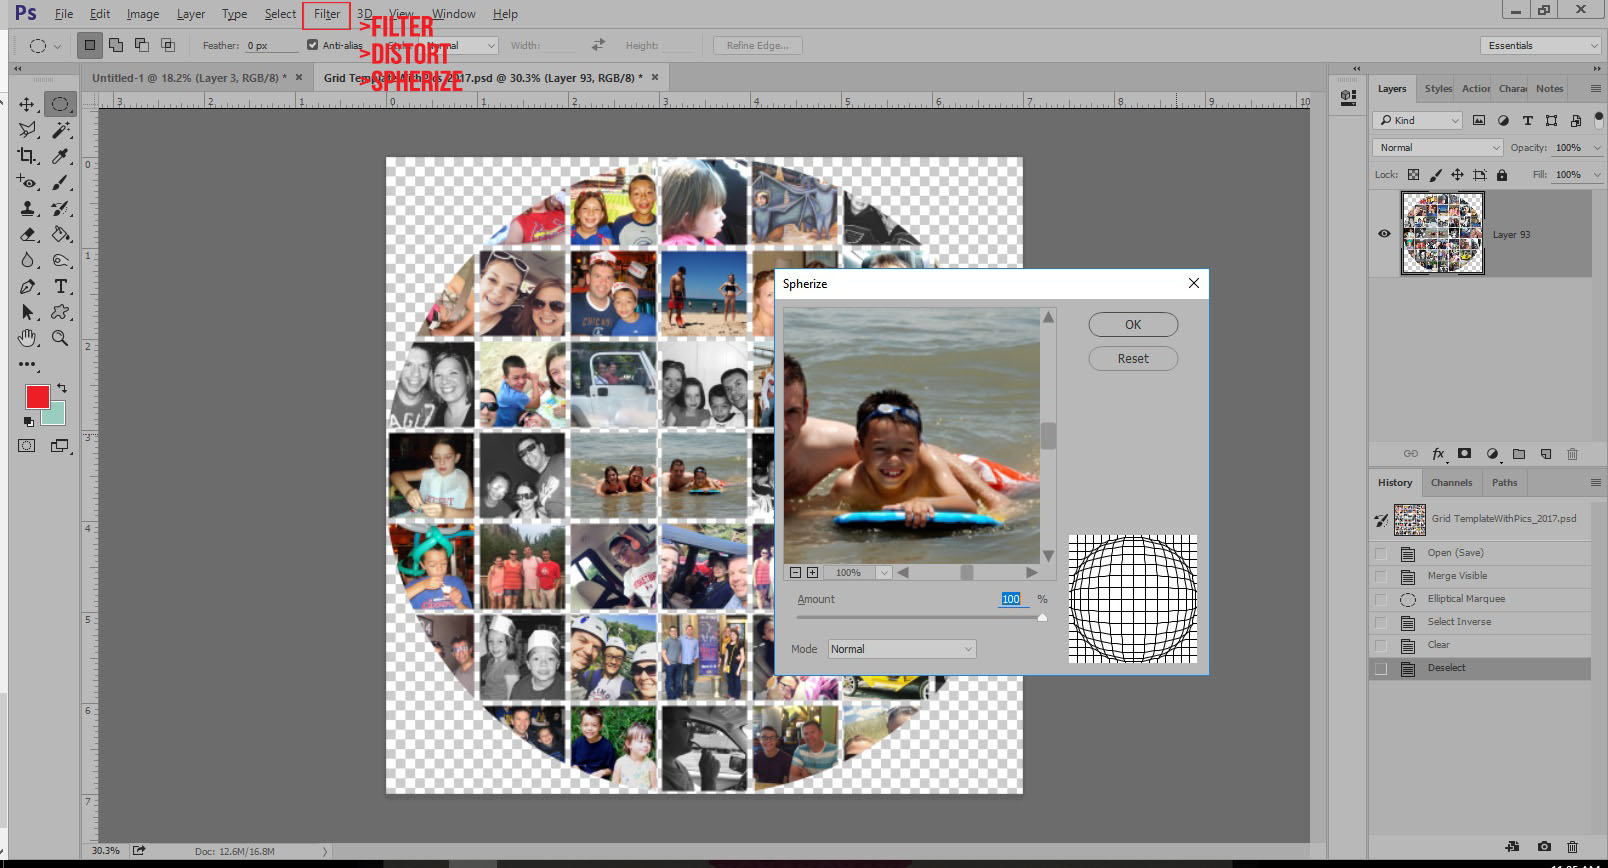
Now for the fun part!  You will click on “Filter” (top tool bar), then “Distort,” then “Spherize.” The Spherize window will come up at this point; I opted for using 100 as the amount (see below)… but you can play around with the setting for your own. You may find another setting that works well for you…

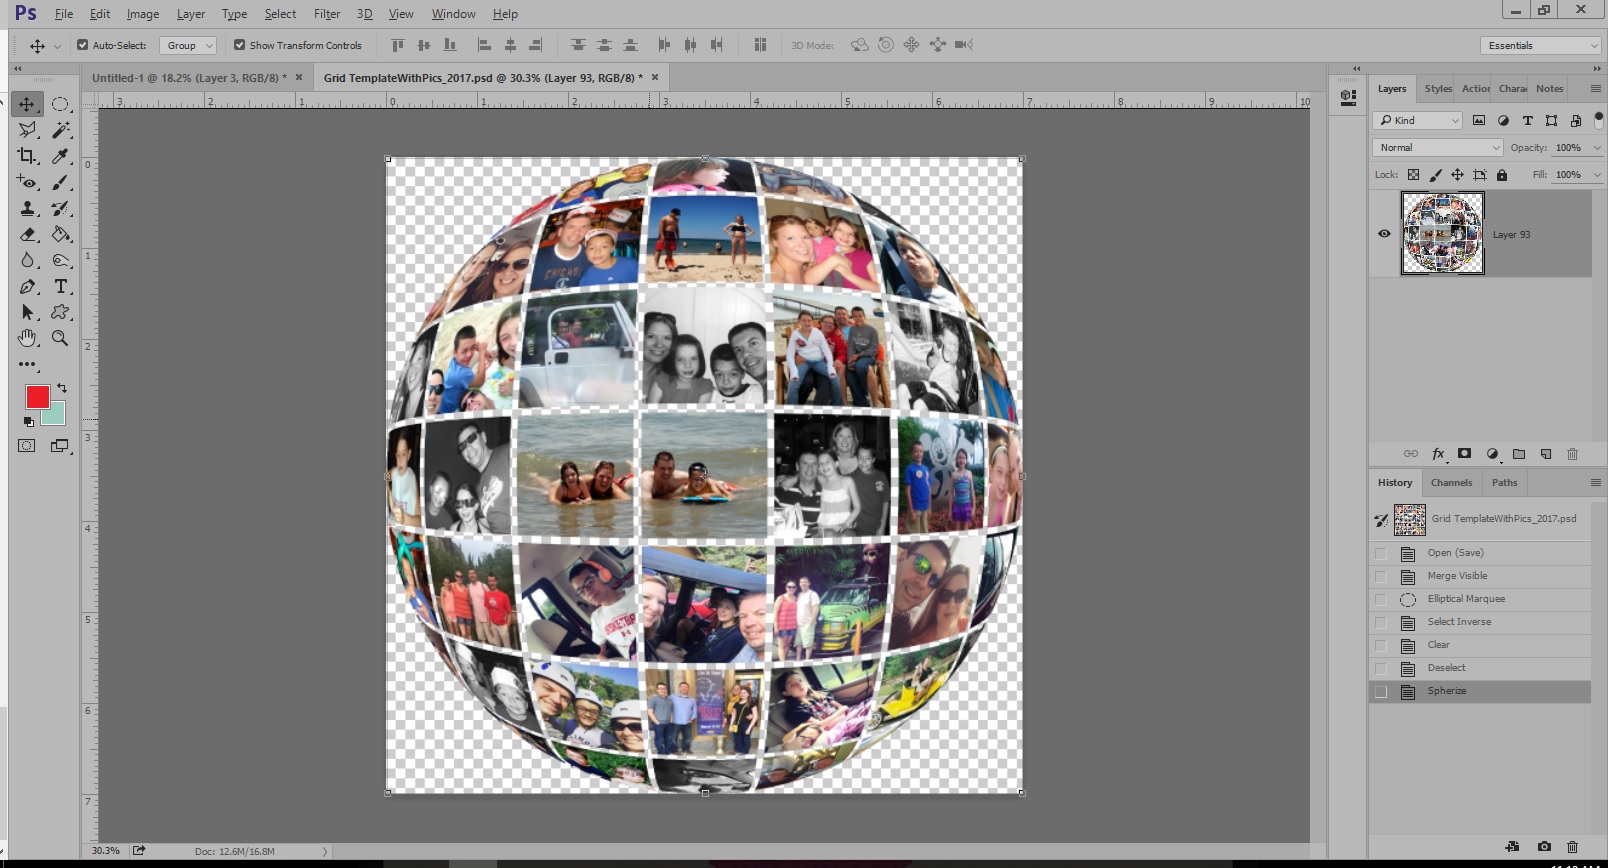
After applying “Spherize,” here’s what your image should look like…

At this point, you can save your image as a PNG (File>Save As or Shift+Ctrl+S). To use the image in a layout or project, you’ll simply need to open your image and drag and drop it into a blank canvas. The possibilities for use are limitless!

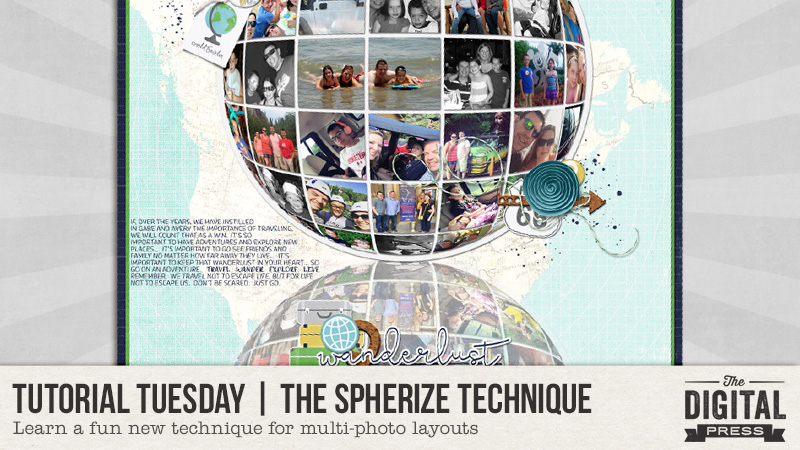
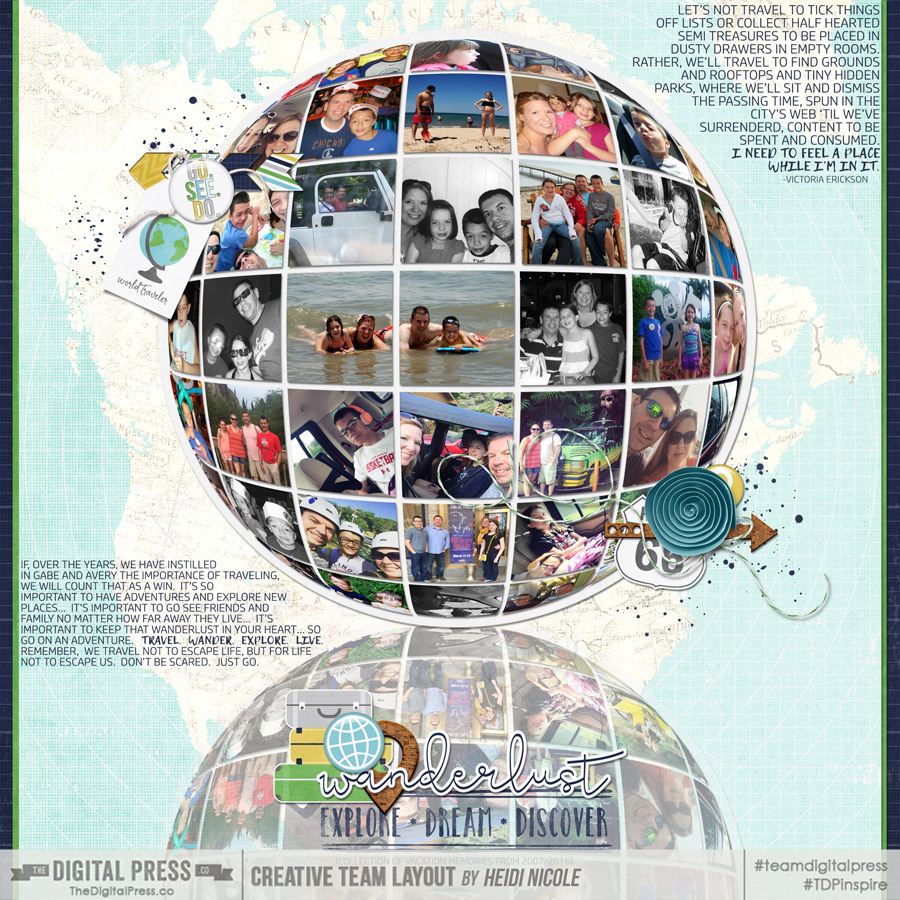
Here’s a look at a layout that I created using my ‘Spherized’ image…

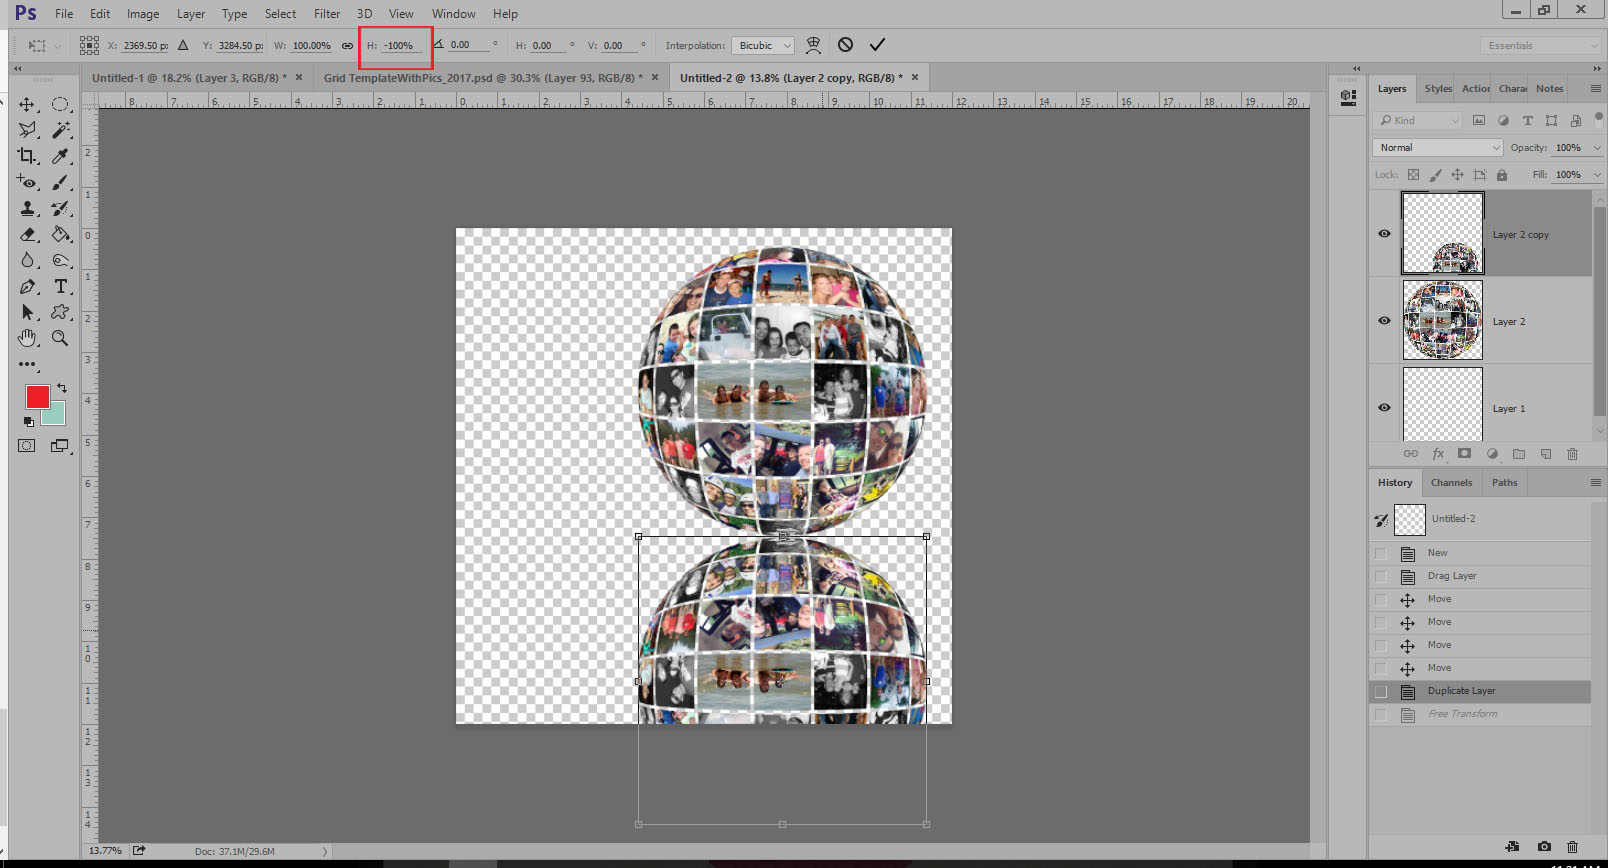
*BONUS TIP* To make the reflection, I simply duplicated the image, and made the height -100, as shown in the next image…

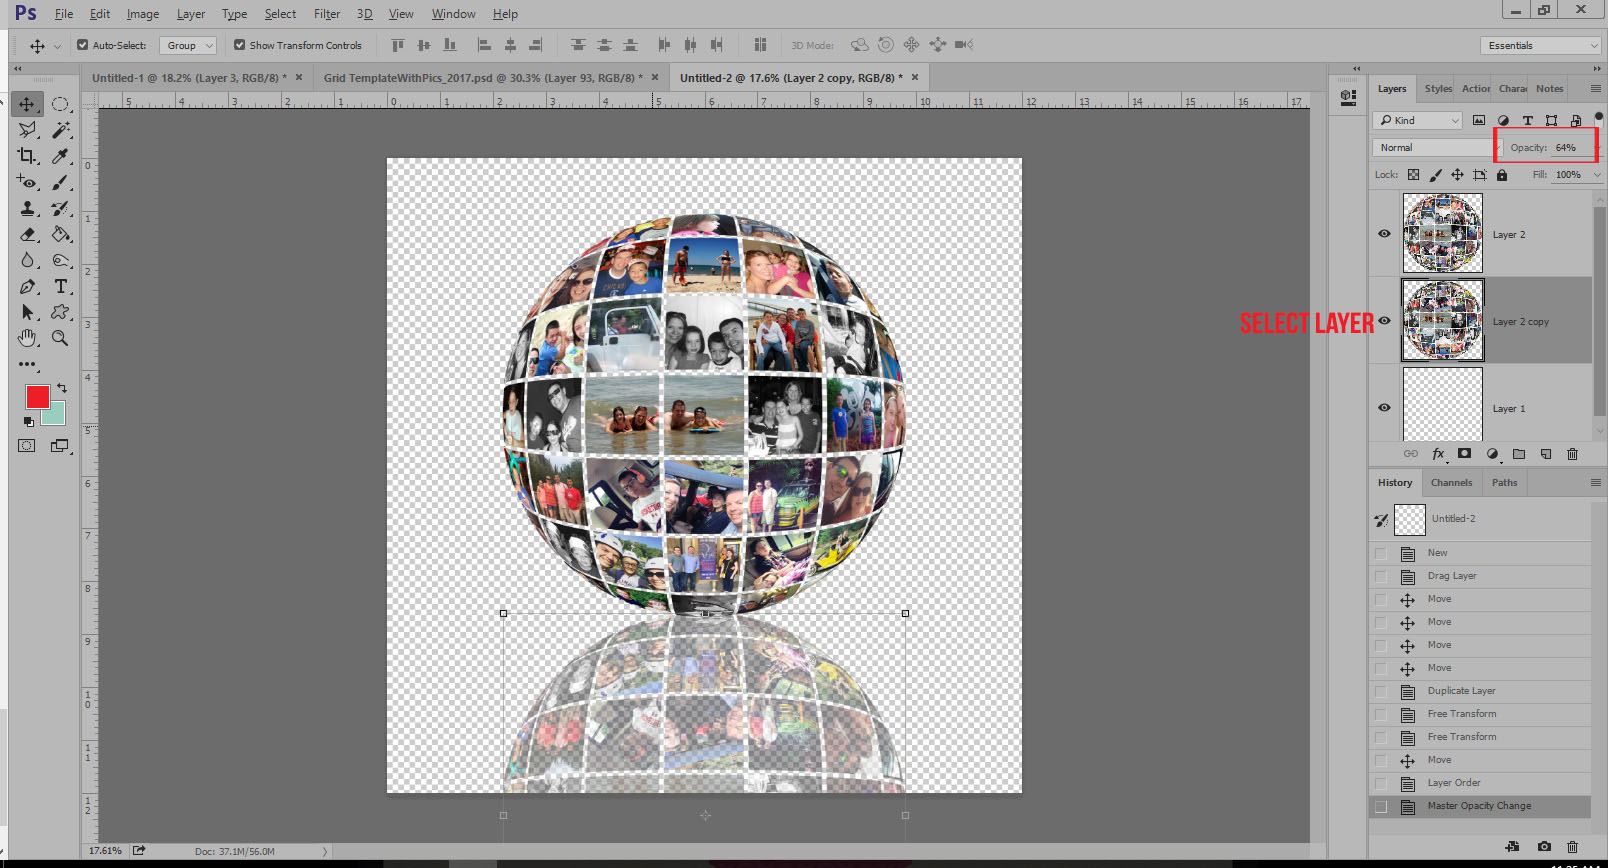
Then, I decreased the opacity of the duplicated layer, as shown below…

And there you go! That’s all there is to it… and you’ve successfully used a fun, new technique!

The fun really starts now…  because you can use this technique to embellish to your heart’s content! It is such a fun way to display a collection or montage of photos that you love! It would also make the perfect front page for an album… or look fantastic printed on a canvas for your home… etc. So many fun possibilities!


Heidi NicoleAbout the Author  Heidi Nicole is happily married to an amazing man, a step mama to 2 wonderful kiddos, and mama to 3 sweet and sassy furbabies.  She’s a radiation therapist by day and creator of pretty things by night (she’s pretty confident that she’s hit super hero status, but refuses to wear a cape.)  She loves cats and huskies, coffee, audio books, FRIENDS reruns, St. Louis Blues hockey, cooking, baking, and traveling.  Oh, and wine… she really likes wine.  She lives a normal and happy life, and enjoys all the absolutely extraordinary people she gets to share it with on a daily basis!

Hybrid How-To | Gift Card Holder

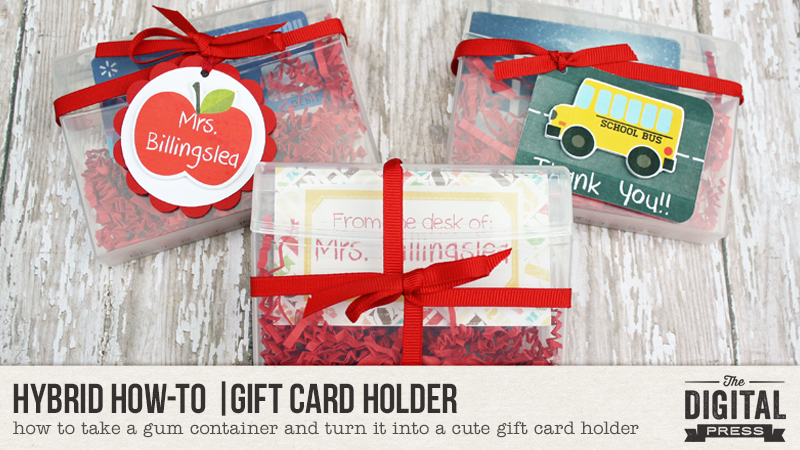
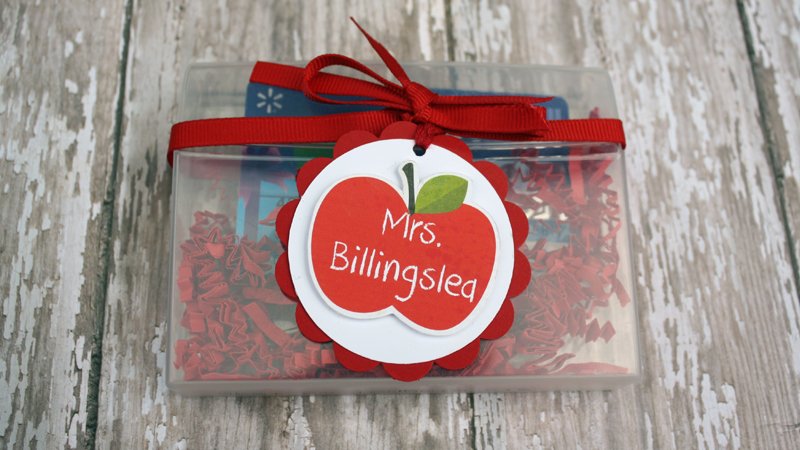
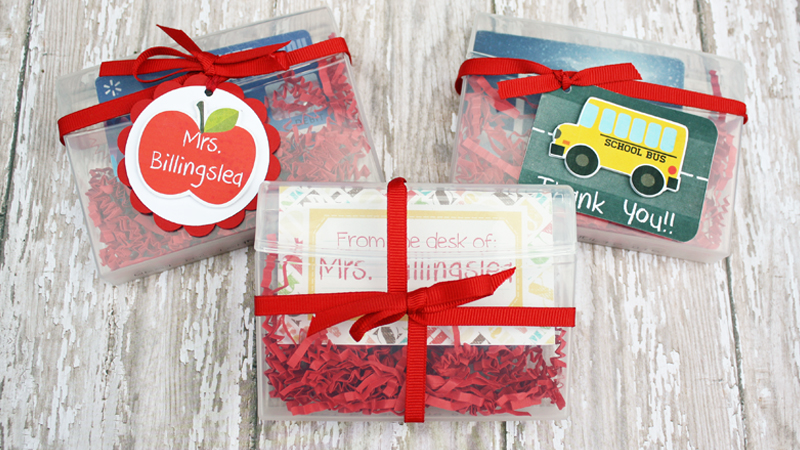
Hello everyone, It’s Tanya here for this week’s Hybrid How-to.  I’m going to show you how to create this cute and easy recycled project.   It’s  one way to show your child’s teacher ” THANK YOU” for all they do.   I loved creating things for my kid’s teachers when they were in school.  There are many opportunities throughout the year….the first day of school, teacher appreciation day, the last day of school, their birthday….just to name a few.  Today we are creating this project for the last day of school.

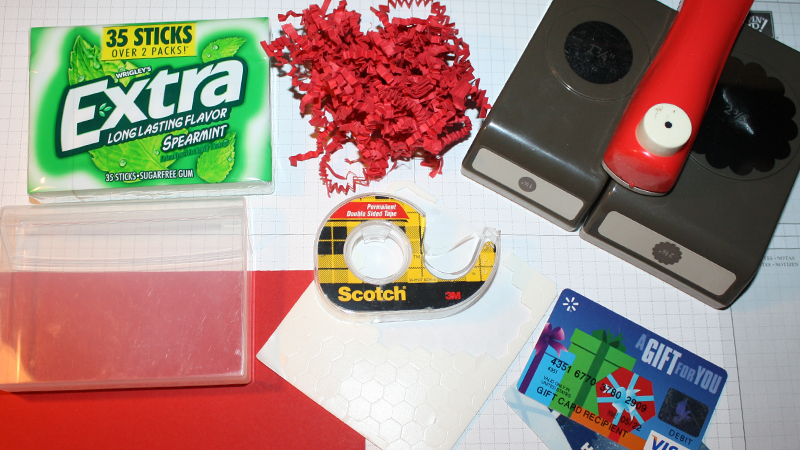
SUPPLIES Needed:

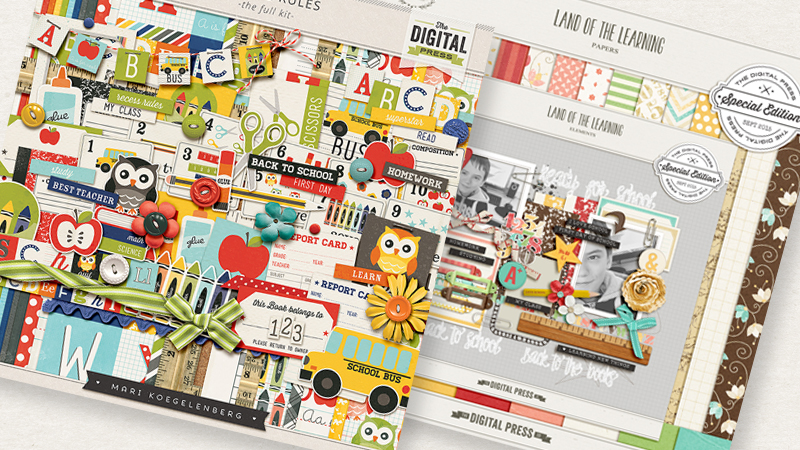
  • digital kit of your choice ( I used School Rules by Mari Koegelenbern and Land of the learning by Anita Designs)
  • empty gum container
  • double sided tape
  • pop up dots
  • punches
  • scrap piece of cardstock
  • shredded paper
  • gift card

These are the two kits that I chose, but there are many more fun “school” kits at The Digital Press shop to choose from.

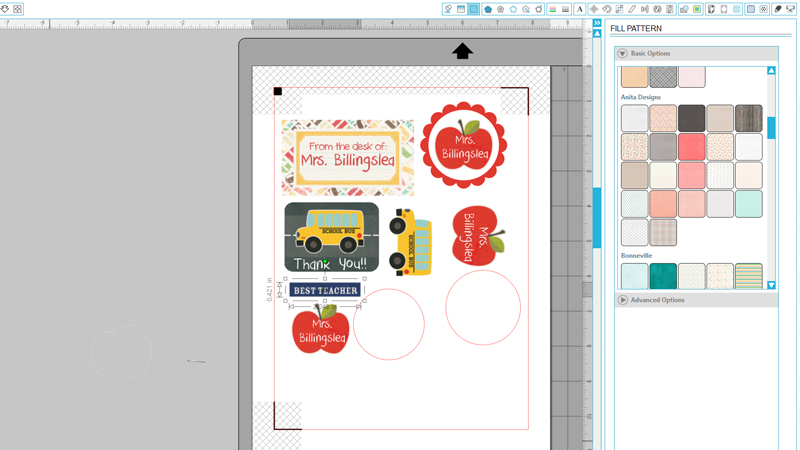
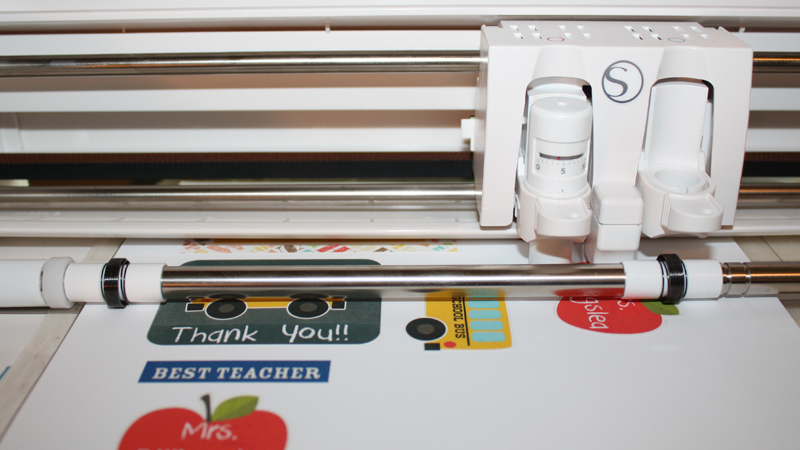
I created the tags and note cards using the Silhouette Studio Designer Edition software using the print and cut feature.   It can be done in any photo editing program, print and cut with a pair of scissors.

I love my Silhouette and even when things are probably easier just to cut out  Old School, I still use my Silhouette instead.  It’s kinda addicting!!

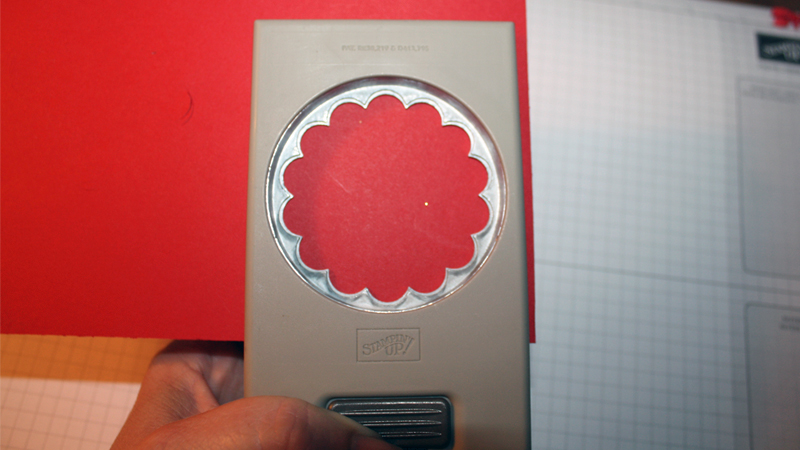
Use the big scallop to punch out the bottom piece.  Continue using the different punches for the layered tag.

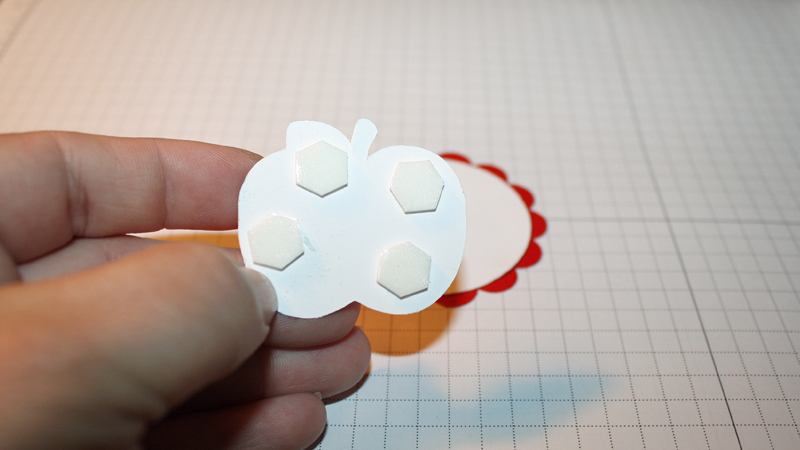
Add pop dots to the apple for dimension.  I have tons of pop dots on hand because I love the layered look.

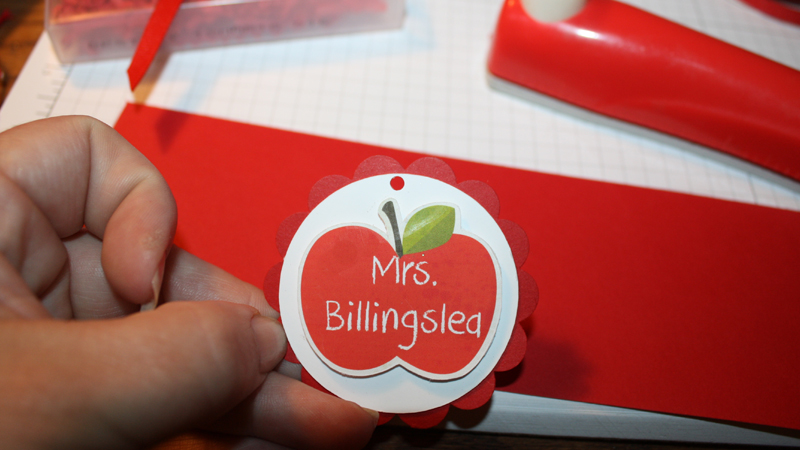
Use the tiny circle punch to punch a hole for the ribbon to go through.

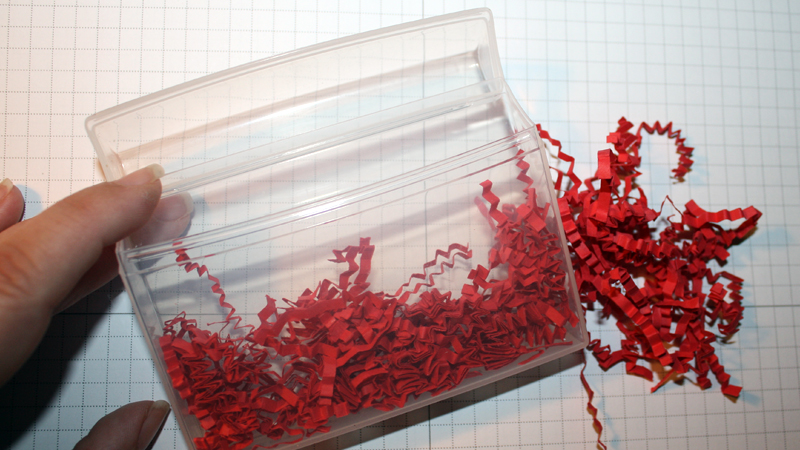
Before adding the gift card, add some of the shredded tissue to the bottom.  There are so many different colors and you can find them for a $1.00 a bag at the Dollar Tree.

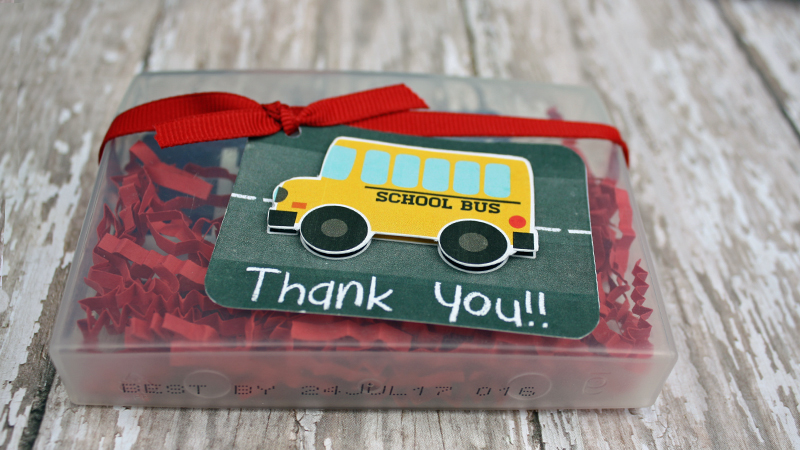
After adding the gift card, attach the tag with ribbon of your choice.   Isn’t this a super cute way to give your child’s teacher a gift card?

Oh and don’t forget the bus driver.  Because of them, the kiddos get to and from school safe and sound.

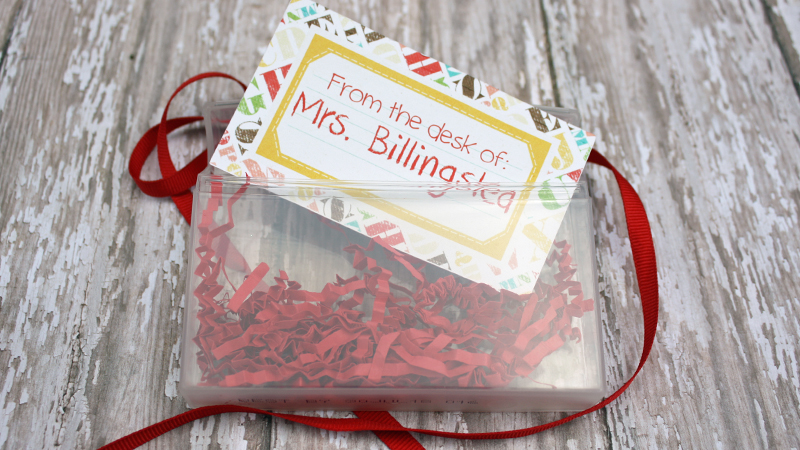
For this one, I created little note cards for the teacher to use next year.   Imagine them stapled to the top of your child’s work.   This simple gift even without a gift card would be very sweet.

I hope that you have enjoyed today’s Hybrid How-To here on The Digital Press’ Blog.  Now it’s your turn to create something fun!

I hope that you have enjoyed today’s Hybrid How-To here on The Digital Press’s blog. Now it’s your turn to create something fun (with or without a cutting machine)! If you would like to earn points toward TDP’s monthly challenge system, visit the corresponding monthly Hybrid Challenge in the forum’s CROSSWORD SECTION (you’ll find it stickied up near the top during May 2017). We’d love to see your creations!


Tanya

About the Author  Tanya is a part of the hybrid team here at The Digital Press. She has been hybrid crafting for at least 14 years now, and loves creating and sharing those creations with others. Her all-time favorite tool is her Silhouette Cameo. She has been married for 28 years to her high school sweetheart, Richard and has two sons: Chris, 25 and Chance, 20. She also enjoys crocheting, photography and woodworking