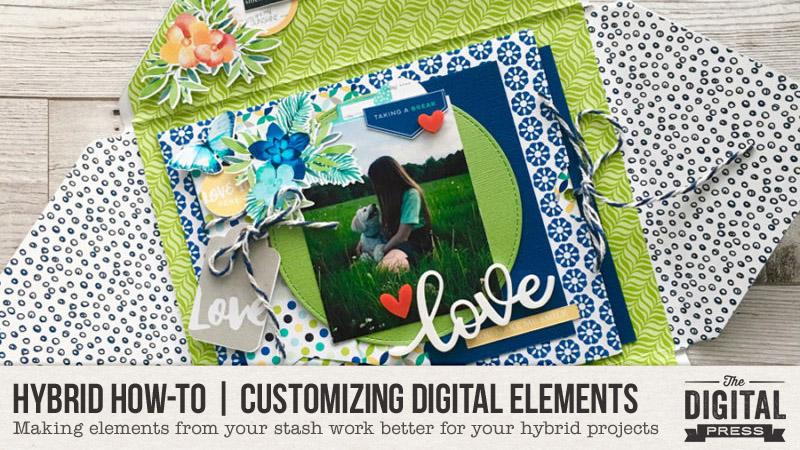
One of the key things that attracts me to hybrid memory-keeping are all of the wonderful digital embellishments that can be used (and/or tweaked to work for any project!). Namely, the ability to print and cut digital elements many times over is definitely a huge bonus for crafters on a budget (one purchase = endless uses!). Even better, though, is the fact that if you need to alter an element slightly to make it fit into one of your projects — with digital elements, you can do this! Today, I am going to show you how to take a standard digital element and customize it for your project.
The first step is to choose a digital kit from the amazing selection at The Digital Press. I chose the gorgeous Fresh Air collection designed by Anita Designs and Kim B Designs, because I love the color combination and the clean lines…
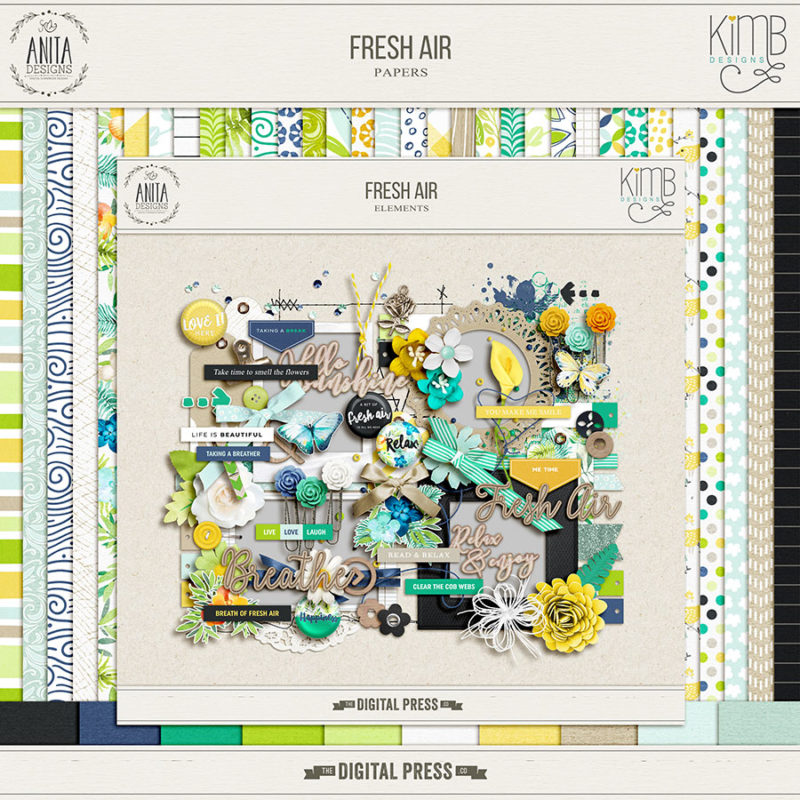
For my projects, I wanted to use one of the tags found in this collection (see below). The “Love” tag in the kit is gorgeous — but I wanted a shorter version for my project, so it would fit better into the space I had available. This next simple editing trick works wonders for tags that have a plain section.
Shorten a Tag
You will need photo editing software such as Photoshop (PS) or Photoshop Elements (PSE) — but there are plenty of alternative applications (there’s even a free online PS tool/version).
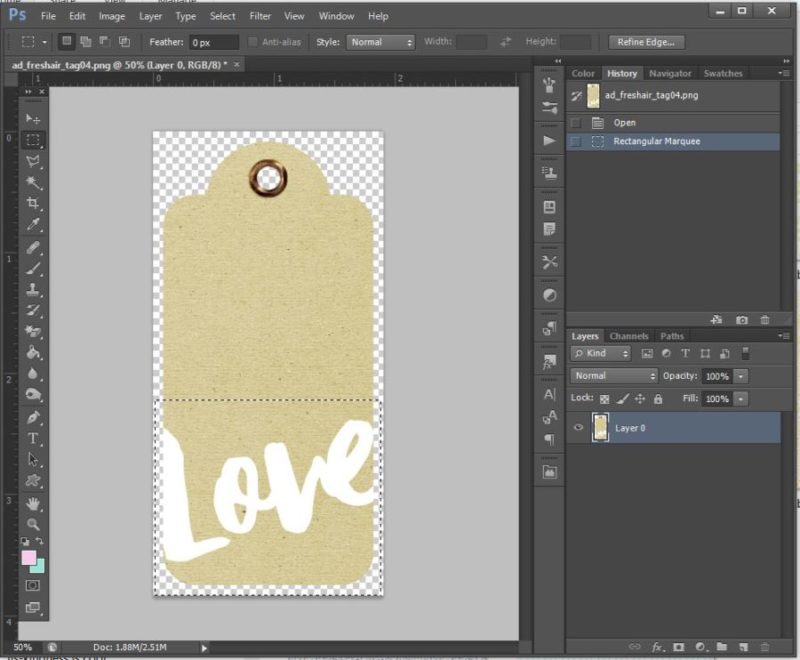
- Open your tag in the editor and select the marquee tool (shortcut key + m + the dashed rectangle on the left).
- Now select an area to move. We will shorten the tag by moving the lower section up towards the top of the tag. Drag the mouse to select an area as shown below…
3. Switch to the move tool (shortcut key =+ v).
4. Using the arrow keys, move the selected area up; you should see the tag becoming shorter as you move it…
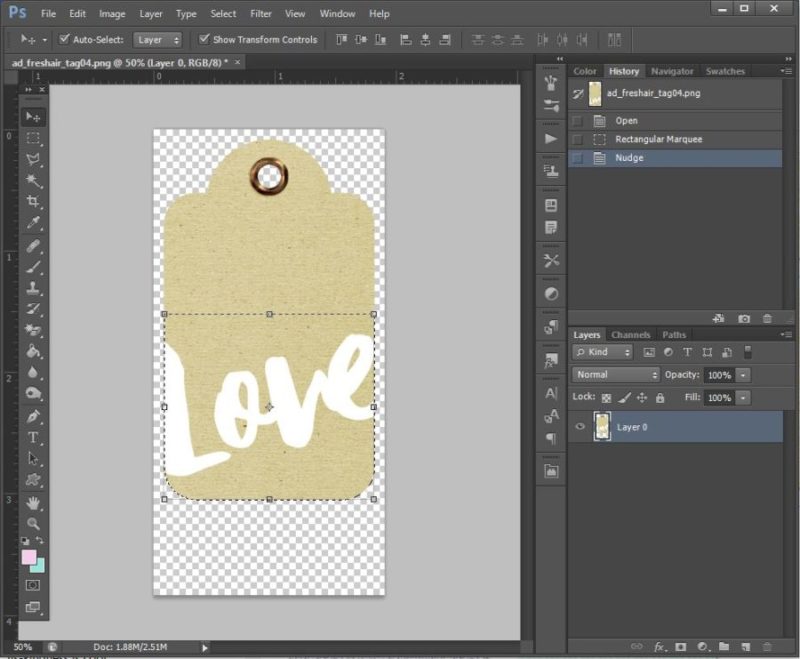
Voila! The tag is now shorter — and it’s just right for my project! This techinique is very simple but very effective.
*TIP* don’t forget to “Save As” a new document, or you will actually overwrite the original file — which you don’t want to do!
Cookie Cut Your Own Tag
Next up, how about making your own version of the tag? We will use a cookie cutter effect to create another tag from patterned paper. This time I’ll use the free online Photoshop tool to demonstrate…
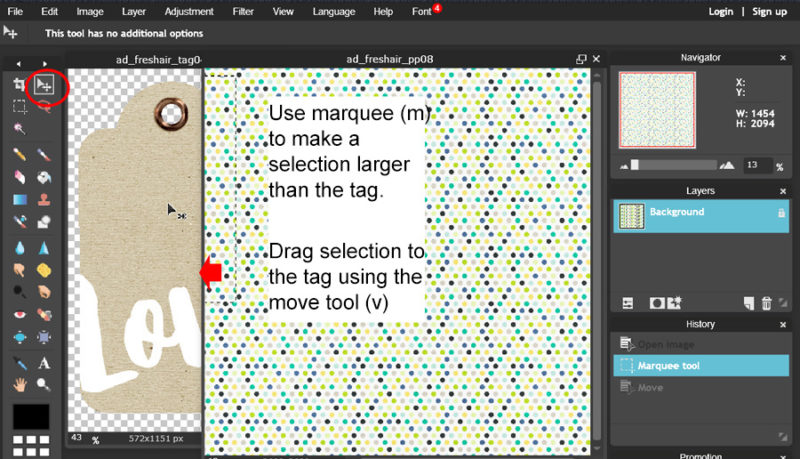
- Open a tag and paper; the paper can be patterned or plain.
- On the patterned paper window, make a selection larger than your tag using the marquee tool (m).
- Now click and hold on the selected area to drag the paper selection across to the original tag. There will be 2 layers in the tag window.
- Close the patterned paper.
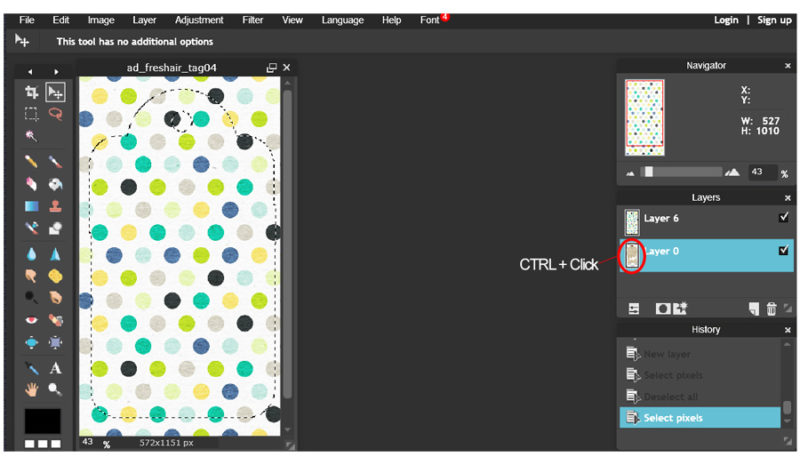
5. In the tag window, Ctrl+click on the icon on the tag layer (layer 0 as shown above). This selects the image outline. You will see the “marching ants” around the outside of the tag.
6. The current selection is the tag itself but we only want to cut the ‘excess paper’ outside of the tag. To invert the selection, Edit > Invert Selection. This selects everything except the tag shape.
7. To cut out the patterned paper in the shape of the tag, click the patterned paper layer.
8. Click Delete to delete the selected area. The excess paper is deleted leaving only the tag behind.
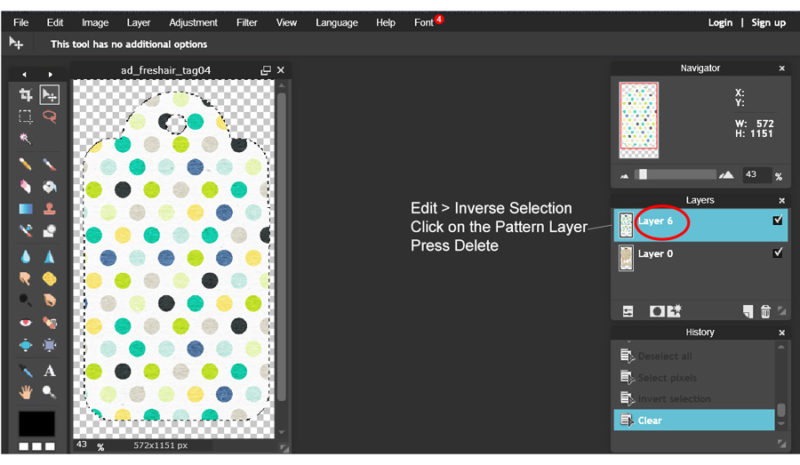
Ta-da! Your new tag is ready to decorate… but again, don’t forget to save as a new document first (so you don’t overwrite your original file).
Here’s a look at my finished project, which is a decorated envelope (happy mail!)…
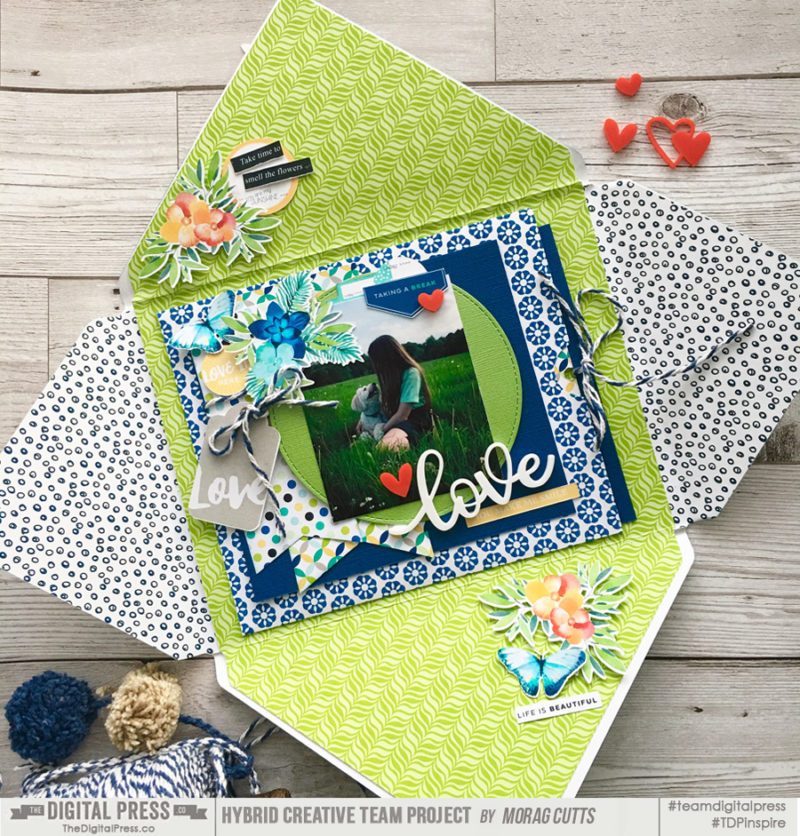
I used patterned papers from the kit to make an ‘envelope’. There are plenty of free envelope templates on the internet to use as a guide.
Here’s another closer-up view…
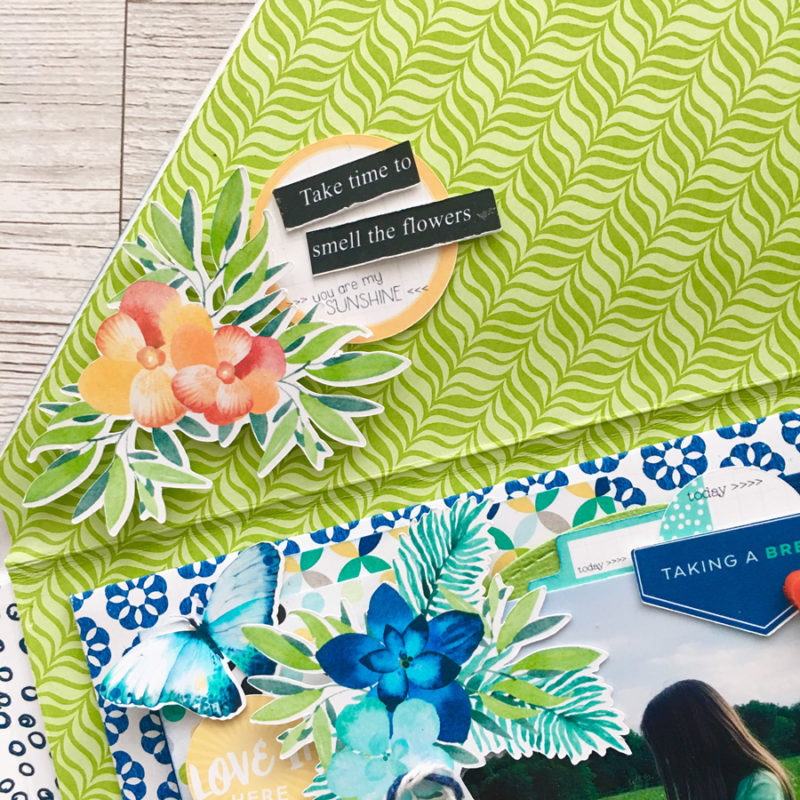
I only have singled-sided printing paper, so I lined the envelope with different papers. I really like the additional interest this created. It also made the project a bit more sturdy. A simple pocket holds a tag (for a message or for adding journaling). To finish off, I fussy-cut some flowers and butterflies and added tags and labels…
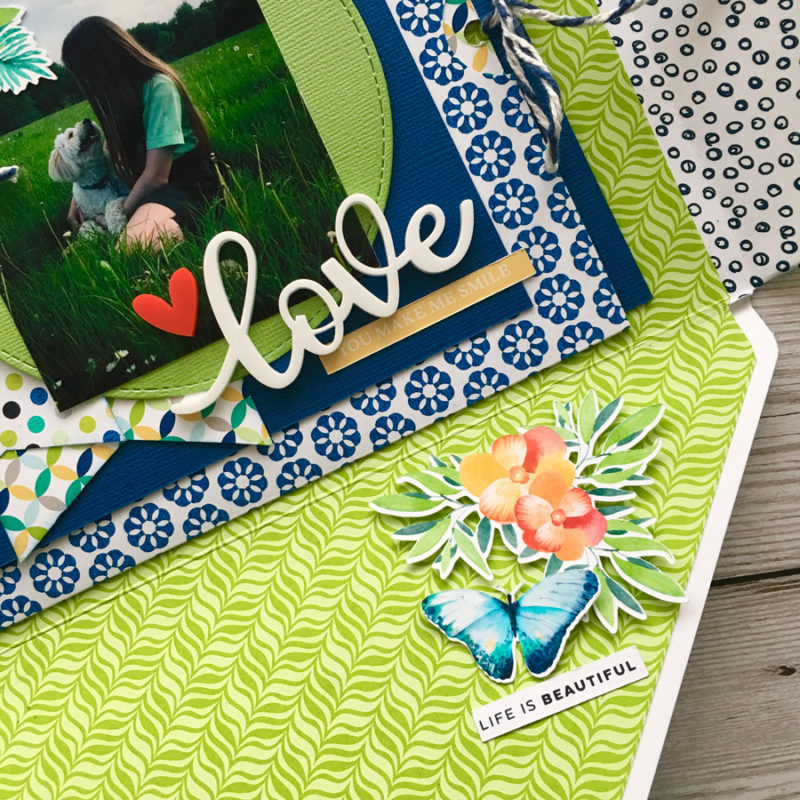
I hope that with a few of these ideas, I have inspired you to use elements from your own digital stash and tweak them around to make them work better for your own projects (and maybe even inspire you to try making your own happy mail and embellish with customised elements?). I think receiving a project like this would really make someone’s day!
 Morag Cutts is part of the Hybrid Creative Team here at Digital Press. Morag has been an avid scrapper and photographer for ten years. Although she adores the flexibility and creativity of digital, Morag can’t resist playing with paper and embellishments – so hybrid scrapping is the perfect medium for her! Morag lives in the UK with her hubby, two kids and puppy.
