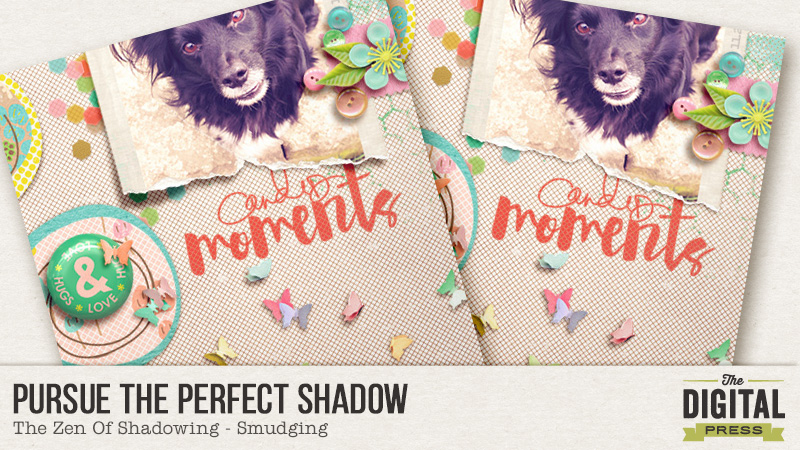
I think that most of us seasoned scrappers went through phases with shadowing on a page. I remember my first pages, where I simply skipped the shadowing. I maybe just didn’t know that there was a shadowing feature and most probably I was ignorant that shadows would make a difference. After a while I found the shadows feature but just didn’t know how to use it properly and in review these pages don’t look much less awkward than my first attempts. After a while of shadow dabbling I found shadow styles and gosh, they made my scrapping life so much easier and rewarding. In this tutorial I will show you one technique to go even further and bring you closer to your Zen of Shadowing.
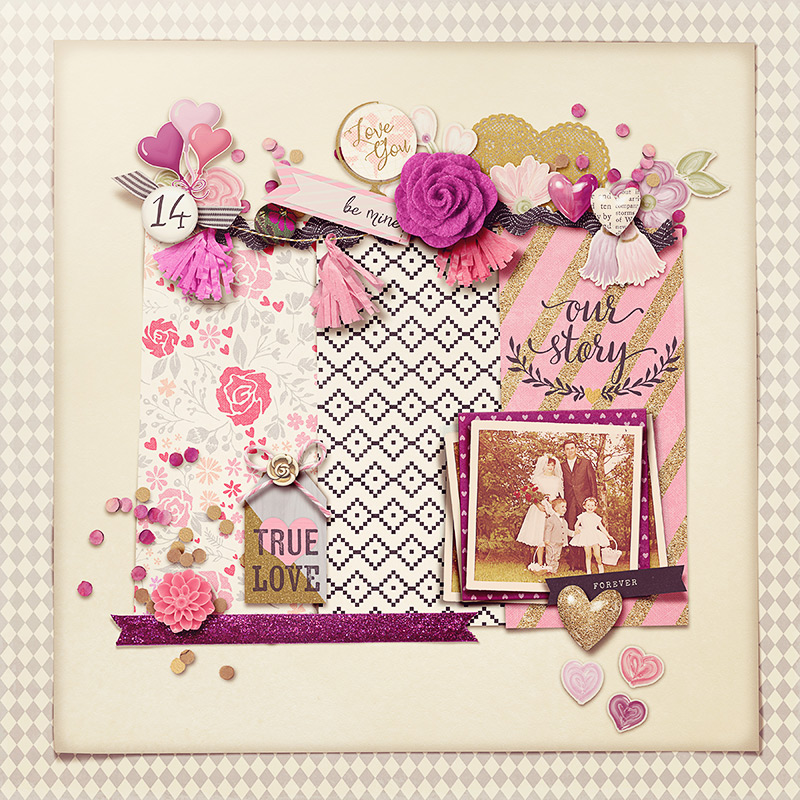
As much as anything in art, shadowing styles are a matter of taste. I personally like my shadows to be noticeable and giving depth to the page. I love it when I achieve a close-to-paper look. It’s still a hit and miss and I’m working, tweaking, changing my ways constantly to try something new and „better“ in this realm.
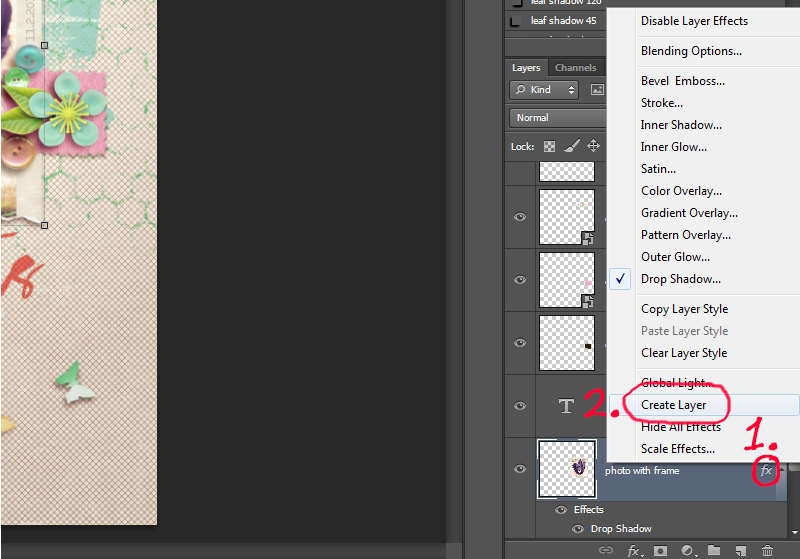
My latest obsession is „smudging“ the shadow. To do this, you have to be able to put your software-generated shadow on it’s own layer. I do this in photoshop cs6 by 1. right-clicking on the fx icon of the layer and 2. clicking „create layers“. If you can’t do that, you can always separate the shadow manually. Look up google for „Putting a Drop Shadow on Separate Layer„ for your graphic software.
Before you can separate a shadow, you surely have to apply one. It’s up to you how you do that. I use shadow styles all the time and sometimes tweak them before separating, sometimes I do it afterwards.
So with your shadow separated, you 1. click on the new shadow layer 2. click on the smugde tool, which is housed with the blur and sharpen tool. 3. Select a big round brush with about 20% hardness. The size of the brush depends on the size of the item your shadow belongs to. I usually go with a 825 px brush for the most items and adjust for very big or small items. 4. Look closely which part of the shadow you want to smudge. Put the middle of your brush to that part and pull a tiny bit into the direction where the light falls (away from the virtual light source).
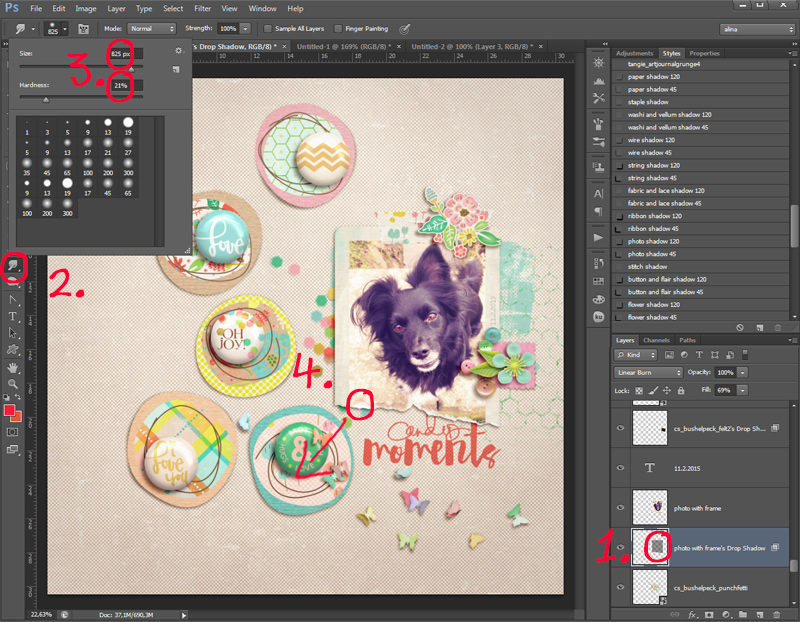
All the settings are just a suggestion and you may want to play around with this feature to get acquainted and make it your friend. The tool is not always easy to handle and especially when your software is going slow anyway, you may have some terrible fun waiting for your machine to calculate your move.
On a more detailed note (I love details!) some things I consider when working with shadows:
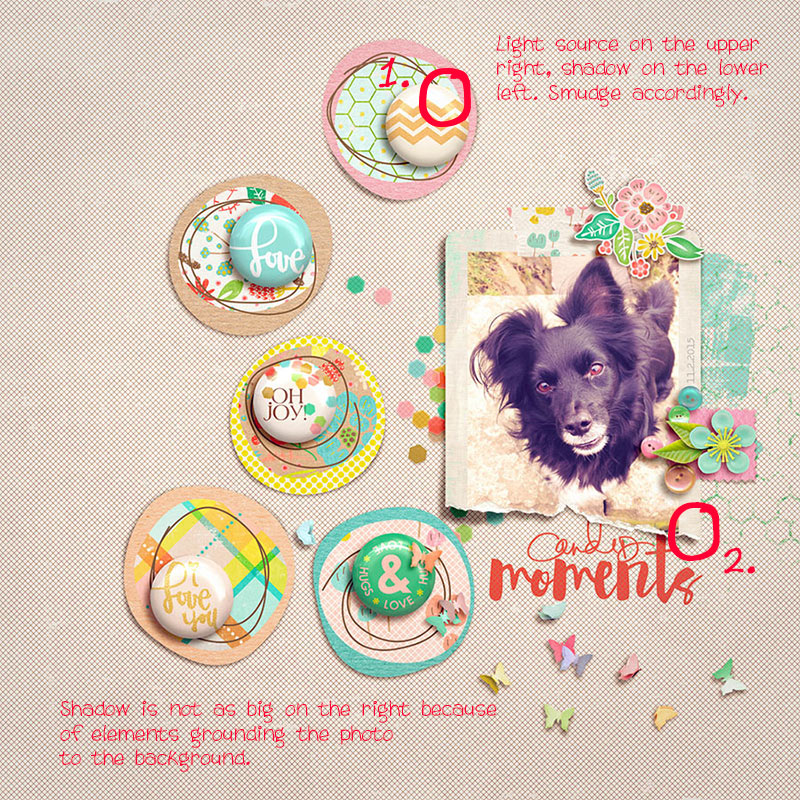
1. What is your global light doing? When the virtual lightsource is on the upper right corner, it usually makes no sense to stretch the shadow into that direction. Follow the path away from the light to stretch your shadow and create depth by applying the shadow how it would fall in a natural setting. If in doubt, go to a window, place a paper somewhere, crunch the paper a little and see how the shadow is falling when you turn the paper. It’s a great exercise for any visual artist.
2. Are there elements grounding your item? I personally don’t like it (blame it on my mild scrap ocd) when my shadow is spread where it naturally wouldn’t be spread. I smudge the shadow more to the inside of the item in these cases. Also the parts that are close to the grounding elements can’t be as far away from the background in my imagination.
3. Is the shadow strong or weak enough? As stated above, I like my shadows stronger, so most of the time I adjust the fill up to achieve a deeper tone. For more distance between item and background I might lighten the fill a little.
4. Smudge several times on one item if you want. As you see in the layout, I smudged the shadow of the photo several times. It still goes with the direction of the light, though. This makes the photo pop out of the spread even more.
Let’s try this! It’s easier than it looks and it can make a huge difference on your page!
Happy smudging!
PS: I use ctrl z all the time when smudging (or using any other feature…)
 About the Author: Alina enjoys sitting in front of her large computer screens too much. Apart from that she loves walking her dog and watching sunsets while being amazed of life in general. She is married to her best friend. Tries to manage the needs of her two cats and her dog and badly fails when they all want their cuddle time at once. Everything else is scrapping, taking photos and currently crafting. Having said that, she needs a bigger craft room.

wow i will definitely give this a try! tfs!
tag me 🙂 i’m happy to see how this works for you! :*
Your shadows are stunning! I will have to try putting this technique.
Thank you! I’m looking forward to see you in the galleries 🙂 Let me know what you have created!
Well-written! I so want to improve my shadowing to make more real-looking pages. Thank you!
Thank you! I want to improve on that as well and try something new all the time. That’s the fun in scrapbooking that there is so much to play with.
Oh goodness! I saw your page on Shen’s wall and gushed about your shadows. Now I see this tutorial. Thank you!
😀 Thank you, Dawn.