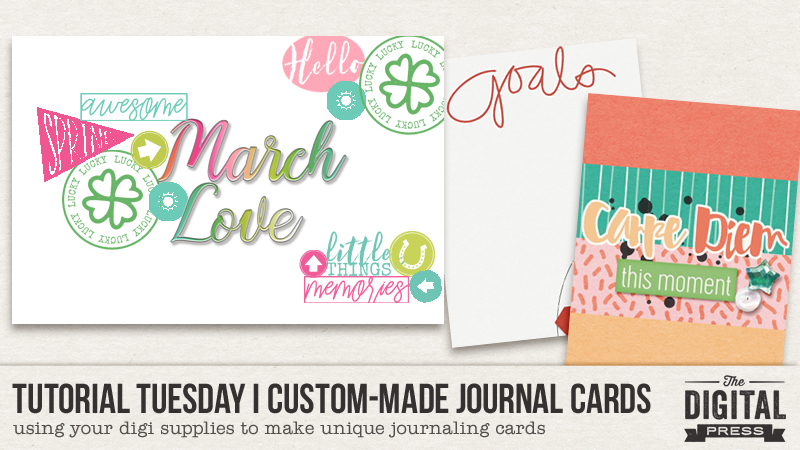
Hello, and welcome to another edition of Tutorial Tuesday at The Digital Press! Today, I will be showing you some fun ways you can use your own digital kits to create custom journal cards.
You can really stretch your digital stash by making your own custom pocket cards with the various pieces included in the digital kits. Even if the kit comes with cards already, you can still create your own customized cards with photo editing software and digital papers, brushes, and elements. Getting creative with your supplies and making cards not only stretches your kit, but it adds a personal touch to your projects.
Let’s get started!
First, choose your canvas size. In Photoshop (PS) or Photoshop Elements (PSE), you will select File –> Open New File …and then a screen will pop up where you can enter your desired canvas size. Change pixels to inches, if necessary, and then select your size. I went with 3×4 for my canvas…
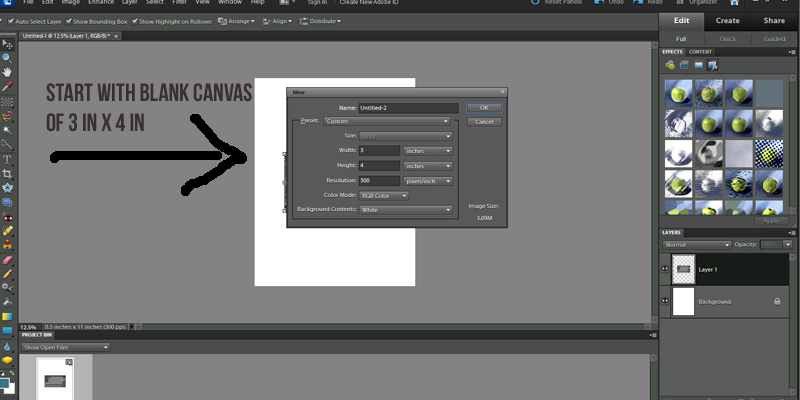
Now pick a kit, and start adding items to your blank canvas. Yes, it’s that easy! 🙂
EXAMPLE 1
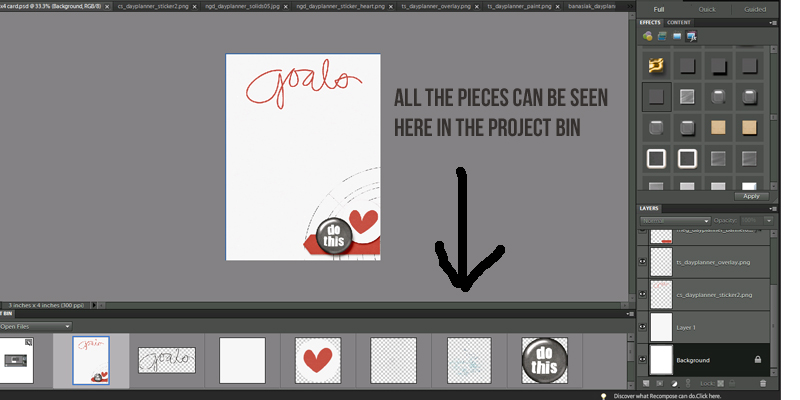
For the following card, I picked the new May 2017 TDP Designer Collab collection, Day Planner, to make my card. I added in a sticker, brush, flair, and another heart sticker. It was so quick to make… and looks awesome. Here is a screenshot with my 3×4 canvas and all the different pieces in the project bin…
EXAMPLE 2
Another example of a card you can make would be a card with separate “striped” sections. This is also really easy!
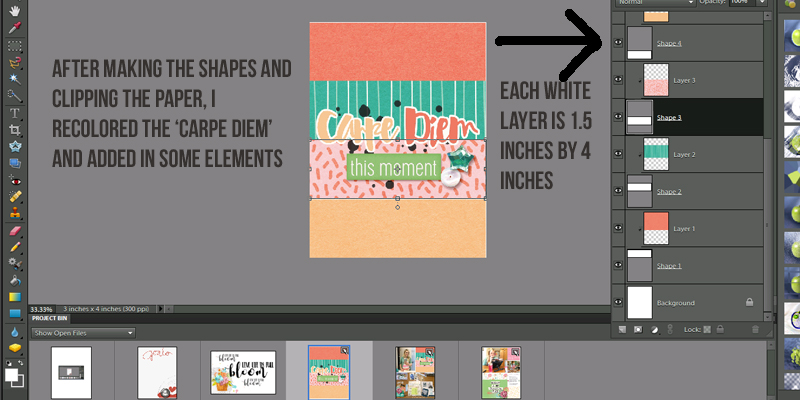
You can do this by making some rectangle shapes on your canvas, and then clipping digital papers onto those shapes to create the separate pieces. I made each rectangle shape 1.5 inches high and 4 inches wide… and then I clipped some fun patterned papers and solid papers onto those shapes. To do this, you simply place the digital paper in the layer above the rectangle shape in your layers palette (see the right side of the following image)… and then use the “clipping mask” feature (Ctrl-G in PSE, or Ctrl-Alt-G in PS).
After I had my rectangle stripes, I added in a paint splatter, a few embellishments, a word sticker, and a title word art ‘carpe diem’. Also, for the ‘carpe diem’ I changed the color from black to the orange and pink using the eye dropper tool to get the exact colors from the other papers/elements in the kit.
This is how the card looked in PSE with the layers off the right; you can see them in the white boxes…
EXAMPLE 3
Lastly, I also created a fun 4×6 card using the digital brushes from This Life March, which can be found in Juno Designs’ shop at The Digital Press. I used a bunch of the stamps/brushes found in that collection to create a few clusters on my card…
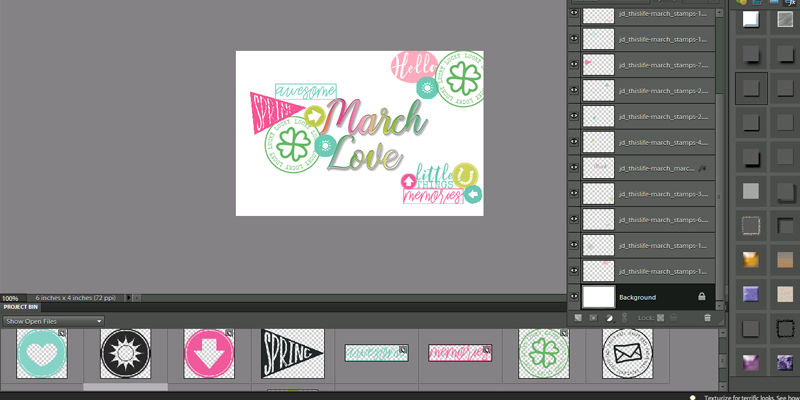
As you can see, it’s so easy to create your own custom cards using photo editing software and the papers, elements, and brushes/stamps you find in your own digital stash! I hope these journal card examples, above, will inspire you to stretch your own kits and use them in new and creative ways!

About the Author Sabrina is married to a hard-working man and has two rambunctious kids, nicknamed Captain and Sunshine. She spends every free minute creating at her crafty space. Digital layouts, hybrid layouts, project life and just anything memory keeping. She also loves to read, kickbox and go a bike ride.
