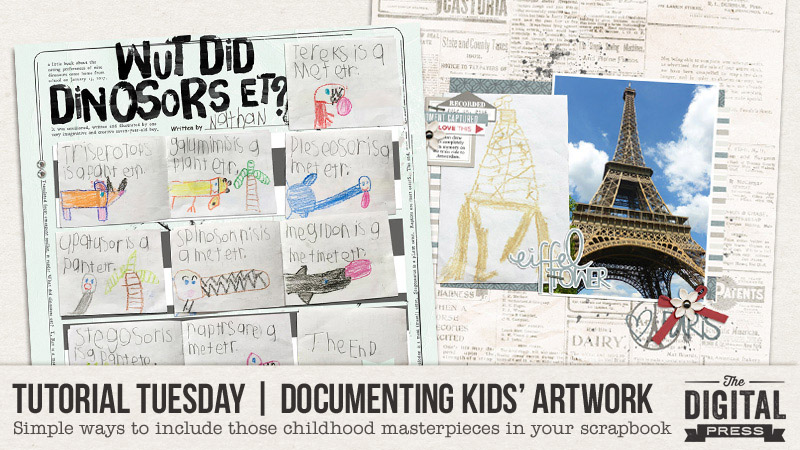
If you’ve got children, you’ve probably also got an ever-growing assortment of art projects slowly accumulating dust and fading in the sunlight somewhere in your house.
You’ve probably also decided — maybe more than once — that it’s time to organize said pieces, and/or *gasp!* archive them into the recycling bin. Today, I am here to share a couple of ideas about preserving these amazing masterpieces (a.k.a. glimpses into our children’s lives at a certain age), while simultaneously reducing the clutter associated with this endless stream of kids’ artwork.
STEP 1: RECORD IT
How? When new artwork comes into the house, I photograph it. I do this for all things I think I might want to keep — drawings, handwritten stories, paintings, decorated bags… all of it. I try to do this immediately (or at least within a day or two), because then the art hasn’t had time to get damaged by sunlight, dirty fingers, angry siblings, the robot vacuum, being stuffed between sofa cushions, left in the bathroom, misplaced or (let’s admit it) recycled in a fit of clutter-induced pique.
I usually try to photograph artwork mid-day, and I do it indoors in indirect natural light so there are no harsh shadows. I lay flat pieces on the floor, and photograph from directly above, usually against a background that’s a different color than the artwork so that it is easier to extract in Photoshop (if desired). For dimensional pieces, I try a variety of different angles to capture the depth and/or texture of the piece. Once I have my photos, I can take my time deciding how to archive them without having to worry about the artwork degrading or disappearing. This also allows our family the ability to enjoy the originals for as long (or short) a time as desired.
While I prefer to photograph my kids’ artwork… there are also other methods that can be employed. If you own a scanner, you can always scan the flat pieces. There are also plenty of apps out there that you can use to “archive” artwork, but I’ll admit that that particular avenue hasn’t ever held as much appeal to me. Occasionally we’ve had cute little pictures turned into tangible items such as note cards, magnets, or pillows… and/or we’ve framed our favorite finger-paintings… but in general, I much prefer photographing everything and using those photos in my memory-keeping. Shoving the old artwork deep into the recycling bin before the kids wake up seems a bit heartless, and so the photography-to-scrapbook method as worked out to be a fantastic compromise.
STEP 2: DOCUMENT IT
Once you have your artwork recorded, there are a handful of different things to do with the photos to get them off the computer and into your scrapbooks. Here are just a few ideas…
- Scrapbook an entire page to showcase a specific piece of art
- Use a single piece or artwork to support a page about some aspect of your child’s personality (or even about an event)
- Turn a single piece into a pocket card and include it in a weekly or monthly summary page (or an “All About Me” page)
- Accumulate pictures of artwork over time, and then have them all printed and bound into a single photo book that’s all about the art
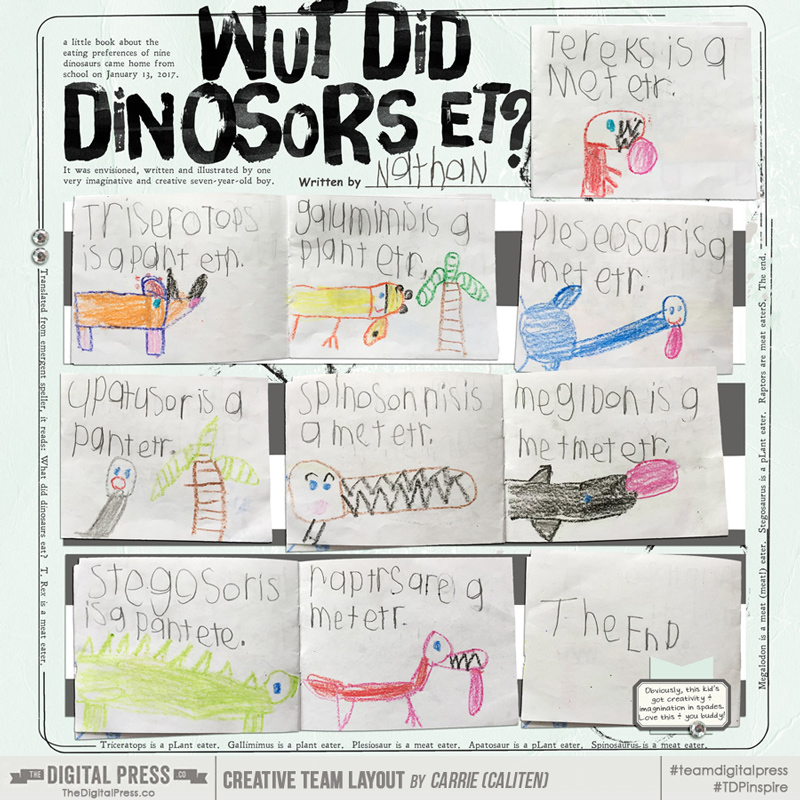
My kids (and others) enjoy seeing their creations incorporated right into our family albums. Recently, for instance, I made this page about a little book my son recently made at school…

To create the above page, I individually photographed each two-page spread of his book, and then I extracted the photos in Photoshop (I also extracted the “written by” line and name from a photo by removing the white background). If you look closely, I also included a “translation” of the text in the border; be sure to include a translation or explanation if the subject matter isn’t immediately apparent, and/or if your audience isn’t fluent in “emergent speller.” 🙂
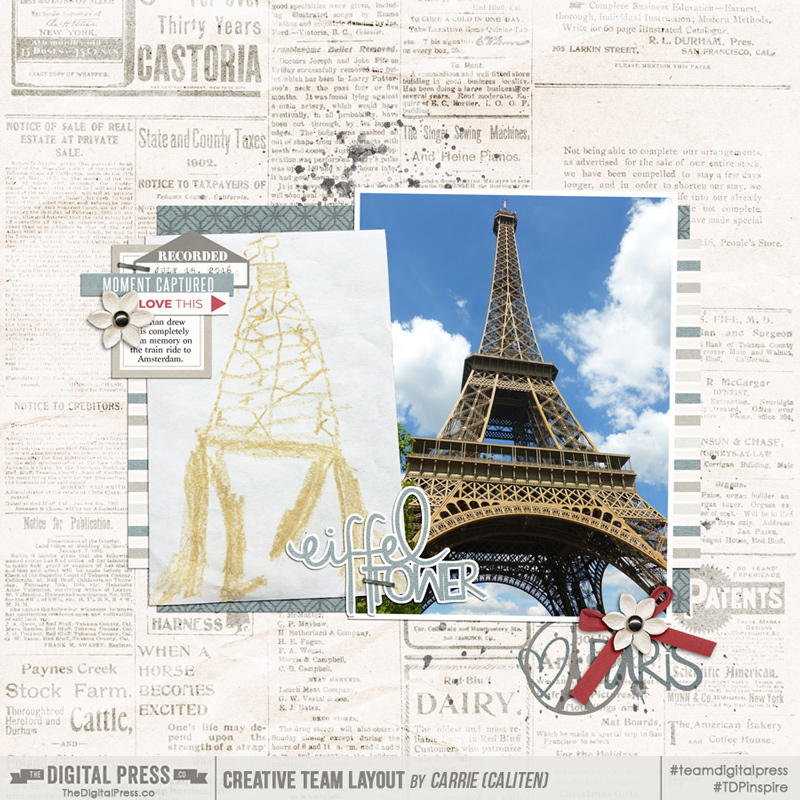
This next page highlights a single drawing, as well as the original photo that inspired it. I used a similar extraction technique on this picture…

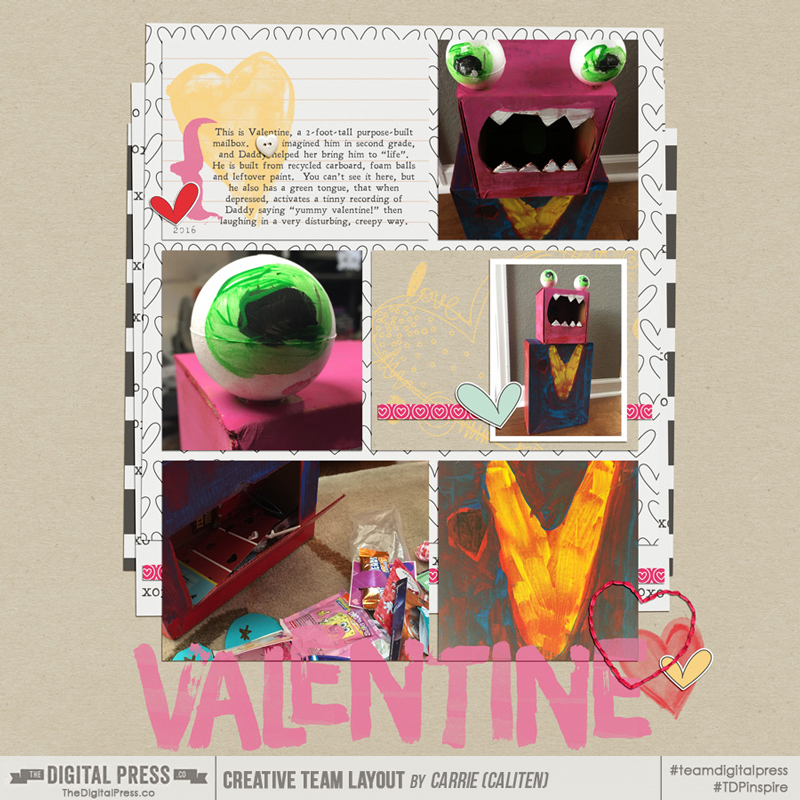
Finally, this next one highlights the mailbox my daughter dreamed up and constructed (with recyclables! and a little adult help) for Valentine’s Day. I love the detail images, such as the eyeball and the painted heart (“it’s a v-neck sweater,” I was later informed).

The artwork photography technique also works well for a host of other types of kids’ art, including…
- Dimensional ephemera (like egg-carton caterpillars, foam-ball-and-pipe-cleaner ants, decorated rocks, and Valentine mailboxes, as shown above)
- Artwork items that you want to record in multiple spaces (say, in both a family album and in a child’s album… or even one you send out to the grandparents)
- Anything made out of colored construction paper
As you can see, though… it doesn’t really matter which method you use, as long as you record and document it. Whether you photograph and scrap your child’s artwork to preserve color, prevent damage, reduce clutter, record a memory, or capture a moment in time… the general idea is to get it photographed and get those pictures scrapped before the memories are faded just like the construction paper they were created on.
Including your kids’ masterpieces is simply another great way to document your child’s (or entire family’s) story, while also reducing some of the household clutter at the same time. Win-win! 🙂

About the Author Carrie is a creative team member here at The Digital Press. She and her family enjoy spending time outdoors, year-round, near their home in Colorado. In addition to scrapbooking and the occasional hybrid home decor project, Carrie also reads voraciously, accumulates fabric, makes soap, brews beer, grows hops, and tries to keep indoor plants alive.

LOVE this article! Thanks for sharing!