Category: Inspiration

Realistic Washi Tape

header


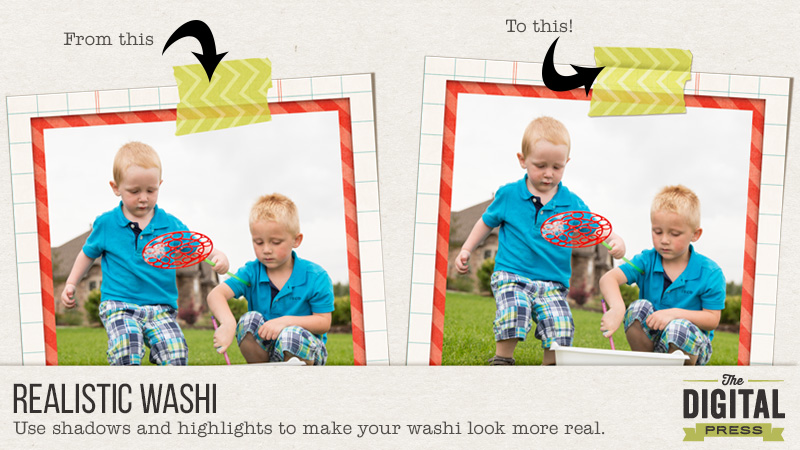
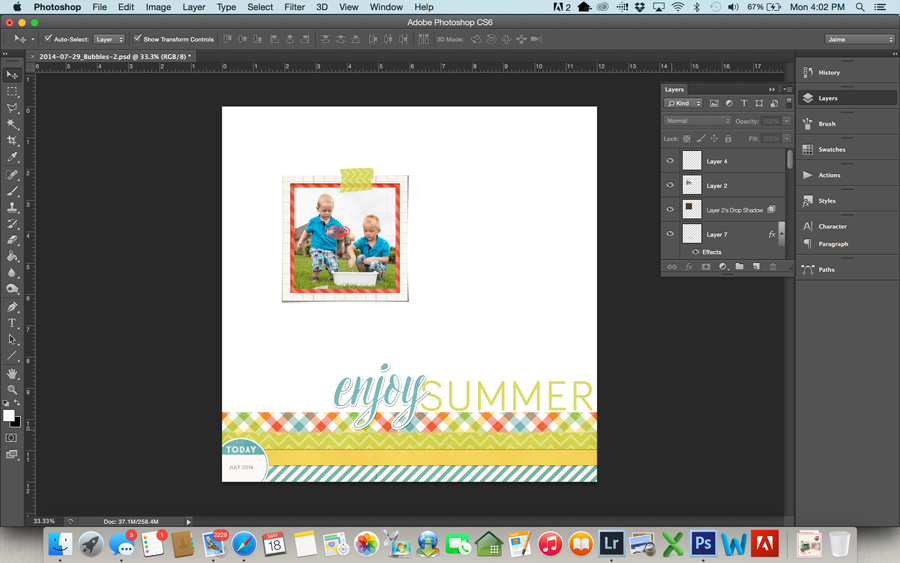
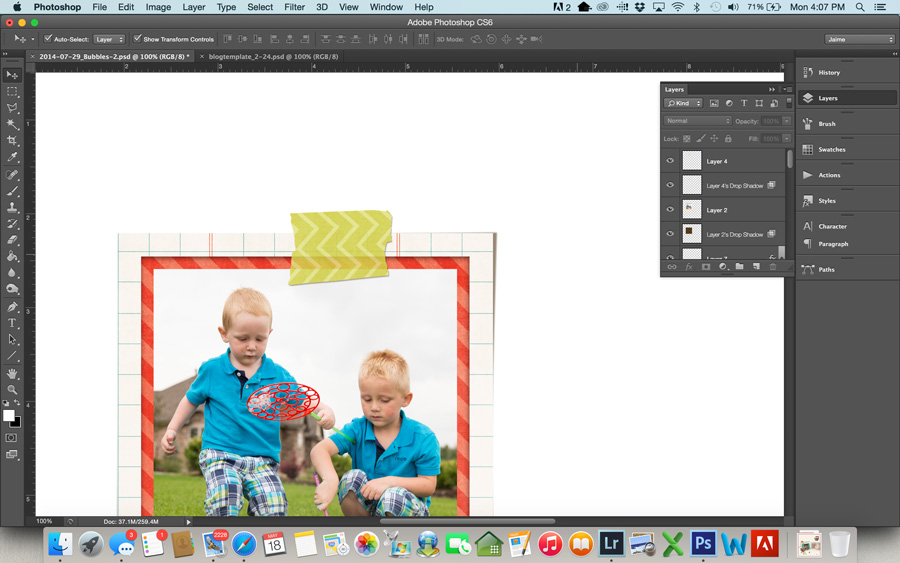
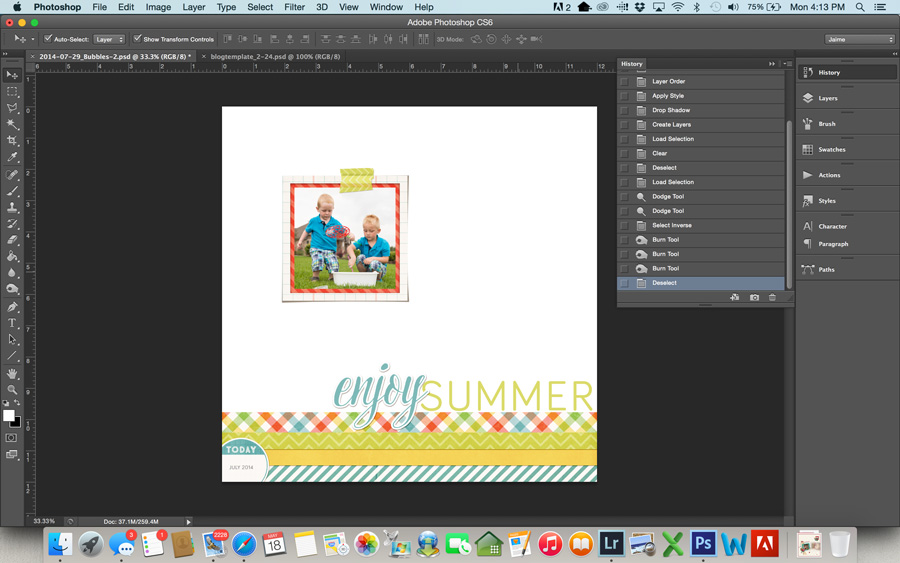
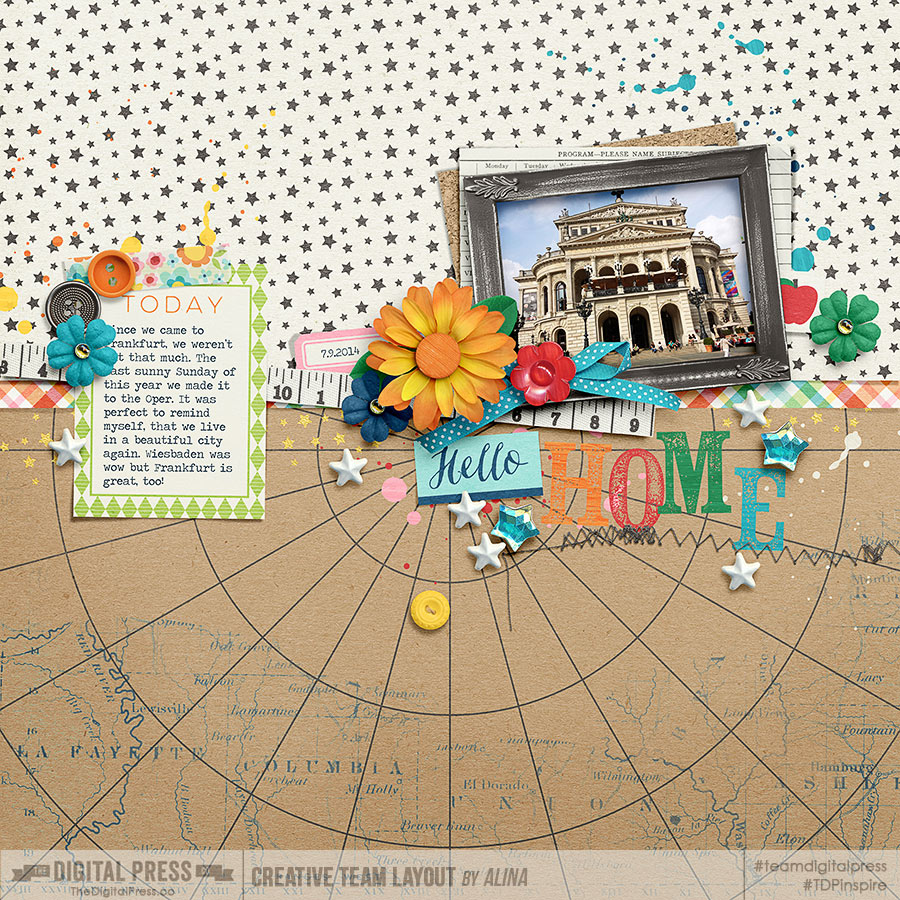
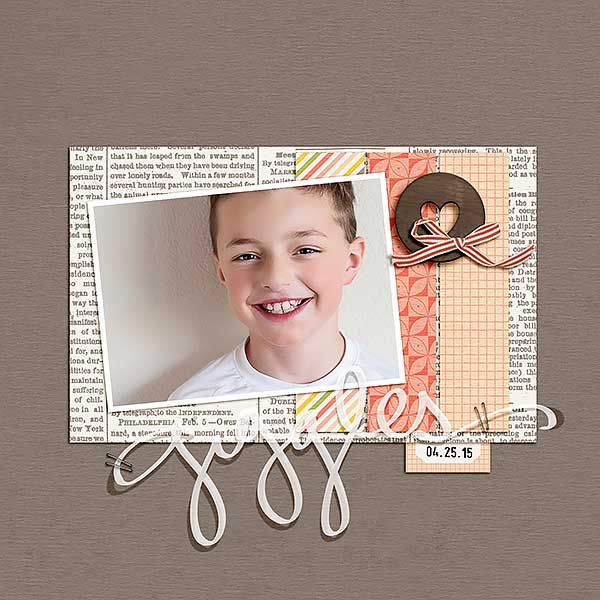
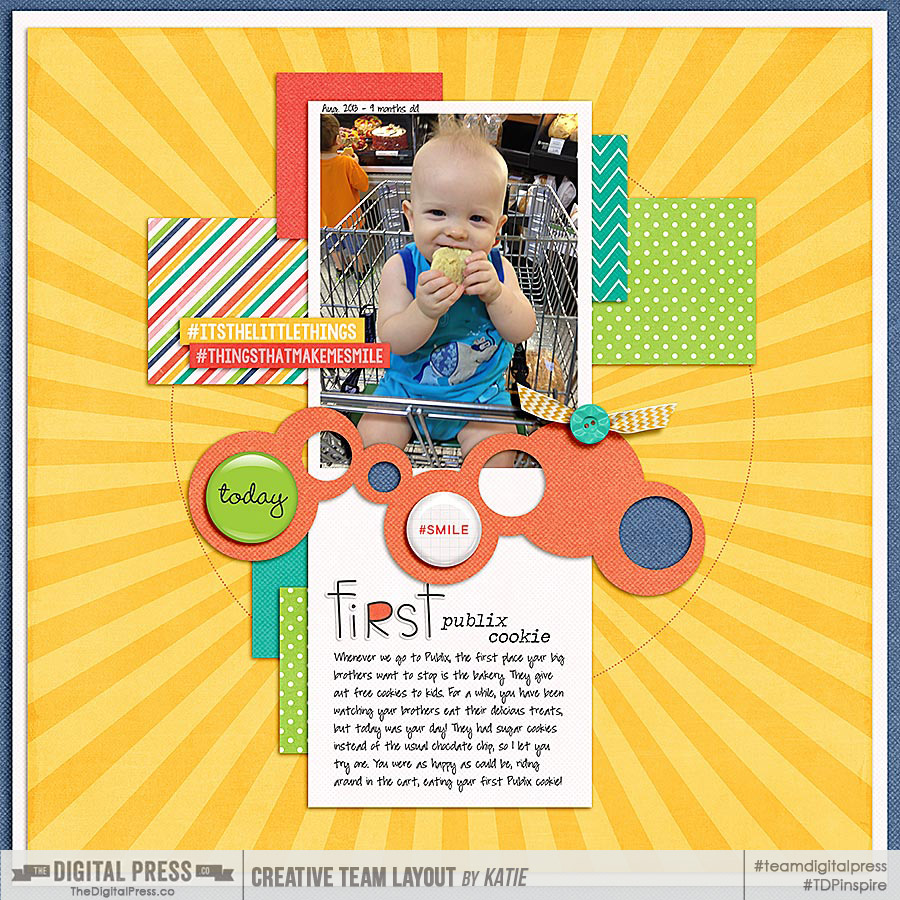
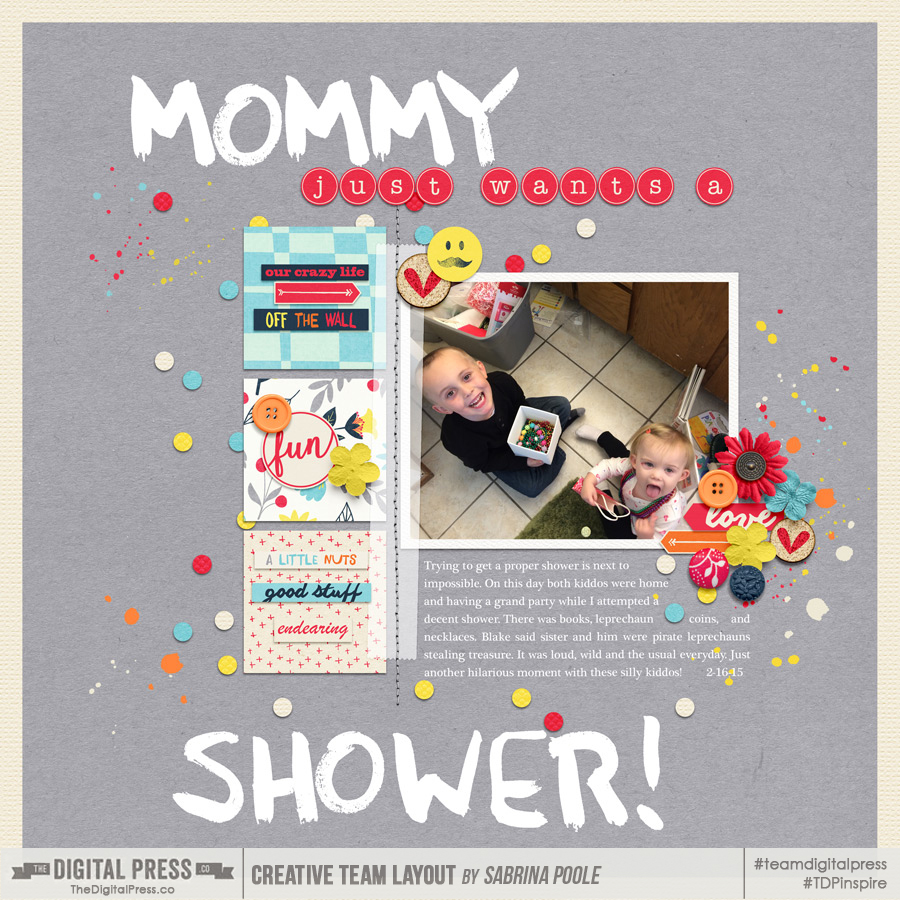
Washi tape is probably one of my very favorite elements to scrap with. I love it both in real life and in digital form. In this tutorial, I’m going to show you how to use shadows and highlights to make your washi tape look a bit more realistic on your layouts. I’m going to use this layout below. I have everything finished on it, and the washi placed. The only thing left to do is add shadows to the washi tape. You can see here that it just looks a little flat with no realistic dimension.


1


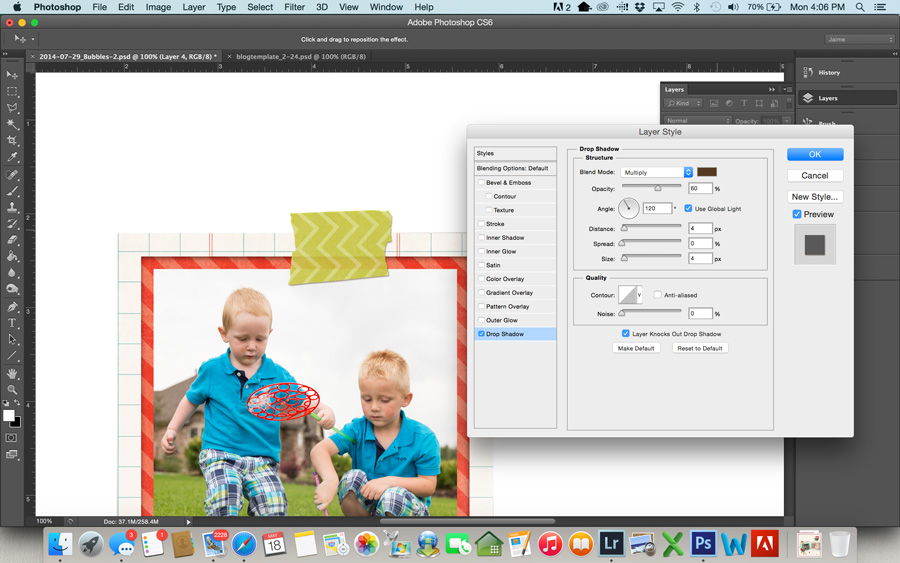
  • First, add a basic drop shadow to the washi tape. The settings below are what I used, but use whatever suits your preference. I typically prefer a small shadow on washi tape, because if you look at a piece of real washi tape on paper, it doesn’t come off of the paper much. There’s not a lot of shadow there.

2


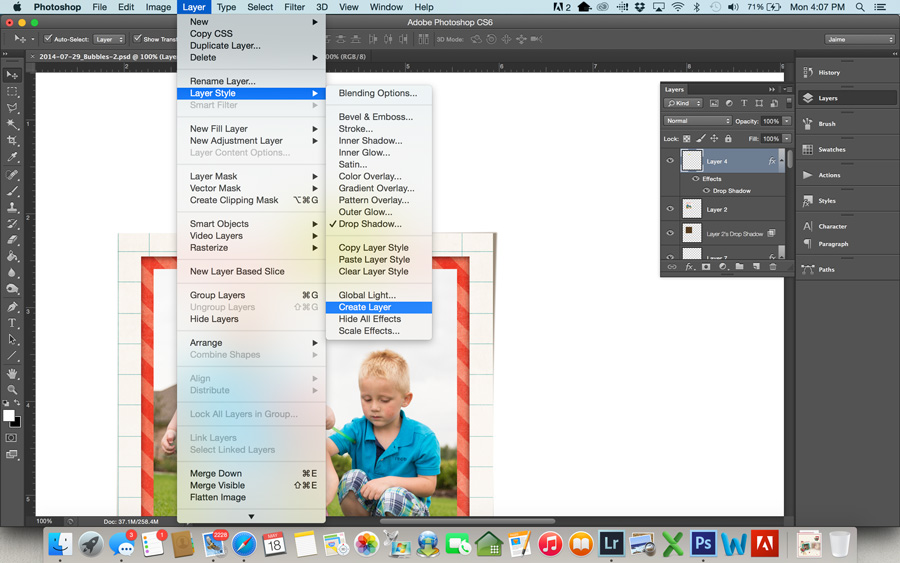
  • Now, we’re going to put this shadow on its own layer. To do this, go to Layer>Layer Style>Create Layer. This will put the drop shadow on its own layer below the washi tape.

3


  • Even this shadow makes the washi look better than it did, but the shadow darkened the washi tape. I like to preserve the transparency of the tape. To do this, load a selection of your washi tape layer by using Command-click (or Control-click for Windows) on the tape layer in the layers palette. This should give you marching ants around your tape. Now click on the shadow layer in the layers palette, and hit delete (make sure you are on the shadow layer before hitting delete… this is important). This will delete the shadow that sits directly beneath your tape and bring back the transparency of the tape. (You can use a layer mask if you’d rather not permanently delete it, but I never have wished I had it back, so I just go ahead and delete.)

4


  • Command-d (or Control-d on Windows) will deselect the tape.

5

I think this looks good, and you can stop here if you like. I have left my tape with a basic shadow like this sometimes when I am trying to save time and get a page done. If you want to take it one step further to make the washi tape really look like it’s stuck on your page, follow the steps below.

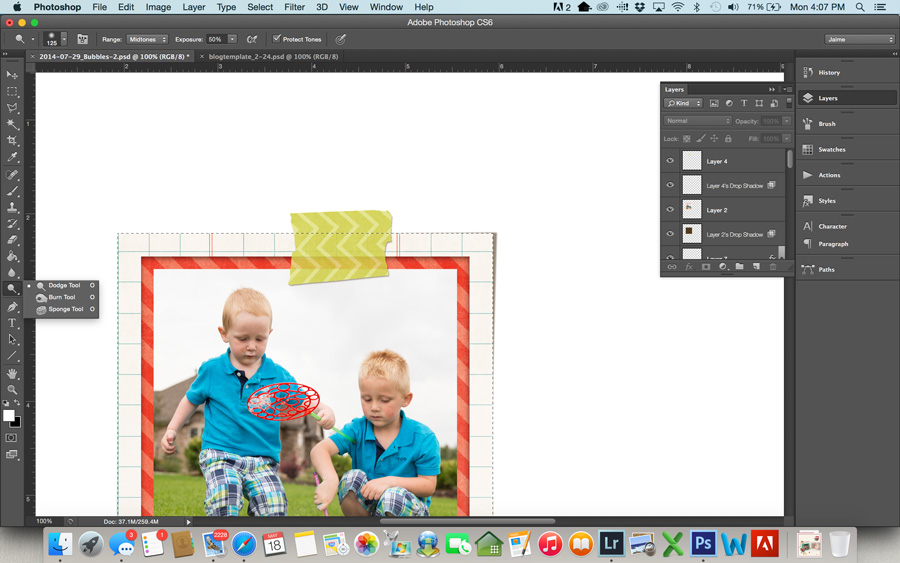
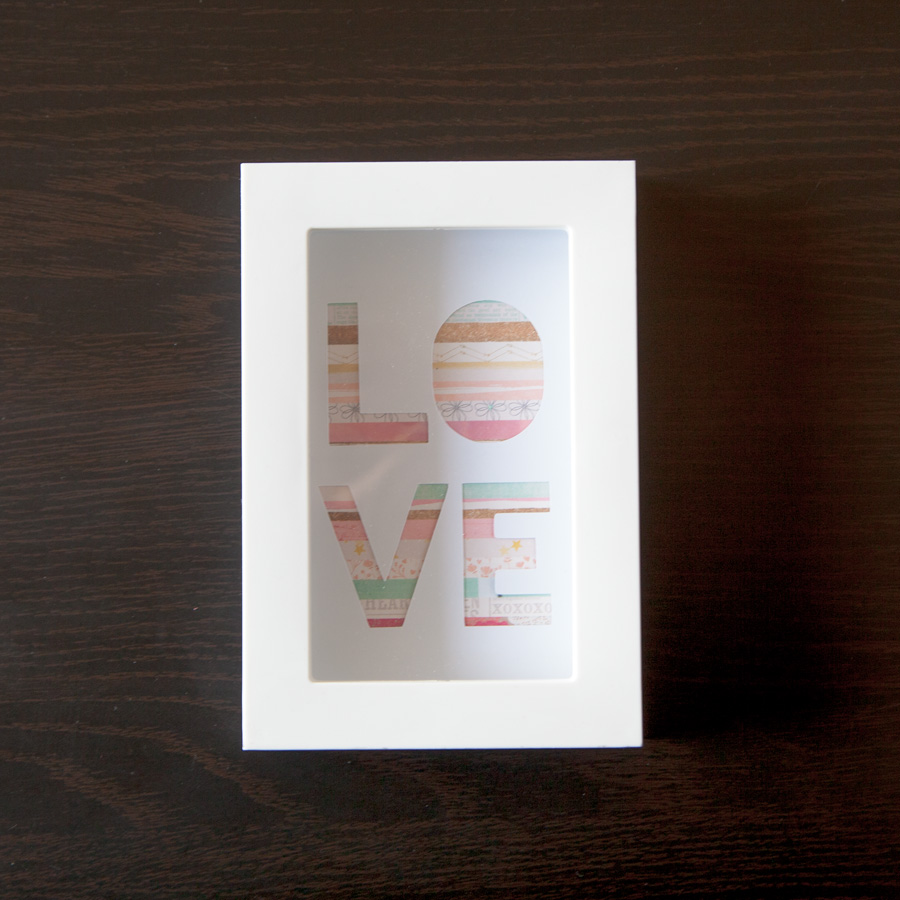
  • First, you need to select the item the tape is holding down. In my layout, it’s the framed photo of my boys. Command-click that layer in the layers palette to load a selection.
  • Next, select the dodge tool from your tool bar. At the top of your screen, you want a soft brush that’s big enough to brush over the bottom part of the tape covering the photo. For this particular page, I used a brush size of 125. Set your range to Midtones and the Exposure to around 50%. You may need to play around with this exposure depending on the specific tape and how dark or light it is. Most of the time 50% works pretty well.
  • Make sure your washi tape layer is selected in the layers palette on the right, and brush over the tape 2-3 times. This highlights the part of the tape that is “stuck” to the photo.

6


  • If you think about pressing a piece of tape over a photo in real life, it’s going to leave a little crease where photo meets the background page. In this next step, we’ll create this look digitally.
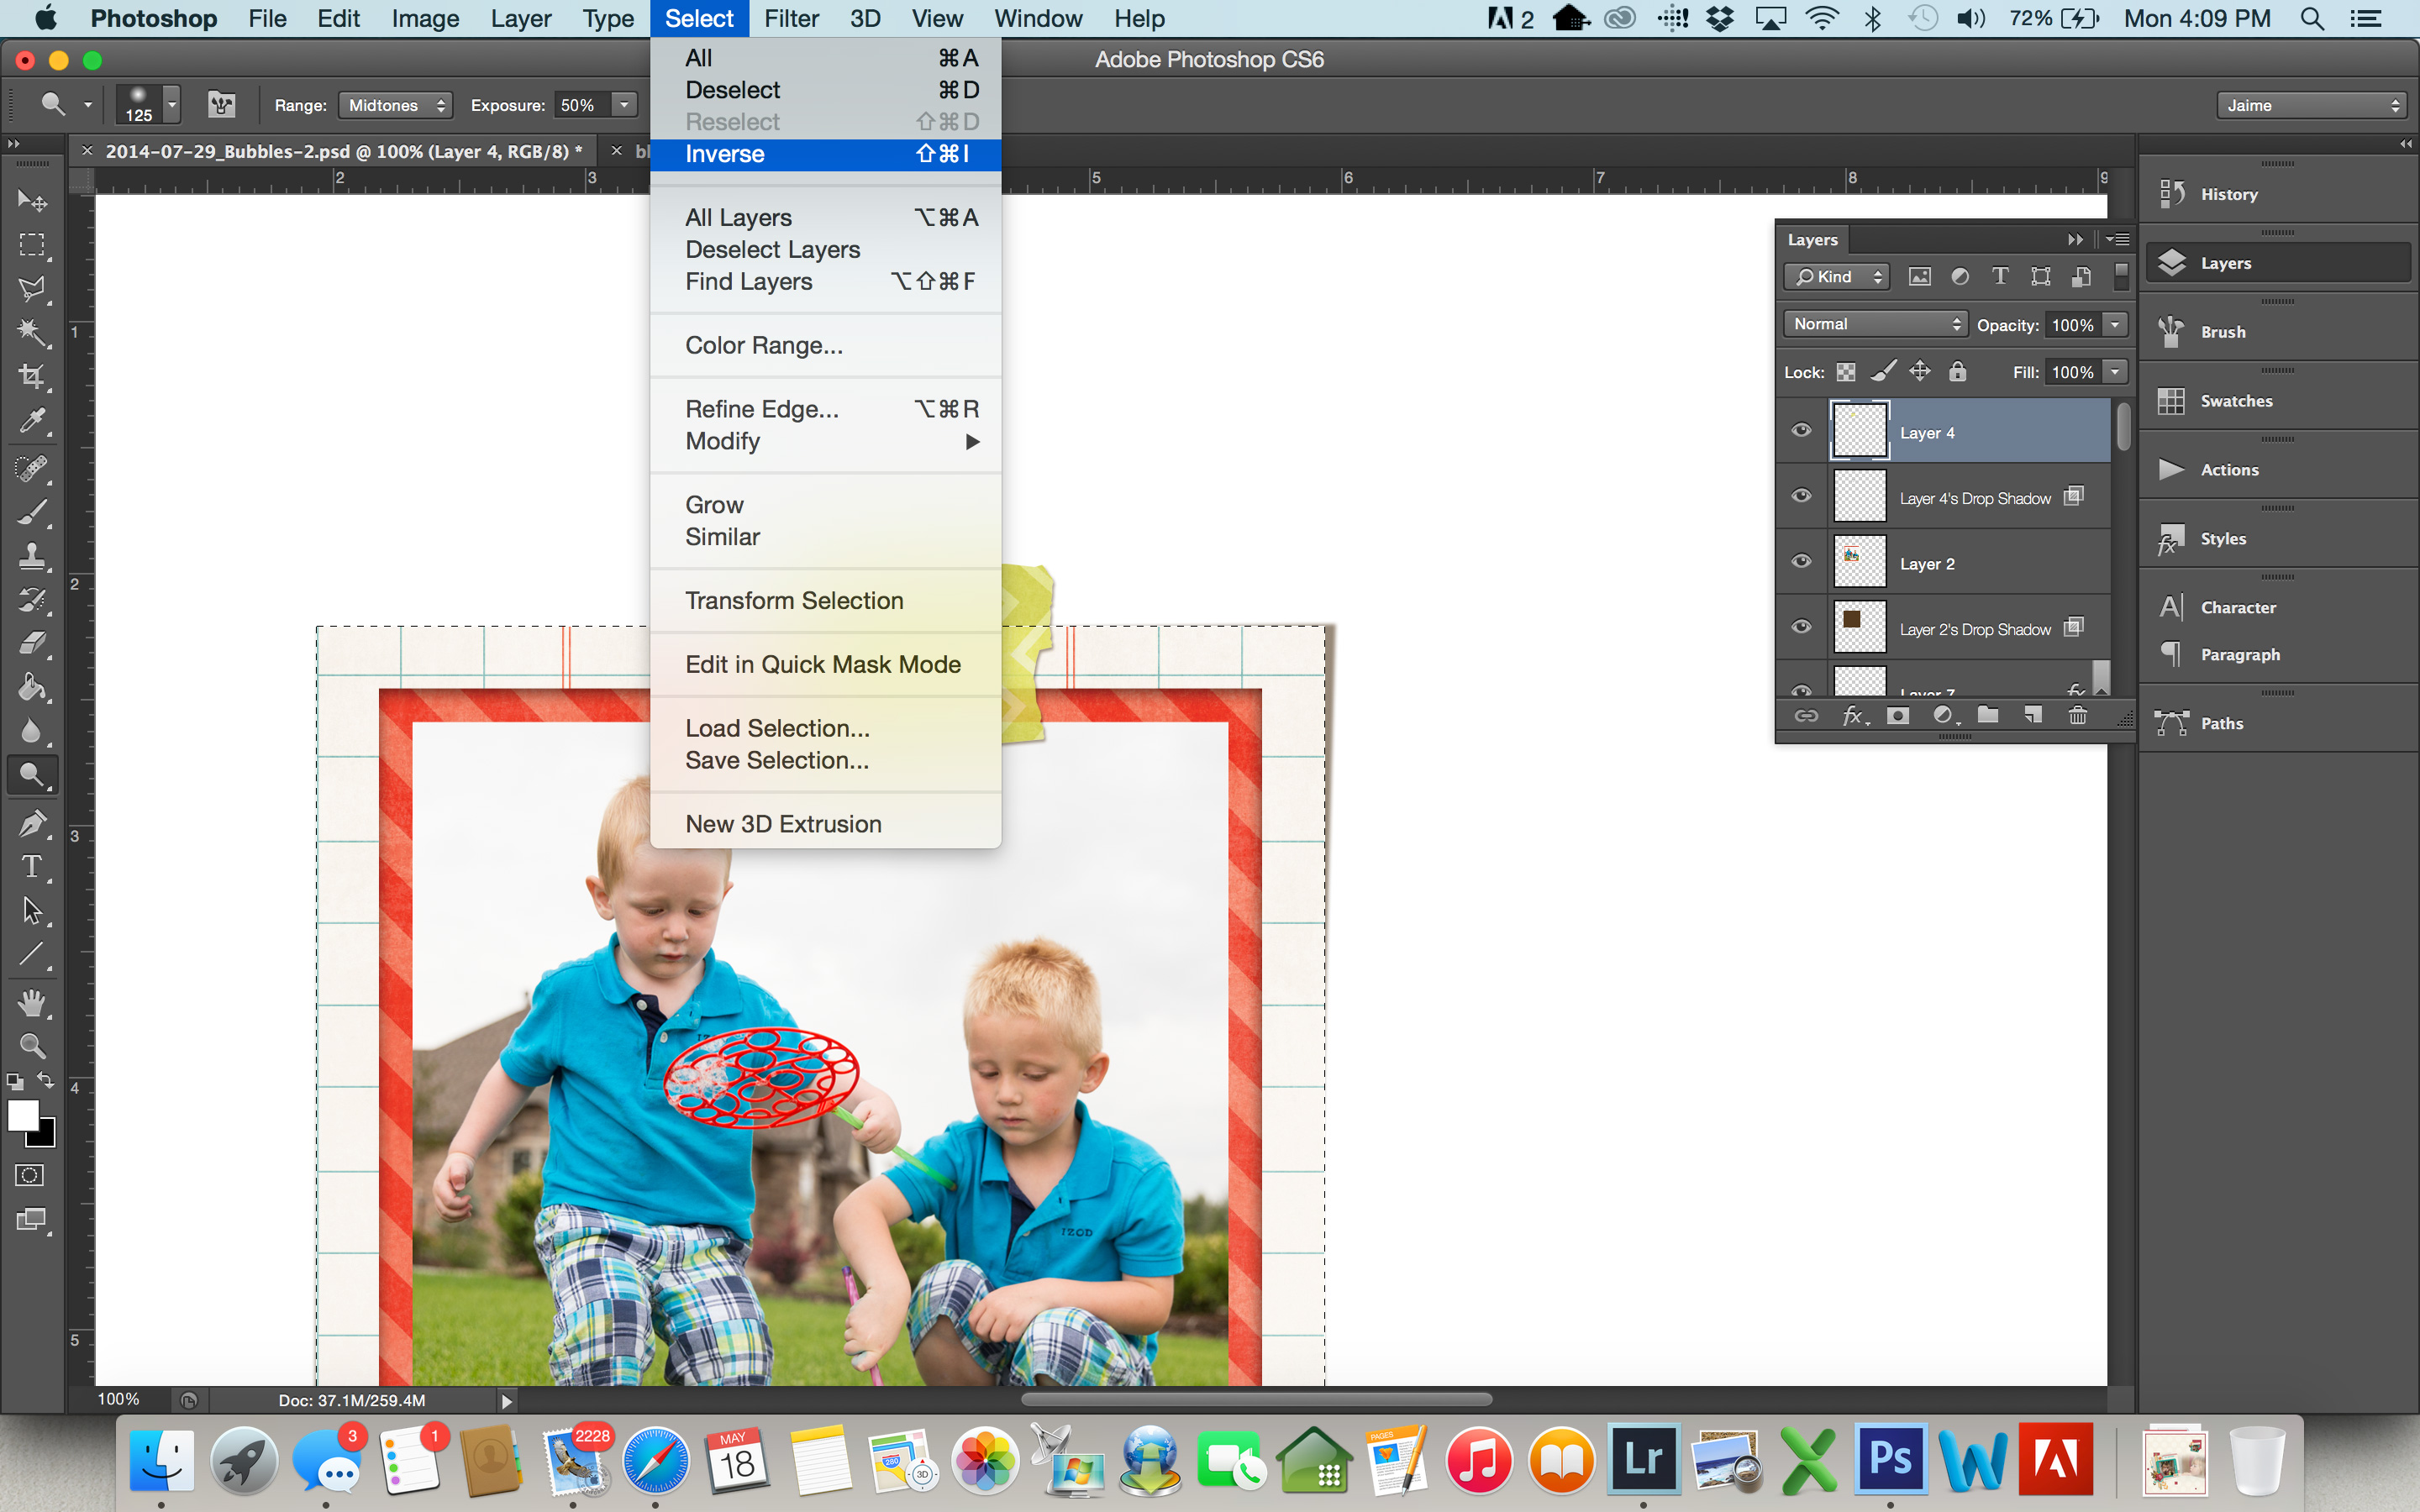
  • Your frame selection should still be loaded (meaning you have marching ants around your frame). If it’s not, select it again. But now we want the tape that outside of the frame area, so we’re going to select the inverse of what is currently selected. To do this, go to Select>Inverse. It won’t look any different, but now everything except the frame is selected.

8


  • We’re going to use the Burn tool to add some shadows to the top part of the tape where it is “sticking” to the page. Select the burn tool from the toolbar.
  • This time you want a pretty small brush… just big enough to shadow the tape right at the edge of the photo. I used a brush of size 35, and for this particular tape I set my exposure to 25%. If the shadow isn’t as dark as you like, you may want to change this to 50%. Use the burn tool on your washi a few times along the edge of your selection, until the shadow is as dark as you want it.

9


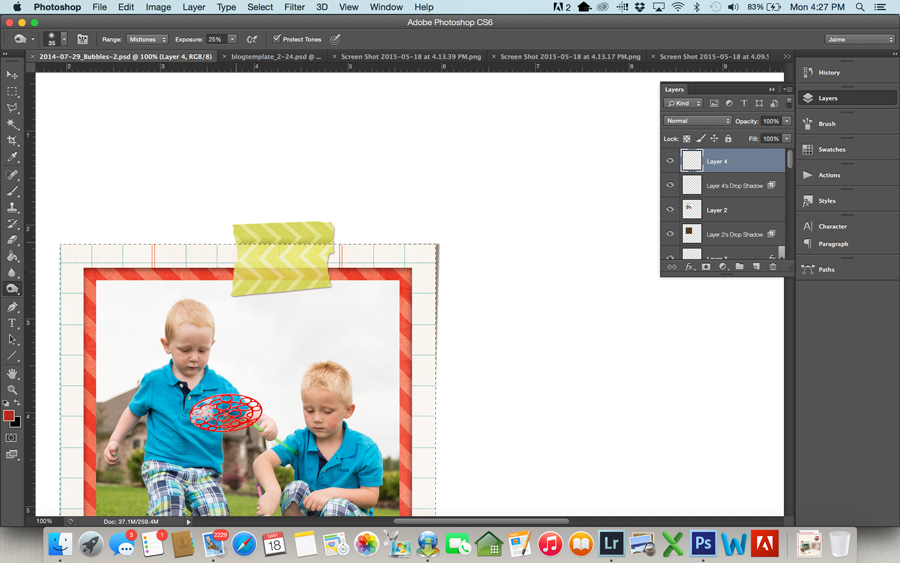
  • Command-D to get rid of your selection, and you can see the end result.

10


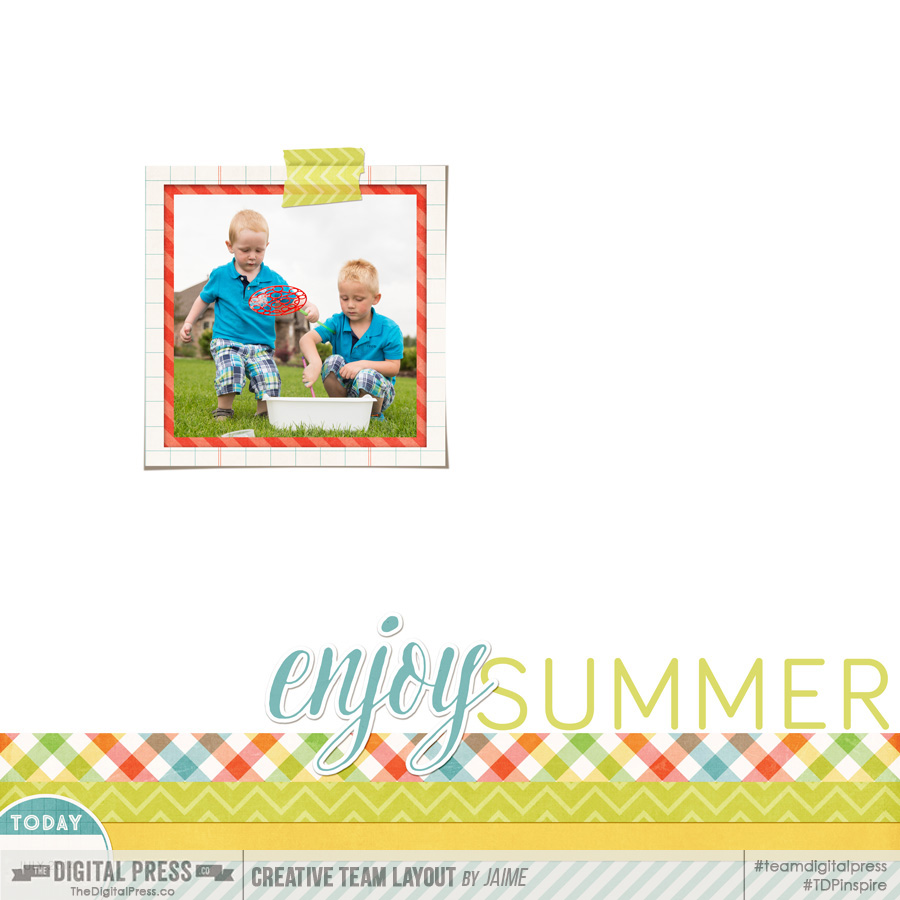
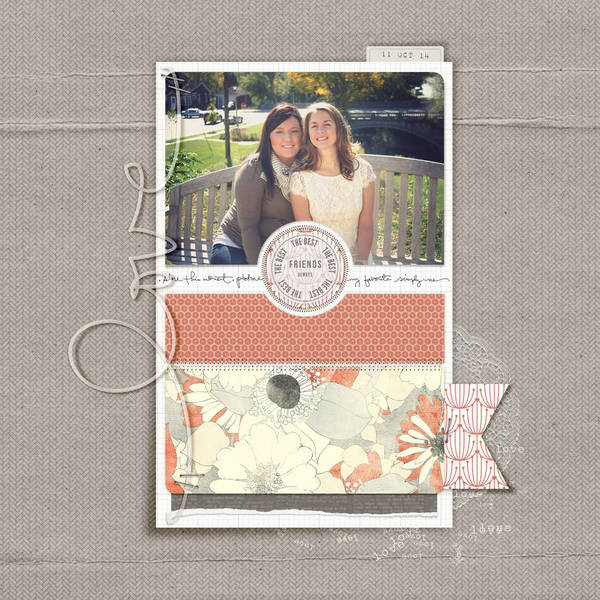
Here’s a look at the final layout:

Layout using Summer Bucket List by Amanda Yi Designs and Wishing Well Creations


JaimeAbout the Author: Jaime is a member of the creative team here at The Digital Press. She is a stay-at-home mom to 4 boys and 1 girl. When she’s not chauffeuring, volunteering at school, or helping with play costumes, she likes to digitally record her family’s memories, improve her photography skills, and read (there’s always a stack of books on her nightstand).

Thoughts on your Real Home

Thoughts on Your Real Home
Hello Scrappers! As I write my first blog post for The Digital Press, I ‘really’ couldn’t be more excited! 🙂

As I thought about this month’s word – REAL – it got me thinking about places. Places that are real…places where “I” am real. And there’s only one place that fit the bill… it took me back to my home. The place where I can really be me…no pretenses…just at home with myself…with the ‘real’ me. My home…where I come back to for love and for comfort…where I am welcomed for who I am. My home…which isn’t perfect ….but puts me perfectly at ease. I am sure you would agree that there’s no place like home 🙂

Another thing that also became clear to me is that in my pages, the stories about my home, were the ones that were really untold. In the hum drum of capturing my everyday life with my toddler, I had forgotten about the site where all the action takes place 🙂

That is what I set out to do initially that got me thinking about ‘Home’.

Is home really a place…a house? Where all our memories are created? Where each corner is full of ‘that incident where…’

Or, is it about the city? I know for myself that we’ve moved around so much that just a mere mention of some places tugs at the heart..like really does!

Or finally…and most importantly, is it about the people? No matter where we are…when we are with ‘our own’ it doesn’t matter the place, it feels like home.

Well, after all these heavy…soul searching thoughts (I was also getting tired with all the thinking by that time :)), I realized that these are all stories that were left uncaptured by me so far and I need to get started with capturing these very important snippets that make me who I am today.

My first layout was about the first city I called home..the city where I grew up…the city of my friends and family.

Thoughts on your Real Home

In this process I came across some layouts that also beautifully captured my thoughts. Below is a layout by CT Alina where she talks about the city where she lives now…

Thoughts on your Real Home

In the next layout, CT Amie beautifully captures the sunlight streaming through her home…both through her picture and through her words…

Thoughts on your Real Home

Last but definitely not the least 🙂 … is the layout by CT Pamie. She captures her gorgeous house here.

Thoughts on your Real Home

I hope you feel inspired by some of my thoughts. I’m hosting a challenge over in The Digital Press forum today and I’d love for you to share a little about whats home for you and where you can be your REAL self.  The challenge can be found here: May 18: Thoughts on Your Real Home


all photos 560 edit

About the author: Pallavi Sureka is a wife and newly designated stay at home mom to 3 years old Rajveer. She currently lives in Mexico City but her family moves around a lot. She has previously lived in Calcutta, Pune, San Francisco, Chicago and London. She reflects all these places in her pages as she captures her everyday stories.

May 13 Find the Real You Through Inspiration Scraplift Challenge

blogtemplateMay


Sometimes, I have a hard time starting off with a black 12×12 canvas. I stare at it, close my eyes and try to imagine it finished, and then I open my eyes and I got nothin’! When I’m at a loss for creating a layout, I like to browse through my inspiration folders and the galleries looking for the perfect layout to scraplift. There’s a line between taking a layout and using it for inspiration and well, just plain copying it exactly. To really make your layout unique when scraplifting, identify the parts that you are drawn to in the first place. Is it the overall design? The use of color or elements? What exactly made you choose that particular layout to lift? Next, think about how to take the items you love from the layout you are lifting and making them your own. A true to you layout is far better than a just a copy of someone else’s layout. Of course, it will look very similar, but you’ll love it even more when you make it real!

I choose this layout by Amanda. I am initially drawn in by the design, but even more, I absolutely LOVE the use of the vellum word art stapled on top.

October1

Although, I lifted the use of vellum word art, I changed up the design a bit and used a different set of papers and elements to make my layout my own.

04.25.15-giggles2

Your challenge is to make a new layout using a layout from The Digital Press gallery as inspiration, but make it your own.

Now, for the rules…
1. Pages must be created using 100% TDP Products and loaded in the gallery no later than midnight EST on May 31, 2015.
2. Please link your gallery listing in this thread: May 13 challenge thread
3. Link your comment in this thread in the monthly challenge tracker thread. You can find it here: May’s Tracking Thread.
4. Have fun!!!


FarrahAbout the Author:  Farrah Jobling is a member of the Creative Team here at The Digital Press.  She lives in Denver with her amazing family, Mike, Nicholas (8), Claire (5) and Hope (7 mo puppy).  She works from home as a photographer and enjoys scrapping her personal photos.

Scrapping Imperfect Photos

Scrapping Imperfect Photos
Hi scrappers! I’m here today to talk about those less than perfect photos that we all have. You know what I’m talking about, those blurry, out of focus, grainy, or weirdly lit photos that you snapped trying to capture a moment. Sometimes I just don’t want to haul my big DSLR camera with me and sometimes I just miss that perfect shot. So, what is a scrapper to do? I say find a way to make those photos work in your layouts! Here are some strategies you can turn to when your photos are less than ideal…

1.  Make it black and white – Grain, noise, and less than perfect color can often be fixed or improved by converting your photo to black and white. I use this strategy often when dealing with less than perfect images, especially from my phone.

2.  Make it small – If I have a photo that I love but that is blurry, I often include it on my layout but make it small so the imperfections are less noticeable. This works especially well if you have a larger photo from the same event that is in focus. Then, you can include the small photo along with the larger one and still include the special memory.

Here’s an example of this strategy by Tiffany. She made these photos of birds small and cropped way in, and it worked wonderfully!
Scrapping Imperfect Photos

3.  Blend it – Use a mask for your photo or blend it with the background.

4.  Use strategically placed elements to cover up parts of the photo – Do you have distracting parts of your photo that you can’t crop out? Use a well-placed embellishment or cluster of elements to hide it!

Here’s a great example by Stacy where she was working with a scanned photo that lacked in quality. She adjusted the black and white and covered up a trouble spot with an element…

Scrapping Imperfect Photos

5.  Just embrace it! – This is my favorite choice of all! Life is messy and imperfect and sometimes the photo is too special to leave out, even if it isn’t perfect. I try to remember that someday my kids will be looking through their albums and will smile at the moments I have preserved for them. They will never think, “Oh, I wish this photo was a little less blurry” or “Gee, the lighting really could have been better in this shot.” They are going to see the love and wonderful memories that I have captured for them.

Here’s my example of just embracing the photo even when it’s not quite perfect. This photo was clearly out of focus, but it captured a special moment that I couldn’t recreate. I decided I wanted to scrap with it anyway, and I’m really happy with how it came out!

Scrapping Imperfect Photos

I’m hosting a challenge over at the TDP forums this month and I hope you’ll come play along! I can’t wait to see the layouts you are able to create with your less than perfect photos! You can find the challenge here.

KatieAbout the Author: Katie is a member of the Creative Team here at The Digital Press. She lives in Central Florida with her husband and their four sweet but crazy boys. When she’s not dodging Nerf bullets or trying to dig out from under the never ending pile of laundry, she enjoys photography, cooking, going to Disney World with her family, and, of course, digital scrapbooking.

Framed Cutfile

cutframeheader

This time I like to show you a simple way to use your cutfiles for home decor.

First you create a new photoshop file in the size of your frame. Fill it with strips of your pattern paper. They don’t have to be all part from the same collection, you can mix & match the colors just as you like.

2015-05-09 12_23_24-LOVE-CUT

The next step is to add your cutfile to make sure it has the correct size. Pay attention to the actual size of your frame. Even though they say they are made for 6×4 photos doesn’t mean the inside is actually 6×4 big! Mostly they are a little smaller and my frame was quite a bit smaller too.

2015-05-09 12_24_35-LOVE-CUT

save your cuttingfile in black, because that is most easy for the silhouette to trace and open it in silhouette studio. If you don’t have a silhouette you can definitly cut it by hand, but this will take longer.

2015-05-09 12_26_34-Silhouette Studio Designer Edition_ Unbenannt-1.studio3

Then you use the trace feature with the following options:

2015-05-09 12_27_29-

Sorry for the german screenshot, but I guess you can match the words to what you see on your screen. Make sure the file is placed far enough away from the edges of your workspace as we use the negativ space of it and we need a bigger space around it.

Print, cut, assemble and voila, here it is:

cutframe


Anika About the Author:  Anika is part of the hybrid team here at thedigitalpress.com. She loves to travel and use the photos her boyfriend takes (thanks for that!) to scrapbook. Digital, paper and hybrid. When she is not scrapping, she is most likely playing a computer game or in a city searching for a geocache.

Be Real with your Mess

Real Life is messy in all aspects, especially if you have children. I’m sure you have taken pictures of the messes your children or pet or even YOU have made. What have you done with them? For me, I usually decide to scrap a ‘better’ photo or one that makes life look ‘better’. Not anymore, though. This year I am being brave and more real with my scrapbooking. I am documenting life and all the messes that go along with it.

Be Real with your Mess


Mommy Just Wants a Shower- I’m sure most Moms can relate to just wanting a shower without the house burning down.


Be Real with your Mess


This is Our Everyday- Two photos from that week that perfectly define our evenings. laughter, noise and utter silliness.


Be Real with your Mess


Real Life is Messy- My toddler is nicknamed the Tornado Toddler for good reason.


Be Real with your Mess


Lastly, this two pager documents all my favorite messes- literally and in terms of just a busy, messy life.


Be Real with your Mess


This quote sums up how I am approaching the mess of every day life. The actual messes, the long hours, the frustrations and the struggles with raising children.


Be Real with your Mess


So do you think you are up for the challenge of Being Real with your Mess? Head over to my challenge to scrap a page that perfectly captures your messy life.

____________________________________________________________________________________________________________________

Sabrina 
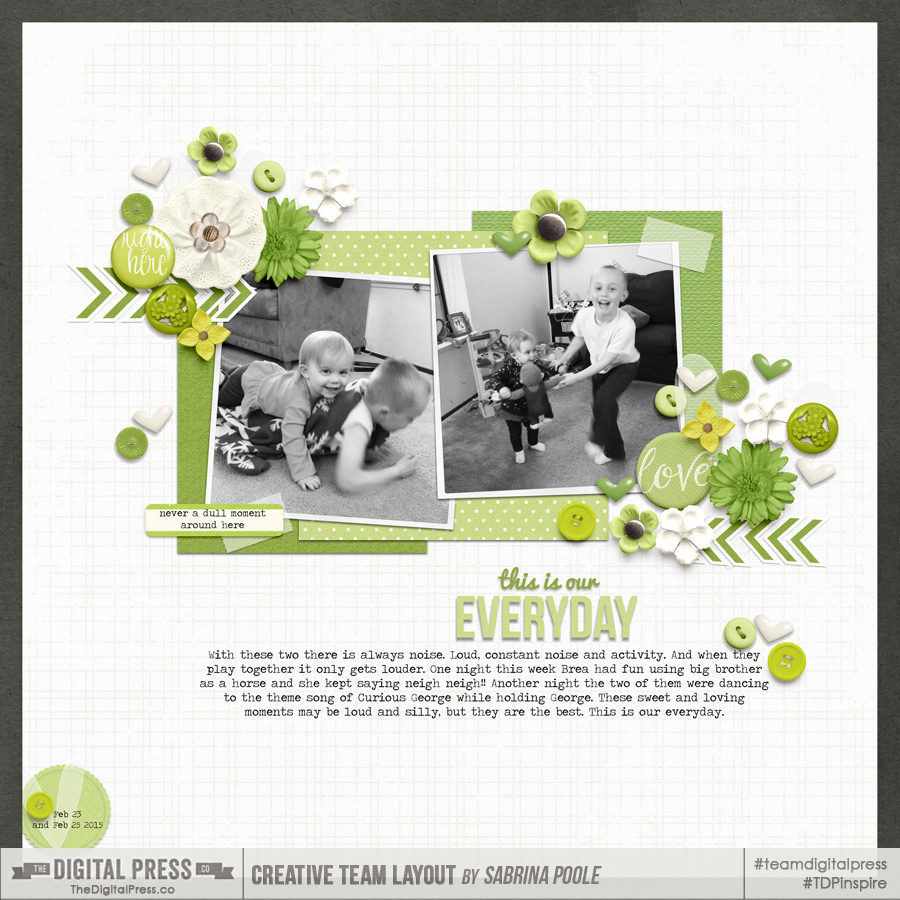
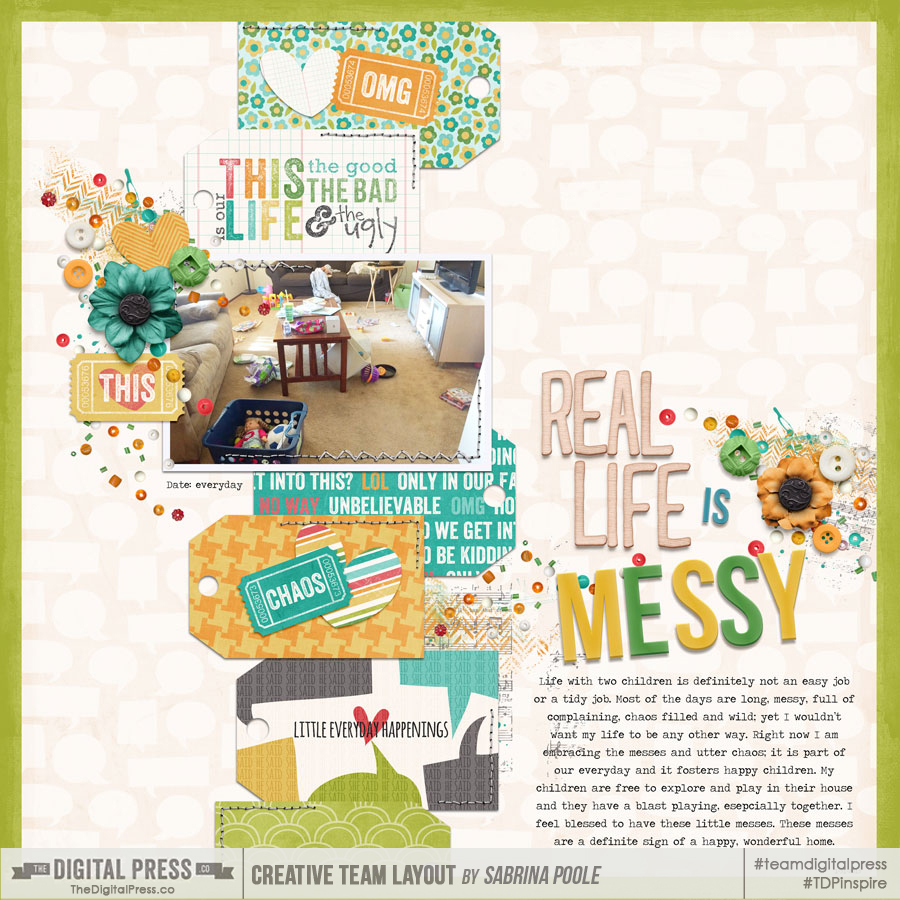
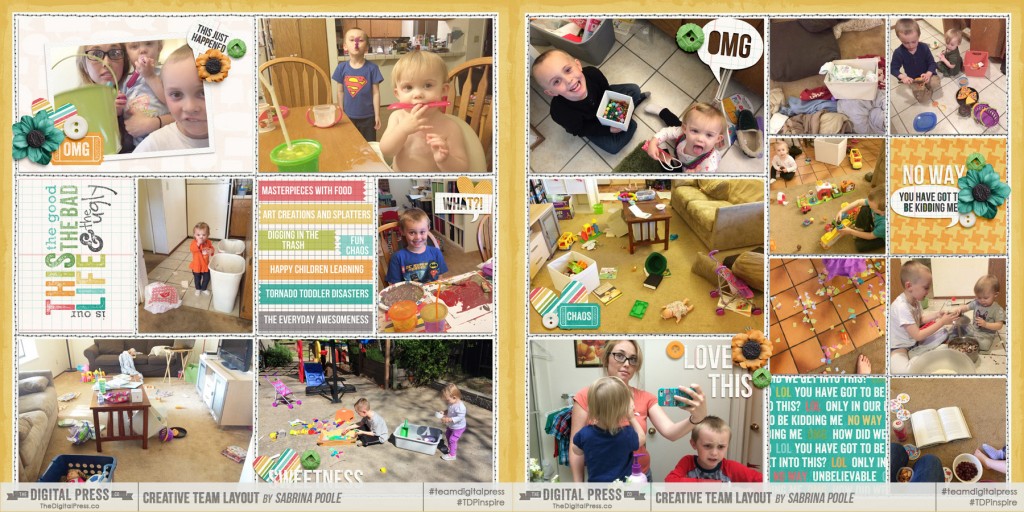
About the Author: Sabrina is a wife and mom to two kiddos- Captain and Sunshine- living in sunny California. When she has free time she loves to do some type of  project whether it is scrapbooking, a string art board, a washi tape project or other DIY project that is usually inspired by Pinterest. Her favorites are creating colorful  layouts or pocket pages.  Another lofty goal she has for the year is reading 100 books.