Category: Inspiration

Listen to what is around you

listen to what is around you
Hey Scrappers! It is Krista Lund back with another blog post!

With 3 small children, my house can become very loud! Everyone has something to say and wants to be heard. I find myself saying and hearing the same phrases over and over.
“Where is your patience?”
“I love you so!”
“How much does Mama love you?”
“I want to watch Monster Trucks.”

My 2.5 year old’s mispronunciations are so cute and I don’t want to forget.
“Fwatch” for watch.
Or the way he accentuates the “ch” at the end of “fwatch” and his mouth makes kissy lips.
Or when he is saying “Guys!” over and over trying to get his older sisters’ attention.

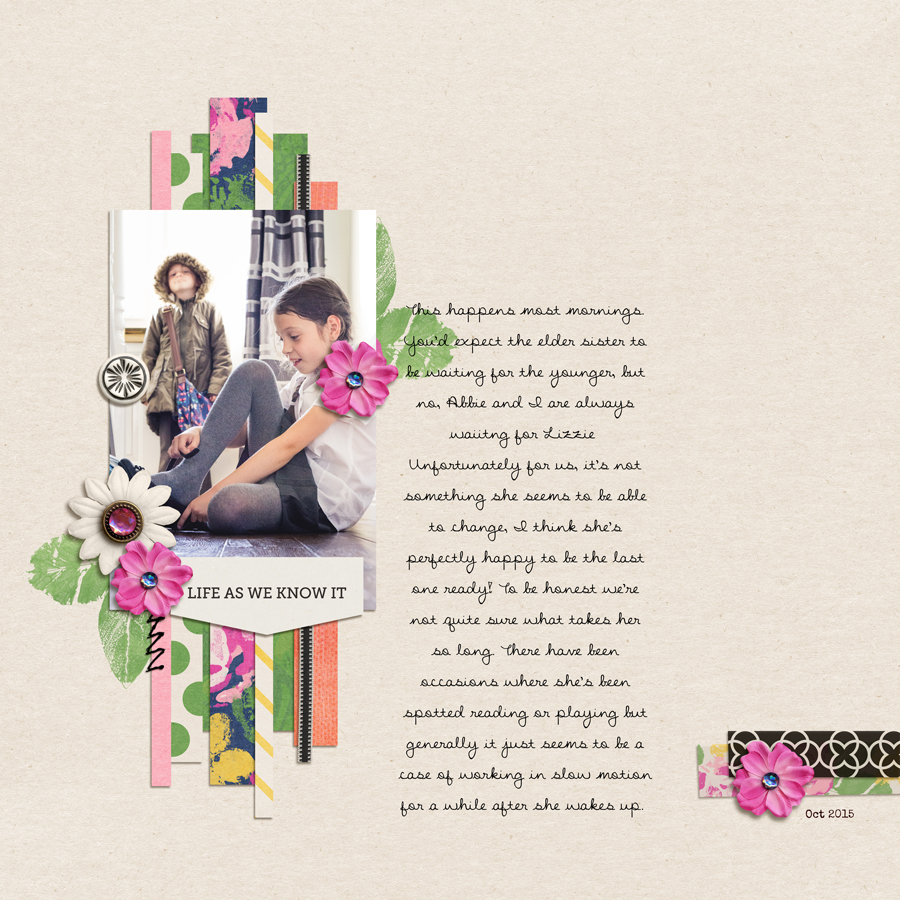
I want to remember and record my Girls (5 and 7.5 years old) playing House with one another and hearing my tone come out of their little mouths.
“Use your words, please”
“It’s ok. Mama is here.”
Or when they say “Ok, pretend I am Chelsea and you are Paige.”

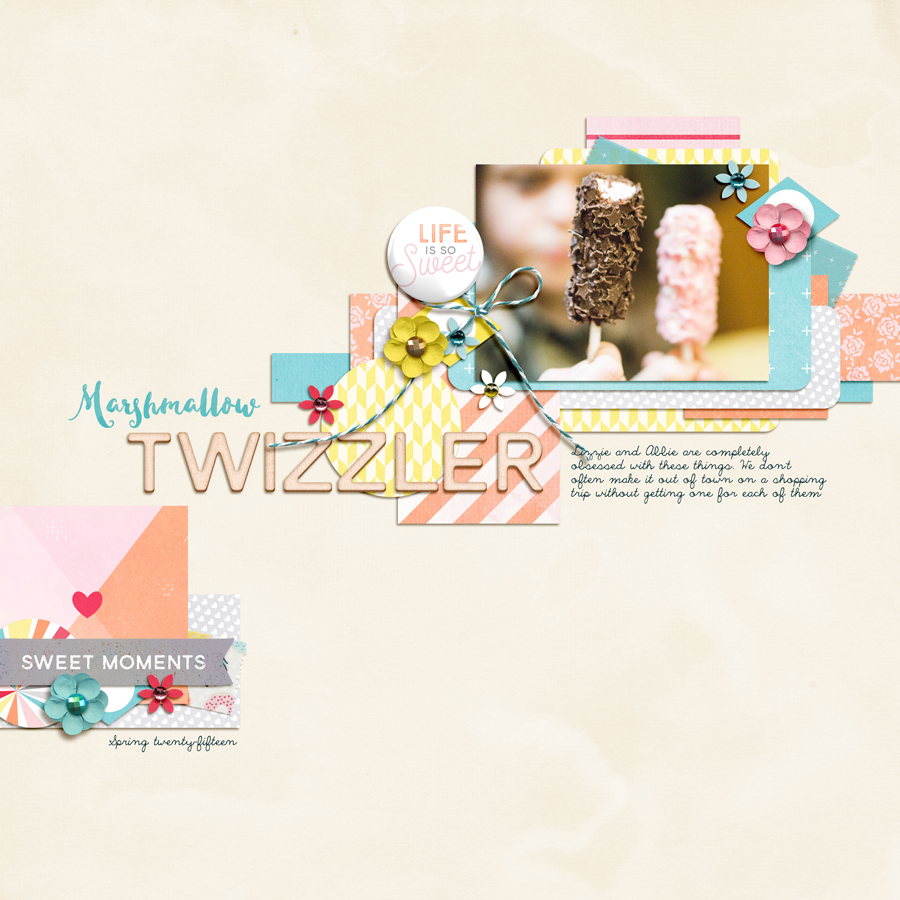
My Daughters love to sing. Some of their current favorite songs:
Firework by Katy Perry
Hey Ho by the Nashville Cast
Let it Go from Frozen

What are you and Hubby talking about lately?
For us it is going solar for the house, Hubby’s new job, where are we going for Spring Break…
Find the story in these everyday conversations and record them.

What did your Mom and you talk about the last time you spoke on the phone?

I hope I have inspired you to record all the things you hear in your daily life. I can’t wait to see what you document.

Krista About the Author: Krista Lund is a mom of 3, married to her High School Sweetheart living in SF Bay Area. Some of her favorite things are brownies, chips n dip, taking pictures and documenting her family’s story.

Listen for the stories

Listen for your Stories

For me, scrapbooking is all about the stories. I love the photos and the pretty kits, but without a story, I can’t get started. Sometimes my inspiration will come from the kit, sometimes from a photo I’ve found in my archives or have taken recently, but I find it particularly satisfying to start completely with the story. I particularly love the ‘everyday’ stories, things that happen all the time.

Take this layout, telling the story of my slowcoach daughter making everyone else wait for her in the morning when we’re trying to go to school. I came up with the journalling idea first, then set up and took the photo – it was just a case of asking my younger daughter to stand in the frame – then finally made my page.

Listen for your stories

My approach to this was to sit down with a notepad and write down the stuff that happens in a regular day, adding notes about the stories that I’d like to tell. I’ve still got quite a few ideas still to use from this list, and I didn’t actually get past lunchtime! If mornings don’t inspire you, why not start with your evening? Or your weekend routine?

How about something that happens every time you go to a particular place – like our trips to Starbucks nearly every time we go to our local town.

Listen for your stories

I hope that I’ve inspired you to start with the story for your next layout – hop over to the challenge forum to join in today’s challenge!

JudeAbout the Author: Jude Toone is part of the Creative Team at The Digital Press. She lives in the UK with her husband and two fantastic girls. She’s loves travelling and would be off in her campervan every weekend if she could get away with it and loves time spent exploring new places and trying new experiences – and photographing them! She also spends too much time on the computer and doesn’t go running as often as she says she’s going to.

Tuck it in! Hide your Photo Corners under Paper

It’s Tutorial Tuesday and I’m happy to bring you something, that I just figured out to do myself (insert big smile here). Tucking in the photos into the paper. It’s like you make a cut into the paper and insert your photo’s corner. Only without real scissors, paper or  photos of course.


My first layout with this technique took me a while. I tried and failed many times. Ctrl-z was my best friend. I found it super complicated but now that I recreated it for you, it’s not too fiddly. I made it into tiny steps and hopefully easy to follow. I also tried to make it PSE friendly. For all the other software girls… you can do this too! I just don’t know how (insert giggle here)! I’m sure you will be able to recreate this with your software.

So here is my first layout with this technique:


My first try on the technique. Image is linked to my gallery, if you want to know what I used.


Want to have a try? Here we go:

  1. Choose a photo or a frame that you want to use. When you use a frame, put a clipping mask for the photo under the frame for later use. Link the frame and the mask together.
  2. Increase the size of your canvas to 130% (Image → Canvas Size → choose „percent“ from the dropdown menu and 130% on width and height). You should now see the checkered background around your photo. If this is not the case, go one step back (ctrl/cmd+z) and double click on the layer name in the layers panel, click „ok“ and repeat the canvas resize. For better visibility of shadows put a paper layer under the photo. The paper will not be part of the tucked in corners later.
  3. Create a shadow for your photo (on a separate layer)
    For PS users: create a drop shadow for the photo and put it on a separate layer (right click on the fx icon of the layer → create layer)
    For PSE users: ctrl/cmd+click on the layer icon to get the marching ants around the photo → Select → Modify → Feather → 10px. Create a new layer beneath the photo and fill the selection with a dark gray, brown or simply black. Deselect the selection with ctrl/cmd+d. Nudge the shadow to the side where you need it. In my example I left it pretty much where it was. For a deeper shadow simply copy the shadow layer (ctrl/cmd+j) and maybe decrease opacity of the upper shadow layer when needed. Link the photo, frame, clipping mask and shadow together.
    It should now look something like this:


A cherished photo of my parents’ wedding in 1963.


  1. Create a new layer above the photo and draw a triangle. You can use any method you like. I always use the polygonal lasso tool and fill the selection with a color. The triangle will later be invisible. Make the triangle so, that you cover one corner of the photo like a photocorner would (see picture). Make it so big, that you can’t see the shadow of the photo but not too big that it gets to the edge of the canvas.
  2. Create a shadow for the triangle (see also 3.)
    For PS users: create a drop shadow and put it on a separate layer
    For PSE users: Create a new layer beneath the triangle, ctrl/cmd+click on the triangle layer icon, feather the selection with 10px, fill the layer beneath the triangle with a dark color, deselect.
  3. Nudge your shadow slightly to the middle of the photo. Link triangle and shadow together.


The triangle already shadowed.


  1. Ctrl/cmd+click on the triangle layer icon to make a selection. Turn off visibility of the triangle.
  2. Delete the selection of the triangle on every layer (except for the paper and the triangle layer itself). Deselect the triangle (ctrl/cmd+d).
  3. Now you will still have some shadow of the triangle left where it doesn’t belong. Use your eraser with a brush size that is about half as wide as your triangle at 30% hardness 100% opacity and carefully erase the shadows that are parallel to the edges of the photo and a little of the ends of the „cuts“, so that the illusion of the cut ends is given (see photo).


Left you see what it looks like after you deleted the triangle selection from all layers and turned the visibility of the triangle off. Right you see the same after I erased the unwanted parts of the shadow.


  1. Now it should look like one corner is tucked into the paper. If you want this on every corner of the photo you just have to copy the triangle and the shadow, turn it around and place it over the next corner, ctrl/cmd+click on the triangle layer icon and delete the triangle from the photo and the photo shadow (and the frame and photo mat if you have them).
  2. Save your ps or pse file for later use as a tucked in template.
  3. For use in your layout just drag the photo (with its shadow) and the corner shadows on your layout and link them together. You can now move everything around to your liking.


The technique in full size view. The image is linked to my gallery.


Tipps and Tricks:

  • For your next tucked in photo just use your cut corner template.
  • Always remember to first shadow your photo on a separate layer.
  • Use your single corners for any size/edge relation of photo.
  • You could also do this directly on your layout. I only wanted to show you the technique as simplyfied as I could.
  • Instead of deleting the triangle from the layers, you can of course also apply a layer mask to the items and fill the mask with black after the selection of the triangle to make this technique non-destructive to the photo or frame.
  • You can also make horizontal or diagonal cuts with this technique to tuck in a whole edge of your item
  • Not only photos can be tucked in. Paper shapes, envelopes, flowers…

Enough said, you can do it! If any questions appear, feel free to ask in the comments! Have fun!


AlinaAbout the Author: Alina enjoys sitting in front of her large computer screens too much. Apart from that she loves walking her dog and watching sunsets while being amazed of life in general. She is married to her best friend. Tries to manage the needs of her two cats and her dog and badly fails when they all want their cuddle time at once. Everything else is scrapping, taking photos and currently crafting. Having said that, she needs a bigger craft room.


Listen: Letter to your kids

TDP Listen

In 2013 my oldest daughter graduated from high school. **gulp** I am amazed at how fast time flew. It seemed like just yesterday, I was teaching her to talk! But I was in a different season now … I had to teach her how to become an adult while she was still a “child” or teenager. It is such a fine line. What do you share/teach, yet still keep them innocent? How do you show them that there are horrible things in the world, yet not scare them to death?!? After praying about it, I felt the best way to go about that was to teach both of my children to listen to their instinct or gut. I would constantly tell them, if something feels off, then it is. Trust yourself. Listen to what God is telling you or even screaming at you. Even when everything else seems “normal”, if your gut says something is off, trust it. As Brianna got closer to graduating high school and going off to live on her own at college, I would constantly test her on if she was listening to her “Holy Spirit” alarm. She began to learn to trust herself. While she still has lots to learn about trusting herself (as we all do), she has learned that she really can trust herself and God. All she has to do is LISTEN.

Here is a layout I created with her graduation pictures:

Listen

So let’s see your “letter”! When you have finished your page make sure to share it with us in the forum. We have so much to teach our children! Putting it in writing is a great way for them to always remember the lesson taught. 🙂
HeidiHeidi is a CT member for TDP and has been scrapping for 17 years. Her passions include dark chocolate, photography of her family and reading Christian fiction. When not doing one of these activites, she can be found working at an elementary school library or enjoying being a SAHM.

Alter A Type Tray: Hybrid Style

Hybrid Type Tray

This year I am all about catching up on my very {very!} long list of projects. I am listening to my desires by focusing on pursuing all of the things I enjoy and creating happiness in my home. {Did you catch what I did there? Focus, Pursue and Listen…January, February AND March’s TDP words of the month all in one blog post. Boom! Go Me! Haha!} At the top of my list is filling a type tray with everyday photos of my family. I created this project a few years ago when I acquired three type trays. I loved the first one I made and the other two trays have been sitting empty and neglected in a corner in my office for much too long. There is also a heaping pile of leftover photos from my project life albums accumulating in my office so I decided this was the time to get it done.

To get started, I selected photos from that pile and played around with an arrangement on the type tray until I felt I had a nice variety of images {and to make sure no child was getting left out – oh the horror that would be!}. There were moments when I wanted to go through my Lightroom album on my computer and find different images, but I resisted as I knew that I would just get sidetracked and procrastinate even more {I am quite good at that!}. Since all of my printed photos were in color, I decided that I would use neutral tones for my patterned papers and elements. I also knew I wanted to include some word are and a few simple embellishments. All of these were easily found in The Digital Press’ shop…papers and elements from Dawn by Design {tender moments}, papers from Digital Scrapbook Ingredients {everyday essentials} and word art from Karla Dudley {stamp press life}. I easily printed my chosen elements and papers on my home printer and printed the word art onto transparencies as I love the look of the type tray showing through. Then I made quite the mess on my desk but I like to think that is a sign of a great creative day. 😉

Type Tray Hybrid Project at the Digital Press


Once I hit my groove, the project came along quite easily. This project required a lot of measuring and re-cutting to get the photos and papers to fit nicely in the boxes, but nothing complicated and quite simple to do. Some physical products were all that was needed to finish things off and it was complete. 🙂 Here are a couple of closer shots to show some of the detail in the compartments:

Type Tray Hybrid Project Close Up 1 at The Digital Press

Type Tray Hybrid Project Close Up 2 at The Digital Press


And the finished project:

Type Tray Hybrid Project Final at The Digital Press

It is always a great feeling to finish a project and check it off the list. I hope this inspires you to create a project of your own!


Lori


About the Author: Lori Pereyra is a member of the Creative Team here at The Digital Press. She is a stay at home mom to 4 children and loves capturing life…the good, the not so good, & the perfectly imperfect… and documents it all through photos, paper & pixels. She feels this is modern scrapbooking at it’s best!

Listen to what everyone’s talking about

Listen to what everyone's talking about

Design trends, by definition, come and go. What’s super-hot right now may be incomprehensibly old-fashioned in a few years time. One thing you’ll hear a lot if you watch many home makeover type shows is the term “a bit dated.” Usually meaning that when you walk into a room, you get this instant sense that it was decorated in precisely 1978 or 1992. Although that’s something that we tend to see in a negative light (who doesn’t want to be surrounded by this season’s latest Pantone color picks or the coolest patterns?), it’s also a really important part of placing our memories at a point in time – giving context to our photos, and adding to that nostalgic feeling when we look back. There will come a time when we’ll have to explain to our grandkids that grey chevron and mismatched vintage was all the rage! Today’s post is actually inspired by this old family photo of me with grandfather at around age 4:

Listen to what everyone's talking about


Amazeballs. From the brown velour to the floral wallpaper to the terrarium peeking out in the corner, every last detail of this screams that it’s from another time. I was completely inspired to document elements of design – be it things that we’re visually inspired by (hello, Pinterest) or things that we have around us – that will one day create that same nostalgic feeling by sparking a memory of what was ‘so hot right then’. Maybe because there are so many more places for us to access design inspiration, it’s easy to spot when everyone is talking about some new trend or style (I’m looking at you, gold foil!). I recently created this layout using the new Peccadillo collection from Dawn by Design (coming Friday 6 March) to remind me of the artsy, hipster design influences that we have added to our new nursery:

Listen to what everyone's talking about

If you’re looking for ways to meaningfully incorporate current design influences into your memory keeping, how about these ideas:

  • scrap a new, so-hot-right-now purchase, and explain why you wanted it
  • scrap a collection of things you think define this time, such as a list of what you have on your desk, or the ingredients of a standard outfit for you at the moment
  • coordinate scrap goodies with one of your fave design trends (for example, use an amazing floral like the one I’ve used above to document your obsession with floral fabrics)

Hopefully you’re inspired to consider where today’s design influences are most present in your life, and how you can document that. Don’t forget to hop on over to our challenge forum, where there is a design-trend challenge for 6 March.