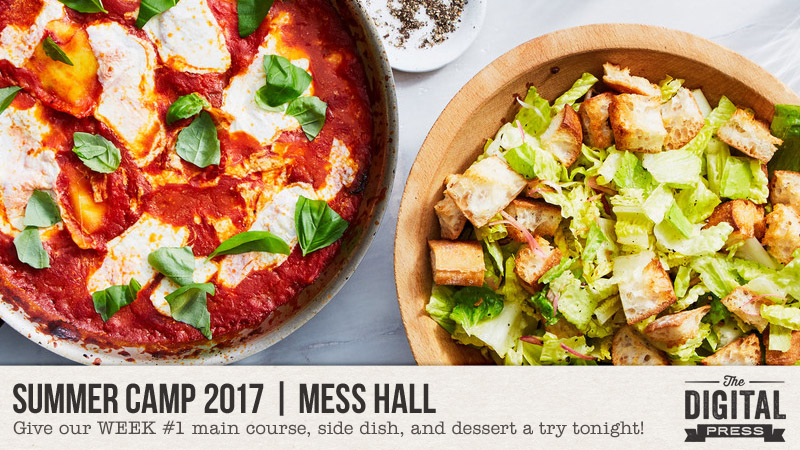
Hello, and welcome to the first edition of our weekly “Mess Hall” feature — part of The Digital Press’s big SUMMER CAMP 2017 event this July!
If you haven’t already checked out our lineup of activities for SUMMER CAMP 2017… definitely swing through the forum, grab yourself a badge tracking card, and join the fun! We’ve got events, challenges, tutorials, and more lined up throughout the month of July… including a weekly FOOD article! 🙂
Each Sunday throughout the first 4 weeks of July, members of our team will be here on the blog sharing a meal with you — a main course, side dish, and dessert that are each tried-and-true (tested personally by members of our team!). Give any of the meal items a try, and you could earn a SUMMER CAMP 2017 badge! Get the full details HERE.
The WEEK #1 meal is very, very worth a little time in the kitchen, folks. Trust us on this (and it’s actually sooooo quick & easy!).

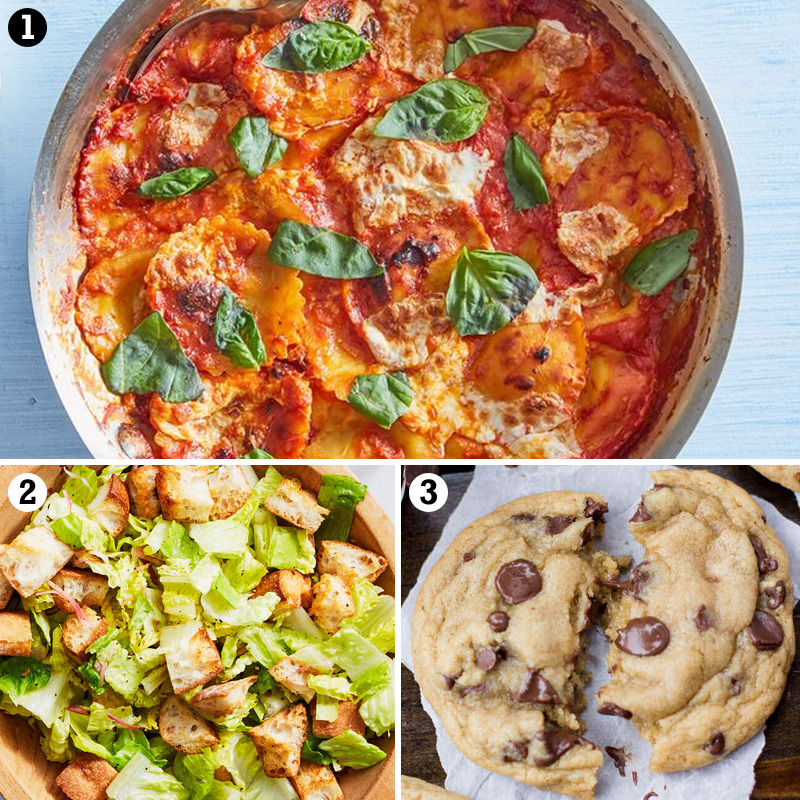
photo credits to [1] [2] Marley Spoon and [3] Sugar Spun Run
What is that up there, you ask?
- Skillet Ravioli Lasagna
- Salad with Homemade Croutons
- The World’s Best Chocolate Chip Cookies
Seriously, just YUM. To all of it. You won’t be disappointed if you give any of these recipes a try.
SKILLET RAVIOLI LASAGNA
I’ve made this recipe 3 times in the past few weeks. It’s that good (and easy!). Every time we eat it for dinner, my husband and I sit and try to figure out how the sauce could possibly be so flavorful and delicious… because seriously, it doesn’t seem like there’s anything in it other than tomatoes and tomato paste… and… shallot. BOOM. I never realized what an amazing little onion a shallot could be (and I cook with them all the time, folks, seriously)… until this recipe. This pasta sauce is living proof that a single shallot can season a tomato sauce like nobody’s business (and probably lead to world peace, and also, yes, I know that the sauce isn’t living proof of anything because it’s not alive. It’s an expression, and we’re going to roll with it).
INGREDIENTS NEEDED
—1 package of store-bought fresh cheese raviloi (I use the “RANA” 4-cheese variety, but really any will do; that’s simply my definite favorite)
—1 14oz can of tomatoes (I use diced… but again, anything works; the original recipe calls for whole/peeled, and my way cuts down on the work of smashing them up)
—1 Tbsp tomato paste
—1 medium-to-large shallot*
—1 ball of fresh mozzarella cheese (recipe actually calls for about half this amount, but I use the whole ball so I don’t end up with weird portions of leftover cheese in my fridge)
—fresh basil (I use 2-3 stems’ worth; equivalent to just under one of the small plastic containers you get in the fresh herb section of your grocery)
—olive oil, salt, and pepper
INSTRUCTIONS
*if you’ll be making the salad, below, as well… cut your shallot in half and use half for this pasta recipe, and half for the salad. If you’re only making the pasta, you can use a slightly smaller shallot OR you can just throw it all in the pan because it won’t hurt anything! mmmm mmmm good
—Pre-heat oven to 450 degrees
—Pick the basil leaves from stems and tear leaves into bite-size pieces; divide into 2 portions
—Cut the fresh mozzarella ball into bite-sized pieces (about 1/2″ to 3/4″ cubes)
—Finely dice the shallot
—Heat about 1 Tbsp olive oil on medium-high in an oven-proof skillet; once shimmery and hot, throw in the shallot and cook until softened and fragrant (1-3 min)
—Stir in about 1 Tbsp of tomato paste and mix into the shallot/oil for about 1 min
—Add the can of tomatoes and half of the basil leaves; season with salt and pepper to taste; cook for 3-5 min, until heated through
—Add 1 cup of water and the ravioli pasta; stir to combine, and then continue cooking for about 5 min until the sauce is bubbling and pasta is softening
—Remove from heat, add half of the mozzarella pieces, and stir to combine
—Add the rest of the mozzarella pieces to the top, and then place the entire skillet (again, as long as it’s oven-proof) in oven to bake for about 8 min
[recipe adapted slightly from an original recipe found on Marley Spoon]
SALAD WITH HOMEMADE CROUTONS
Salad is salad is salad, right? Usually, yes. Except for when the salad uses fresh, warm, homemade croutons… and the dressing is a simple oil and vinegar with shallots that is, once again, inexplicably delicious.
INGREDIENTS NEEDED
—1 ciabatta roll (my grocery store carries them in bulk in the bakery section, right next to the bagels)
—1 small head of romaine lettuce (or you can also use pre-cut/bagged romaine heart lettuce)
—1 small-or-medium shallot*
—1 Tbsp red wine vinegar
—1-1/2 Tbsp olive oil
—salt and pepper (and about 1 extra tsp of olive oil for baking the croutons; optional)
INSTRUCTIONS
*if you also made the pasta, above… you likely have half of a medium-to-large shallot leftover for this salad recipe; if not, however, you can just use one small-to-medium-sized shallot instead
—Pre-heat oven to 450 degrees (if you are also making the pasta, you can bake the croutons at the same time you bake the pasta)
—Thinly slice the shallot and then add it into a large bowl with the vinegar and the olive oil; season with salt and pepper to taste; whisk together
—Cut the ciabatta roll into 3/4″ to 1″ cubes
—Toss the ciabatta with a teaspoon or two of olive oil (optional; you an also bake them dry) and sprinkle with a little salt and pepper
—Bake the ciabatta pieces in the oven for about 6-8 min, until they’re starting to toast slightly
—While the croutons are baking, cut or tear the lettuce into bite-sized pieces and add into the bowl with the salad dressing
—Once the croutons have cooled slightly, add them to the salad
—You can also add other ingredients, if desired (in our house, we occasionally also use grape tomatoes, cucumbers, celery, and more)
[recipe adapted slightly from an original recipe found on Marley Spoon]
CHOCOLATE CHIP COOKIES
These are, hands-down, the best chocolate chip cookies I’ve ever made. They are totally delicious — and they come out chewy and gooey, but also with a slightly “crispy outer shell” (there’s really no other way to describe that, although I know it sounds ridiculous). They’re so good I often make a double-batch and then keep the dough in a tupperware container in our fridge for a week or two so we can bake up a few fresh, hot cookies every night for dessert.
INGREDIENTS NEEDED
—1 cup butter (use the real stuff; melt it and let it cool off for a few minutes before mixing it, so it won’t melt the sugar too much)
—1-1/2 cups light brown sugar
—1/2 cup granulated white sugar
—2 eggs (or equivalent amount of egg substitute, which is preferred if you like to eat raw dough) 😉
—1/4 cup maple syrup
—1 tsp vanilla extract
—3-1/4 cups all-purpose flour
—2 tsp cornstarch
—1 tsp baking powder
—1 tsp baking soda
—1 tsp salt
—at least 2 cups semi-sweet chocolate chips (I use half regular-sized chips and half mini-chips, per recommendation of the original author of the recipe)
INSTRUCTIONS
—Once the melted butter has cooled slightly, mix it completely in a very large mixing bowl with the brown sugar and the granulated white sugar
—Add the eggs and mix completely
—Add the maple syrup and the vanilla extract and mix completely
—In another large bowl, combine the following ingredients: flour, cornstarch, baking powder, baking soda, and salt
—After whisking together the dry ingredients completely, gradually add (in about 3-4 batches) the flour mixture to the wet ingredients in the other bowl
—The more flour mixture you add, the harder it will get to stir… so pat yourself on the back for your “upper body workout” and pour yourself a glass of wine
—Finally, add the chocolate chips (I usually add about 1/2 a package of the big chips, and 1/2 a package of the mini chips — if making a regular batch)
—Once combined, you’ll probably want to eat a spoonful or two of raw dough (sooooo good)… and then put the rest into the fridge to chill for about 30 minutes
—While the dough is chilling, pre-heat your oven to 350 degrees
—Place dough onto parchment paper-lined cookie sheets about 2+ Tbsp at a time in balls that are a bit taller than they are wide
—Bake at 350 degrees for 12-14 minutes (keep an eye on your first couple batches until you know how hot your oven is and how long it takes to bake)
—Cookies are done once they start to turn golden brown around the edges
—You’ll probably want to do a few taste tests to figure out if the cookies are better warm & fresh out of the oven, or cooled completely with a slightly crispy outside and a soft inside. This will require eating at least 2 or 3 cookies from every batch. This is normal; just enjoy.
[recipe adapted slightly from an original recipe found on Sugar Spun Run, where you’ll find a bunch of other amazing & desserty recipes, as well]
.
Want to give one of these recipes a try and earn your WEEK #1 MESS HALL BADGE for TDP’s SUMMER CAMP 2017? Come get the details in the forum —> HERE.
.

About the Author Laura Passage is the owner of The Digital Press, and also the designer behind Wishing Well Creations by Laura Passage (WWC). She works now as a graphic designer in both the digital and paper scrapbooking industries, but previously spent over a decade working as a college soccer coach. She lives in the Pacific Northwest with her husband and two young sons (affectionately referred to as The Tiny Terrorists), and will rationalize eating coffee ice cream for breakfast to anyone who questions it.

3 comments