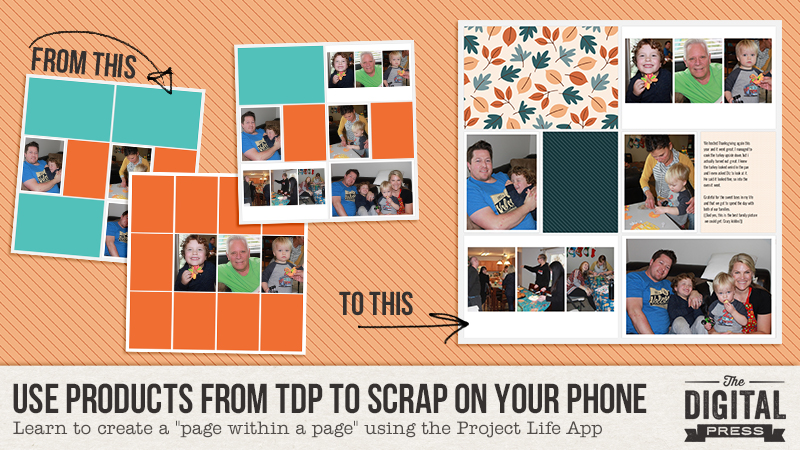
Hello, and welcome to another edition of our Tutorial Tuesday series here on The Digital Press blog! Today I’m going to show you a creative hack for using the Project Life App, something I like to call the “page within a page” technique. This technique is fairly simple and it’s a fun way to make your app-scrapped pages a little more creative. It’s also a great way to add more photos to your layouts without making them seem overly photo-heavy.
Before we get started today with my “page within a page” process… a quick recap, for anyone new to this series! You may recall that in my last Tutorial Tuesday blog post, I talked about some of the newer features of the Project Life App — like ‘Freeform Text’ and adding your own fonts. Additionally, be sure to read the entire “phone scrapping” series here on The Digital Press blog if you’ve never used your phone or tablet to scrapbook, and/or if you need a refresher on some of the things you can do.
And now, let’s get started with today’s project! Here’s a look at a page that I was working on in the Project Life app…
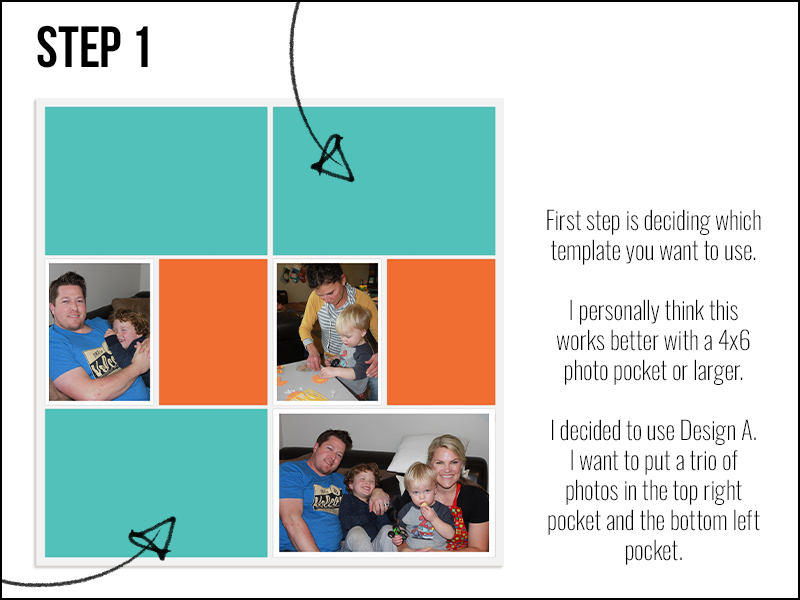
I use a light grey background from the ‘Project 52 2016’ kit and the white frame photo overlay is from the ‘Project 12 2019 May Overlays’ in the Project Life App. I really like the way the photos pop with the white frame on the neutral gray background.
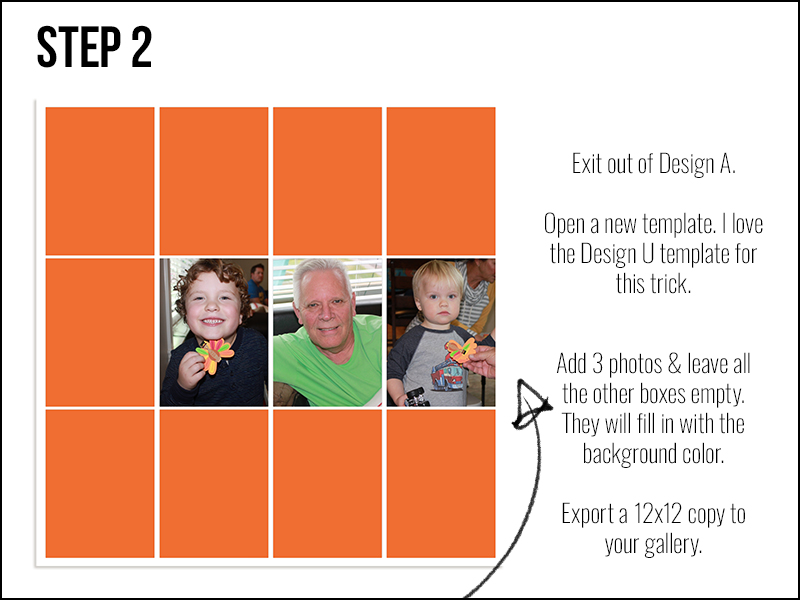
Don’t worry about exiting out of the first layout, it will save in your library in the app. You could use any layout for this trick, I’m partial to the trio of 3×4 pockets into a 4×6 pocket, but the possibilities are endless. Get creative! Also, I leave the background white on this layout. I think It helps to coordinate with the frame overlay.
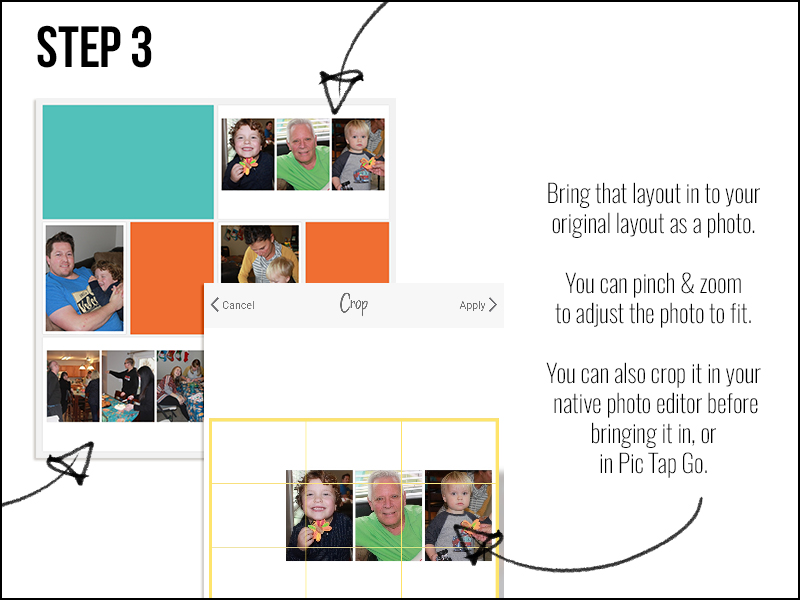
This step can get a little tricky. When you pinch and zoom in the app, it can be difficult to get it *exactly* centered. I think it’s easier to crop the photo before you bring it in to the app, either in your native photo editor, or even in Pic Tap Go (which is integrated right into the Project Life App). You can see I repeated Step 2 for the bottom left pocket.
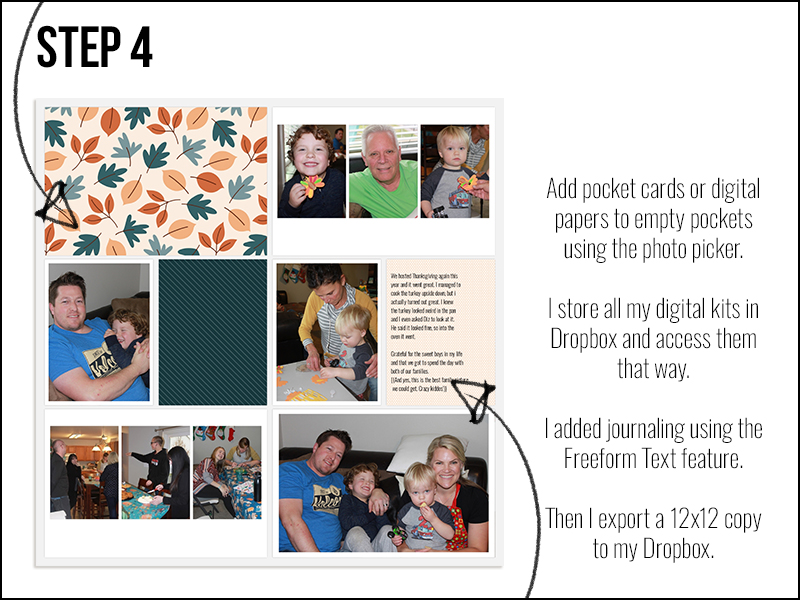
I used k.becca’s Autumn Leaves & Pumpkins papers as pocket cards for this layout. She’s one of our favorite TDP Designer Alumni, visiting the site again this month for our 5th Birthday Reunion! Be sure to hurry and check out her shop while it’s open again during TDP’s birthday celebration (through 12/2).
Then I download the layout to my computer and open it in Photoshop to add embellishments, as well as any journaling or titles, if I didn’t add it in the app prior.
Here’s a look at the finished layout…
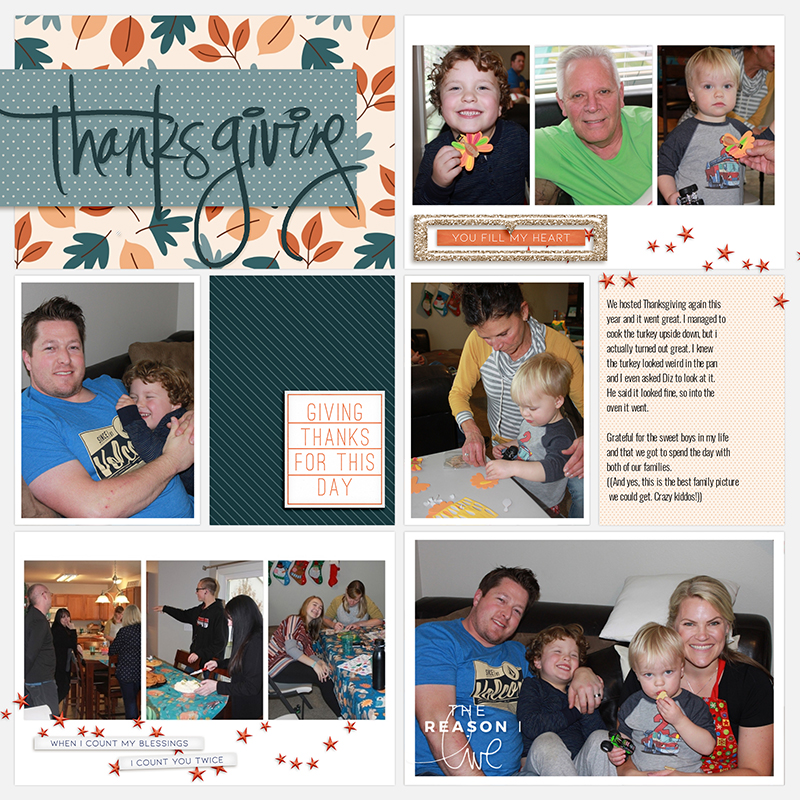
I love Karla Noel’s photo stamps! This one is from her Love Life – Sentiment Bits. The Thanksgiving title (recolored) is from Thanks – The Elements by Karla Noel too. I added other embellishments to fill in the white space on the trio of photos from Cornelia Designs – With a Grateful Heart kit.
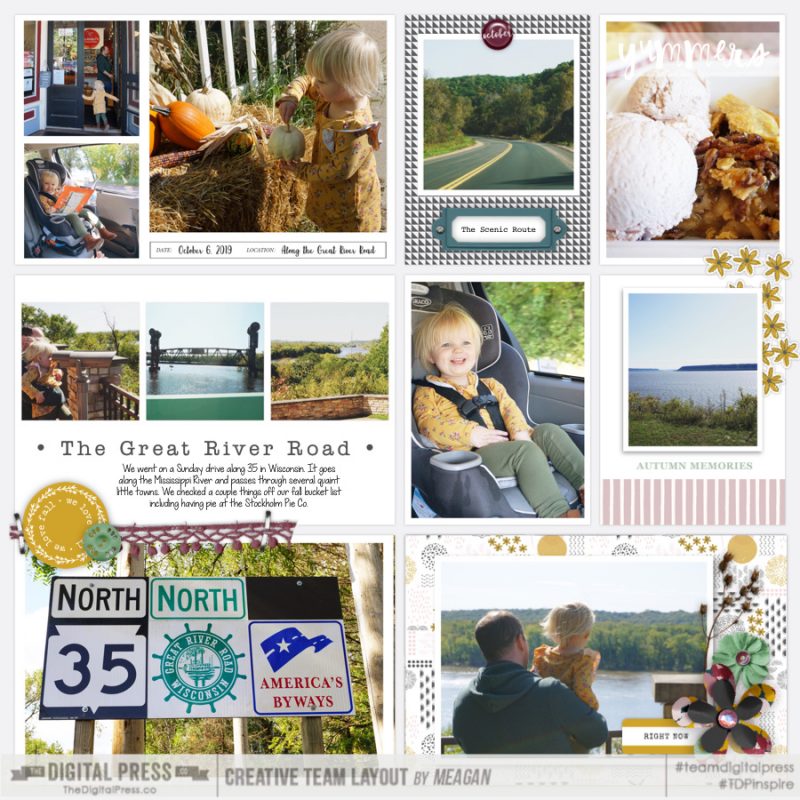
I found some great layouts by our very own Meagan & Jenna from the Creative Team, in the gallery that used this technique.
Look at Meagan’s gorgeous layout. Now she used the Over app as well, but you can see how the middle photo pocket on the left side has the 3 square photos with the white space, that was done in the Project Life App. She used Rachel Etrog’s October Stuff kit.
And this one by Jenna. She used Rachel Etrog’s At The Fair collection.
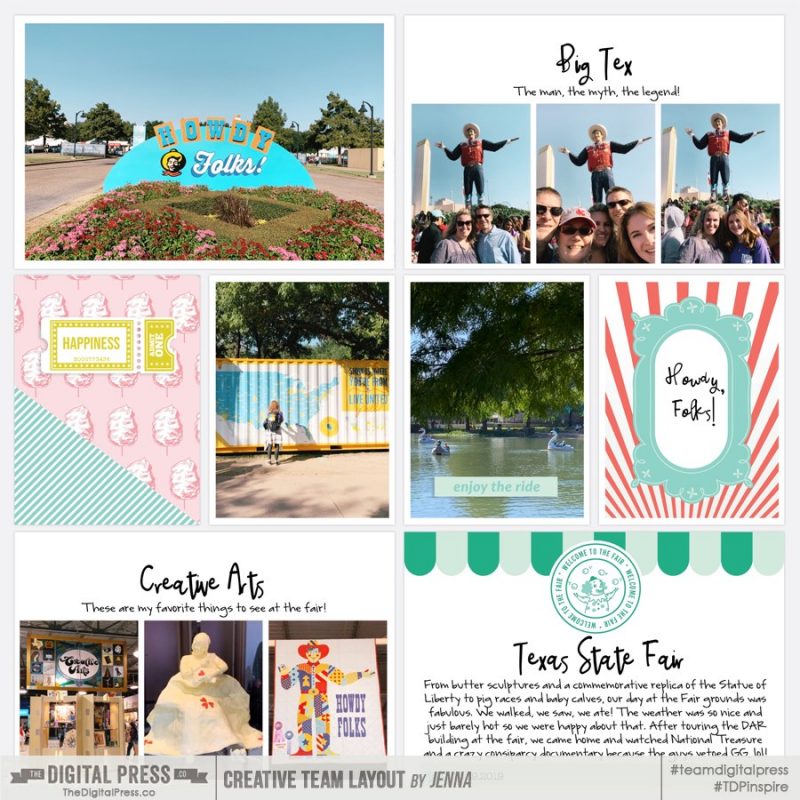
Can you tell we all love the neutral gray background with the white frame overlay on our photos? Great minds think alike.
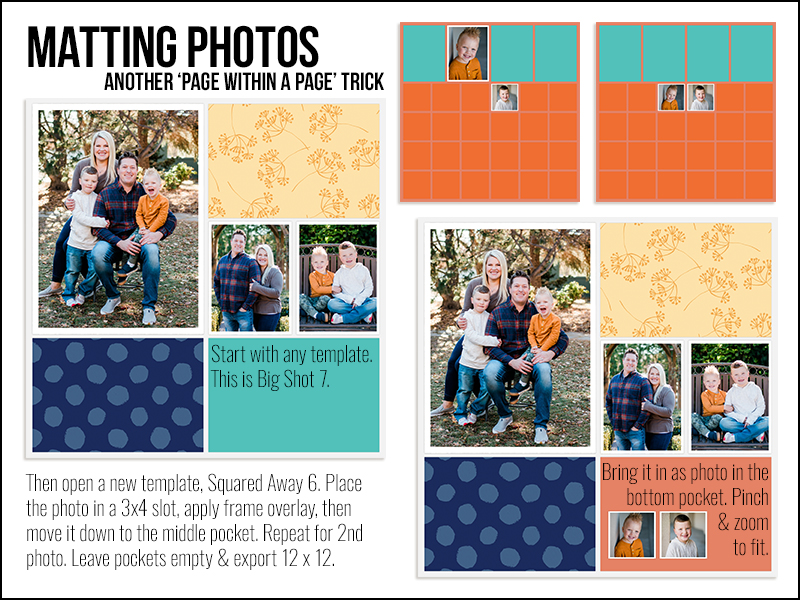
Another fun trick is to “mat” your photos with a colored background using the ‘page within a page’ technique.
And here’s the finished layout after it got some embellishing in Photoshop.
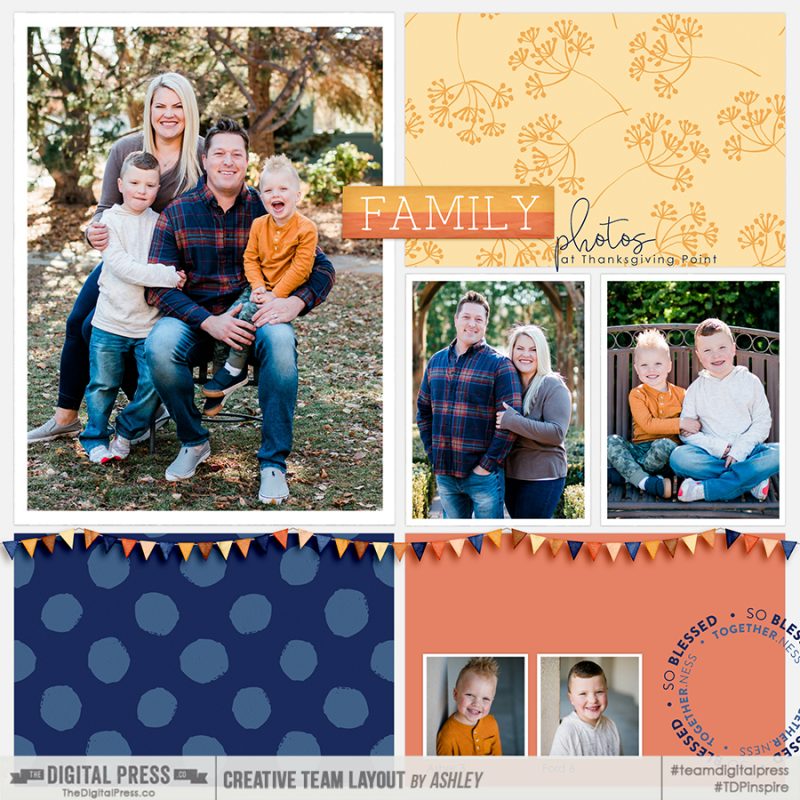
Similar to my first page, I used Cornelia Designs – With a Grateful Heart kit, Karla Noel’s KN Touch font (for the title) and her Thanks – The Elements (the circle stamps). The coral colored background is from an app kit called ‘Brave Patient’
It’s a fun trick and a great way to add some color to your app layouts, but also what I’d consider white space, to allow for some embellishments.
Now are you asking yourself “Why doesn’t she just do ALL of it in Photoshop?” I know… I know. It’s a great question. Here’s my answer. I take the majority of my pictures on my phone and I love the ease of scrapbooking on the go with my phone. I can complete a layout while I’m on lunch break at work, while waiting in the doctor’s office, or even in bed! I used the Project Life App to get current after being perpetually 7-ish years behind. My love for the app runs DEEP. That being said, now that I’m caught up, I have the luxury of being able to spruce up my app layouts in Photoshop when I want to. However, if you want to do this all in Photoshop, here at The Digital Press, there is NO shortage of amazing pocket templates by our designers. Cornelia Designs has designed some stunning pocket templates in her Pocket Basics Template series, Anita Designs has quite a few template packs in her ‘A Story Captured’ series that lean toward pocket-style with an artistic flair, and Little Lamm Paper Co has a bunch of ‘Add-On Photoshop Templates’ that are great for adding multiple photos to one pocket.
Let me know if you have any questions about the Project Life App – I’d love to get you scrapping on the go! Be sure to post your layouts that use TDP products along with the Project Life app in the gallery! We’d love to see what you come up with!
Happy Scrapping!
 About the Author Ashley is a member of The Digital Press creative team. She lives in Utah with her husband, 2 young boys, and 1 lazy (but lovable) pup. She works full-time at a busy medical clinic. She has been scrapbooking since childhood… scrapbooking digitally for 10 years… and most recently (& obsessively) app-scrapping on her phone.
