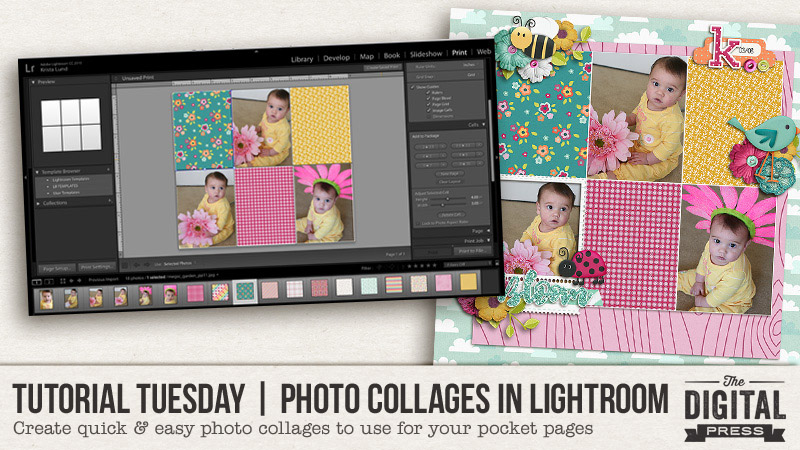
I love creating pocket pages, and I just recently discovered that I could quickly and easily create photo collages in Lightroom to use on my layouts. It’s a fantastic time-saver, and I’m here today to show you how to do it, too!
First, I collect all the papers and photos that I want to use in my collage, and place them in a single folder on my computer’s desktop.
Next, I import all these files into Lightroom. For my example, I chose to only use patterned paper… but you could use journal cards, too!
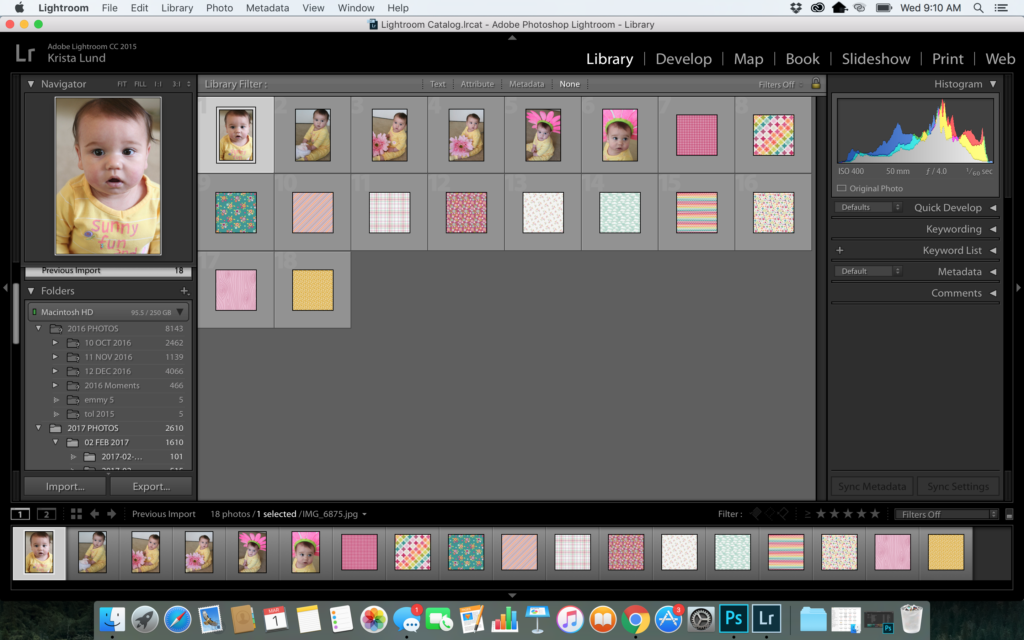
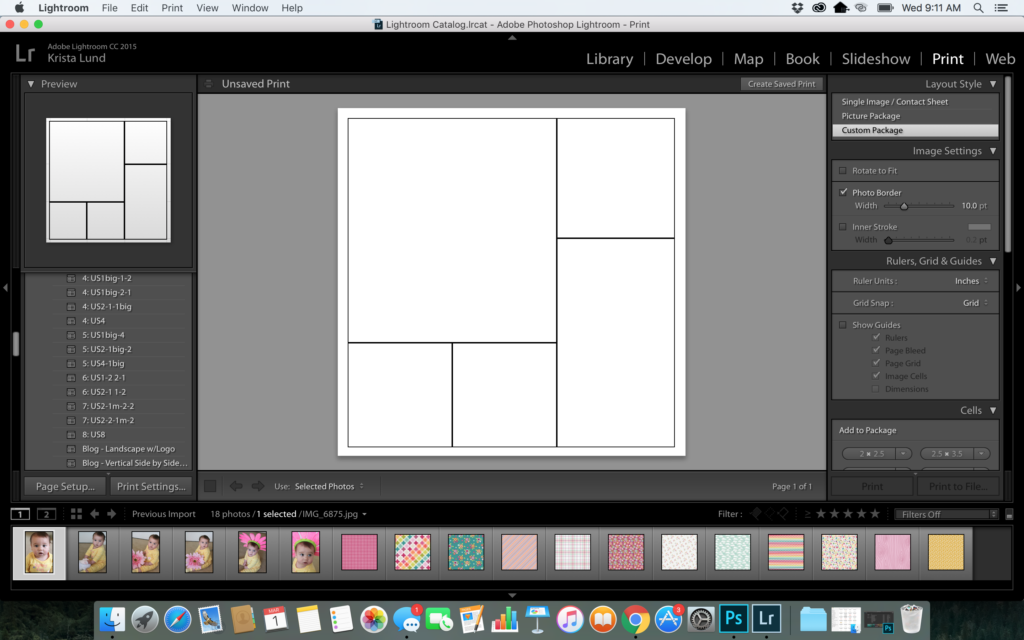
Next, I went to the Print Panel. You can see that I have a bunch of pre-made templates (the best thing is that I found them free on the web, but you can also create your own)! These templates can be edited to fit your needs or you can create your own!
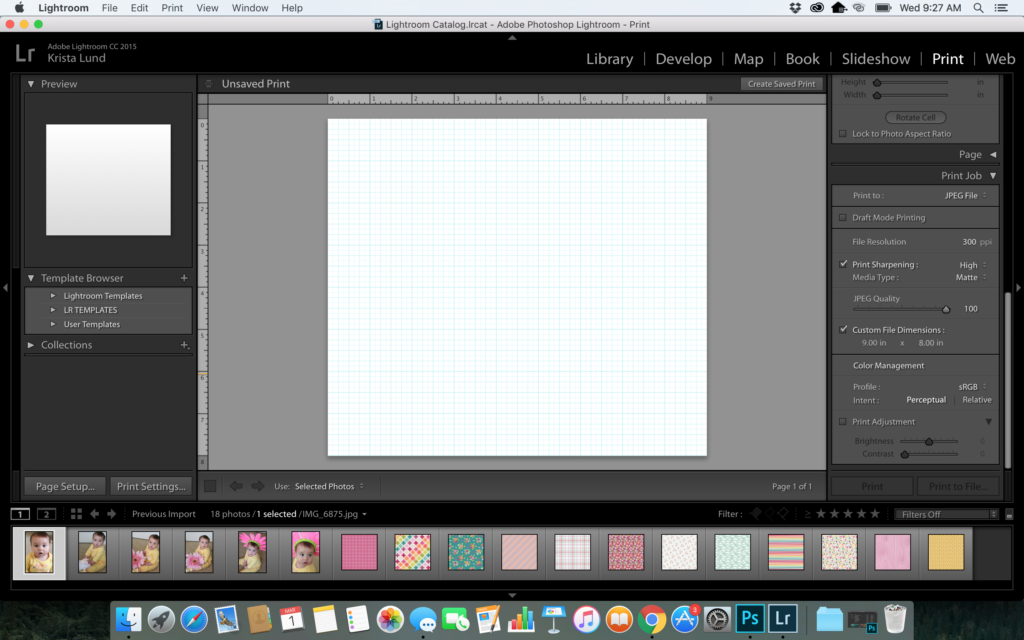
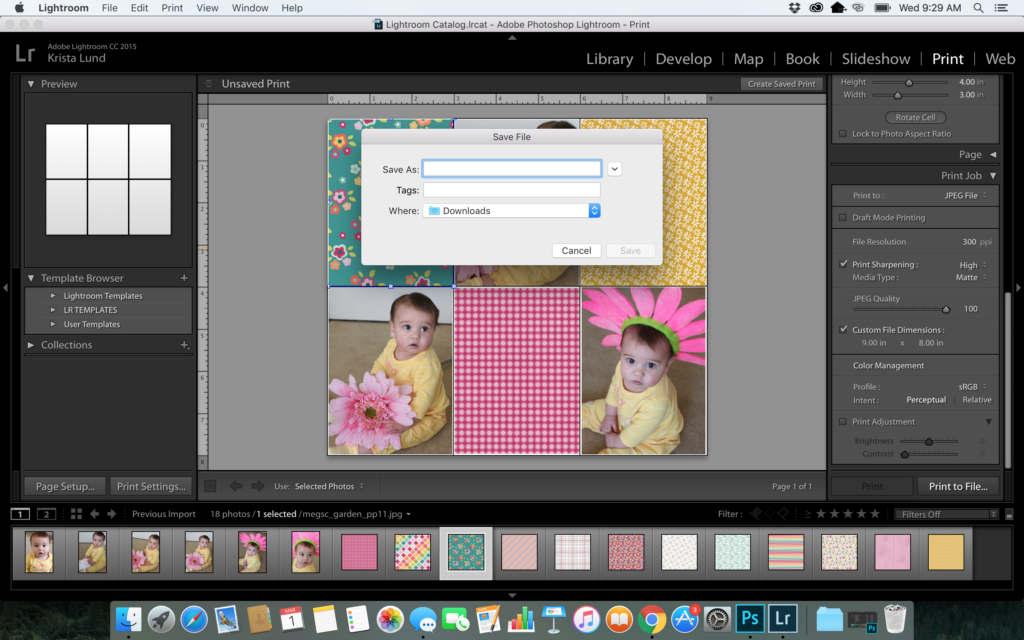
In the Print Job drop-down area, input the dimensions you like. In this example, I chose 9″ x 8″ for my size. In the Print To field, make sure it says JPEG file and that the file resolution is set to 300ppi.
In the Cells drop-down area, I edited one of the sizes in the Add to Package area to 4″ x 3″ (the size of most journaling cards).
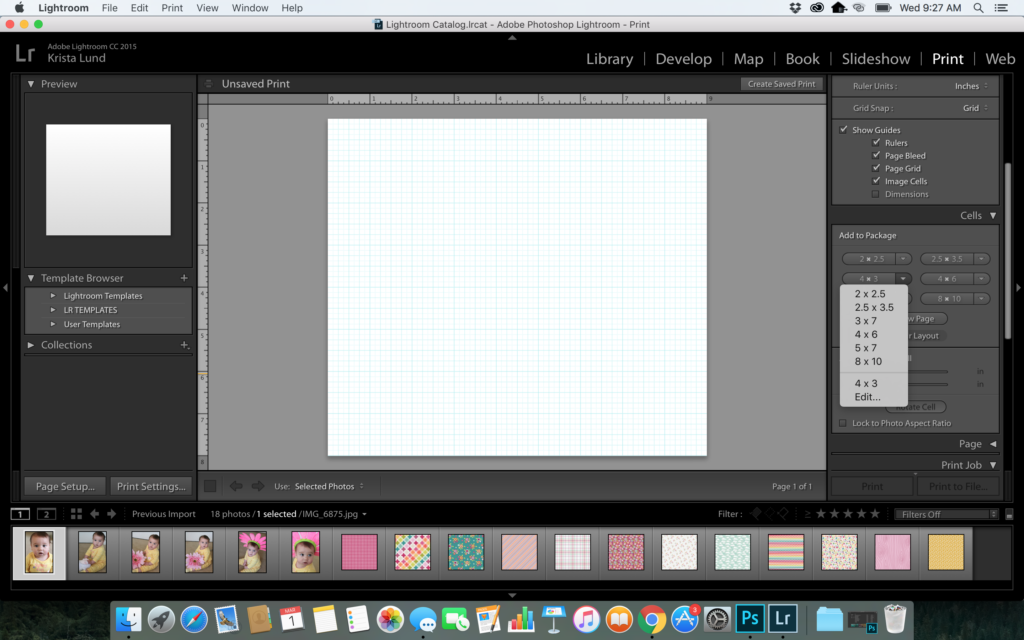
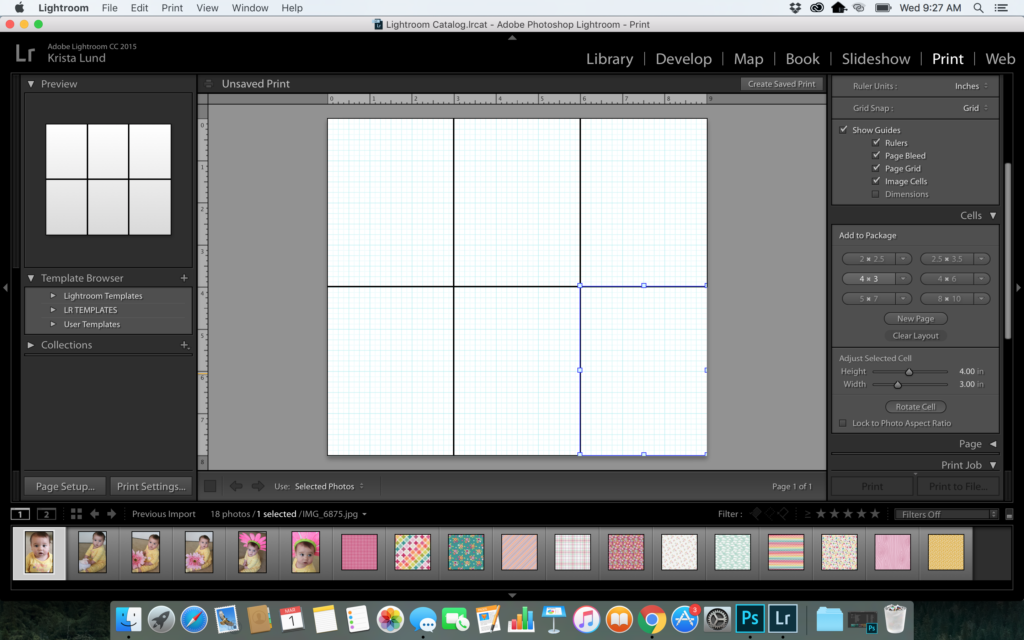
Then I added six 4″ x 3″ boxes to my photo collage by continually clicking on the 4″ x 3″…
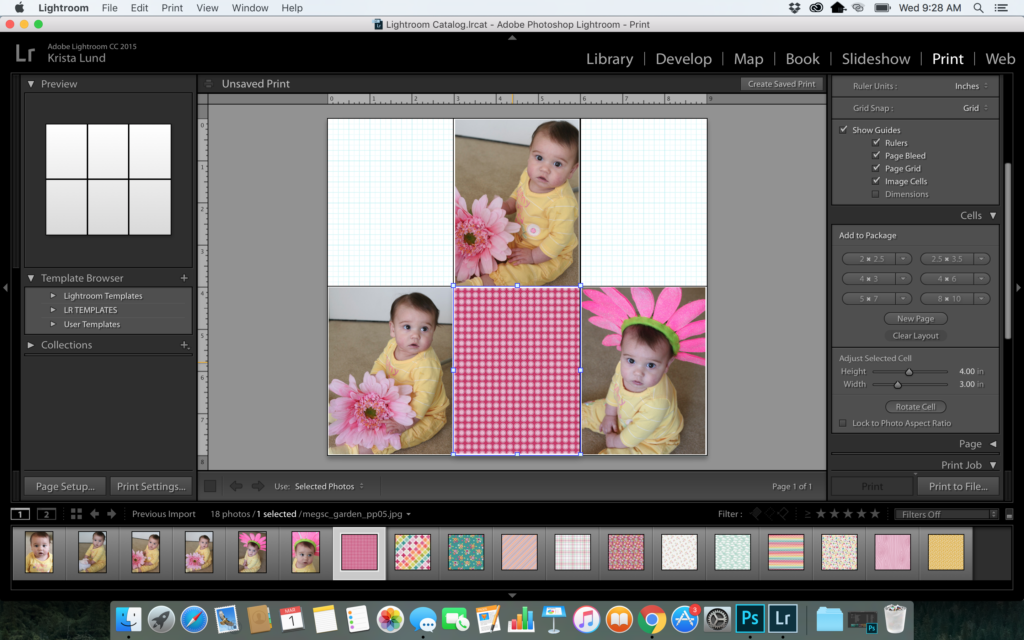
Next, I added the photos and paper I wanted to use simply by clicking and dragging the photos and paper onto the collage…
And finally, here is a look at my finished photo collage.
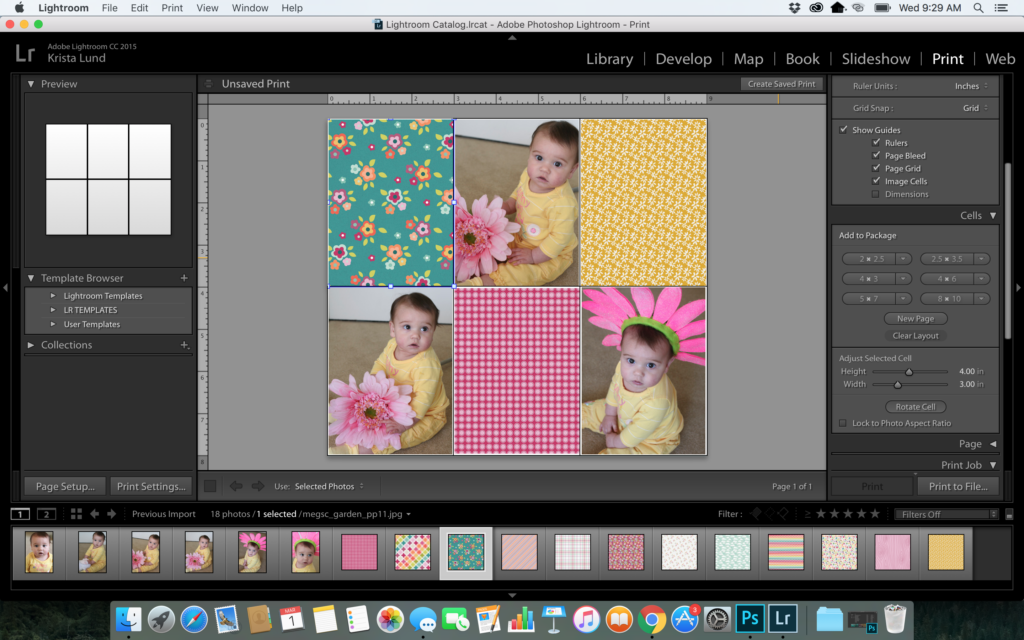
I clicked on Print to File in the lower right hand corner and saved my collage…
Then, I opened up my collage image in Photoshop to complete my Pocket Page with some embellishments/etc…
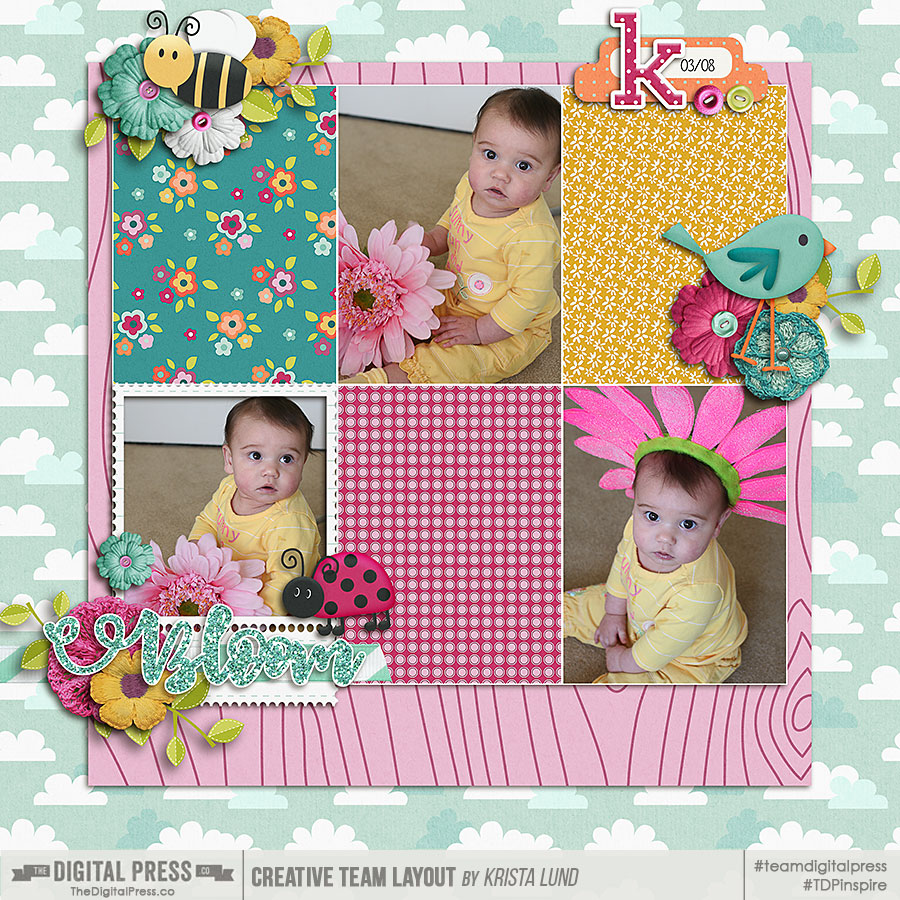 [ products used –My Garden elements, papers, and extra papers by Meagan’s Creations ]
And that’s it! It’s so simple… and such a great time-saver. 🙂

About the Author Krista Lund is a mom of 3, married to her high school sweetheart and living in the San Francisco Bay Area. Some of her favorite things are brownies, chips ‘n’ dip, taking pictures, and documenting her family’s story.
