Welcome to another edition of our Tutorial Tuesday series here on The Digital Press blog! Today I’m here to share tips for using masks and overlays on your digital scrapbooking pages.
We all love those big-photo layouts, right, such as my example page just below this paragraph? You know… the pages which have that one spectacular picture that deserves all the accolades of being front-and-center on a page. But what happens when you want to create a collage, of sorts, and blend photos together? It might seem like a challenging task, but it’s not. Let me share with you a few quick and easy tips on combining photos to create a background for your scrapbooking layout.
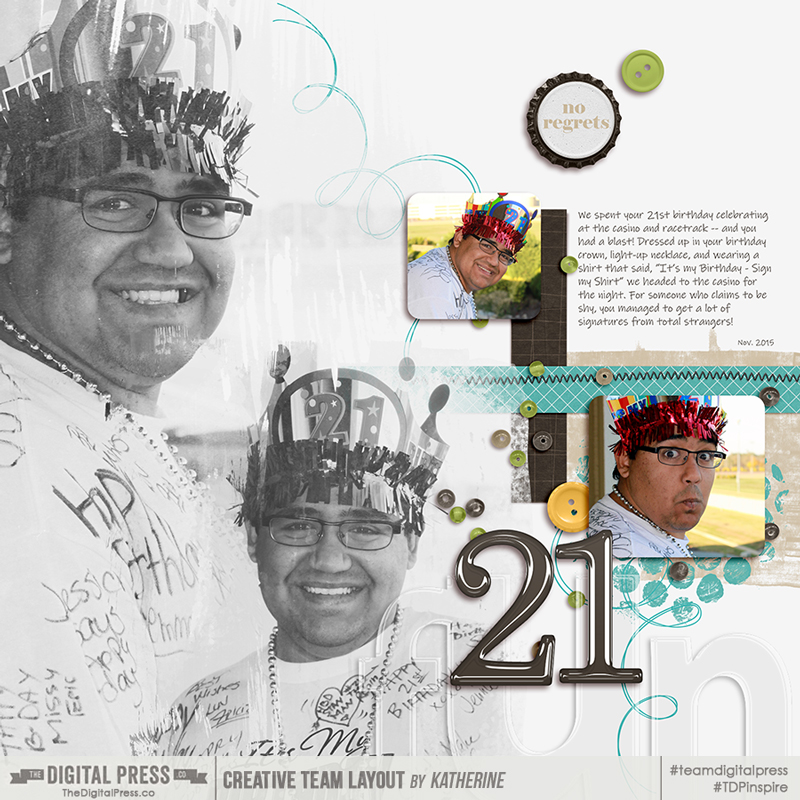
When I posted this layout (above) in the gallery, I received some love with a request for instructions on how I created the look of the overlapped black and white photos. Well, here we are! What I’m going to share are my own tips on how I achieved this look. As many of us know, there is often “more than one way to skin a cat” and the world of digital scrapbooking offers a multitude of ways to achieve a specific look or outcome. I’ll be using Photoshop CC for this tutorial, but the same or similar results can be achieved in Photoshop Elements, or any other program that allows for layers and masks.
Tip 1: Start with a neutral foundation
I typically start my pages with a white or off-white color. This allows for a more seamless blending of the photos (although I will note here that sometimes I don’t want the images to just fade away and the harsher edges are good to see). If you use a kraft paper or a darker color, you may need to play with Blending Modes a bit to get the right effect. But that’s the fun of digital, playing around to find what works for you! Personally, I would steer away from patterned paper unless it is neutral tone on tone and almost not visible.
In my layout I used a simple layer filled of a light grey, knowing ahead of time that I was going to convert my photos to black and white.
Tip 2: Select photos that work with each other
Easier said than done, right? How do you determine if the photos “work” or not? Grab two or three images and place them on your layout. Lower the fill percentage on the top photo(s) to make it slightly transparent. This will allow you to position the pictures into an arrangement that will work. Look for areas where the images naturally seem to fit together.
Here’s an example of how the photos I chose for my layout, when reversed, do NOT work (vs. the placement I ended up with for the final scrapbook page). The crown in the smaller photo is too close and overlapping with the face on the larger one … nope.
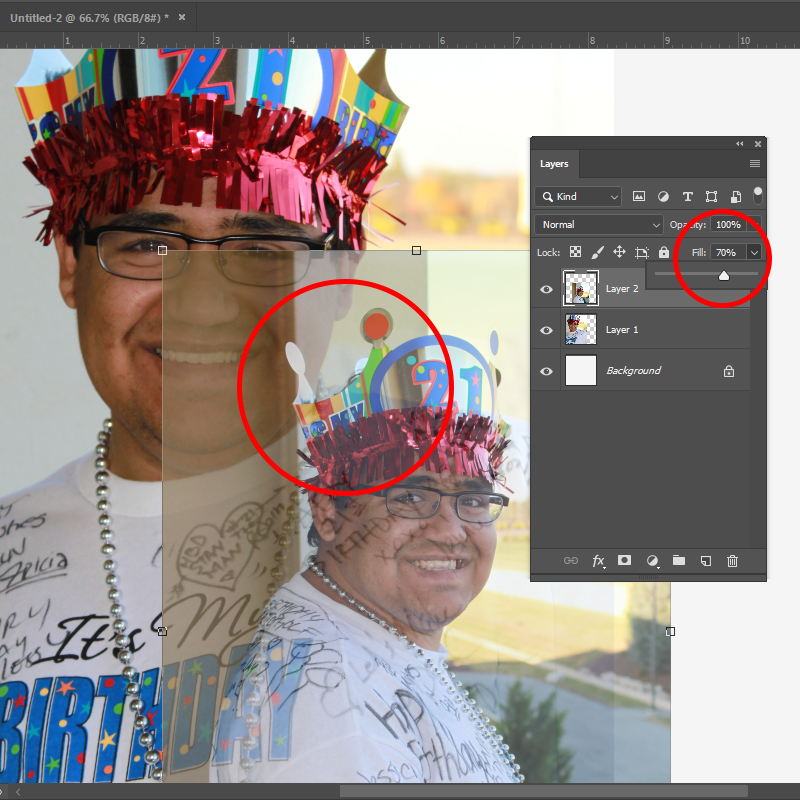
What you are looking for are natural lines where things like shoulders, heads, faces blend together. It’s a bit like putting a puzzle together.
Tip 3: Make it easy for yourself and use masks or overlays
With the foundation laid of where you’d like the photos, it’s a quick step to throw some masks or overlays under them (there are plenty of options in the shop). I’m usually looking more for a general shape of what I’m looking for, i.e., circular, rectangular, etc. and will seek that out. Some masks have ‘hard’ edges to them, but many have the softer, faded edges, which are perfect when you’re layering photos in the way we’d like to in this example.
Start by adding the masks over the photos.
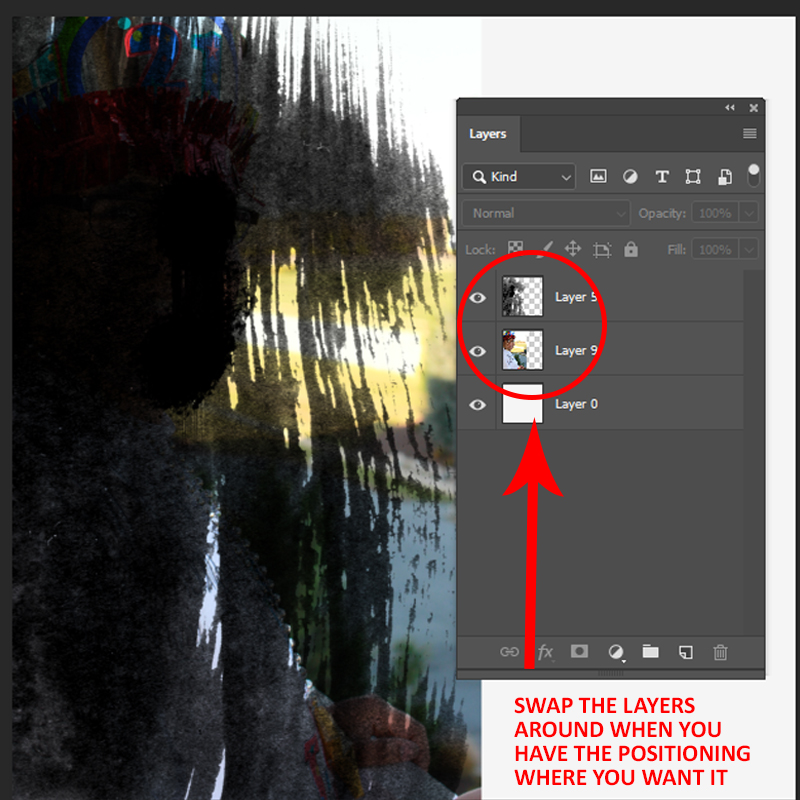
You may be reading this and thinking I’ve done things backwards. Surely you would do the masks or overlay first and then add the photos? Yes, you could. However, for my workflow with this kind of layout, I like to initially put the mask over the photo so I can see what will show through when I reverse the layers and clip the picture to the mask.
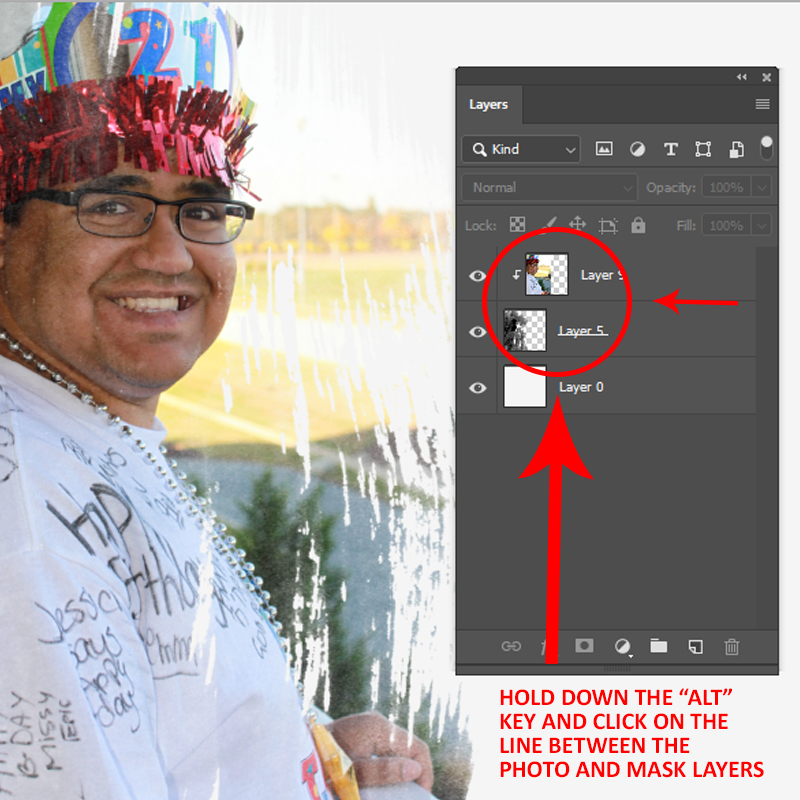
Sometimes through use of this process of line, I find a mask that just isn’t right or needs some resizing. In this example, the mask for the larger photo will reveal almost all of my son’s face, with other sections of the photo just showing through in bits and pieces — exactly what I was looking for!
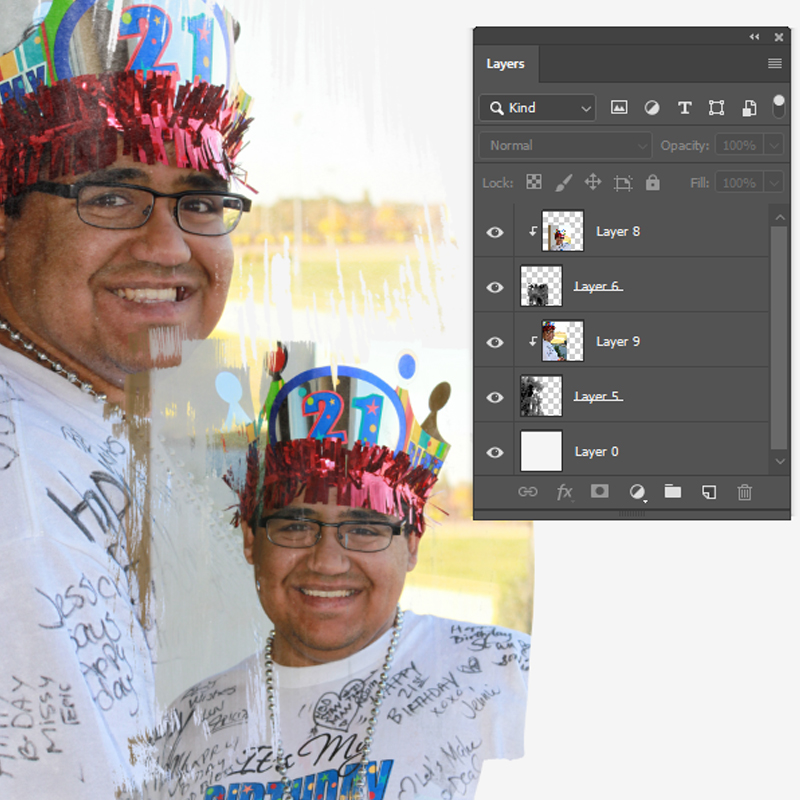
Repeat for all photos.
Tip 4: Don’t be afraid to “mask the mask”
Sounds a bit strange, doesn’t it … “mask the mask”. We’d all love it if a scrapbook page came together 100% perfect 100% of the time. Yeah. No. Doesn’t really happen that way. Even in selecting what seems to be the ideal masks or overlays for layering your background photos, there might still be a need to adjust a few edges.
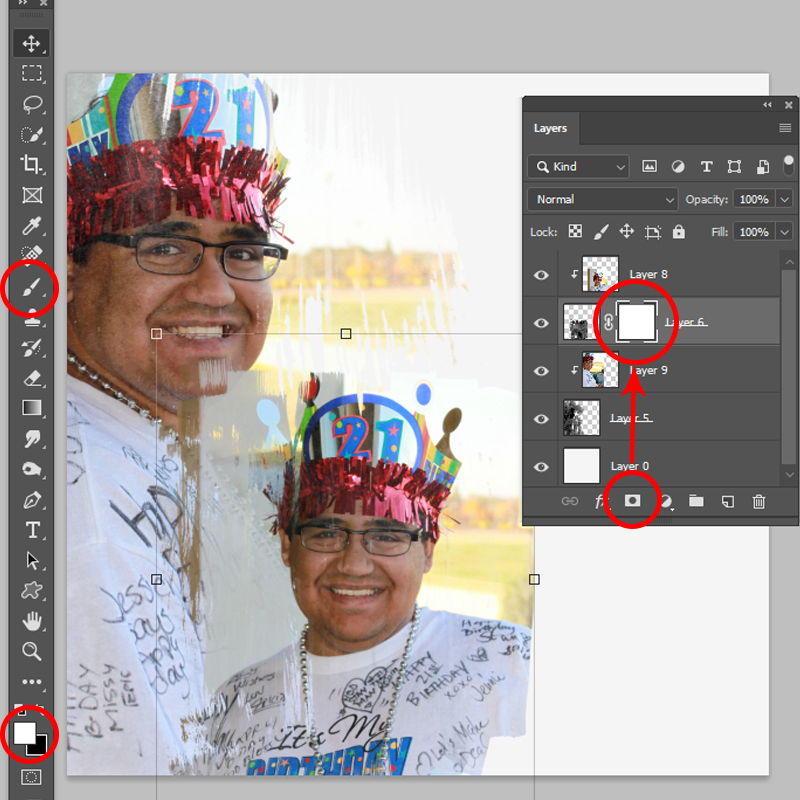
You’ll see here that the upper left and lower right corners of my smaller photo still need a bit of refinement.
Making sure you have the mask layer selected, click on the “add layer mask” icon in the Layers Palette. A white square will be added to the layer – this is the one you want to work on. Select a brush from your palette (soft round, artsy – whatever you like), and using black or white, “paint” the areas of the mask you’d like to adjust. Remember, when using masks, a black brush will conceal or hide things, while white will reveal (great if you accidentally hide too much).
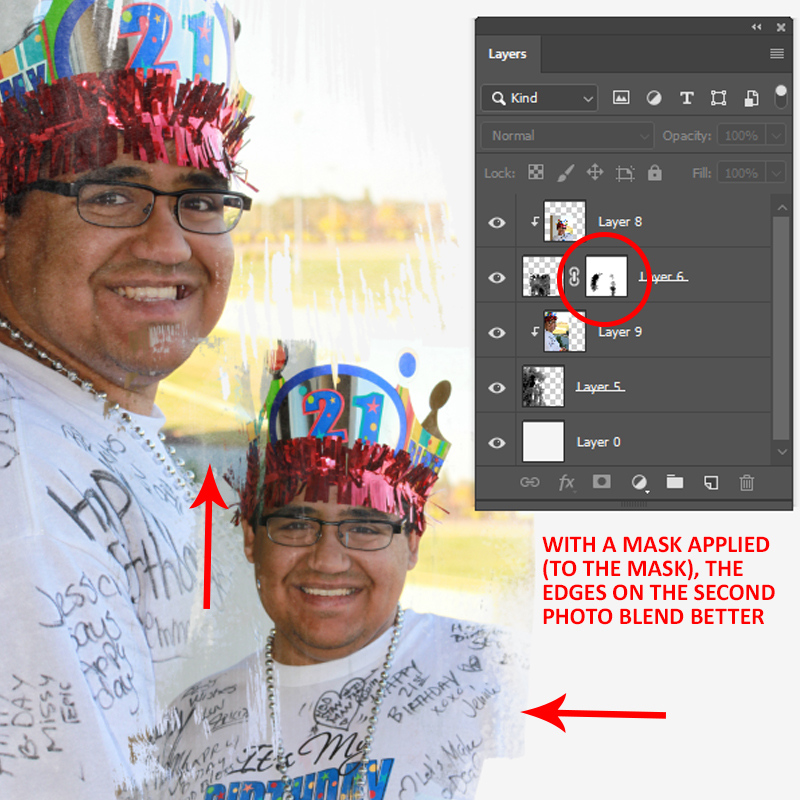
As you can see here, just a few small changes helps soften the edges and assist with blending the two photos. With my background now complete, I can layer in other photos or, as I did in my layout, add a template to the page.
While this might seem like a complicated process, it’s really only a few steps and then some artistic playing around to get the look you’d like – and with so many paint-like masks available at The Digital Press, why not give this technique a try?

About the Author Kat Hansen is a creative team member here at The Digital Press. A HR Manager in the real estate industry by day, she loves the opportunity to spend a few hours each evening being creative. Vacation memories feature pretty heavily in Kat’s scrapbooking pages, as well as her health and fitness journey. Kat has quite the sense of humor (she “blames” her father for this), which she incorporates into her journaling and memory-keeping.
